Introduction
Welcome to our comprehensive guide on how to set up a new solid-state drive (SSD) with Windows 11. If you’re looking to give your computer a significant speed boost and improve overall performance, upgrading to an SSD is a fantastic choice.
SSDs have become increasingly popular due to their lightning-fast read and write speeds, lower power consumption, and improved durability compared to traditional hard disk drives (HDDs). Whether you’re installing a new SSD as your primary storage device or adding it as a secondary drive, this guide will walk you through the entire setup process.
Setting up a new SSD involves several key steps, including backing up your data, physically installing the drive, formatting and partitioning it, installing Windows 11, migrating your data, and optimizing the SSD for maximum efficiency. By following this step-by-step guide, you’ll be able to seamlessly integrate the new SSD into your system and enjoy faster boot times, quicker application launches, and snappier overall performance.
Before we dive into the setup process, it’s important to note that this guide assumes you already have a new SSD and a copy of Windows 11 installation media. Additionally, it’s recommended to have a backup of your important files and documents, as we’ll be performing operations that could potentially result in data loss. With that said, let’s get started!
Step 1: Gather the necessary materials
Before you begin the process of setting up your new SSD with Windows 11, it’s important to gather all the necessary materials to ensure a smooth and successful installation. Here’s a list of items you’ll need:
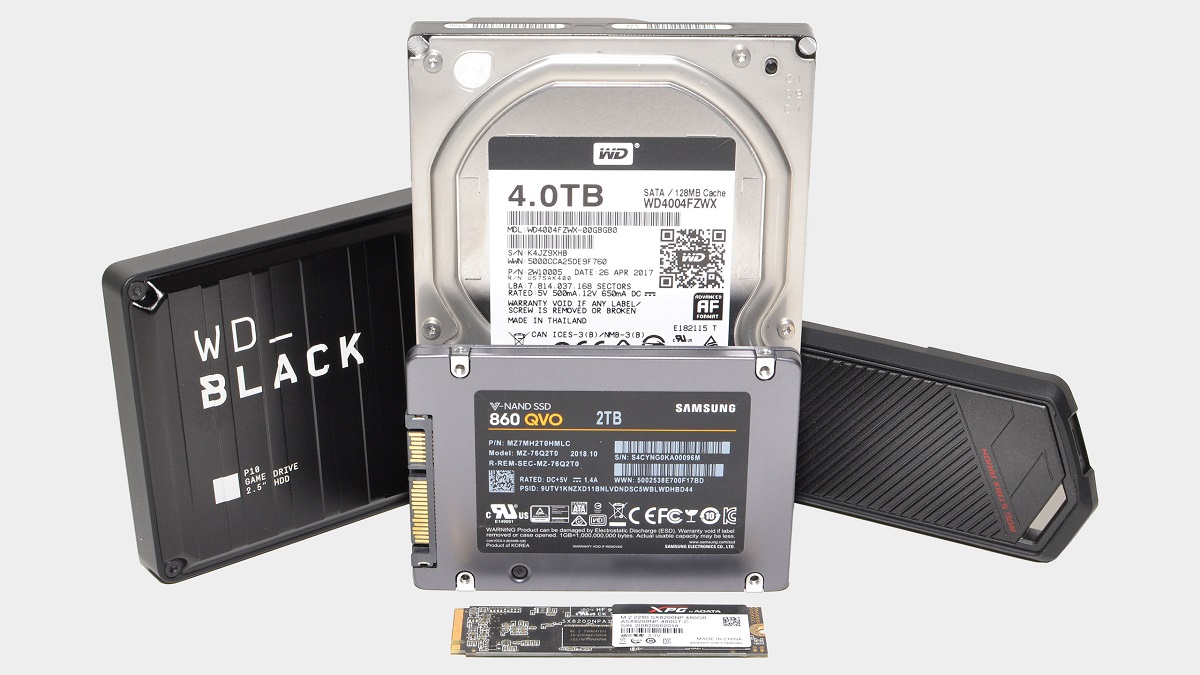
- SSD: Of course, you’ll need the SSD itself. Make sure you purchase a compatible SSD with the appropriate storage capacity for your needs.
- SATA Cable: Most SSDs use a SATA interface for data transfer. Ensure you have a SATA cable to connect the SSD to your motherboard.
- SATA Power Cable: In addition to the data cable, you’ll need a SATA power cable to provide power to the SSD. Make sure your power supply unit has sufficient connectors available.
- Screwdriver: Depending on your computer case, you may need a small screwdriver to open the case and secure the SSD in place.
- Windows 11 Installation Media: To install Windows 11 on the new SSD, you’ll need a copy of the installation media. This can be in the form of a bootable USB drive or a DVD.
- Backup Storage: It’s always a good idea to have a backup of your important files before performing any hardware changes. Make sure you have an external hard drive or cloud storage solution to back up your data.
Take a moment to gather all these materials before proceeding to the next steps. It’s essential to have everything at hand to minimize interruptions and ensure a smooth installation process.
Once you have everything ready, you’re prepared to move on to the next step: backing up your data. It’s crucial to create a backup of your important files to avoid any potential loss during the setup process. Let’s move on to Step 2!
Step 2: Backup your data
Before making any changes to your system, it’s essential to create a backup of your data to protect against any potential loss. This step is crucial as we’ll be formatting the new SSD and potentially migrating your data from the old drive. Here’s how you can back up your data:
- Select Important Files: Identify the files and folders that contain your essential data. These may include documents, photos, videos, music, and any other sensitive information you want to keep safe.
- Choose Backup Method: Decide on the backup method that suits your needs. You can use an external hard drive, a cloud storage service, or a combination of both. If using an external hard drive, connect it to your computer.
- Manual Backup: For a manual backup, simply copy and paste your important files to the backup storage device. Organize them in a logical and understandable manner for easy retrieval later.
- Backup Software: Alternatively, you can use backup software like Windows Backup and Restore, Mac Time Machine, or third-party solutions. These tools offer automated backups and more advanced features.
- Verify Backup: Once the backup process is complete, verify that all your important files are safely stored in the backup location. Check a few random files to ensure they were copied correctly.
Remember to double-check everything before proceeding to the next steps. Data loss can be devastating, so it’s worth investing time and effort into a proper backup. With your data securely backed up, we can now move on to the next step: physically installing the new SSD.
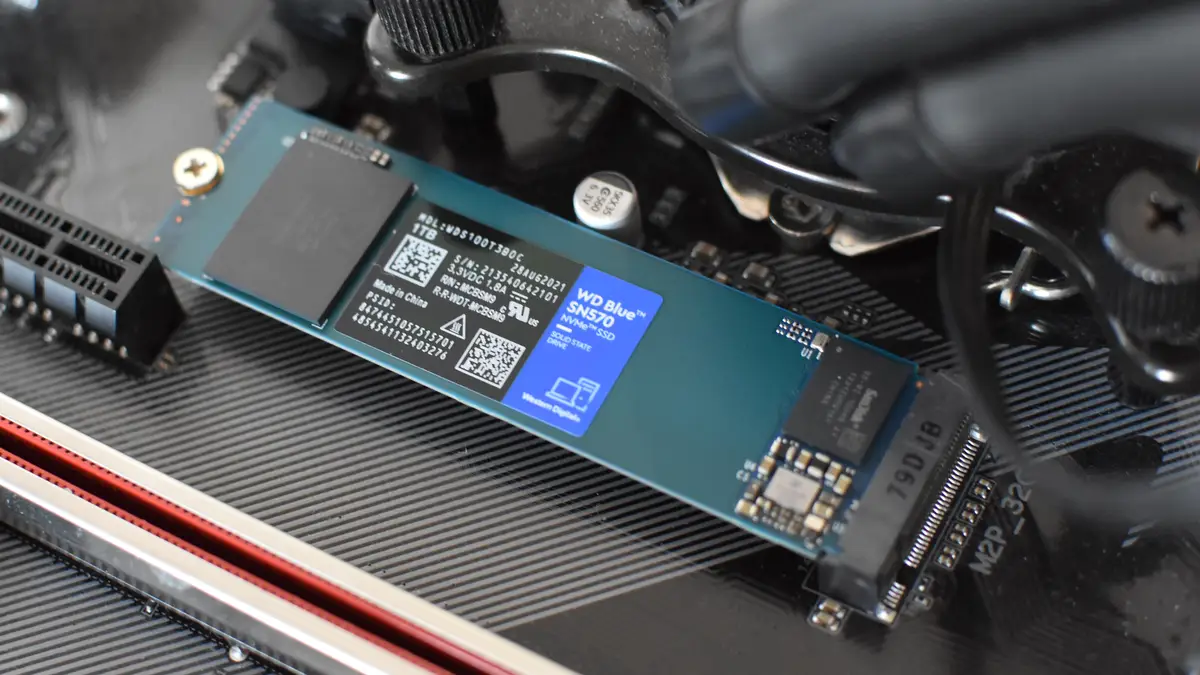
Step 3: Physically install the new SSD
Now that you have your data safely backed up, it’s time to physically install the new SSD into your computer. Follow these steps to ensure a proper installation:
- Prepare your workstation: Before opening your computer case, make sure to shut down your computer and unplug it from the power source. Also, touch a grounded object to discharge any static electricity.
- Access your computer’s internals: Depending on your computer case, you may need to remove a panel or side panel to access the internal components. Refer to your computer’s manual for specific instructions.
- Locate the appropriate drive bay: Identify an empty drive bay where you can install the new SSD. This can be a 2.5-inch bay or a 3.5-inch bay, depending on the size of your SSD. Check the manual or manufacturer’s website for guidance.
- Attach the SSD: Carefully insert the SSD into the drive bay, making sure it aligns with the screw holes. Use the appropriate screws to secure the SSD in place. Be cautious not to overtighten the screws.
- Connect the SATA cable: Locate the SATA ports on your motherboard and connect one end of the SATA cable to the SSD and the other end to an available SATA port. Ensure a firm connection.
- Connect the power cable: Locate the SATA power connector from your power supply unit and connect it to the SSD. Ensure a secure connection, making sure not to force it.
- Close your computer case: Carefully put back the panel or side panel, making sure it is securely fastened. Ensure that all cables and components are neatly organized and not obstructing any airflow.
Once you have successfully installed the new SSD, you can move on to the next step: formatting and partitioning the drive to prepare it for installing Windows 11. This step will ensure your SSD is ready to be used as the storage medium for your operating system and applications.
Step 4: Format and partition the new SSD
With the new SSD physically installed in your computer, the next step is to format and partition the drive to prepare it for the installation of Windows 11. Follow these steps to ensure a smooth setup:
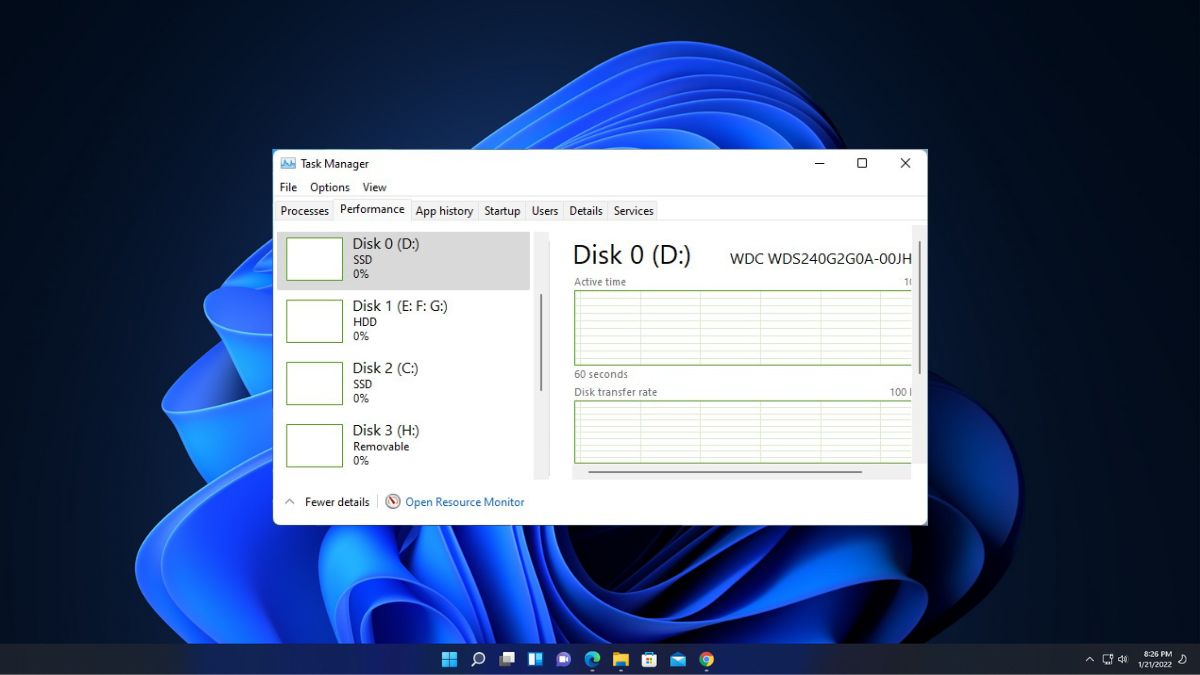
- Access Disk Management: In Windows, open the Disk Management utility by pressing the Windows key + X and selecting “Disk Management” from the menu.
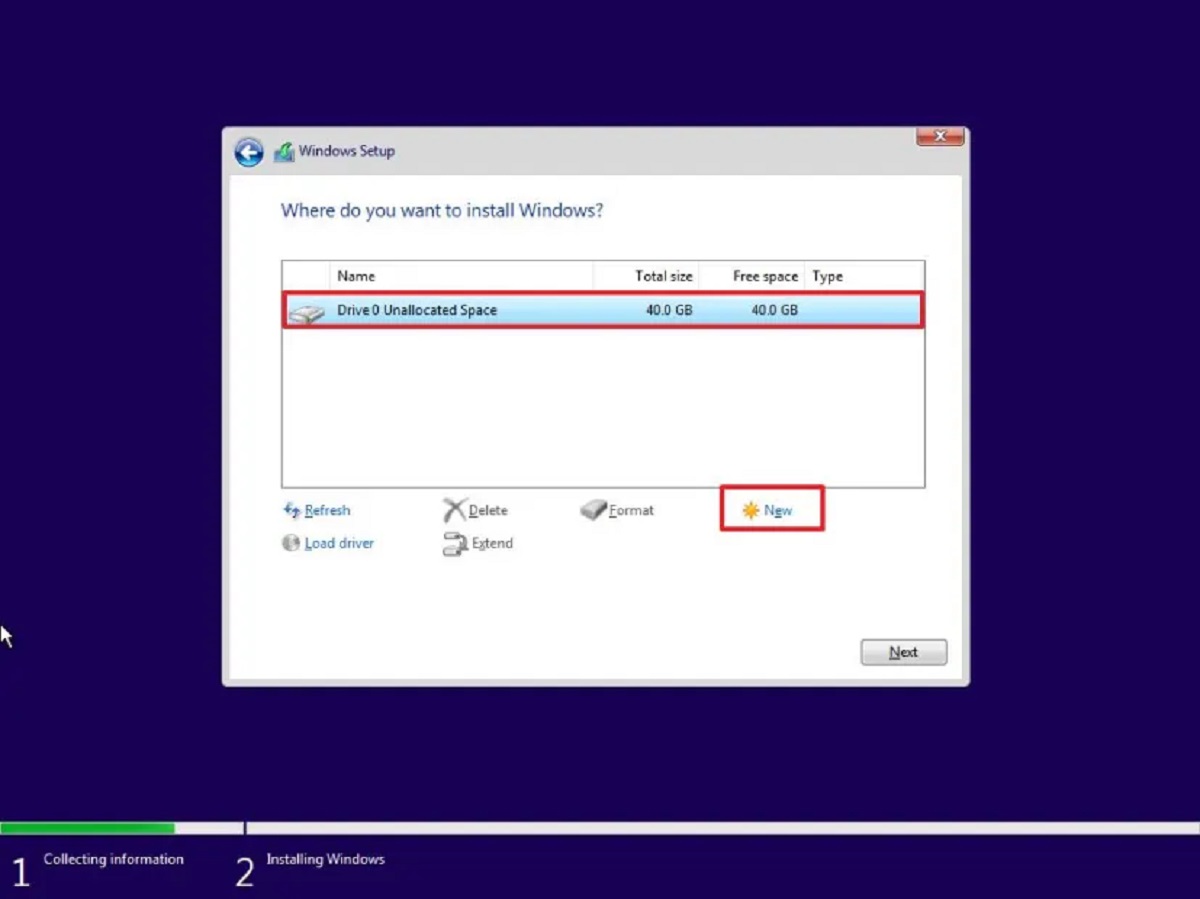
- Identify the new SSD: Locate the newly installed SSD in the list of available drives. It should be labeled as “Unallocated” or “Not Initialized.”
- Initialize the SSD: Right-click on the SSD and select “Initialize Disk.” Choose the appropriate disk type (MBR or GPT) and click “OK” to proceed.
- Create a partition: Right-click on the unallocated space and select “New Simple Volume.” Follow the on-screen instructions to create a new partition, specifying the desired size and assigning a drive letter.
- Format the partition: Right-click on the newly created partition and select “Format.” Choose the desired file system (NTFS is recommended for Windows) and enter a volume label if desired. Click “OK” to begin the formatting process.
- Wait for formatting to complete: The formatting process may take some time, depending on the size of the partition. Once it’s finished, the status should change to “Healthy” or “Online.”
With the SSD now formatted and partitioned, it’s ready to be used as the storage space for Windows 11. The next step in our guide is to install the operating system onto the new SSD, ensuring a fresh and speedy start for your computer.
Step 5: Install Windows 11 on the new SSD
Now that you have formatted and partitioned the new SSD, it’s time to install Windows 11 onto the drive. Follow these steps to complete the installation process:
- Insert the Windows 11 installation media: If you’re using a bootable USB drive, insert it into a USB port on your computer. If you’re using a DVD, insert it into the optical drive.
- Restart your computer: Shut down your computer and then turn it back on. As the computer starts up, be sure to enter the BIOS or UEFI settings by pressing the appropriate key (usually F2, F10, or Del).
- Set the SSD as the boot device: In the BIOS or UEFI settings, navigate to the “Boot” or “Boot Order” section. Set the SSD as the first boot device in the list. Save the changes and exit the BIOS/UEFI settings.
- Follow the on-screen instructions: Your computer will now boot from the Windows 11 installation media. Follow the on-screen instructions to proceed with the installation. You may need to choose your language, accept the license terms, and select the installation type (if prompted).
- Select the SSD as the installation destination: When prompted to choose where to install Windows 11, select the newly formatted and partitioned SSD as the destination drive. Make sure to select the correct partition if you have created multiple partitions on the SSD.
- Complete the installation: Follow the remaining on-screen instructions to complete the installation of Windows 11 onto the new SSD. This may include specifying your region, setting up user accounts, and customizing settings. Be patient as the installation process may take some time.
Once the installation is complete, your computer will restart, and you’ll be greeted with the setup screen for Windows 11. Congratulations, you’ve successfully installed Windows 11 onto your new SSD! In the next step, we’ll cover how to update drivers and install necessary software to ensure optimal performance on your newly setup system.
Step 6: Update drivers and install necessary software
With Windows 11 installed on your new SSD, the next step is to update drivers and install the necessary software to ensure smooth operation and optimal performance. Follow these steps to complete this important phase:
- Check for Windows Updates: After the installation, make sure to check for and install any available Windows updates. These updates often include important driver updates and bug fixes, which can enhance system stability and compatibility.
- Update Graphics Drivers: Visit the website of your graphics card manufacturer (such as NVIDIA or AMD) to download and install the latest drivers. Proper graphics driver installation is crucial for optimal performance, especially if you’re using your computer for gaming or graphics-intensive tasks.
- Update Chipset and Motherboard Drivers: Visit the website of your motherboard manufacturer to download and install the latest chipset and motherboard drivers. These drivers are essential for proper communication between your hardware components and the operating system.
- Install Essential Software: Install any necessary software that you regularly use, such as web browsers, productivity suites, media players, antivirus software, and any other applications you rely on. Make sure to download them from reputable sources to ensure safety.
- Configure Windows Settings: Take the time to configure various Windows settings according to your preferences. This includes personalizing your desktop, adjusting power settings, setting up security options, and customizing the start menu and taskbar.
- Set Up Data Backup: Now that you have a fresh Windows 11 installation, it’s a good idea to set up a regular data backup system. Utilize external hard drives, cloud storage, or backup software to automate this process and protect your important files.
By following these steps and ensuring that all your drivers and necessary software are up to date, you can maximize the performance and stability of your system. With this phase completed, you’re ready to move on to the next step: transferring your data from the old drive to the new SSD.
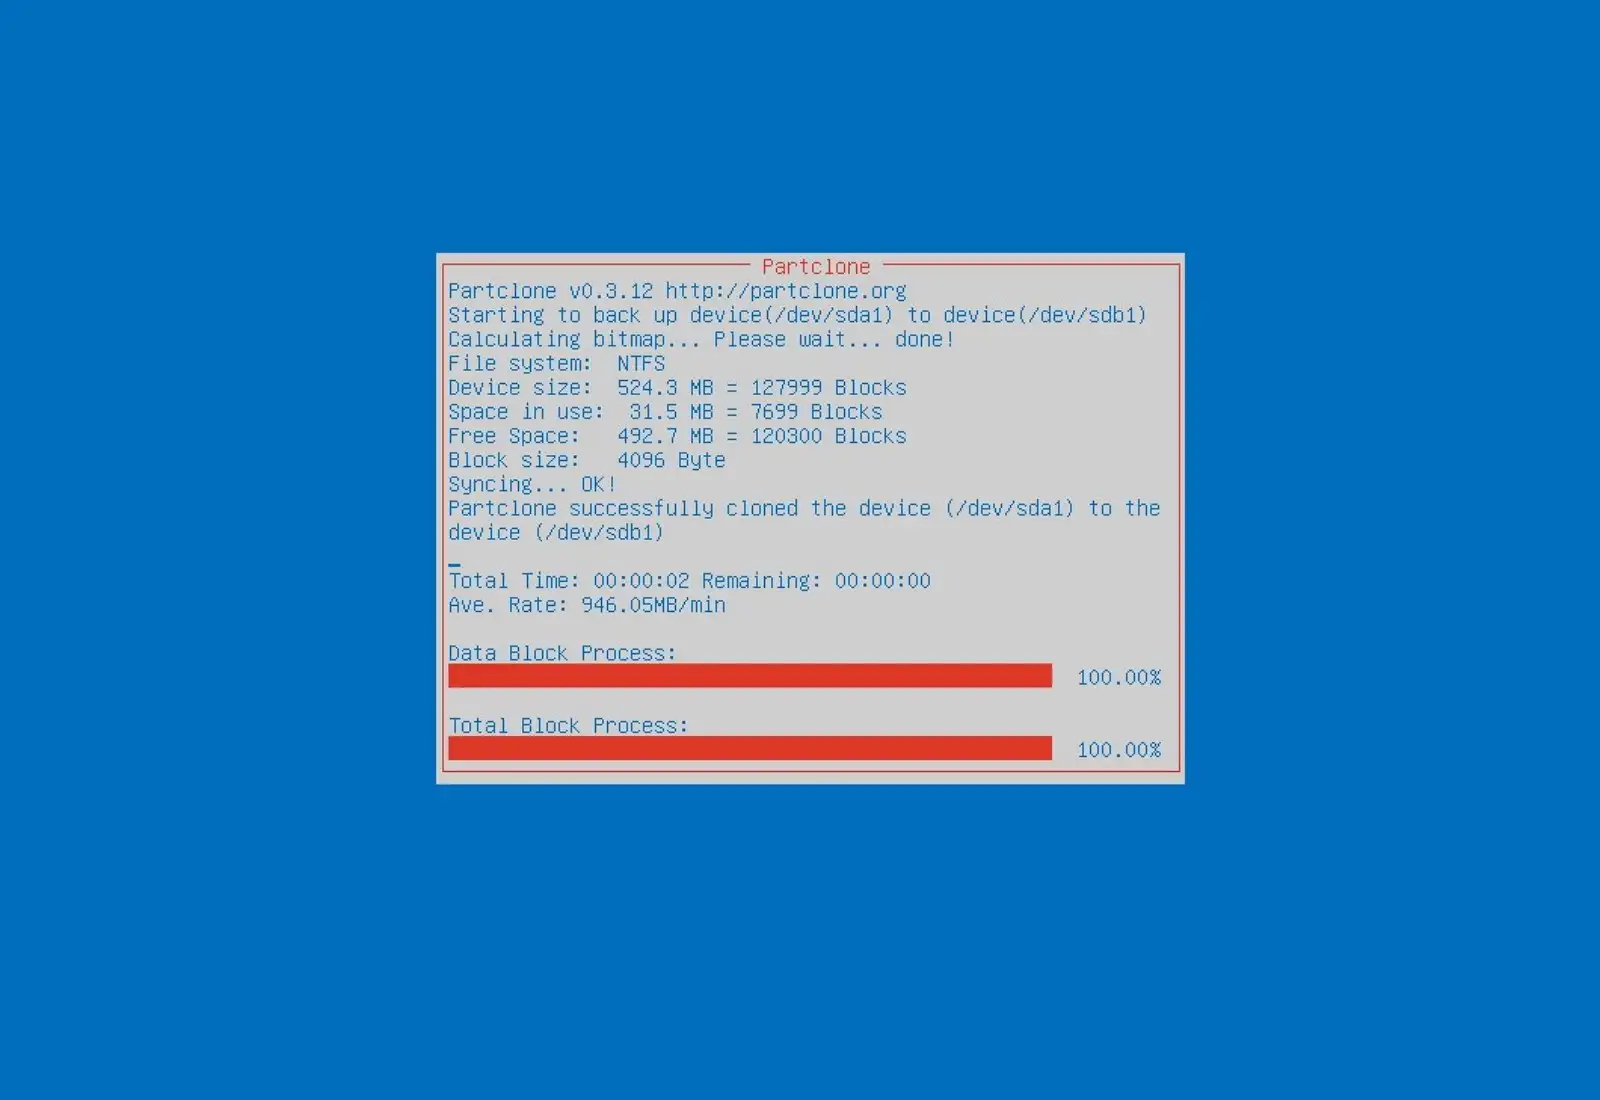
Step 7: Transfer your data from the old drive to the new SSD
Now that your new SSD is up and running with Windows 11, it’s time to transfer your data from the old drive to the new SSD. Follow these steps to ensure a smooth and efficient data transfer process:
- Identify the data you want to transfer: Determine which files and folders you want to transfer from the old drive to the new SSD. This may include documents, pictures, videos, music, and any other files you consider important.
- Connect the old drive: If your old drive is an internal drive, shut down your computer, open the case, and connect the old drive to a spare SATA port on your motherboard using a SATA cable. If the old drive is an external storage device, connect it to your computer using the appropriate interface (USB, eSATA, etc.).
- Copy and paste the files: Open File Explorer (Windows Explorer) and navigate to the old drive. Select the files and folders you want to transfer, right-click, and choose “Copy.” Then, navigate to the new SSD, right-click in an empty space, and choose “Paste” to transfer the files.
- Organize the transferred files: Once the transfer is complete, take some time to organize the transferred files and folders on the new SSD. Create new folders and rearrange files as needed to ensure easy access and a clean file structure.
- Verify the transferred data: After the transfer process, double-check the transferred files on the new SSD. Open a few random files and ensure they open without any issues. Also, compare the file sizes to make sure they match the original files.
Transferring your data from the old drive to the new SSD allows you to have all your important files and documents readily accessible on the faster and more efficient storage medium. Once you have completed this step, you can proceed to the next step: removing the old drive and setting the new SSD as the boot drive.
Step 8: Remove the old drive and set the new SSD as the boot drive
With your data successfully transferred to the new SSD, it’s time to remove the old drive and set the new SSD as the boot drive. This step ensures that your computer will start up from the new SSD and use it as the primary storage device. Follow these steps to complete this process:
- Shut down your computer: Make sure your computer is powered off before proceeding.
- Disconnect the old drive: If your old drive is an internal drive, open your computer case and carefully disconnect the data and power cables from the old drive. If the old drive is an external device, simply disconnect it from your computer.
- Prepare the new SSD: Ensure that the new SSD is securely connected to the SATA port and has power cables attached. Check that the connections are tight and secure.
- Close your computer case: Once you have removed the old drive and verified the connections of the new SSD, carefully close your computer case and secure it in place.
- Start your computer: Power on your computer and enter the BIOS or UEFI settings by pressing the appropriate key during startup (usually F2, F10, or Del).
- Set the new SSD as the boot drive: In the BIOS or UEFI settings, navigate to the “Boot” or “Boot Order” section. Set the new SSD as the first boot device in the list. Save the changes and exit the BIOS/UEFI settings.
- Restart your computer: Allow your computer to restart. It will now boot from the new SSD as the primary drive.
- Verify the new SSD: Once your computer has started up, verify that it is indeed booting from the new SSD. Open File Explorer and navigate to the new SSD to ensure that all your data and applications are accessible.
By removing the old drive and setting the new SSD as the boot drive, you have completed the transition to your faster and more efficient storage medium. In the final step, we will cover how to finalize the setup and optimize your new SSD for optimal performance.
Step 9: Finalize the setup and optimize your new SSD
Congratulations! You’re in the final step of setting up your new SSD with Windows 11. Now it’s time to finalize the setup and optimize your new SSD for optimal performance. Follow these steps to complete the process:
- Install essential applications: Take this opportunity to install any additional applications or software that you need on your new SSD. This may include productivity tools, media players, web browsers, or any other software you regularly use.
- Enable TRIM: TRIM is a feature that helps maintain the performance and longevity of your SSD. To enable TRIM, open the Command Prompt as an administrator and type the command “fsutil behavior set disabledeletenotify 0” without quotes. Press Enter to execute the command.
- Adjust power settings: Optimize power settings to ensure the longevity and efficiency of your SSD. Open the Windows 11 Power Options and select a power plan that suits your needs, such as the “Balanced” or “High performance” plan.
- Disable Disk Defragmentation: SSDs do not require defragmentation like traditional hard drives. To avoid unnecessary wear and tear, disable automatic disk defragmentation for your SSD. Open the “Defragment and Optimize Drives” tool and exclude your SSD from the defragmentation schedule.
- Turn off indexing: SSDs offer fast access to data, making indexing unnecessary. To disable indexing, navigate to the properties of each drive on your SSD, go to the “General” tab, and uncheck the “Allow files on this drive to have contents indexed” option.
- Enable AHCI mode: Ensure that your SSD is set to use the AHCI (Advanced Host Controller Interface) mode for optimal performance. You can access this setting in the BIOS or UEFI settings under the SATA configuration options.
- Regularly update firmware: Check the website of your SSD manufacturer for any available firmware updates. Keeping the firmware up to date can provide improved performance and compatibility with your system.
- Regularly backup your data: Establish a regular backup routine to protect your data from loss or corruption. Consider utilizing cloud storage, external hard drives, or backup software to automate the process.
By following these optimization steps, you can ensure that your new SSD performs at its best and prolong its lifespan. Enjoy the blazing-fast performance and responsive experience that your new SSD brings to your Windows 11 system!
Conclusion
Congratulations on successfully setting up your new SSD with Windows 11! By following the step-by-step guide outlined in this article, you have upgraded your system to enjoy faster boot times, improved application launches, and overall snappy performance.
We began by gathering the necessary materials and backing up your data to ensure a smooth transition. Then, we physically installed the new SSD and proceeded with formatting and partitioning it. The installation of Windows 11 on the new SSD followed, accompanied by updating drivers and installing necessary software for optimal performance.
We covered the crucial step of transferring your data from the old drive to the new SSD, ensuring that all your important files and documents are readily accessible on the faster storage medium. Removing the old drive and setting the new SSD as the boot drive solidifies the transition.
Finally, we finalized the setup and optimized the new SSD by enabling TRIM, adjusting power settings, disabling disk defragmentation, turning off indexing, enabling AHCI mode, and keeping firmware regularly updated.
Remember, maintaining regular backups of your data and following good data management practices will keep your information safe and secure. Enjoy the enhanced performance and responsiveness that your new SSD brings to your Windows 11 experience.
Thank you for following this guide, and we hope it has been valuable in helping you set up your new SSD with Windows 11. If you have any questions or need further assistance, feel free to refer back to this guide or seek additional support from relevant resources.