Introduction
Welcome to the guide on how to install an SSD (solid-state drive) in Windows 7! Upgrading to an SSD can greatly improve the performance and speed of your computer, allowing you to enjoy faster boot times, quicker program launches, and smoother multitasking. If you have been experiencing sluggishness or longer wait times when using your computer, installing an SSD is a cost-effective solution that can breathe new life into your system.
Before we dive into the installation process, it’s important to note that upgrading to an SSD will require you to open your computer case and make a few hardware connections. If you’re not comfortable with this or if your computer is still under warranty, it’s best to consult a professional technician for assistance. However, if you’re up for the challenge, we’ll guide you through the step-by-step process to successfully install your SSD.
During this installation, we’ll assume that you have a basic understanding of computer hardware and are familiar with the internals of your PC. Additionally, please ensure that you have a backup of all your important data before proceeding with the installation. While we will take precautions to minimize data loss, it’s always good practice to have a backup as a safety net. Now, let’s gather the necessary tools and prepare for the installation process.
Preparing for Installation
Before we proceed with the installation of your new SSD, there are a few important steps to take to ensure a smooth and successful upgrade. By properly preparing for the installation, you can minimize any potential errors or difficulties that may arise during the process. Let’s go through each step together:
Gathering the Required Tools and Hardware: To start, make sure you have all the necessary tools at hand. You’ll need a screwdriver (typically a Phillips-head) to open your computer case and secure the SSD in place. It’s also a good idea to have an antistatic wrist strap or mat to prevent static electricity from damaging any components. Additionally, ensure that you have the appropriate cables to connect the SSD to your power supply and motherboard.
Backing Up Your Data: As mentioned earlier, it’s crucial to back up all your important data before proceeding with the installation. This will safeguard your files in case of any unforeseen issues during the upgrade process. You can either create a full system backup using a backup software or manually copy your essential files to an external hard drive or cloud storage.
Shutting Down and Opening the Computer Case: Once you have gathered the necessary tools and backed up your data, shut down your computer and disconnect it from the power source. Ensure that all cables are unplugged and any residual charge is drained. Now, carefully remove the side panel of your computer case by unscrewing the screws or releasing the latch, depending on the case design. Place the panel aside in a safe location.
Installing the SSD in an Available Drive Bay: With the computer case open, choose an available drive bay to install your SSD. Most cases have dedicated slots for hard drives and SSDs. Remove the caddy or bracket from the bay and gently slide the SSD into place, ensuring the connectors align properly. Secure the SSD in the bay using screws or the provided mounting mechanism, taking care not to overtighten.
Connecting the SSD to the Power Supply and Motherboard: Once the SSD is securely installed in the drive bay, locate a spare SATA power cable from your power supply and connect it to the power connector on the SSD. Next, find a spare SATA data cable and connect one end to the SATA port on the motherboard and the other end to the corresponding port on the SSD. Make sure the connections are snug and secure.
Now that you’re prepared for the installation, we can move on to configuring the BIOS settings to optimize the SSD’s performance. In the next section, we’ll guide you through the necessary steps to ensure your SSD is detected and used correctly by your computer.
Gathering the Required Tools and Hardware
Before you begin installing the SSD in your computer, it’s essential to gather all the necessary tools and hardware. Having everything at hand will make the installation process smoother and more efficient. Here’s a list of what you’ll need:
Screwdriver: You’ll need a screwdriver to open your computer case and secure the SSD in place. Most computer cases use Phillips-head screws, but double-check the type of screws used in your case.
Antistatic Wrist Strap/Mat: Although not strictly required, it’s recommended to use an antistatic wrist strap or mat. This will help prevent the buildup and discharge of static electricity, which can potentially damage sensitive computer components.
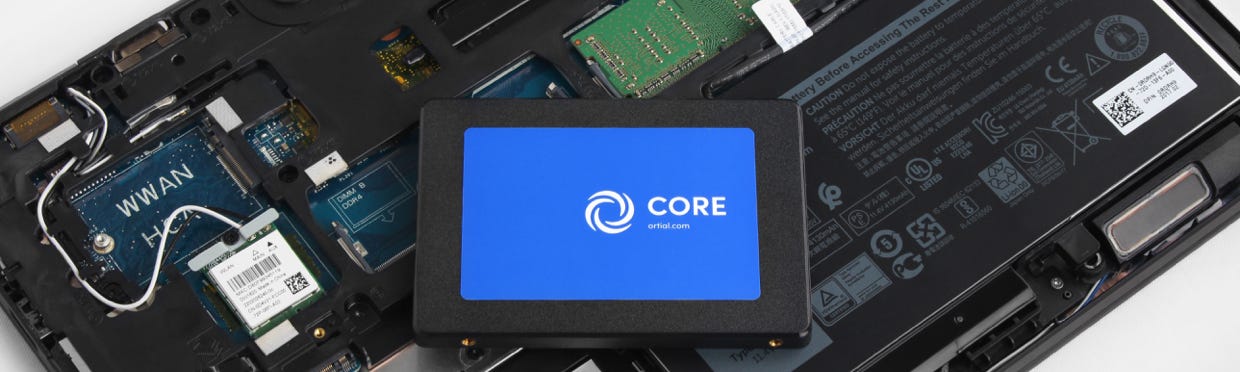
SSD: Of course, you’ll need the SSD itself. Ensure that you have a compatible SSD that matches the form factor supported by your computer case, such as the more common 2.5-inch or M.2 SSD.
SATA Cables: You’ll need SATA cables to connect the power and data between the SSD, motherboard, and power supply. Check if your motherboard and power supply come with the necessary SATA cables. If not, you may need to purchase them separately.
Power Supply Connector: Ensure that your power supply has enough spare SATA power connectors to connect the SSD. If not, consider purchasing a SATA power splitter cable or adapter to provide power to multiple drives.
Mounting Bracket (if necessary): Some computer cases, especially older ones, may require a mounting bracket or adapter to securely install the SSD in the drive bay. Check if your case needs one and make sure to have it ready.
Documentation: Finally, it’s always a good idea to have the user manual or documentation for your computer case and motherboard. This will help you identify the appropriate locations for installing the SSD and any specific instructions or precautions.
Once you have gathered all the necessary tools and hardware, you can proceed with the installation process confidently. Remember, it’s crucial to have a clean and organized workspace to avoid misplacing any components or causing accidental damage to your computer. Now that you’re prepared, let’s move on to the next step: backing up your data before proceeding with the installation.
Backing Up Your Data
Before you proceed with the installation of the SSD, it is crucial to back up all your important data. This step is essential to safeguard your files and ensure that you don’t lose any valuable information during the upgrade process. Follow these guidelines to create a secure backup:
Consider Full System Backup: For comprehensive data protection, consider creating a full system backup. This will capture everything on your computer, including the operating system, installed programs, and personal files. Windows 7 offers a built-in tool called “Backup and Restore” that allows you to create a system image backup. Alternatively, you can use third-party backup software like Acronis True Image or Macrium Reflect.
Manually Save Essential Files: If creating a full system backup seems overwhelming, focus on manually saving your essential files. These may include important documents, photos, videos, music, and any other data that you cannot afford to lose. Copy them to an external hard drive, USB flash drive, or utilize cloud storage services like Google Drive or Dropbox.
Verify the Integrity of Your Backup: Once you have completed the backup process, take a moment to verify the integrity of your backup. Ensure that all files were successfully copied and that they can be accessed and opened without any issues. This step will give you peace of mind knowing that your important data is securely stored and easily recoverable.
Backing up your data is a critical step that should never be overlooked. In the unlikely event that anything goes wrong during the installation process, having a backup ensures that you can restore your data and prevent any major loss. Take the time to double-check your backup and ensure that everything is in order before proceeding to the next step.
Now that you have successfully backed up your data, you can move on to the next step: shutting down your computer and opening the case to prepare for the SSD installation. We’ll guide you through this process to ensure a safe and smooth installation experience.
Shutting Down and Opening the Computer Case
Before you can proceed with the installation of your SSD, you need to shut down your computer and open the case. This process requires caution and careful handling of your computer’s internals. Follow these steps to safely shut down and open your computer case:
Save and Close Programs: Before shutting down your computer, save any open files and close all programs. This ensures that your data is properly saved and prevents any potential data loss. Take a moment to confirm that you have closed all necessary applications and that your work is safely stored.
Shut Down Your Computer: From the Windows 7 desktop, click on the “Start” button or press the Windows key on your keyboard. Then, click on the “Shut Down” option in the Start menu. Wait for your computer to shut down completely before proceeding to the next step. It’s important to allow your computer enough time to power down properly before proceeding.
Unplug the Power Cable: Ensure that your computer is completely powered off, and then unplug the power cable from the back of the computer. This step eliminates the risk of electric shock and protects both you and your computer from any potential harm while working inside the case.
Ground Yourself: It’s crucial to discharge any static electricity from your body before opening the computer case. Ground yourself by touching a grounded metal object, such as a doorknob or a metal surface of your computer case. This step prevents static discharge that could potentially damage the sensitive internal components of your computer.
Remove the Side Panel: The layout of computer cases can vary, but most will require you to open the side panel to access the internal components. Identify the screws or latches securing the side panel, and use a screwdriver to remove the screws or release the latches. Carefully slide off the side panel, and set it aside in a safe location. Be mindful not to force or apply excessive pressure to prevent any damage to the case or its components.
You have now successfully shut down your computer and opened the case, preparing it for the installation of the SSD. Remember to handle the computer case with care and avoid touching any of the exposed internal components. In the next section, we will guide you through the process of installing the SSD in an available drive bay.
Installing the SSD in an Available Drive Bay
With your computer case open, it’s time to install the SSD in an available drive bay. Follow these steps to ensure a secure and proper installation:
Select an Available Drive Bay: Take a look inside your computer case and identify an available drive bay for the SSD. Most cases have dedicated slots for hard drives and SSDs, marked as 2.5″ or 3.5″. Choose an appropriate bay for your SSD, considering factors such as cable reach and airflow.
Prepare the Drive Bay: If the selected drive bay has a removable caddy or bracket, remove it before proceeding. The caddy or bracket may be held in place by screws or clips, so gently detach it to create enough space for the SSD to be inserted.
Insert the SSD: Hold the SSD firmly by the sides and align the SATA connectors on the SSD with the corresponding connectors in the drive bay. Gently slide the SSD into the bay until it is fully seated. Be cautious not to apply excessive force or damage the connectors.
Secure the SSD: Once the SSD is properly inserted, use the screws or clips provided to secure it in the drive bay. Secure each side of the SSD to prevent any movement or vibrations that could affect performance or cause damage during operation. Make sure not to overtighten the screws, as this could potentially damage the SSD or the drive bay.
Double-Check the Connection: Once the SSD is securely installed, double-check the SATA connectors to ensure they are properly aligned and firmly connected. Improperly connected cables can lead to connection issues or low performance, so verify that they are snug and seated correctly.
Reinstall the Caddy or Bracket (if applicable): If the drive bay had a removable caddy or bracket, carefully reinstall it to secure the SSD in place. Refer to your computer case’s documentation or manufacturer’s instructions for any specific steps or considerations.
Congratulations! You have successfully installed the SSD in an available drive bay. Next, we will proceed with connecting the SSD to the power supply and motherboard to ensure it receives power and is properly recognized by the system. In the following section, we’ll guide you through this essential step of the installation process.
Connecting the SSD to the Power Supply and Motherboard
Now that the SSD is securely installed in the drive bay, it’s time to connect it to both the power supply and the motherboard. This step ensures that the SSD will receive power and be properly recognized by the system. Follow these steps to make the necessary connections:
Locate the SATA Power Connector: Take a look at your power supply and locate a spare SATA power connector. These connectors are typically labeled and have a similar shape to the SATA data connectors. Ensure that your power supply has enough available SATA power connectors to connect the SSD.
Connect the SATA Power Cable: Take the SATA power cable and connect one end to the available SATA power connector on your power supply. Align the connectors and firmly insert them until they snap into place. It’s important to make sure the connection is secure to avoid power issues.
Locate the SATA Data Connector: Identify an available SATA data connector on your motherboard. These connectors are usually located near the SATA ports on the motherboard. Check if your motherboard’s documentation indicates specific SATA ports dedicated to SSDs or primary storage.
Connect the SATA Data Cable: Take one end of the SATA data cable and connect it to the SATA data connector on the motherboard. Ensure that the orientation of the connector is correct and matches the alignment of the port. Insert the connector until it is firmly seated in the port.
Connect the Other End of the SATA Data Cable: Now, take the other end of the SATA data cable and connect it to the corresponding SATA port on the SSD. Again, ensure that the alignment is correct and the connector is properly seated. Firmly push the connector into the SSD until it is securely in place.
Secure Loose Cables: After making the necessary connections, take a moment to secure any loose cables. Use cable ties or clips to organize and bundle the cables, preventing them from interfering with other components or impeding airflow within the case.
Great job! You have successfully connected the SSD to both the power supply and the motherboard. This ensures that the SSD will receive power and be recognized by the system. In the next section, we’ll guide you through configuring the BIOS settings specifically for the SSD installation.
Configuring the BIOS for SSD Installation
Configuring the BIOS (Basic Input/Output System) is an essential step to ensure that your SSD is recognized and operating optimally. The BIOS controls the basic hardware settings of your computer, including storage devices. Follow these steps to configure the BIOS for your SSD installation:
Power on your computer: Start by powering on your computer and immediately press the designated key (such as Del, F2, or F10) to access the BIOS. The specific key may vary depending on your computer manufacturer. Refer to your computer or motherboard’s manual if you’re unsure which key to press.
Navigate to BIOS settings: Once you are in the BIOS settings, use the arrow keys on your keyboard to navigate. Look for the “Storage,” “Drives,” or “SATA Configuration” section. The exact name and location may differ depending on your motherboard manufacturer.
Enable AHCI Mode: Locate the option related to the SATA mode and set it to AHCI (Advanced Host Controller Interface) mode. This mode allows your SSD to perform at its optimal speed and enables advanced features such as Native Command Queuing (NCQ).
Save and Exit: Once you have made the necessary changes, navigate to the “Exit” or “Save & Exit” section of the BIOS. Select the option to save the changes you made to the BIOS settings and exit the BIOS interface.
Your computer will now reboot with the new BIOS settings in place, allowing your SSD to be properly recognized and utilized by the operating system. Keep in mind that this step is crucial for maximizing the performance and compatibility of your SSD.
It’s worth mentioning that if you already have an operating system installed on an existing drive, you may need to adjust the boot order in the BIOS settings to prioritize the SSD as the primary boot device. This will ensure that your computer boots from the SSD instead of the old drive. Refer to your computer or motherboard’s manual for instructions on adjusting the boot order.
In the next section, we’ll guide you through the process of rebooting your computer and formatting the SSD, preparing it for use as your primary storage device.
Rebooting and Formatting the SSD
After configuring the BIOS settings, it’s time to reboot your computer and format the SSD to prepare it for use as your primary storage device. Follow these steps to complete this crucial phase:
Save and Exit BIOS: Before rebooting, ensure that you save any changes made in the BIOS settings. Navigate to the “Exit” or “Save & Exit” section of the BIOS interface, and select the option to save the changes you made. This will ensure that the updated settings are applied upon reboot.
Reboot your Computer: Once you’ve saved the changes, initiate a system reboot. Your computer will automatically restart with the new BIOS settings in effect. Allow the system to reboot completely before proceeding to the next step.
Access Disk Management: When the computer finishes rebooting, go to the Windows Start menu and search for “Disk Management.” Click on the “Create and format hard disk partitions” option that appears to open the Disk Management utility.
Initialize the SSD: Within Disk Management, you should see your SSD listed as an unallocated drive. Right-click on the SSD and select the “Initialize Disk” option. Select the appropriate disk (typically the entire disk) and choose the partition style, either MBR (Master Boot Record) or GPT (GUID Partition Table), depending on your needs and system requirements.
Create a New Partition: After initializing the SSD, right-click on the unallocated space and select “New Simple Volume.” Follow the on-screen instructions to create a new partition on the SSD. You can choose the file system and assign a drive letter to the partition during this process. Alternatively, you can create multiple partitions if desired.
Format the Partition: Once the partition has been created, right-click on it and select the “Format” option. Choose the desired file system, such as NTFS, and allocate a volume label to the partition if desired. Click “OK” to start the formatting process, which may take a few moments.
After the formatting is complete, you will have a formatted and ready-to-use SSD. It will be assigned a drive letter and appear in the Windows File Explorer. You can now begin transferring data to your new SSD or install your operating system directly on it.
Formatting the SSD is a crucial step to ensure compatibility and prepare it for use. In the next section, we’ll guide you through the process of transferring data from your old drive to the SSD, allowing you to migrate your files seamlessly.
Transferring Data from the Old Drive to the SSD
Now that your SSD is formatted and ready for use, it’s time to transfer your data from the old drive to the new SSD. Follow these steps to ensure a smooth and efficient data migration:
Determine the Data to Transfer: Start by identifying the data that you want to transfer from the old drive to the SSD. This may include documents, photos, videos, music, and any other files that you want to have on your new SSD.
External Data Transfer: If you have a small amount of data or specific files you want to transfer, you can use an external storage device such as an external hard drive or a USB flash drive. Simply copy the files from the old drive onto the external storage device, and then connect the device to your computer to copy the files onto the SSD.
Drive Cloning: If you want to transfer the entire contents of your old drive, including the operating system and installed programs, you can use a drive cloning tool. These applications create an exact copy of your old drive and transfer it to the SSD. Popular drive cloning software includes Clonezilla, Macrium Reflect, and EaseUS Todo Backup.
SATA-to-USB Adapter (Optional): If you choose to use drive cloning, you may need a SATA-to-USB adapter. This adapter allows you to connect the SSD to your computer via a USB port, making it easier to clone the old drive onto the SSD. Make sure to follow the manufacturer’s instructions for properly connecting and using the adapter.
Follow the Cloning Process: If you opt for drive cloning, follow the instructions provided by the cloning software you have chosen. Typically, you’ll need to select the source (old drive) and the destination (SSD) and proceed with the cloning process. Be patient, as this process can take some time depending on the size of the data being transferred.
Verify the Data Transfer: Once the transfer process is complete, take a moment to verify that all the transferred data is intact on the SSD. Open a few files, check folders, and ensure that everything is as expected. This double-checking step will give you peace of mind knowing that the data transfer was successful.
Transferring your data from the old drive to the SSD ensures that you have all your files and documents available on your new, faster storage device. You can now enjoy the improved performance and responsiveness that the SSD provides.
Next, we’ll guide you through the process of updating drivers and optimizing your SSD for the best possible performance.
Updating Drivers and Optimizing the SSD
After transferring your data to the new SSD, it’s important to update the necessary drivers and optimize the SSD for enhanced performance. Follow these steps to ensure your SSD and computer are functioning optimally:
Update SSD Firmware (if applicable): Check the manufacturer’s website for any firmware updates available for your SSD. These updates can improve compatibility, performance, and reliability. Follow the provided instructions to download and install the latest firmware for your specific SSD model.
Update Motherboard Drivers: Keeping your motherboard drivers up to date is crucial for overall system stability and performance. Visit the manufacturer’s website and download the latest drivers for your motherboard model. Pay special attention to drivers related to storage or SATA controllers.
Update Graphics and Peripheral Drivers: Update other drivers, such as graphics card drivers, network adapter drivers, and audio drivers, from the respective manufacturers’ websites. Having up-to-date drivers ensures proper communication between devices and optimal performance.
Enable TRIM (if applicable): TRIM is a feature that helps maintain the performance and longevity of SSDs. Check if TRIM is enabled on your SSD by opening the Command Prompt as an administrator and entering the command “fsutil behavior query DisableDeleteNotify.” If the result is “DisableDeleteNotify = 0,” TRIM is enabled. If it shows “DisableDeleteNotify = 1,” enter the command “fsutil behavior set DisableDeleteNotify 0” to enable TRIM.
Adjust Power Settings: It’s recommended to adjust power settings to accommodate the SSD’s capabilities. Open the Power Options in the Control Panel and select the “High Performance” power plan. Check that advanced power options, such as turning off hard disk sleep mode, are optimal for SSD usage.
Disable System Defragmentation (if applicable): SSDs do not benefit from defragmentation and excessive writes can decrease their lifespan. Confirm that automatic defragmentation is turned off for your SSD. Open the “Defragment and Optimize Drives” utility in Windows and ensure that your SSD is not included in the defragmentation schedule.
Monitor SSD Health and Performance: Install SSD management software provided by the manufacturer to monitor the health and performance of your SSD. These tools provide insights into drive usage, temperature, and can alert you to any potential issues.
By updating drivers and optimizing your SSD, you ensure that your system is operating at its best with improved performance and reliability. Your SSD will continue to deliver top-notch speed and responsiveness, enhancing your overall computing experience.
With your SSD properly installed, data transferred, and drivers optimized, you can now fully enjoy the benefits of your upgraded storage solution. Should you encounter any issues in the future, refer to the manufacturer’s resources or consult with technical support for assistance.
Conclusion
Congratulations on successfully installing an SSD in your Windows 7 computer! By upgrading to an SSD, you have significantly improved the performance and speed of your system, allowing for faster boot times, quicker program launches, and seamless multitasking.
Throughout this guide, we discussed the importance of preparing for the installation by gathering the necessary tools and hardware, backing up your data to ensure its safety, and shutting down and opening the computer case with caution.
We then went through the step-by-step process of installing the SSD in an available drive bay, connecting it to the power supply and motherboard, configuring the BIOS settings, and formatting the SSD for use. The importance of updating drivers and optimizing the SSD for optimal performance was also highlighted.
Remember, always ensure that you take precautionary measures when working with computer hardware, and if you are unsure or uncomfortable with any step, it is advisable to seek the assistance of a professional technician.
With your SSD installed, your data transferred, and your system optimized, you can now reap the benefits of improved speed, reliability, and overall performance. Enjoy the enhanced computing experience, whether it be for work or play!
Thank you for following this installation guide. We hope that it has been informative and helpful in your SSD upgrade journey. Should you have any further questions or concerns, don’t hesitate to consult the manufacturer’s resources or seek additional assistance. Happy computing with your new SSD!