Introduction
Welcome to the ultimate guide on how to improve your CPU performance! If you’re experiencing sluggishness or lag on your computer, the processor, or CPU, may be the culprit. Fortunately, there are several steps you can take to optimize your CPU’s performance and boost your overall system speed.
Your CPU plays a critical role in executing instructions and performing calculations for all the tasks you carry out on your computer. Over time, however, factors like accumulated dust, outdated drivers, and excessive background programs can slow down your CPU’s processing speed.
In this guide, we’ll explore various methods to enhance your CPU’s performance and get your computer running smoothly again. You don’t have to be a tech expert to implement these strategies, as we’ll walk you through each step with easy-to-understand instructions. Get ready to unleash the full potential of your CPU!
Before we dive into the specific techniques, it’s important to note that every computer setup is unique, and the effectiveness of each method may vary. However, by implementing a combination of these strategies, you can significantly optimize your CPU performance.
Let’s get started by addressing one of the most basic yet crucial steps.
Clean Out Dust
Over time, dust and debris can accumulate inside your computer case, especially around the CPU and cooling fans. This buildup can negatively impact your CPU’s cooling efficiency, leading to higher temperatures and reduced performance. Cleaning out the dust is a simple yet effective way to improve your CPU’s performance.
To begin, shut down your computer and unplug it from the power source. Open your computer case by removing the screws or latches, ensuring that you’re grounded to prevent static electricity damage. Using a can of compressed air, gently blow away the dust from the CPU heatsink, cooling fans, and any other components where dust has accumulated. Be careful not to use excessive force or get too close to the components to avoid causing damage.
If necessary, you can also use a soft brush or lint-free cloth to remove stubborn dust particles. Ensure that you’re thorough in cleaning all areas, including the corners and crevices. Once you’ve finished cleaning, close the computer case and reconnect all the cables.
Regularly cleaning out dust is recommended to maintain optimal airflow and prevent overheating. Depending on your computing environment, you may need to clean your computer every few months or more frequently if you notice significant dust buildup.
Cleaning out the dust from your computer is a simple and cost-effective solution to boost your CPU’s performance. By improving airflow and reducing heat, you’ll be able to maximize the efficiency of your CPU and prevent potential performance issues.
Manage Running Programs
One of the common reasons for a slow CPU is having too many unnecessary programs running in the background. These programs consume valuable system resources, such as CPU usage and RAM, leading to decreased performance. By managing and optimizing your running programs, you can enhance your CPU’s efficiency and regain valuable processing power.
Start by identifying the programs that are running in the background. On Windows, you can use the Task Manager by pressing “Ctrl + Shift + Esc” or right-clicking on the taskbar and selecting “Task Manager.” On macOS, open the Activity Monitor from the Utilities folder in the Applications folder.
In the Task Manager or Activity Monitor, you’ll see a list of processes and programs running on your computer. Sort the list by CPU usage to identify the programs that are utilizing a significant amount of processing power. Take note of any unnecessary programs that you don’t need while working or gaming.
To reduce the CPU load, you have several options. First, you can close any unnecessary programs manually. Right-click on the program in the Task Manager or Activity Monitor and select “End Task” or “Quit.” This will free up valuable CPU resources.
If you notice certain programs consistently using high CPU usage, you may want to consider disabling them from starting up automatically. On Windows, open the Task Manager and navigate to the “Startup” tab. Disable any unwanted programs by right-clicking on them and selecting “Disable.” On macOS, open “System Preferences,” go to “Users & Groups,” and select your username. Click on the “Login Items” tab and uncheck the programs you want to prevent from launching at startup.
Remember to exercise caution when disabling startup programs, as some may be necessary for your computer’s functionality. Be sure to research the programs before making any changes.
By managing your running programs and reducing unnecessary CPU usage, you can ensure that your CPU has ample resources for the tasks that matter most, resulting in improved performance and responsiveness.
Disable Unnecessary Startup Programs
When you start up your computer, various programs and applications may automatically launch in the background. While some of these startup programs are essential, others may be unnecessary and contribute to a slower CPU performance. By disabling these unnecessary startup programs, you can free up valuable system resources and speed up your computer’s boot time.
On Windows, you can manage startup programs using the Task Manager. Press “Ctrl + Shift + Esc” to open the Task Manager, then navigate to the “Startup” tab. Here, you’ll see a list of programs that are configured to start automatically when your computer boots up. Assess each program and determine whether it’s necessary or not.
To disable a startup program, simply right-click on it and select “Disable.” This will prevent the program from launching during startup. It’s important to note that disabling a program from startup doesn’t uninstall or delete the program; it only prevents it from automatically launching when your computer starts.
On macOS, managing startup programs is done through the “Users & Groups” settings. Open “System Preferences” and click on “Users & Groups.” From there, select your username and navigate to the “Login Items” tab. Here, you’ll find a list of programs that launch during startup. To remove a program from startup, select it and click on the minus (-) button at the bottom of the list.
When deciding which startup programs to disable, consider the functionalities and importance of each program. Programs like antivirus software and essential system utilities should generally remain enabled, as they contribute to the overall security and functioning of your computer. Non-essential applications, such as chat clients or music players, can usually be safely disabled.
By disabling unnecessary startup programs, you reduce the CPU resources and memory usage required during boot-up, resulting in a faster and more efficient start for your computer. This will not only improve your CPU performance but also enhance your overall computing experience.
Update Your Drivers
Outdated or incompatible drivers can significantly impact your CPU’s performance and overall system stability. Drivers are software components that allow your operating system to communicate and interact with hardware devices, including your CPU. Keeping your drivers up to date ensures that they are optimized for performance and can take full advantage of your CPU’s capabilities.
To update your drivers, you first need to identify which ones require updating. Windows users can use the Device Manager to check for outdated drivers. Press “Win + X” and select “Device Manager” from the menu. Expand the different categories and look for any devices with a yellow exclamation mark, indicating a driver issue.
On macOS, you can update drivers by installing system updates. Click on the Apple menu and select “System Preferences.” From there, choose “Software Update.” If there are any available updates, click “Update Now” to install them, which may include updated drivers for your hardware devices.
For both Windows and macOS, you can also visit the manufacturer’s website for your specific hardware devices, such as your CPU or graphics card, to download the latest drivers. Ensure that you download and install the correct drivers for your specific hardware model and operating system version.
Additionally, there are third-party driver update tools available that can scan your system and automatically update your drivers. These tools can simplify the updating process and ensure that you have the latest drivers for optimal CPU performance. However, exercise caution when using third-party tools and ensure that you download them from reputable sources.
Regularly updating your drivers helps to keep your CPU running smoothly and ensures compatibility with the latest software and hardware advancements. By having up-to-date drivers, you can maximize your CPU’s performance potential and eliminate any performance issues caused by outdated or incompatible drivers.
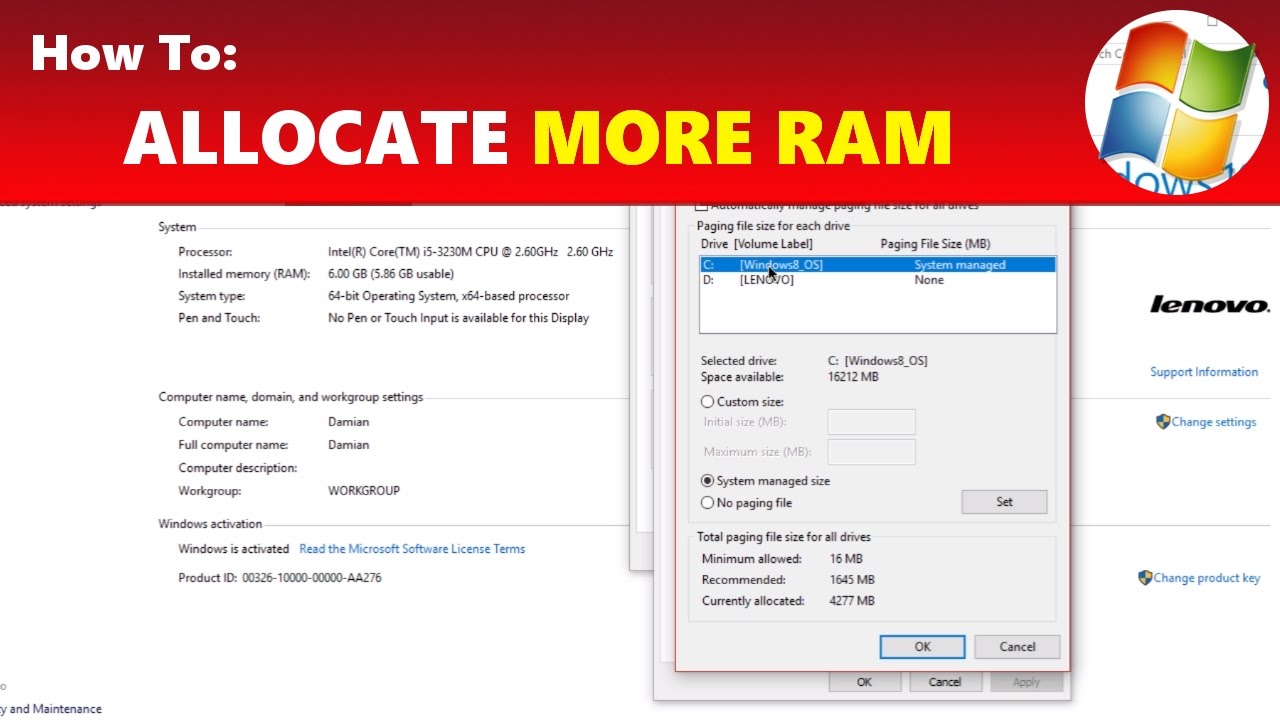
Upgrade Your RAM
If you’re experiencing sluggishness and poor CPU performance, your computer may be running low on memory. Upgrading your RAM (Random Access Memory) can significantly improve your CPU’s performance by providing more room for data and programs to be stored and accessed quickly.
RAM acts as temporary storage for data that your CPU needs to access frequently. When your computer runs out of available RAM, it starts using the hard drive as virtual memory, which is much slower and can cause a noticeable slowdown in performance.
To determine if a RAM upgrade is necessary, you can check your computer’s current memory usage. On Windows, open the Task Manager by pressing “Ctrl + Shift + Esc” or right-clicking on the taskbar and selecting “Task Manager.” Under the “Performance” tab, look for the “Memory” section. Here, you can see how much RAM is currently being used and if you’re consistently running close to or at full capacity.
On macOS, open the Activity Monitor from the Utilities folder in the Applications folder. In the “Memory” tab, you can view your RAM usage and determine if an upgrade is needed.
If you decide to upgrade your RAM, you’ll need to check your computer’s specifications to determine the maximum amount of RAM it can support and the type of RAM module required. You can usually find this information in your computer’s manual or by searching for your specific model online.
RAM modules are relatively simple to install. Start by shutting down your computer and disconnecting the power source. Depending on your computer’s design, you may need to remove the case or access a specific compartment to find the RAM slots. Insert the new RAM module into an available slot, ensuring it is properly aligned with the slot and pushed all the way down until it clicks into place.
Once you’ve installed the new RAM module, power on your computer and check if it recognizes the additional memory. You may need to adjust the BIOS settings to ensure the new RAM is detected correctly.
Upgrading your RAM can have a significant impact on your CPU’s performance, especially when running memory-intensive tasks or multitasking. With additional memory, your computer can handle more demanding applications and processes without slowing down, resulting in a smoother and more responsive computing experience.
Check for Malware
If your CPU performance is abnormally slow, it’s possible that your computer has been infected with malware. Malware can consume system resources, including CPU usage, resulting in decreased performance and overall sluggishness. Checking for and removing malware from your system is essential to restore your CPU’s performance and ensure a secure computing environment.
There are several methods to check for malware on your computer. One of the most effective ways is to use reputable antivirus software. Update your antivirus program to the latest version and perform a thorough scan of your entire system. The antivirus software will detect and remove any malicious programs or files that may be impacting your CPU’s performance.
In addition to antivirus software, you can also use dedicated anti-malware tools to scan for specific types of malware. These tools focus on detecting and removing malware that may go undetected by traditional antivirus programs.
It’s important to regularly update your antivirus and anti-malware software to protect against the latest threats. In many cases, these programs have automatic updates enabled by default to ensure continuous protection.
Prevention is also key to avoiding malware infections. Be cautious when downloading and installing programs from the internet, and only download from trusted sources. Avoid opening suspicious email attachments or clicking on unknown links, as these can lead to malware infections.
If malware is detected and removed from your system, make sure to monitor your CPU performance afterwards to verify that the issue has been resolved. If you continue experiencing slow performance, it may be worth seeking further assistance from a professional to ensure all traces of malware have been eradicated.
By regularly scanning for and removing malware from your system, you can restore your CPU’s performance and safeguard your personal information. A clean and malware-free system will allow your CPU to operate at its full potential, resulting in improved speed and responsiveness for all your computing tasks.
Adjust Power Settings
Adjusting your computer’s power settings can help optimize CPU performance and improve overall energy efficiency. By adjusting power settings, you can ensure that your CPU operates at its maximum potential when you need it, while also conserving energy during periods of low activity.
On Windows, you can access the power settings by clicking on the Start menu and searching for “Power & Sleep Settings” or “Power Options.” Within the power settings, you’ll find different power plans such as “Balanced,” “Power Saver,” and “High Performance.” The default setting is often set to Balanced, which aims to find a balance between performance and energy consumption.
If you want to prioritize CPU performance, you can select the “High Performance” power plan. This plan ensures that your CPU runs at maximum speed and doesn’t throttle its performance. However, keep in mind that this may consume more energy and result in shorter battery life for laptops.
If energy efficiency is your main concern, you can choose the “Power Saver” power plan. This plan prioritizes energy conservation by reducing CPU speed and brightness levels. While this may limit performance, it can significantly extend battery life on laptops and reduce power consumption on desktop systems.
On macOS, open the Apple menu and go to “System Preferences.” From there, select “Energy Saver” to access power settings. You can adjust the settings for both battery and power adapter usage. Similar to Windows, you’ll have power-saving options to conserve energy and high-performance options for maximum CPU performance.
Customizing power settings allows you to fine-tune your computer’s performance based on your specific needs. For example, you can adjust sleep and hibernation settings to strike a balance between quick startup times and energy efficiency.
Keep in mind that adjusting power settings may have different effects on different computers and configurations. It’s important to monitor your CPU performance after making changes to ensure that your desired performance level is achieved without any adverse effects.
By adjusting power settings to match your requirements, you can optimize your CPU’s performance and energy usage. Whether you need maximum performance or energy conservation, finding the right power setting will allow your CPU to operate efficiently and effectively.
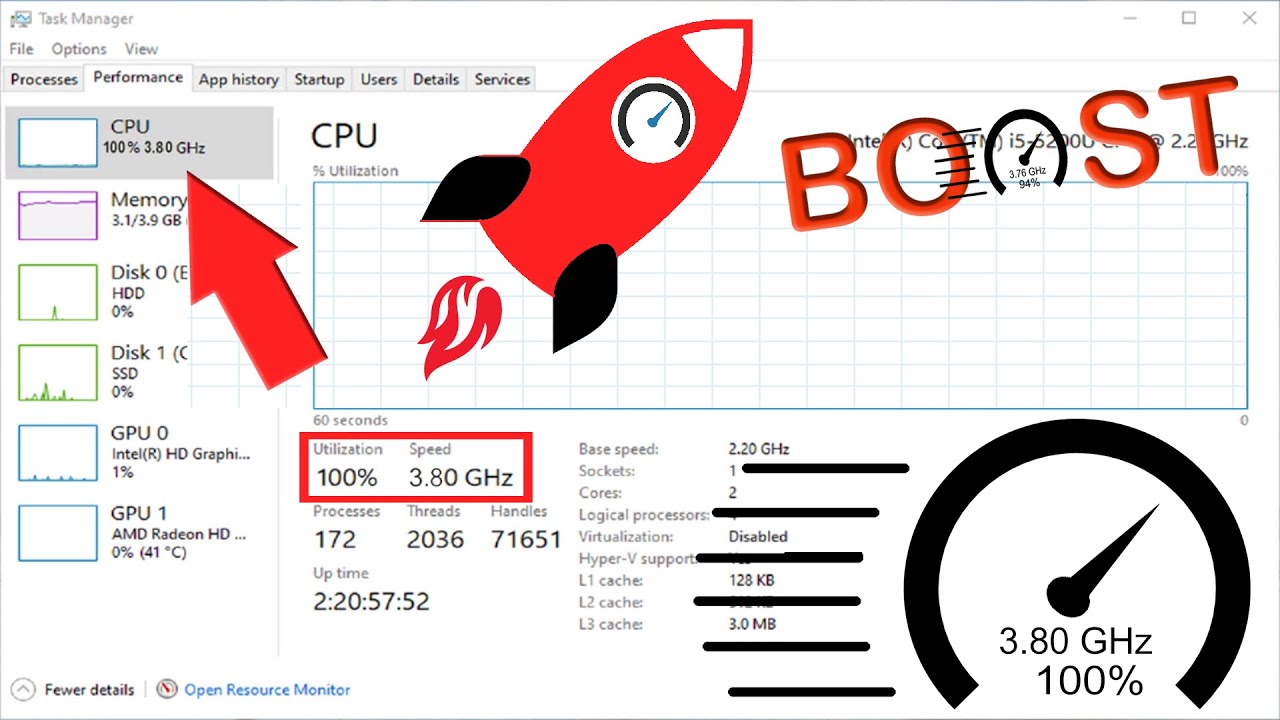
Overclock Your CPU
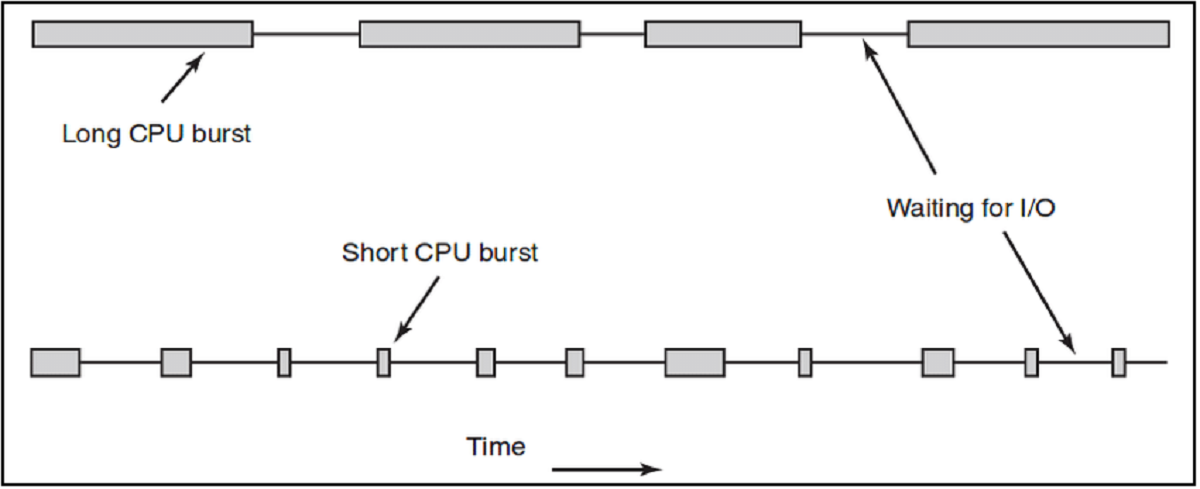
If you’re looking to push your CPU performance to the next level, overclocking can be a viable option. Overclocking refers to running your CPU at a higher clock speed than its default configuration, allowing for increased performance. However, it’s important to note that overclocking can also come with risks and should be approached with caution.
Overclocking requires accessing your computer’s BIOS or UEFI settings, which vary depending on the motherboard manufacturer and model. Typically, you can enter the BIOS or UEFI by pressing a specific key during the boot-up process, such as Delete, F2, or F10. Consult your motherboard manual or manufacturer’s website for detailed instructions on accessing and navigating the BIOS or UEFI.
Once you’re in the BIOS or UEFI, find the settings related to your CPU. Look for options such as “CPU multiplier” or “base clock frequency.” Increasing the CPU multiplier will directly increase the clock speed of your CPU, providing a straightforward approach to overclocking. Alternatively, adjusting the base clock frequency can have a similar effect but may affect other components as well, so it requires more careful tweaking.
When overclocking, start by making small incremental adjustments and test stability and temperature after each change. You can use benchmarking software or stress-testing tools to ensure system stability during extended periods of high CPU usage. Monitoring your CPU temperature is crucial, as increased clock speed can cause higher temperatures and potentially damage your CPU if not properly cooled.
Remember that not all CPUs can be overclocked, and even among those that can, the potential for overclocking varies. Additionally, each CPU has its own safe limits, and exceeding these limits can lead to instability or damage. It’s recommended to research your specific CPU model and consult online resources or community forums for guidance on safe overclocking parameters.
Lastly, be aware that overclocking may void your CPU’s warranty. Manufacturers typically do not provide support or replacement for CPUs that have been overclocked, so proceed with caution and at your own risk.
Overclocking your CPU can provide a noticeable performance boost for tasks that heavily rely on CPU power, such as gaming or video editing. However, it requires careful monitoring, testing, and understanding of the risks involved. Ensure that you have adequate cooling solutions in place and are prepared to adjust settings to maintain stability and prevent excessive temperature buildup.
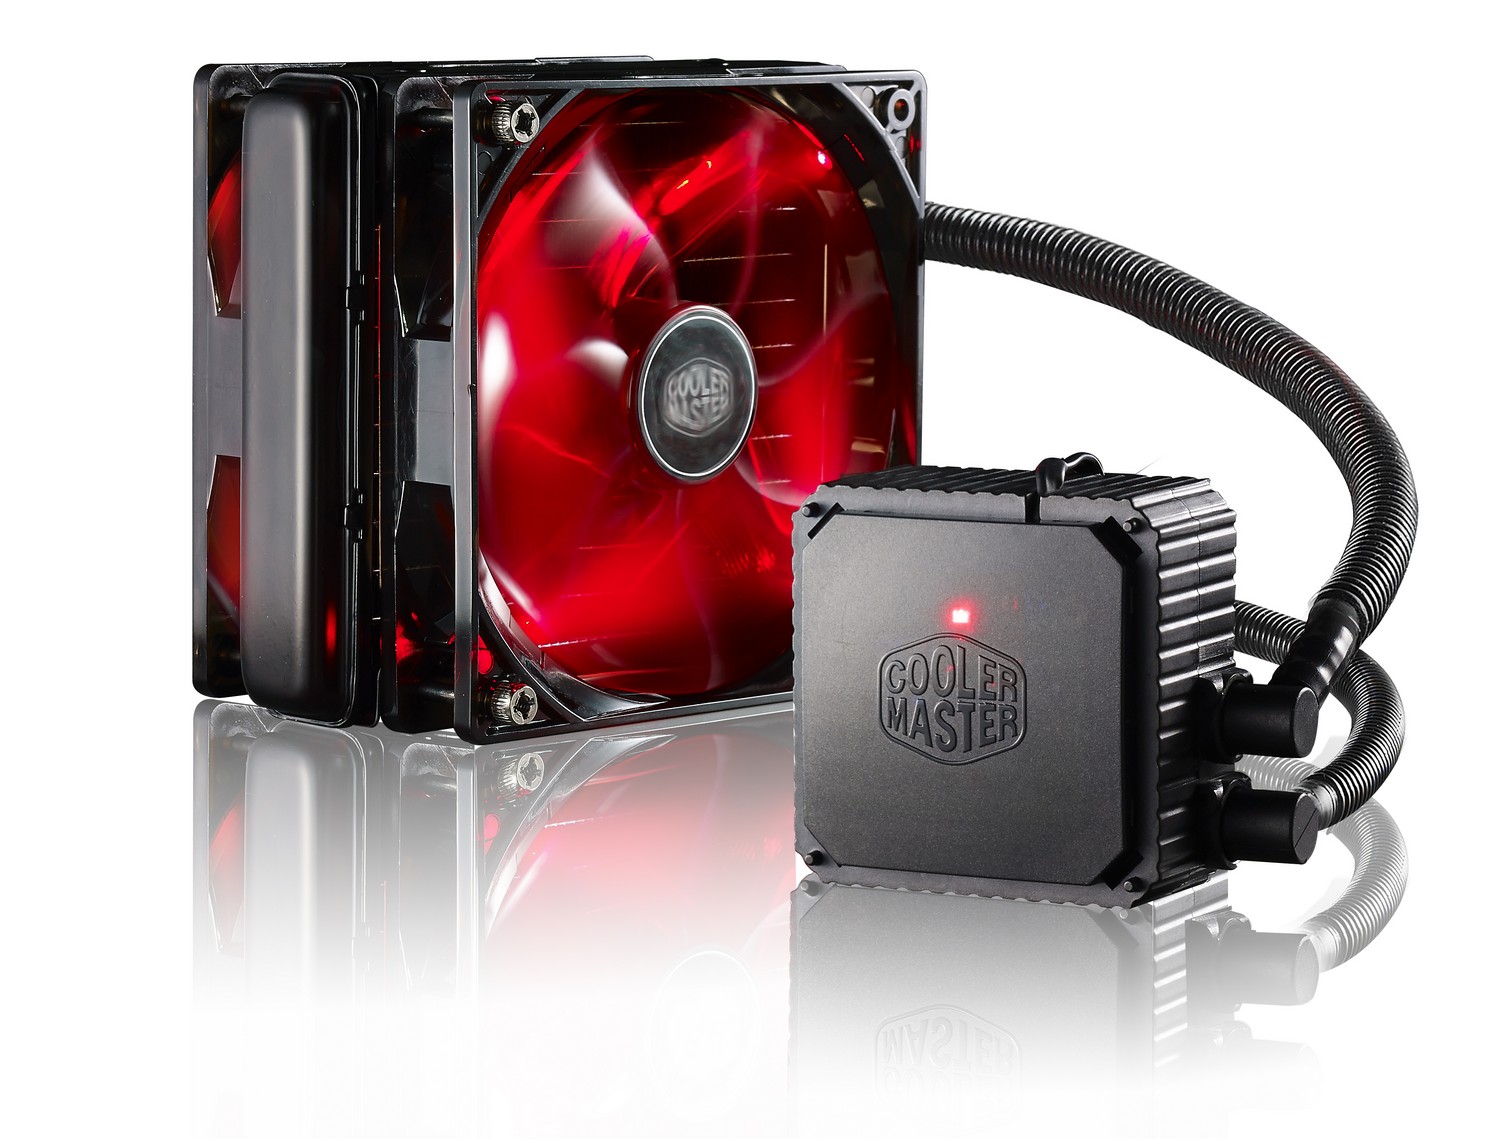
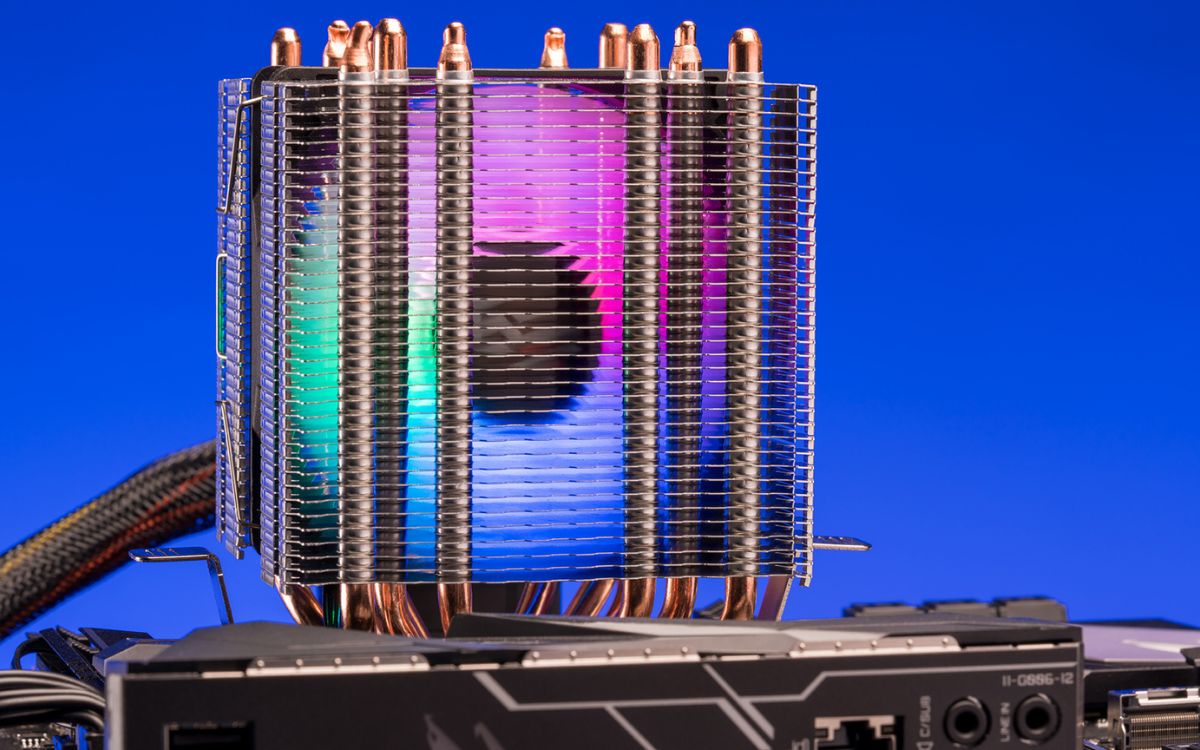
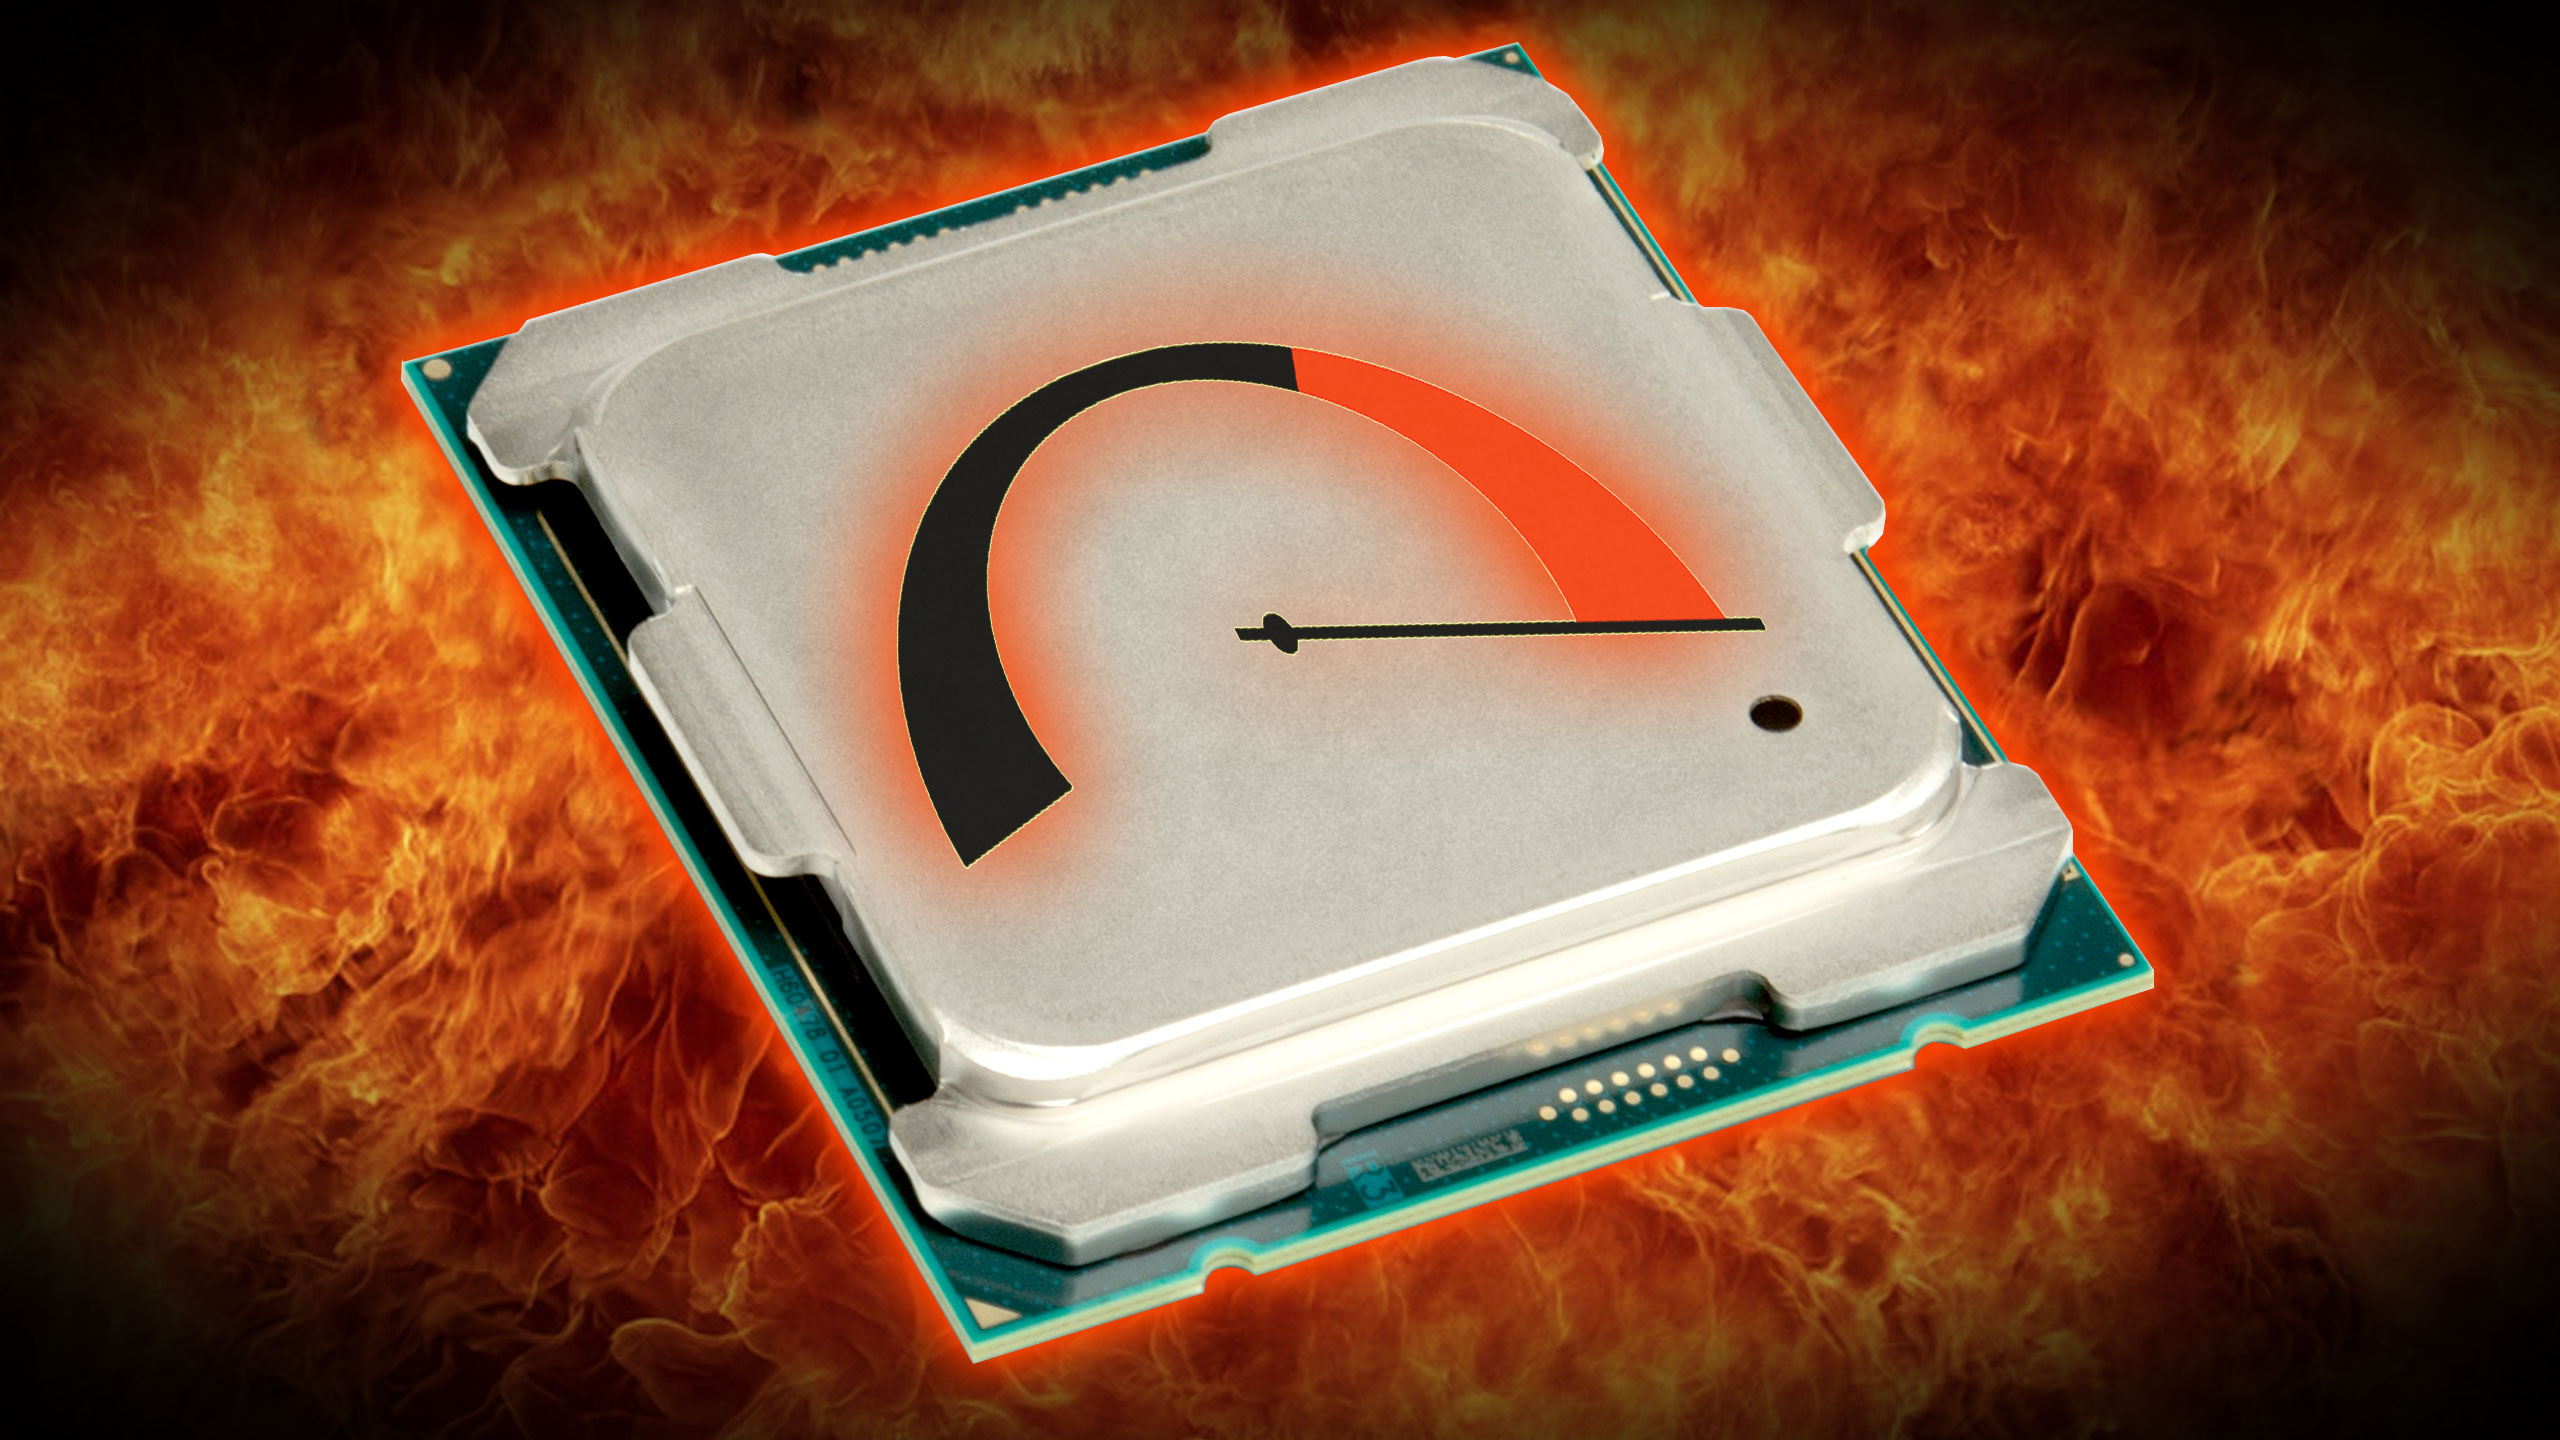
Use Cooling Solutions
When your CPU is operating under heavy loads or overclocked, it generates more heat, which can affect its performance and potentially lead to thermal throttling or damage. To maintain optimal CPU performance, it’s crucial to implement effective cooling solutions to keep temperatures in check. Proper cooling not only ensures consistent performance but also extends the lifespan of your CPU.
There are various cooling solutions available, each with its own advantages and suitability depending on your specific requirements and budget.
The most common cooling solution for CPUs is an air cooler, which consists of a heatsink and a fan. The heatsink helps dissipate heat, while the fan promotes airflow to cool down the heatsink effectively. Air coolers range from stock coolers that come with your CPU to high-performance aftermarket coolers. Upgrading to a more efficient air cooler can significantly improve your CPU’s cooling capability.
If you’re looking for more advanced cooling, you may consider liquid cooling. Liquid cooling involves circulating a coolant through a radiator, which absorbs heat from the CPU. This coolant is then cooled down before being circulated again. Liquid cooling systems can offer superior cooling efficiency and reduced noise levels compared to air coolers. However, they are generally more expensive and can be complicated to install, requiring additional maintenance.
Regardless of the cooling solution you choose, it’s essential to ensure proper airflow in your computer case. Make sure that the intake and exhaust fans are properly positioned to facilitate the flow of cool air in and hot air out. Keeping your computer case clean and dust-free also helps prevent airflow restrictions and overheating.
In addition to external cooling solutions, consider applying thermal paste between your CPU and heatsink. Thermal paste helps ensure proper heat transfer and improves cooling efficiency. When applying thermal paste, ensure that it’s spread in a thin and even layer to maximize its effectiveness.
Monitoring your CPU’s temperatures is vital for ensuring efficient cooling. You can use software utilities or BIOS/UEFI settings to check CPU temperatures. If your CPU consistently reaches high temperatures, consider adjusting fan speeds, improving case airflow, or upgrading your cooling solution to better accommodate the heat generated.
By implementing effective cooling solutions, you can maintain optimal CPU performance and prevent thermal issues. Whether you choose an air cooler or liquid cooling system, ensuring proper cooling will help your CPU operate at its best and provide you with a stable and efficient computing experience.
Conclusion
Improving your CPU performance is essential for a smooth and efficient computing experience. By following the strategies outlined in this guide, you can optimize your CPU’s performance and unlock its full potential.
Start by cleaning out dust from your computer to ensure proper cooling and prevent overheating. Managing running programs and disabling unnecessary startup programs will free up valuable system resources and improve CPU efficiency. Updating your drivers and upgrading your RAM will ensure compatibility and provide more memory for faster data access. Checking for malware will eliminate any performance-draining threats and maintain a secure system.
For those looking to take their CPU performance to the next level, overclocking can provide a significant boost. However, it requires caution and an understanding of the risks involved. If you do decide to overclock, make sure to monitor temperatures and stability closely.
Finally, employing effective cooling solutions is crucial to maintaining optimal CPU performance. Whether it’s utilizing air coolers, liquid cooling, or improving airflow in your computer case, keeping your CPU cool is essential for consistent performance and longevity.
Remember that every computer setup is unique, and the effectiveness of these strategies may vary. It’s important to tailor these techniques to suit your specific needs and system configuration. Properly implementing these strategies can result in noticeable improvements in CPU performance and overall system responsiveness.
By taking the time to optimize your CPU’s performance, you can enjoy a faster, smoother, and more enjoyable computing experience. Keep your CPU running at its best, and let your computer truly shine in all its processing power.