Introduction
Is your CPU cooler fan making an unbearable amount of noise? You’re not alone. Many computer users have experienced the annoyance of a loud CPU cooler fan. Not only can it be irritating, but it can also indicate potential issues with your computer’s cooling system. In this article, we will explore the common causes of loud CPU cooler fans and provide solutions to help reduce the noise.
Your CPU cooler fan plays a crucial role in maintaining the temperature of your computer’s processor. It circulates air around the CPU to dissipate heat generated during operation. However, various factors can contribute to an excessively loud fan, causing disruption and potentially affecting the performance of your computer.
Understanding the root causes of a loud CPU cooler fan is the first step towards finding a solution. The noise may be indicative of underlying issues that need to be addressed. This article will guide you through the most common reasons for a noisy CPU cooler fan and offer practical tips to help you mitigate the noise and keep your computer running smoothly.
Whether you’re a gaming enthusiast, creative professional, or regular computer user, reducing the noise from your CPU cooler fan can greatly enhance your computing experience. Let’s dive into the main causes of noisy CPU cooler fans and explore the steps you can take to resolve this issue.
Common Causes of Loud CPU Cooler Fans
Loud CPU cooler fans can be attributed to various factors. Identifying the root cause of the excessive noise is essential in determining the appropriate solution. Here are some common reasons why your CPU cooler fan might be making a racket:
- High CPU Usage: When your CPU is working under heavy load, it generates more heat, causing the CPU cooler fan to spin faster and produce more noise.
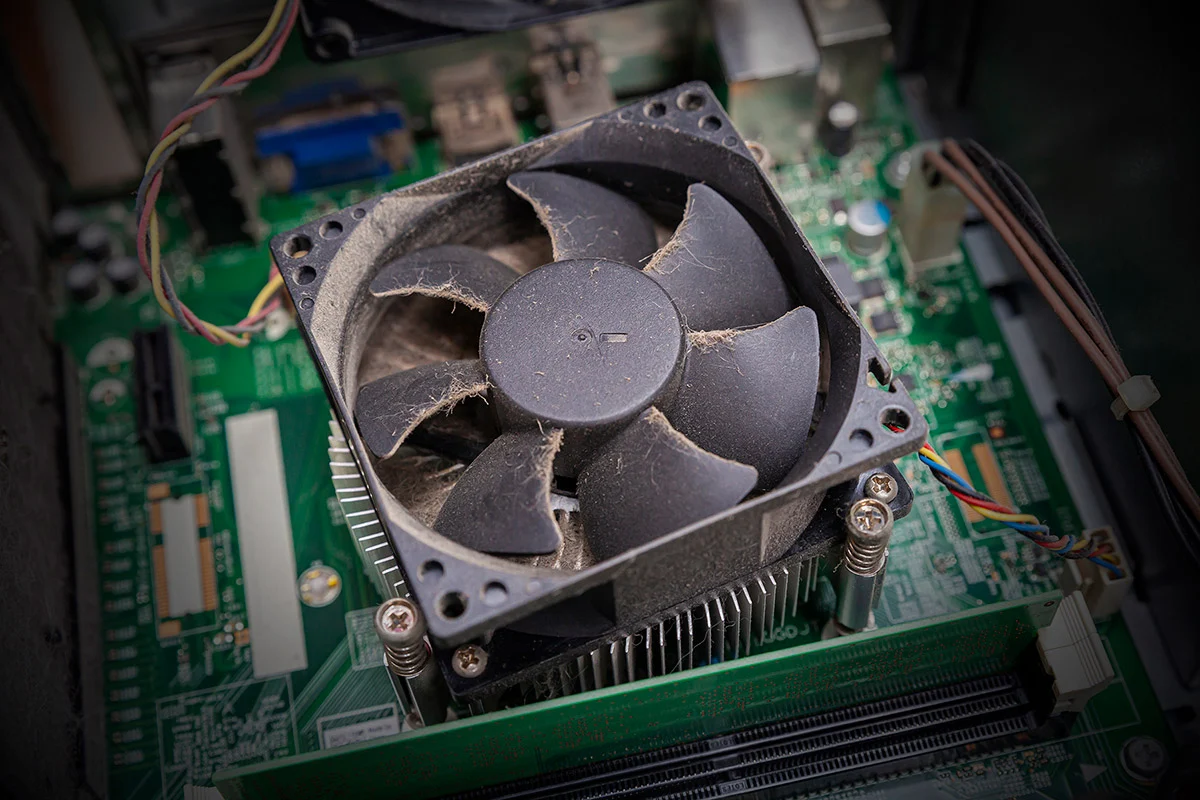
- Dust Accumulation: Over time, dust and debris can accumulate on the CPU cooler’s heatsink and fan blades. This buildup restricts airflow and forces the fan to work harder, resulting in increased noise.
- Incorrect Fan Speed Settings: Improper configuration of the fan speed settings in your computer’s BIOS or software can cause the CPU cooler fan to run at maximum speed constantly, leading to excessive noise.
- Inadequate Cooling: If your CPU cooler is not adequate for the heat generated by your processor, it may struggle to cool it effectively. This can cause the fan to work harder and produce more noise in an attempt to maintain optimal temperatures.
- CPU Overclocking: Overclocking your CPU can increase its performance but also generate more heat. This extra heat can push the CPU cooler fan to its limits, resulting in noisy operation.
- Faulty Fan Bearings or Motors: Over time, the bearings or motor of your CPU cooler fan may wear out or become faulty, causing excessive noise during operation.
- Software Issues: Certain software processes or applications running in the background may cause the CPU to work harder, leading to increased heat and fan noise.
- Poor Cable Routing: Inadequate cable management inside your computer case can obstruct the airflow to your CPU cooler, causing increased fan noise.
These are just a few of the common causes of loud CPU cooler fans. It’s essential to identify the specific cause affecting your system to implement the appropriate solutions. In the following sections, we will explore the steps you can take to reduce CPU cooler fan noise and restore a quieter computing experience.
High CPU Usage
One of the main causes of a loud CPU cooler fan is high CPU usage. When your computer’s processor is working under a heavy load, it generates more heat that needs to be dissipated. As a result, the CPU cooler fan speeds up to cool down the processor, leading to increased noise.
High CPU usage can occur due to several reasons. It could be caused by resource-intensive tasks such as gaming, video editing, or running demanding applications. Additionally, background processes, malware, or outdated software can also contribute to increased CPU usage.
To reduce the CPU workload and minimize fan noise, you can take the following steps:
- Close Unnecessary Programs: If you have multiple applications running simultaneously, consider closing the ones that are not in use. This will help reduce CPU usage and subsequently decrease the workload on the CPU cooler fan.
- Monitor Resource Usage: Keep an eye on your computer’s resource usage using Task Manager (Windows) or Activity Monitor (Mac). Identify any processes or applications that are consuming a significant amount of CPU resources and determine if they can be closed or optimized.
- Update Software: Outdated software can sometimes cause unnecessary CPU usage. Make sure to regularly update your operating system, drivers, and applications to ensure optimal performance and minimize CPU workload.
- Scan for Malware: Malware infections can significantly impact CPU usage. Use a reliable antivirus program to scan your computer and remove any malicious software that may be causing high CPU usage.
- Optimize Power Settings: Adjusting the power settings on your computer can help reduce CPU usage. Consider selecting a power plan that balances performance and energy efficiency, as the high-performance mode can increase CPU workload.
By managing CPU usage effectively, you can lower the heat generated by the processor and subsequently reduce the workload on the CPU cooler fan, resulting in quieter operation.
Dust Accumulation
Dust accumulation is a common culprit behind a noisy CPU cooler fan. Over time, dust particles can accumulate on the CPU cooler’s heatsink and fan blades. This buildup restricts the airflow, causing the fan to work harder to cool the CPU, resulting in increased noise.
To address the issue of dust accumulation and minimize fan noise, follow these steps:
- Power Off the Computer: Before cleaning the CPU cooler fan, make sure to power off your computer and disconnect it from the power source to avoid any accidents.
- Open the Computer Case: Depending on your computer’s design, you may need to remove a side panel or top cover to access the CPU cooler. Consult your computer’s manual or manufacturer’s instructions for guidance.
- Remove Dust with Compressed Air: Use a can of compressed air to blow away the dust from the CPU cooler’s heatsink and fan. Hold the can upright and use short bursts of air to avoid liquid residue from the can. Pay close attention to the crevices and fan blades where dust tends to accumulate the most.
- Use a Soft Brush: If some dust remains stubbornly stuck to the components, you can use a soft brush, like a clean paintbrush or a makeup brush, to gently sweep away the debris. Be cautious not to apply excessive pressure that could damage the delicate components.
- Check for Loose Cables: While cleaning, ensure that no loose cables are obstructing the fan’s movement. Move any cables away from the fan to allow unobstructed airflow.
- Reassemble the Computer: Once you have cleaned the CPU cooler, carefully close the computer case and secure any panels or covers that were removed.
Regularly cleaning the CPU cooler fan and removing dust accumulation not only helps reduce fan noise but also improves the overall cooling performance of your computer. Aim to clean your computer at least every three to six months, or more frequently if you live in a dusty environment or notice a significant buildup of debris.
Incorrect Fan Speed Settings
Incorrect fan speed settings can contribute to a loud CPU cooler fan. If the fan is running at maximum speed constantly, it can lead to unnecessary noise and potentially reduce the lifespan of the fan.
To ensure that your CPU cooler fan is operating at the appropriate speed, follow these steps:
- Access the BIOS or Fan Control Software: Restart your computer and enter the BIOS settings by pressing the designated key during startup. Look for the Fan Control section or a similar option. Alternatively, some motherboards provide fan control software that allows you to adjust fan speeds within the operating system.
- Set Fan Speed to Automatic: In the Fan Control settings, select the option to set the fan speed to automatic or smart mode. This allows the fan to adjust its speed based on the CPU temperature, ensuring optimal cooling performance without unnecessary noise.
- Adjust Fan Curve (if available): Some BIOS or fan control software provides the option to customize the fan curve. The fan curve determines the fan speed at different temperature ranges. Adjusting the curve can help strike a balance between noise levels and cooling performance. Experiment with different settings to find the optimal configuration for your system.
- Save and Exit: Once you have made the necessary adjustments, save your changes and exit the BIOS settings. If you were using fan control software, apply the settings and close the software.
By correctly configuring the fan speed settings, you can ensure that the CPU cooler fan operates at an optimal speed, reducing unnecessary noise while maintaining efficient cooling for your computer.
Inadequate Cooling
Inadequate cooling is another common cause of a loud CPU cooler fan. If your CPU cooler is not sufficient for the heat generated by your processor, it may struggle to maintain optimal temperatures. As a result, the fan has to work harder, spinning at higher speeds to dissipate the excess heat.
To address the issue of inadequate cooling and reduce fan noise, consider the following solutions:
- Upgrade Your CPU Cooler: If you are using the stock cooler that came with your processor, it may not provide sufficient cooling for heavy workloads. Consider upgrading to a more robust aftermarket CPU cooler that can handle higher heat loads more effectively.
- Ensure Proper Thermal Paste Application: When installing or replacing the CPU cooler, ensure that you apply an adequate amount of thermal paste between the CPU and the heatsink. Proper application helps improve heat transfer, allowing the cooler to work more efficiently.
- Verify Proper Cooling System Installation: Ensure that the CPU cooler is installed correctly, with a secure connection to the motherboard. Check that the mounting brackets, screws, and other components are properly aligned and tightened to prevent any gaps that could impact cooling performance.
- Optimize Airflow within the Case: Poor airflow within the computer case can contribute to inadequate cooling. Make sure that your case has sufficient intake and exhaust fans for proper air circulation. Also, organize cables and remove any obstructions that may impede the flow of air to the CPU cooler.
- Consider Liquid Cooling: If you require even more efficient cooling, especially for overclocked CPUs or high-performance systems, consider liquid cooling solutions. Liquid cooling can provide superior heat dissipation and quieter operation compared to air cooling.
By ensuring adequate cooling for your CPU, you can reduce the workload on the fan and minimize the noise generated by the CPU cooler fan.
CPU Overclocking
CPU overclocking, while a popular technique to increase processor performance, can result in higher heat generation and subsequently louder CPU cooler fans. Overclocking involves running the CPU at higher clock speeds than the manufacturer’s intended specifications, which can lead to increased power consumption and heat output.
To address the issue of CPU overclocking and reduce fan noise, consider the following steps:
- Reset to Default Settings: If you have overclocked your CPU, resetting it to its default settings can help reduce heat generation and fan noise. Access the BIOS settings and look for the option to restore default values or revert any changes you made to CPU clock speeds or voltages.
- Consider a Moderate Overclock: If you still wish to overclock your CPU but want to minimize fan noise, consider a more conservative or moderate overclocking approach. Find a balance between increased performance and manageable heat generation to avoid unnecessarily stressing the CPU cooler fan.
- Monitor CPU Temperatures: Keep an eye on the CPU temperatures to ensure they are within safe limits. Use monitoring software to track the temperatures while running intensive tasks or stress tests. If the temperatures become too high, reconsider your overclock settings or take additional cooling measures.
- Upgrade CPU Cooler: If you are determined to maintain a high overclock, consider upgrading your CPU cooler to a more powerful and efficient model. A better cooler can help dissipate the extra heat generated during overclocking, reducing the need for the fan to spin at high speeds and minimizing noise.
- Optimize Airflow and Cooling: Ensure that your computer case has adequate airflow and cooling solutions. Proper cable management, additional case fans, or liquid cooling can help keep temperatures in check and reduce the workload on the CPU cooler fan.
Remember that overclocking poses risks, including potential overheating and component damage. Always proceed with caution and ensure proper cooling measures are in place to maintain stable and safe operation for your CPU.
Faulty Fan Bearings or Motors
A common cause of loud CPU cooler fans is faulty fan bearings or motors. Over time, the bearings in the fan can wear out, causing increased friction and noise during operation. Similarly, a defective motor can result in erratic fan behavior and excessive noise.
To address the issue of faulty fan bearings or motors and reduce fan noise, consider the following steps:
- Inspect and Clean the Fan: Carefully examine the fan for any visible signs of damage or wear. If there is excessive dust or debris clogging the fan, perform a thorough cleaning as described in the section on “Dust Accumulation.” Cleaning may help alleviate noise if the issue is related to an obstruction.
- Replace the Fan: If cleaning does not resolve the noise issue, it may be necessary to replace the faulty fan. Replace it with a compatible fan that matches the specifications of your CPU cooler. Be sure to choose a reputable and reliable brand to ensure quality performance and longevity.
- Consider Upgrading to a Higher-Quality Fan: If you frequently encounter issues with fan noise or failure, consider upgrading to a higher-quality fan. Premium fans often come with better bearings, improved motor technology, and noise-reducing features, providing a quieter cooling solution.
- Consult Technical Support: If your CPU cooler is still under warranty, contact the manufacturer’s technical support for assistance. They may provide guidance on potential solutions or offer a replacement fan if the issue is deemed a manufacturing defect.
- Seek Professional Help: If you are uncomfortable replacing the fan or suspect more complex issues with the CPU cooler, consider contacting a professional technician or computer repair service. They can provide expert diagnosis and help you resolve the problem effectively.
Faulty fan bearings or motors can disrupt the normal operation of the CPU cooler, resulting in excessive noise. By identifying and addressing these issues promptly, you can restore quiet and efficient cooling performance for your computer.
Software Issues
Software-related issues can also contribute to a loud CPU cooler fan. Certain processes or applications running in the background can cause increased CPU usage, resulting in higher heat generation and subsequently louder fan noise. Additionally, outdated or malfunctioning software can impact the performance of your computer, putting unnecessary strain on the CPU.
To address software-related issues and reduce fan noise, consider the following steps:
- Close Unnecessary Background Processes: Open the Task Manager (Windows) or Activity Monitor (Mac) and identify any processes or applications utilizing a significant amount of CPU resources. Close unnecessary processes or applications to reduce CPU usage and alleviate fan noise.
- Update Operating System and Software: Outdated software can lead to performance issues and increased CPU usage. Make sure to regularly update your operating system, drivers, and applications to ensure optimal performance and minimize CPU workload.
- Scan for Malware: Malware infections can cause abnormal CPU usage and impact the overall performance of your computer. Run a thorough scan using reliable antivirus software to detect and remove any malicious programs that may be causing excessive CPU workload.
- Reinstall Problematic Software: If you notice that a specific software application is consistently causing high CPU usage and fan noise, consider reinstalling it. Sometimes, software installation can become corrupted or outdated, leading to performance issues. Reinstalling the application can help resolve these issues.
- Optimize Power Settings: Adjusting the power settings on your computer can help reduce CPU usage. Select a power plan that balances performance and energy efficiency. High-performance mode can increase CPU workload, leading to louder fan operation.
- Consider System Maintenance Tools: System maintenance tools can help identify and resolve software-related issues that may be impacting CPU performance. These tools can clean up unnecessary files, optimize system settings, and improve overall system performance.
By addressing software issues, you can optimize CPU usage and reduce fan noise caused by unnecessary processes or outdated software. Regular software updates and system maintenance are essential in ensuring a smooth and efficient computing experience.
Poor Cable Routing
Poor cable routing inside your computer case can obstruct the airflow to your CPU cooler, leading to increased fan noise. Cables that are not properly organized can create a cluttered and cramped environment, blocking the airflow and causing the CPU cooler fan to work harder to cool the processor.
To address the issue of poor cable routing and minimize fan noise, consider the following steps:
- Organize and Secure Cables: Take the time to route and organize your cables properly. Use cable ties or Velcro straps to secure the cables and keep them neatly aligned along the designated cable management channels or routes within your computer case.
- Keep Cables Away from Fan Blades: Ensure that no cables are obstructing the movement of the CPU cooler fan. Check for any cables that may be touching the fan blades or impeding their rotation. Gently move the cables away from the fan to allow unobstructed airflow.
- Use Cable Sleeving or Extensions: Consider using cable sleeving or extensions to consolidate and manage your cables. These products can help organize the cables, improve airflow, and create a cleaner and more visually appealing interior for your computer case.
- Shorten Excessively Long Cables: If you have excessively long cables, consider shortening them to minimize clutter and improve cable routing. Excess cable length can lead to tangled wires and restricted airflow. You can use cable management accessories or carefully trim and reposition cables to the appropriate length.
- Route Cables Away from CPU Cooler: When routing cables, ensure that they are directed away from the CPU cooler and its fan. Avoid having cables running in front of or directly over the cooler, as this can disrupt airflow and contribute to fan noise. Use cable management channels or routing holes provided in your computer case for proper cable placement.
By optimizing cable routing, you can improve the airflow within your computer case, promote efficient cooling, and reduce the workload on the CPU cooler fan, resulting in a quieter operation.
How to Reduce CPU Cooler Fan Noise
CPU cooler fan noise can be a nuisance, but luckily, there are several measures you can take to minimize it. By addressing the underlying causes of fan noise and implementing the following solutions, you can enjoy a quieter computing experience:
- Clean Your CPU Cooler Fan: Regularly clean your CPU cooler fan to remove dust and debris that can obstruct airflow and cause the fan to work harder. Use compressed air or a soft brush to gently clean the fan blades and heatsink.
- Adjust Fan Speed Settings: Access the BIOS or fan control software to ensure that the fan speed is set to automatic or adjusted to an appropriate level. This allows the fan to operate efficiently based on the CPU temperature without unnecessary noise.
- Upgrade Your CPU Cooler: Consider upgrading to a more efficient CPU cooler that can handle higher heat loads effectively. A better cooler with enhanced cooling capabilities can help reduce fan noise by dissipating heat more efficiently.
- Remove Overclocking: If you have overclocked your CPU, consider reverting to its default settings or adjusting it to a more moderate level. Overclocking can lead to increased heat generation and fan noise.
- Replace Faulty Fans: If the noise persists despite cleaning and adjusting settings, it may be a sign of a faulty fan. In such cases, replacing the fan with a new, high-quality one can resolve the issue and restore quieter operation.
- Update or Reinstall Relevant Software: Ensure that your operating system, drivers, and applications are up to date. Outdated software can lead to increased CPU usage and fan noise. Reinstalling problematic software can also help resolve performance issues.
- Improve Cable Management: Organize and secure cables inside your computer case to improve airflow. Proper cable routing reduces obstructions and prevents cables from interfering with the CPU cooler fan.
By implementing these solutions, you can effectively reduce CPU cooler fan noise, maintain optimal cooling performance, and enjoy a quieter computing environment.
Clean Your CPU Cooler Fan
One of the most effective ways to reduce CPU cooler fan noise is by cleaning the fan regularly. Over time, dust and debris can accumulate on the CPU cooler’s heatsink and fan blades, obstructing airflow and causing the fan to work harder. Cleaning the fan not only helps improve cooling performance but also reduces noise levels. Here’s how you can clean your CPU cooler fan:
- Power Off and Unplug Your Computer: Before beginning the cleaning process, make sure to power off your computer and disconnect it from the power source to avoid any accidents.
- Open Your Computer Case: Depending on your computer’s design, you may need to remove a side panel or top cover to access the CPU cooler. Consult your computer’s manual or manufacturer’s instructions for guidance on how to open your specific case.
- Inspect the CPU Cooler Fan: Take a close look at the CPU cooler fan to assess the level of dust buildup. Check both the fan blades and the heatsink for any visible accumulation of dust or debris.
- Use Compressed Air: Grab a can of compressed air and aim it at the CPU cooler fan. Hold the can upright and use short bursts of air to clean the fan blades and heatsink. Pay extra attention to the areas with the most dust accumulation.
- Use a Soft Brush: If there are stubborn particles stuck on the fan blades or in the heatsink, you can use a soft brush, such as a clean paintbrush or a makeup brush, to gently sweep away the debris. Be careful not to apply excessive pressure that could damage the components.
- Check for Loose Cables: While cleaning, make sure there are no loose cables obstructing the fan’s movement. Avoid any cables that may be touching the fan blades and move them away to allow for smooth airflow.
- Reassemble Your Computer: Once you have finished cleaning the CPU cooler fan, carefully close the computer case and secure any panels or covers that were removed.
Regularly cleaning your CPU cooler fan at least every three to six months, or more frequently if you live in a dusty environment, can help maintain optimal cooling performance and reduce fan noise. By keeping the fan clean and free from dust, you can ensure effective airflow and enjoy a quieter computing experience.
Adjust Fan Speed Settings
Adjusting the fan speed settings in your computer’s BIOS or fan control software is an effective method to reduce CPU cooler fan noise. By optimizing the fan speed, you can strike a balance between cooling performance and noise levels. Here’s how you can adjust the fan speed settings:
- Access the BIOS or Fan Control Software: Restart your computer and enter the BIOS settings by pressing the designated key during startup. Look for the Fan Control section or a similar option. Alternatively, check if your motherboard provides fan control software that allows you to adjust settings within the operating system.
- Set the Fan Speed to Automatic: In the Fan Control settings, select the option to set the fan speed to automatic or smart mode. This mode allows the fan to adjust its speed based on the CPU temperature, ensuring efficient cooling without unnecessary noise.
- Adjust the Fan Curve (if available): Some BIOS or fan control software allows you to customize the fan curve. The fan curve determines the fan speed at different temperature ranges. Adjusting the curve enables you to fine-tune the fan speed based on your preferences and specific cooling needs. Experiment with different settings to find the optimal balance between cooling performance and noise reduction.
- Save and Exit: Once you have made the necessary adjustments, save your changes and exit the BIOS settings. If you were using fan control software, apply the settings and close the software.
By adjusting the fan speed settings, you can ensure that the CPU cooler fan operates at an optimal speed, reducing unnecessary noise while maintaining efficient cooling for your computer. It is important to monitor the CPU temperature after making these adjustments to ensure that it remains within safe limits.
Upgrade Your CPU Cooler
If you find that your CPU cooler fan noise is persistently high, it may be time to consider upgrading your CPU cooler. The stock cooler that comes with your processor may not be sufficient for heavy workloads or overclocking, leading to excessive fan noise. By upgrading to a more efficient aftermarket CPU cooler, you can effectively reduce fan noise while improving cooling performance. Here are some considerations when upgrading your CPU cooler:
- Research and Choose a Suitable Cooler: Start by researching the available CPU coolers in the market. Look for models that are compatible with your CPU socket and offer the necessary cooling capacity for your processor. Consider factors like size, cooling performance, noise level, and customer reviews to make an informed decision.
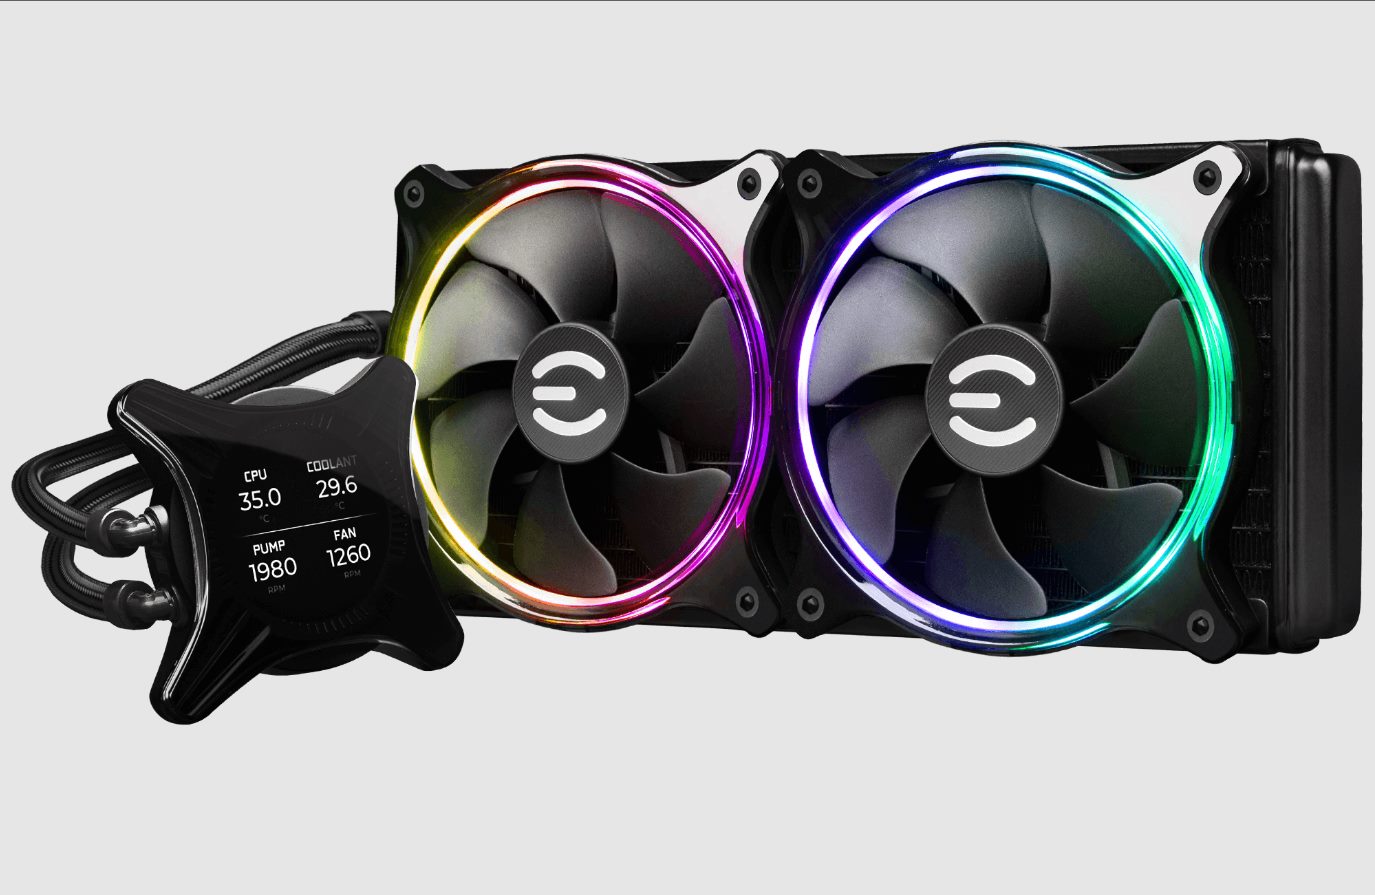
- Air Cooling vs. Liquid Cooling: Determine whether you prefer air cooling or liquid cooling for your CPU. Air coolers consist of heatsinks and fans, while liquid coolers utilize a pump, radiator, and liquid coolant to dissipate heat. Both options can provide efficient cooling, so consider your specific needs, preferences, and budget when making a choice.
- Consider Noise Performance: When selecting a CPU cooler, pay attention to the noise level listed in the specifications. Coolers with larger and quieter fans or those marketed as low-noise cooling solutions can significantly reduce fan noise compared to stock coolers.
- Verify Compatibility: Ensure that the chosen CPU cooler is compatible with your motherboard and case. Check the socket compatibility and the available space in your case to accommodate the cooler’s size. Also, consider other components like RAM clearance to prevent any installation issues.
- Installation and Thermal Paste Application: Follow the manufacturer’s instructions carefully during installation to ensure a secure and proper fit. Apply thermal paste between the CPU and the cooler’s baseplate to enhance heat transfer. Proper installation ensures optimal cooling performance and reduces the risk of noise-causing vibrations.
- Consider Additional Fans or Fan Configurations: Depending on the CPU cooler you choose, you may have the option to add additional fans or configure fans in a push-pull setup. This can further enhance cooling efficiency and reduce fan noise by spreading the airflow across a larger area.
By upgrading your CPU cooler to a more capable and efficient model that suits your needs, you can significantly reduce CPU cooler fan noise and improve overall cooling performance. The investment in a quality CPU cooler can lead to a quieter and more enjoyable computing experience.
Remove Overclocking
If you have overclocked your CPU, it can contribute to increased heat generation and subsequently louder CPU cooler fan noise. Overclocking involves increasing the clock speed of your CPU beyond its factory specifications to obtain higher performance. However, this can also lead to more heat output and strain on the CPU cooler. If you are experiencing excessive fan noise due to overclocking, here are some steps to remove or adjust your overclock:
- Reset to Default Settings: The simplest way to remove overclocking is to reset your CPU settings to their default values. Access your computer’s BIOS settings and look for an option to restore default settings or revert any changes made to the CPU clock speed or voltage settings.
- Adjust to a More Moderate Overclock: If you still wish to maintain some level of overclocking while reducing fan noise, consider adjusting the overclock to a more moderate level. Lowering the clock speed or voltage can help decrease heat generation and subsequently reduce the workload on the CPU cooler, resulting in quieter fan operation.
- Monitor CPU Temperatures: While overclocking or adjusting settings, it is crucial to monitor the CPU temperatures. Use monitoring software to keep an eye on the temperatures during normal usage, as well as during heavy workloads or stress tests. If the temperatures are consistently high and causing excessive fan noise, it may be necessary to adjust the overclock further or consider additional cooling measures.
- Upgrade the CPU Cooler: If you are determined to maintain a high level of overclocking, upgrading your CPU cooler might be necessary. A more powerful and efficient cooler can handle the extra heat generated during overclocking, reducing the need for the fan to spin at high speeds and minimizing noise.
- Seek Professional Assistance: If you are unfamiliar with overclocking or uncomfortable making adjustments yourself, consider seeking assistance from a professional technician or computer enthusiast. They can help guide you through the process and ensure that adjustments are made safely and effectively.
Removing or adjusting your overclock can help decrease CPU heat output and subsequently reduce fan noise. It is important to find a balance between the desired performance gains and the noise generated by the CPU cooler fan. Monitor temperatures regularly and make adjustments as necessary to maintain safe operating conditions for your system.
Replace Faulty Fans
If you have tried cleaning your CPU cooler fan and adjusting settings but are still experiencing excessive noise, it may be a sign of a faulty fan. Over time, fan bearings can wear out or become defective, leading to increased noise during operation. In such cases, replacing the faulty fan is necessary to reduce fan noise and restore quiet operation. Here are the steps to replace a faulty CPU cooler fan:
- Identify the Faulty Fan: Determine which fan in the CPU cooler is causing the excessive noise. Listen closely to pinpoint the source of the noise or visually inspect the fans for any noticeable issues such as inconsistent spinning or physical damage.
- Find a Suitable Replacement: Look for a replacement fan that matches the specifications of your current CPU cooler. Consider factors such as fan size, airflow, noise level, and compatibility with your motherboard or CPU socket.
- Prepare for Replacement: Power off your computer and unplug it from the power source. Open your computer case and locate the CPU cooler. Depending on the type of CPU cooler, you may need to remove screws or clips holding the fan in place. Consult your manual or manufacturer’s instructions for guidance.
- Remove the Faulty Fan: Disconnect any power or fan cables attached to the faulty fan. Carefully remove the screws or clips securing the fan to the cooler or heatsink. Gently detach the fan from the cooler, ensuring not to damage the surrounding components.
- Install the Replacement Fan: Take the new fan and align it with the corresponding mounting holes or clips on the CPU cooler. Use screws or clips provided with the replacement fan to secure it in place. Connect any necessary power or fan cables to the new fan, ensuring a secure connection.
- Close the Computer Case: Once the replacement fan is properly installed, close your computer case and secure any panels or covers that were removed during the process.
- Monitor the New Fan: Power on your computer and monitor the operation of the new fan. Ensure that it is functioning correctly, spinning smoothly, and providing efficient cooling.
By replacing faulty fans in your CPU cooler, you can eliminate the source of excessive noise and restore quieter operation. Ensure to choose a high-quality replacement fan to ensure reliable and long-lasting performance for your CPU cooling system.
Update or Reinstall Relevant Software
Software-related issues can contribute to increased CPU usage and fan noise. Outdated or malfunctioning software can put unnecessary strain on the CPU, leading to higher temperatures and louder fan operation. By updating or reinstalling relevant software, you can address these issues and reduce fan noise. Here are some steps to consider:
- Update Operating System and Drivers: Ensure that your operating system is up to date with the latest patches and updates. Keeping your system software updated can resolve compatibility issues, improve performance, and optimize resource management, resulting in reduced CPU usage and quieter fan operation.
- Update Application Software: Check for updates for the applications you frequently use, especially resource-intensive ones like video editing software or games. Developers often release updates that address bugs, improve performance, and enhance resource utilization, resulting in lower CPU usage and reduced fan noise.
- Scan for Malware and Remove: Malware infections can significantly impact CPU usage and fan noise. Run a thorough scan using reliable antivirus software to detect and remove any malicious programs that may be causing high CPU workload. Regularly scan your system to prevent future infections.
- Reinstall Problematic Software: If you notice that a specific software application is consistently causing high CPU usage and fan noise, consider reinstalling it. Sometimes, software installation can become corrupted or outdated, leading to performance issues. Reinstalling the application can help resolve these issues and restore efficient and quiet operation.
- Optimize Power Settings: Adjusting the power settings on your computer can also help reduce CPU usage. Selecting a power plan that balances performance and energy efficiency and avoiding high-performance mode can decrease CPU workload and subsequently lower fan noise.
- Consider System Maintenance Tools: Utilize system maintenance tools that can help identify and resolve software-related issues. These tools can clean up unnecessary files, optimize system settings, and improve overall system performance, leading to reduced CPU usage and quieter fan operation.
By updating or reinstalling relevant software, you can eliminate potential software-related issues that contribute to increased CPU usage and fan noise. Regularly maintaining your software and keeping it up to date can help ensure efficient and quiet operation of your system.
Improve Cable Management
Poor cable management inside your computer case can obstruct airflow and contribute to increased fan noise from your CPU cooler. Cables that are tangled or improperly routed can restrict the flow of air, forcing the fan to work harder and produce more noise. By improving cable management, you can enhance airflow and reduce fan noise. Consider the following steps to improve cable management in your computer:
- Organize and Secure Cables: Take the time to organize your cables properly. Use cable ties, Velcro straps, or cable management solutions to secure the cables and keep them neatly bundled. This helps create a clutter-free environment and facilitates better airflow.
- Route Cables Strategically: Prioritize routing your cables away from the CPU cooler and its fan. Make use of cable management channels, routing holes, or cable management grommets in your computer case to guide the cables away from the fan’s path. This ensures unobstructed airflow and reduces fan noise.
- Shorten Excess Cable Length: Excessively long cables can add to the cable clutter, obstruct airflow, and impede the efficiency of your CPU cooler. Consider using cable management accessories or carefully trimming and repositioning the cables to eliminate unnecessary length.
- Use Cable Sleeving or Extensions: Cable sleeving or extensions can help with cable management by consolidating and better organizing the cables. These products not only improve the appearance of your cables but also reduce clutter, allowing for improved airflow and reduced fan noise.
- Secure Cables Properly: Ensure that the cables are secured in place and do not obstruct the CPU cooler fan’s movement. Use cable clips, adhesive mounts, or cable ties to fasten the cables to the designated areas within the case. This prevents cables from sagging or interfering with the fan’s rotation.
- Avoid Overstuffing the Case: Limit the number of unnecessary cables inside your computer case. Remove any unused or unessential cables, such as those from old devices or components. This not only improves cable management but also creates more room for airflow and reduces fan noise.
By investing time in improving cable management within your computer case, you can enhance airflow, maintain lower temperatures, and reduce fan noise. Properly organized and routed cables promote efficient cooling performance, enabling your CPU cooler fan to operate more quietly.
Conclusion
Loud CPU cooler fans can be a source of annoyance and disruption, but with the right measures, you can effectively reduce fan noise and enjoy a quieter computing experience. By addressing the common causes of loud CPU cooler fans, such as high CPU usage, dust accumulation, incorrect fan speed settings, inadequate cooling, CPU overclocking, faulty fan bearings or motors, software issues, and poor cable routing, you can significantly minimize fan noise and maintain optimal cooling performance.
Some practical solutions to reduce CPU cooler fan noise include cleaning your CPU cooler fan regularly to remove dust and debris, adjusting fan speed settings to ensure automatic and optimized operation, upgrading to a more capable CPU cooler to enhance cooling efficiency, removing or adjusting CPU overclocking to decrease heat generation, replacing faulty fans that may be causing excessive noise, updating or reinstalling relevant software to address performance issues, and improving cable management to enhance airflow within the computer case.
Each solution plays a vital role in reducing fan noise, and it is essential to consider a holistic approach based on your specific circumstances. Regular maintenance, including cleaning, software updates, and cable management, is crucial for long-term noise reduction and optimal system performance.
Remember, every computer system is unique, and it may take some trial and error to find the perfect balance between cooling performance and fan noise reduction. By implementing these strategies, you can create a quieter and more comfortable computing environment while maintaining an efficiently cooled system.


