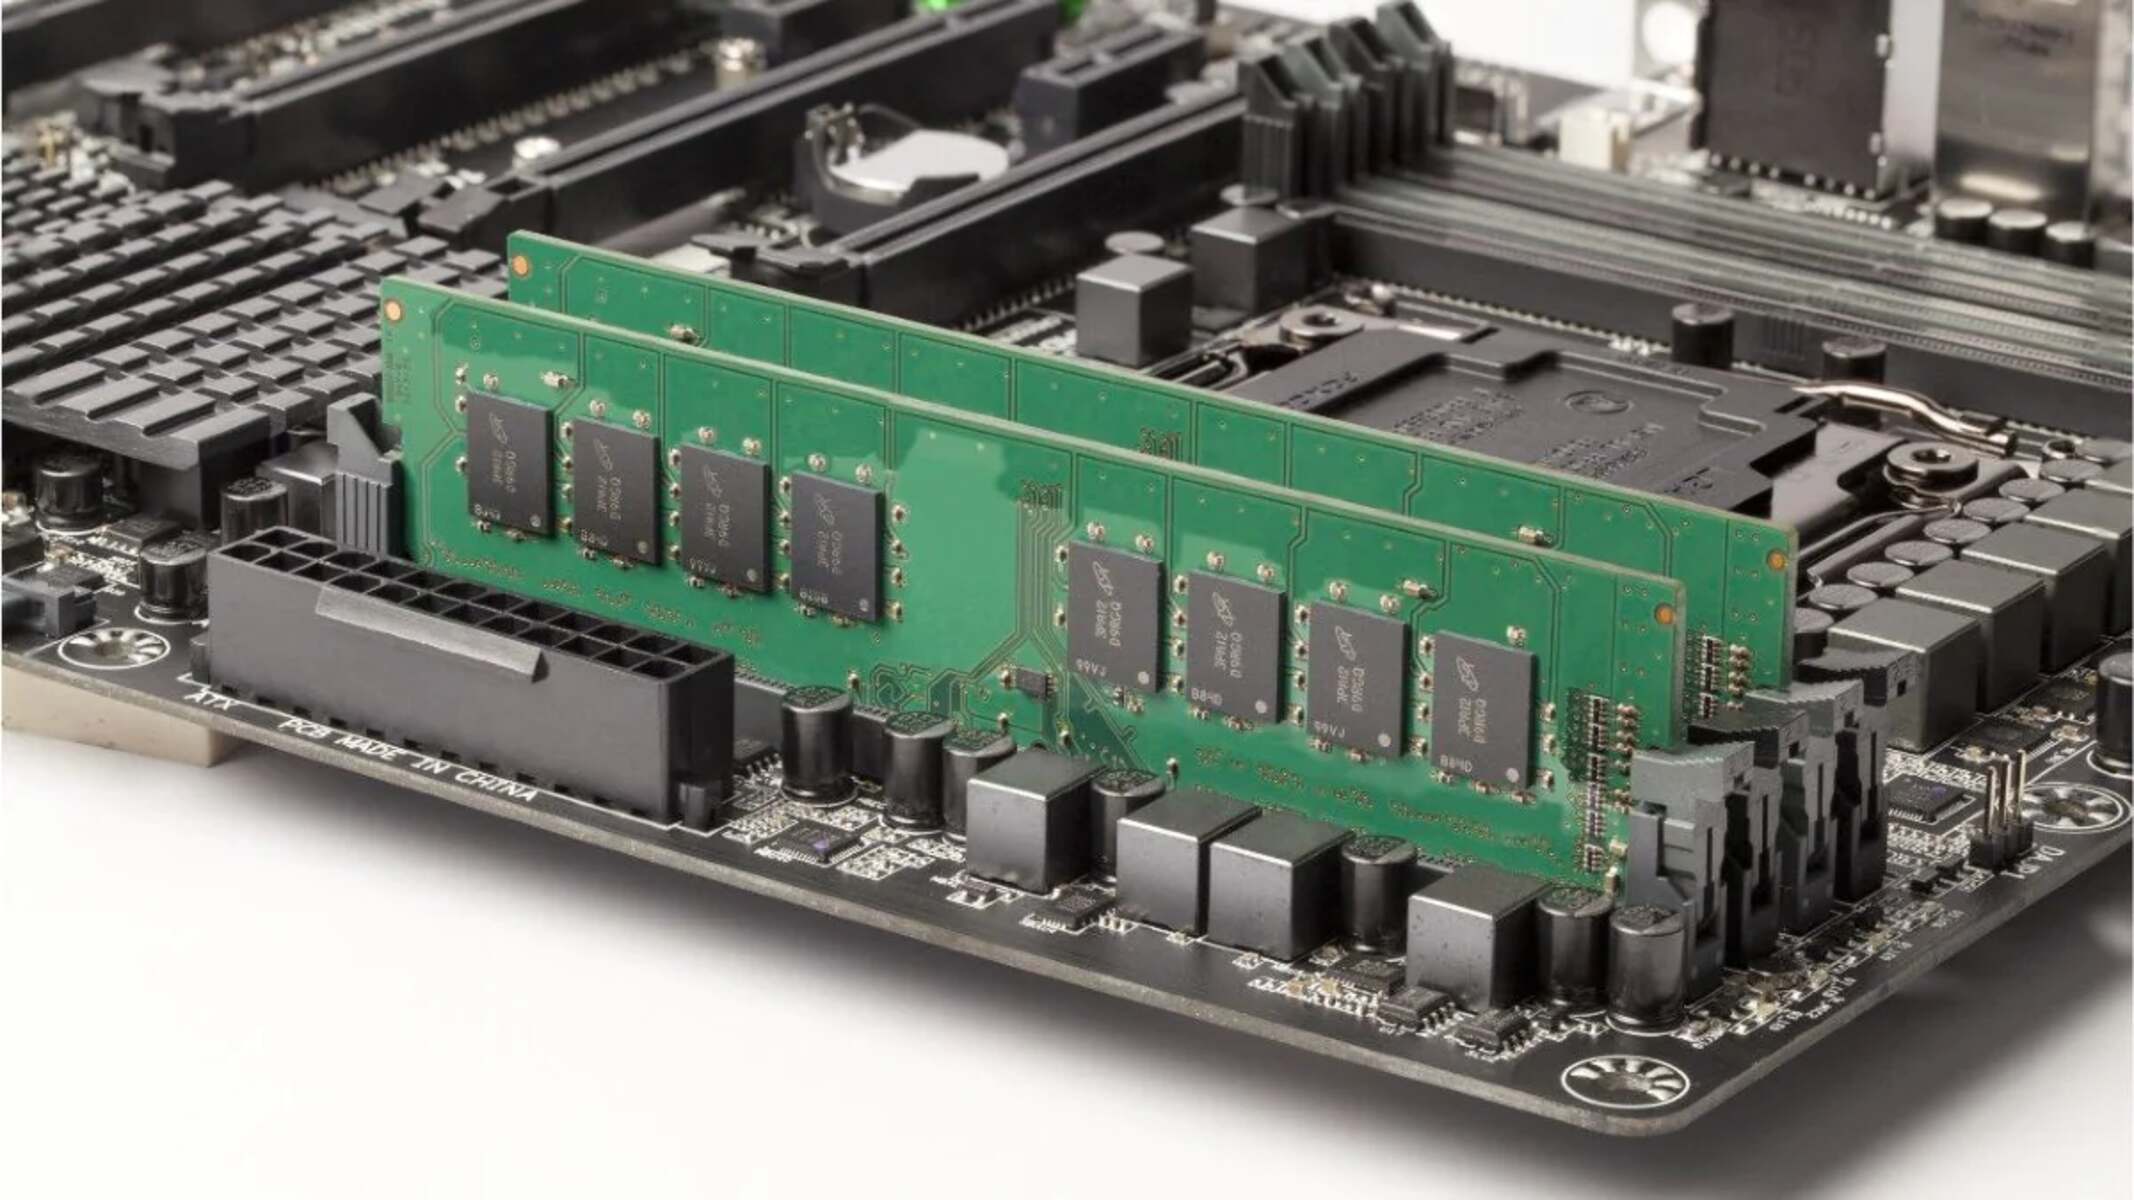
Introduction
Understanding the amount and usage of RAM (Random Access Memory) on your computer is essential for ensuring optimal performance and efficiency. RAM is a vital component that allows your computer to store and access data quickly, enabling smooth multitasking and seamless execution of programs. Whether you are a casual user or a power user, knowing how to view your RAM can help you identify any issues or constraints that may be affecting your system’s performance.
In this article, we will guide you through the process of checking your RAM on different operating systems, including Windows, Mac, and Linux. We will also share additional methods to verify available RAM, monitor its usage, and even check its speed. By the end, you will have a comprehensive understanding of how to view and analyze your RAM, allowing you to make informed decisions to optimize your computer’s performance.
Before we delve into the specific methods, it is important to note that the steps outlined here may vary slightly depending on your operating system version or configuration. However, the general principles and tools discussed should remain applicable regardless of these variations. With that in mind, let’s explore the different ways to view your RAM on various platforms.
Checking RAM on Windows
Windows provides several built-in tools that allow you to easily check the amount of RAM installed on your computer.
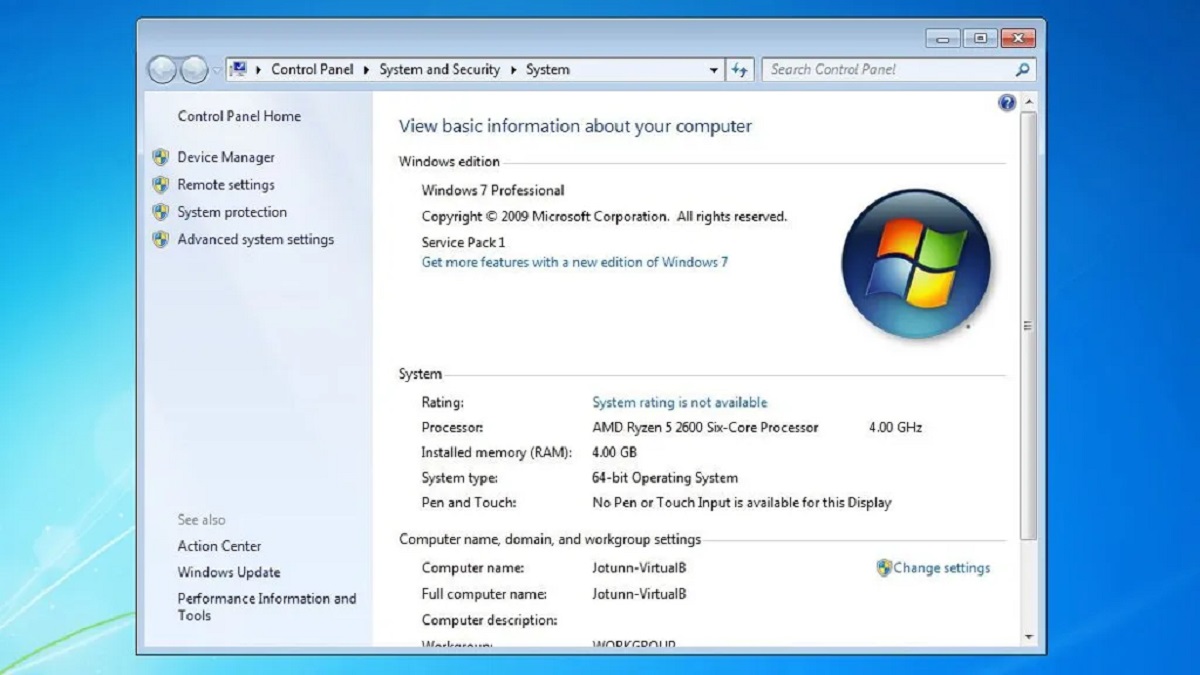
One of the simplest ways to view your RAM on Windows is by using the Task Manager. To access it, right-click on the taskbar and select “Task Manager” or press Ctrl + Shift + Esc on your keyboard. In the Task Manager window, navigate to the “Performance” tab, where you will find information about your computer’s resource usage, including the amount of RAM installed.
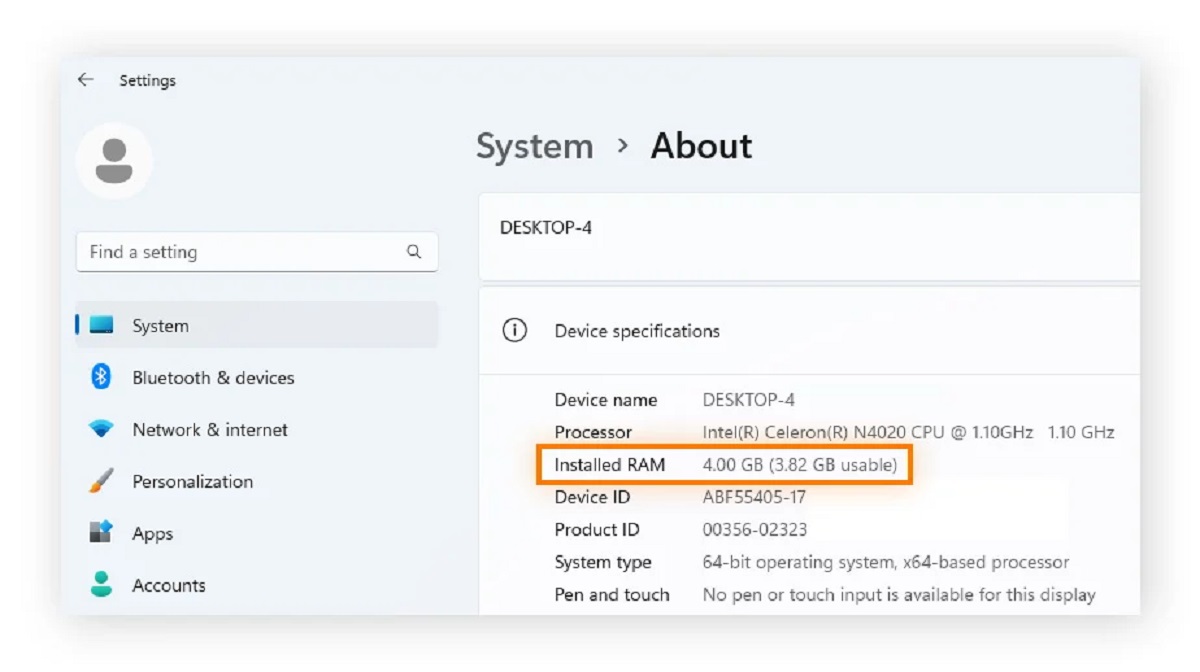
An alternative method is using the System Information tool. To open it, press Win + R on your keyboard to open the Run dialog box, type msinfo32, and hit Enter. In the System Information window, you will see detailed information about your computer’s hardware and software, including the installed RAM under the “System Summary” section.
If you prefer a more detailed breakdown of your RAM usage, you can use the Resource Monitor. To access it, open the Task Manager (as mentioned above) and click on the “Performance” tab. In the bottom-right corner, click on “Open Resource Monitor,” which will provide you with a comprehensive view of your system’s resource usage, including RAM.
Additionally, there are third-party software options available, such as CPU-Z and Speccy, that can provide even more detailed information about your RAM, including its speed, manufacturer, and specifications.
Checking your RAM on Windows is a straightforward process, thanks to the built-in tools and third-party software options available. Understanding your system’s RAM configuration will help you diagnose any issues and determine if an upgrade may be necessary to improve your computer’s performance.
Checking RAM on Mac
If you are using a Mac, there are a few different methods you can use to check your RAM.
One of the easiest ways to view your RAM on a Mac is by using the built-in Activity Monitor. To open Activity Monitor, go to the “Applications” folder, then open the “Utilities” folder, and click on “Activity Monitor.” In the Activity Monitor window, select the “Memory” tab, where you will find information about your computer’s memory usage, including the available RAM.
Another way to check your RAM on a Mac is through the “About This Mac” window. Click on the Apple menu in the top-left corner of your screen and select “About This Mac.” In the window that appears, click on the “Memory” tab, which will provide you with details about the installed RAM, such as its type and speed.
If you want more advanced information about your RAM, you can use the Terminal application. Open the Terminal (located in the Utilities folder) and type the command “sysctl hw.memsize“. Press Enter, and you will see the total installed RAM in bytes.
Lastly, there are third-party apps available in the Mac App Store, such as iStat Menus and Memory Clean, that provide additional features and a more detailed breakdown of your RAM usage.
By utilizing these methods, you can easily check your RAM on a Mac and get valuable insights into your system’s memory usage. Understanding your RAM configuration will help you ensure that your Mac is running optimally and determine if there is a need for a memory upgrade.
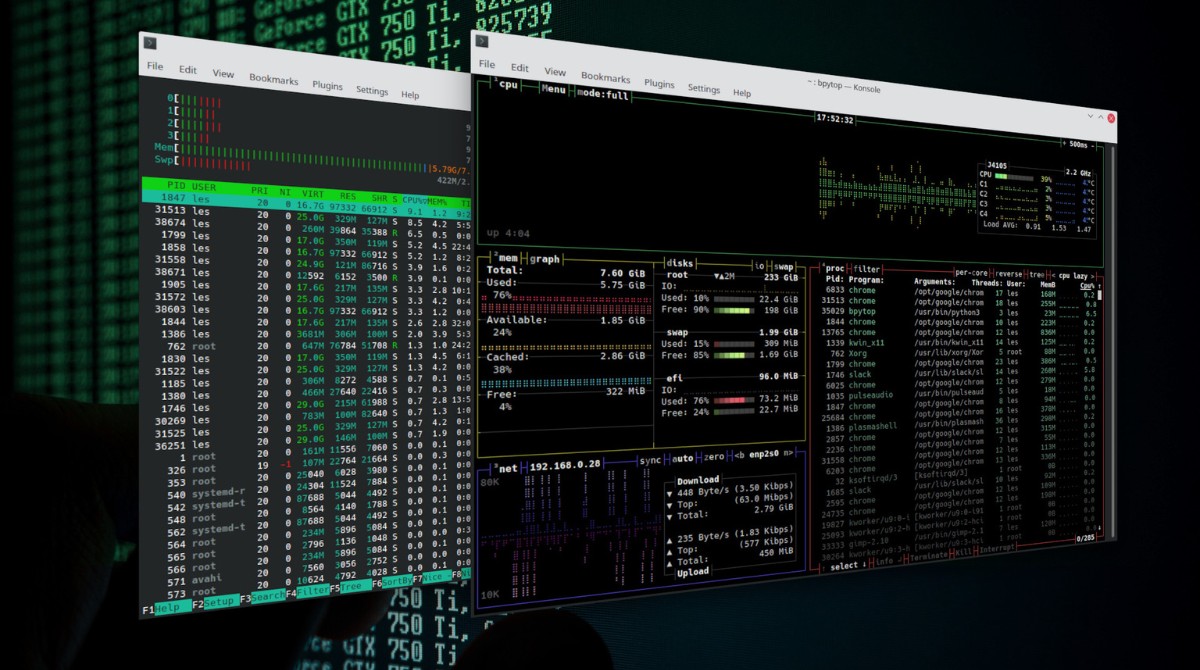
Checking RAM on Linux
Linux offers various tools and commands that allow you to check your RAM and monitor its usage.
One of the common methods to check your RAM on Linux is by using the command-line tool called “free“. Open the terminal and type “free“, then press Enter. The output will display information about your system’s memory, including the total, used, and available RAM.
Another useful command is “top“. Simply open the terminal and type “top“, then press Enter. The top command provides a live view of system tasks and resource usage, including the amount of RAM being used.
If you prefer a graphical interface, many Linux distributions come with a system monitor tool. It may be called “System Monitor” or “Task Manager” and can typically be accessed through the applications menu or by searching for it in the system’s search bar. The system monitor tool provides a visual representation of your RAM usage and other system resources.
Furthermore, you can use third-party applications like “htop” or “GKrellM” to get more detailed information and advanced features for monitoring your RAM on Linux.
With these options at your disposal, you can easily check your RAM on Linux and keep track of its usage. Monitoring your system’s memory will help you identify any potential bottlenecks or optimize resource allocation to ensure smooth and efficient performance.
Verifying Available RAM
Verifying the available RAM on your computer is crucial for understanding how much memory you have at your disposal for running applications and tasks.
In Windows, you can verify the available RAM using the previously mentioned Task Manager. Open the Task Manager by right-clicking on the taskbar and selecting “Task Manager” or pressing Ctrl + Shift + Esc on your keyboard. In the Task Manager window, navigate to the “Performance” tab and look for the “Physical Memory” section. The “Available” value indicates the amount of RAM that is currently unused and can be allocated to new tasks.
On a Mac, you can find the available RAM through the Activity Monitor application. Open Activity Monitor from the “Applications” folder, go to the “Memory” tab, and look for the “Free” value. This value represents the amount of RAM that is currently unused and available for additional processes.
In Linux, the “free” command is a handy tool for verifying available RAM. Open the terminal and type “free“, then press Enter. Look for the “Available” column in the output, which indicates the amount of RAM that is available for use.
It’s important to note that the “available” RAM value may vary depending on the system’s resource management and the processes running at any given time. Therefore, it’s advisable to interpret this value as an estimation rather than a fixed amount.
By verifying the available RAM, you can determine how much memory is readily accessible for tasks and assess whether any upgrades or adjustments are necessary to meet the requirements of your computing needs.
Monitoring RAM Usage
Monitoring your RAM usage is essential to understand how your computer’s memory is being utilized and to identify any potential issues or bottlenecks.
Windows provides built-in tools like the Task Manager and Resource Monitor to monitor RAM usage. Open the Task Manager by right-clicking on the taskbar and selecting “Task Manager” or pressing Ctrl + Shift + Esc on your keyboard. In the Task Manager window, navigate to the “Performance” tab to view real-time information about your system’s memory usage. You can monitor various metrics, such as the percentage of RAM in use, the amount of RAM used by specific applications, and the total physical memory usage.
On a Mac, the Activity Monitor application offers detailed insights into RAM usage. Open Activity Monitor from the “Applications” folder, go to the “Memory” tab, and observe the various metrics displayed, including the amount of RAM being used by active processes, compressed memory, and cached files. This information can help you identify which applications or processes may be consuming excessive memory.
In Linux, you can monitor RAM usage using the “top” command in the terminal. Open the terminal and type “top“, then press Enter. The top command provides a real-time view of system tasks and resource usage, including the memory utilized by different processes. This allows you to identify memory-intensive applications and take appropriate actions.
There are also third-party applications available for monitoring RAM usage on all platforms. Tools like “RAMMap” for Windows, “MenuMeters” for Mac, and “htop” for Linux offer more advanced features and detailed insights into your system’s memory usage.
By regularly monitoring your RAM usage, you can spot any potential memory leaks, address issues with memory-hungry applications, and ensure efficient resource allocation. This allows you to optimize your computer’s performance and maintain a smooth and responsive computing experience.
Checking RAM Speed
Checking the speed of your RAM can help you determine its performance capabilities and ensure that it is running at optimal speeds.
In Windows, you can check the RAM speed using various third-party tools such as CPU-Z and HWiNFO. These tools provide detailed information about your system’s hardware, including the speed and other specifications of your RAM. You can download these tools from their official websites and run them on your Windows computer to gather accurate information about your RAM speed.
On a Mac, you can check the RAM speed through the “About This Mac” window. Click on the Apple menu in the top-left corner of your screen and select “About This Mac.” In the window that appears, click on the “Memory” tab. Here, you can find information about the RAM installed, including its speed. This method provides a quick and convenient way to check the RAM speed on a Mac.
In Linux, you can use the Terminal to check the RAM speed. Open the terminal and type the command “dmidecode –type memory“. Press Enter, and it will display detailed information about your system memory, including the RAM speed. This command retrieves data from the system’s DMI (Desktop Management Interface) table, which contains hardware information.
It’s important to note that when checking the RAM speed, be mindful of the specifications of your RAM and the limitations of your motherboard. The RAM speed is determined by the maximum speed supported by both the RAM module and the motherboard. If your RAM is running at a lower speed than its maximum capability, you may be able to enable the XMP/DOCP (Extreme Memory Profile / Direct Over Clock Profile) profile in the BIOS/UEFI settings to achieve the desired speed.
By checking and verifying the speed of your RAM, you can ensure that it is performing optimally and identify any potential limitations that may need to be addressed for better system performance.
Closing Thoughts
Being able to view and understand your computer’s RAM is vital for maintaining optimal performance and ensuring efficient multitasking. In this article, we explored different methods to check your RAM on Windows, Mac, and Linux, as well as ways to verify available RAM, monitor its usage, and check its speed.
On Windows, tools like Task Manager, System Information, and third-party software provide valuable insights into your RAM configuration. Mac users can utilize Activity Monitor, the “About This Mac” window, or third-party apps to check their RAM. Linux users have commands like “free” and “top” at their disposal, along with additional applications for more detailed monitoring.
Verifying available RAM allows you to understand how much memory is unused and can be allocated for tasks. Monitoring RAM usage helps identify potential issues and optimize resource allocation. Checking RAM speed helps ensure optimal performance and compatibility with your system.
Remember, the specific methods and tools discussed may vary depending on your operating system and software versions. It’s always a good idea to consult the documentation or online resources for your specific setup for accurate and up-to-date information.
By having a clearer understanding of your computer’s RAM, you can make informed decisions about upgrading memory, addressing performance issues, and optimizing your overall computing experience.
So, take the time to explore the methods covered in this article and get acquainted with your computer’s RAM. It will undoubtedly help you unleash the full potential of your system and ensure a smoother and more efficient computing experience.