Introduction
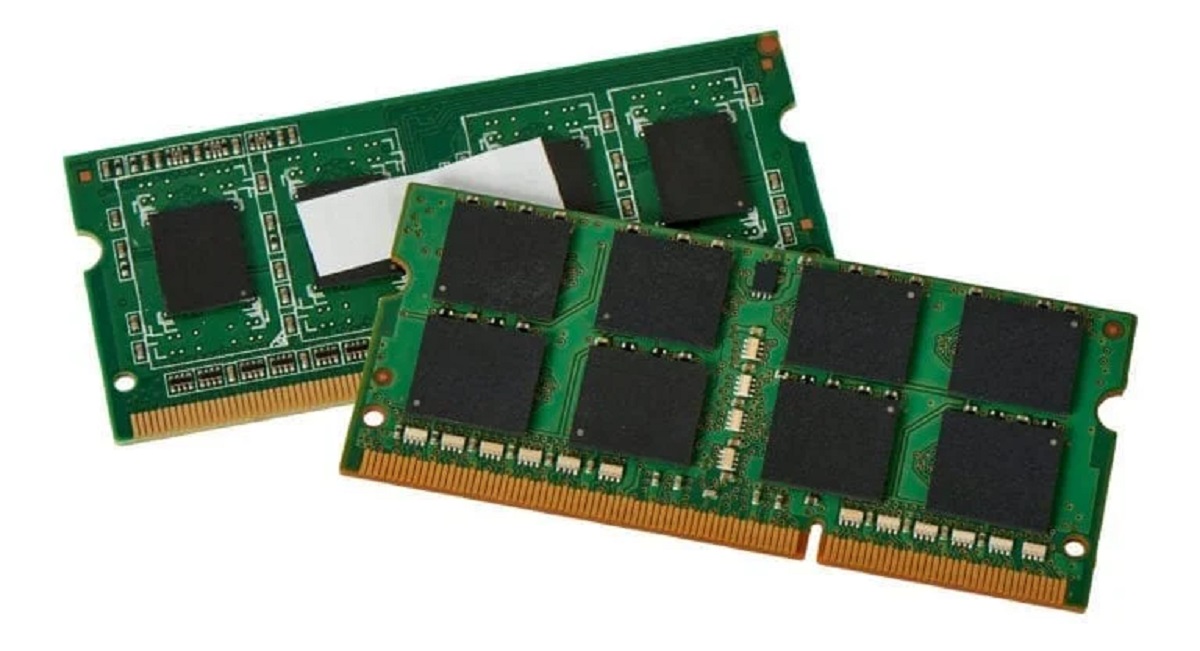
When it comes to managing the performance and optimizing your Windows 10 system, understanding your computer’s RAM (Random Access Memory) is vital. RAM plays a crucial role in the overall speed and responsiveness of your computer, allowing it to handle multiple tasks simultaneously. Whether you’re a casual user or a tech enthusiast, knowing your RAM specifications can help you determine if an upgrade is necessary, troubleshoot performance issues, or simply satisfy your curiosity. In this article, we will explore various methods to find your RAM on Windows 10.
Finding your RAM on Windows 10 is a relatively simple process. Windows 10 provides several built-in tools that allow you to quickly access and view your RAM information. From the Task Manager to the Control Panel, these methods provide different levels of detail and accessibility. Depending on your preference and familiarity with Windows 10, you can choose the method that suits you best. Let’s dive into each method and explore how to find your RAM on Windows 10.
Method 1: Use Task Manager
The Task Manager is a built-in utility in Windows 10 that allows you to monitor and manage various aspects of your computer’s performance. It also provides information about the amount of RAM installed on your system. Follow the steps below to find your RAM using the Task Manager:
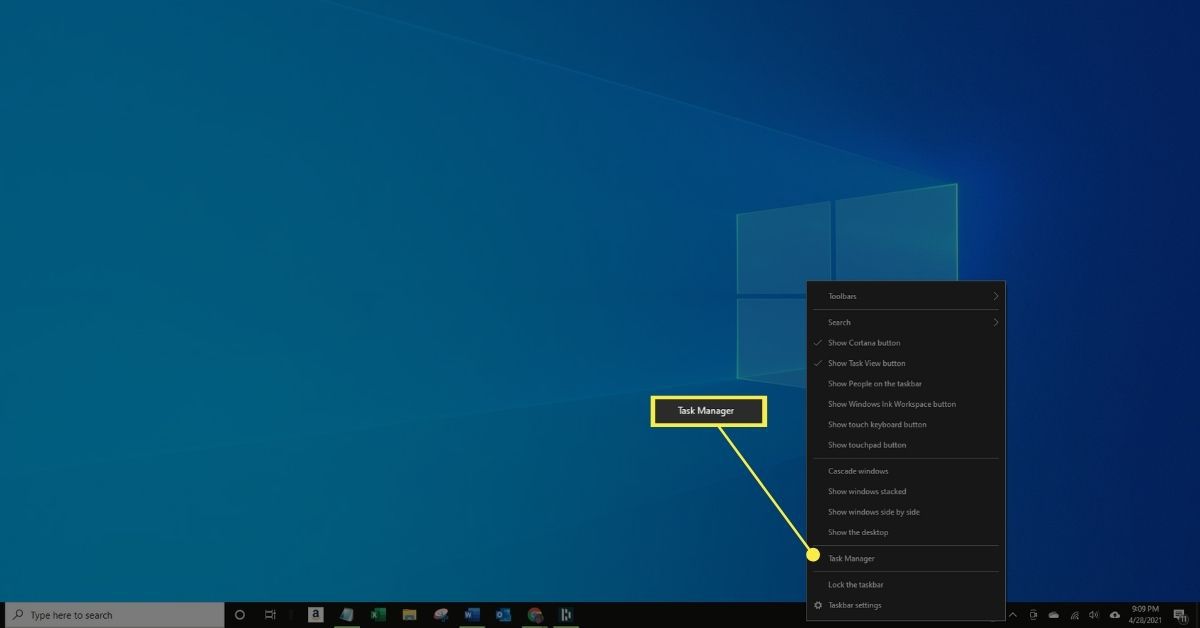
- Right-click on the taskbar and select “Task Manager” from the context menu. Alternatively, you can press Ctrl+Shift+Esc on your keyboard.
- In the Task Manager window, click on the “Performance” tab at the top.
- In the left-hand sidebar, click on “Memory” to view detailed information about your RAM.
- Under the “Physical Memory” section, you will find the “Total” value, which represents the amount of RAM installed on your system.
The Task Manager also provides additional information about your RAM usage, such as the amount of RAM currently in use, available RAM, and cached memory. This information can be useful in troubleshooting performance issues or identifying resource-intensive applications.
Using the Task Manager is a quick and straightforward method to find your RAM on Windows 10. However, if you require more detailed information about your RAM, such as the manufacturer or model number, then you may need to explore other methods.
Method 2: Use System Information
The System Information tool provides a comprehensive overview of your computer’s hardware and software configuration, including detailed information about your RAM. Here’s how to use System Information to find your RAM on Windows 10:
- Press the Windows key + R on your keyboard to open the Run dialog box.
- Type “msinfo32” (without quotation marks) in the Run dialog box and press Enter or click “OK”.
- The System Information window will open, displaying various categories on the left-hand side.
- Click on the “+” icon next to “Components” to expand the category.
- Click on “Memory” to view detailed information about your RAM.
- On the right-hand side, you will find details such as the installed physical memory (RAM) size, speed, and type.
System Information provides in-depth information about your RAM, including technical details such as the memory type, form factor, and even the manufacturer’s name. This can be useful if you are planning to upgrade your RAM or troubleshoot compatibility issues.
While using System Information may require a few additional steps compared to other methods, it offers a more comprehensive view of your RAM specifications. If you need detailed technical information or if you’re troubleshooting specific RAM-related issues, this method can provide valuable insights.
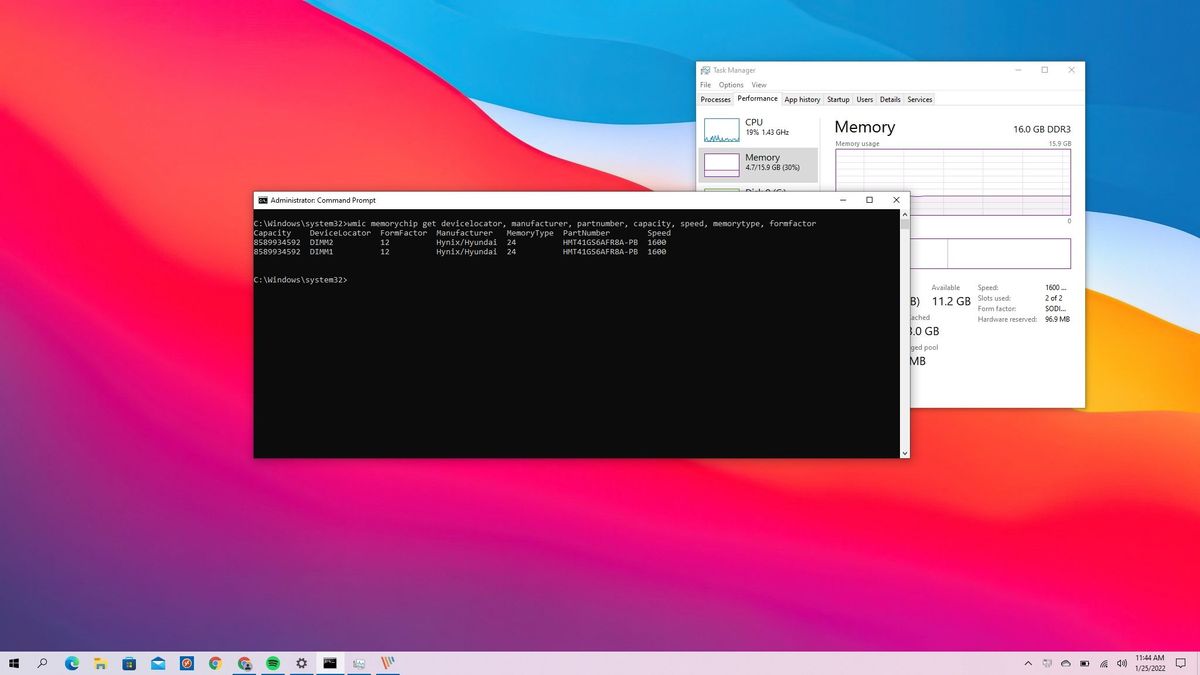
Method 3: Use Command Prompt
If you’re comfortable using the command line interface, you can use the Command Prompt to find your RAM information on Windows 10. Follow these steps to find out your RAM details:
- Open the Command Prompt by typing “cmd” or “Command Prompt” in the Windows search bar and selecting the corresponding result.
- In the Command Prompt window, type the following command:
wmic MemoryChip get Capacity- Press Enter to execute the command.
- You will see a list of numbers representing the capacity (size) of each memory module installed on your computer.
- Add up the values to calculate the total amount of RAM installed.
The output of the command will display the capacity of each individual memory module in bytes. To convert the values to a more readable format, you can divide each number by 1,073,741,824 to get the capacity in gigabytes (GB).
Using the Command Prompt gives you a quick and straightforward way to obtain the total amount of RAM installed on your Windows 10 system. However, keep in mind that this method does not provide additional details such as RAM speed or type.
Method 4: Use PowerShell
PowerShell is a powerful command-line shell and scripting language in Windows that provides more advanced functionalities compared to the Command Prompt. You can use PowerShell to find your RAM details on Windows 10 by following these steps:
- Open PowerShell by typing “PowerShell” in the Windows search bar and selecting the corresponding result.
- In the PowerShell window, type the following command:
Get-WmiObject -Class Win32_PhysicalMemory | Measure-Object -Property Capacity -Sum- Press Enter to execute the command.
- You will see the sum of the capacities of all installed physical memory modules in bytes.
- To convert the result to a more readable format, divide the output by 1,073,741,824 to get the total RAM capacity in gigabytes (GB).
The PowerShell method provides a more comprehensive and detailed view of your RAM compared to the Command Prompt method. It retrieves information using the Windows Management Instrumentation (WMI) service and allows for more advanced data manipulation and filtering.
By utilizing PowerShell, you have access to a wide range of commands and scripting capabilities, making it a useful tool for both casual users and IT professionals who need more extensive RAM-related information on their Windows 10 system.
Method 5: Use Control Panel
If you prefer a graphical user interface (GUI) approach, you can use the Control Panel to find your RAM information on Windows 10. Here’s how:
- Open the Control Panel by typing “Control Panel” in the Windows search bar and selecting the corresponding result.
- In the Control Panel window, change the view to “Large icons” or “Small icons” if it is currently set to categories.
- Locate and click on the “System” or “System and Security” option, depending on your Control Panel view.
- In the System window, you will find information about your computer, including the installed RAM.
- Under the “System” section, you will see the amount of installed RAM listed next to “Installed memory (RAM)”.
The Control Panel method provides a user-friendly interface for finding your RAM information. While it may not provide as much detailed information as other methods, it is a convenient option for users who prefer a visual representation and are not comfortable using command-line tools.
Additionally, the Control Panel provides access to other system-related settings and information that may be useful for troubleshooting or general system maintenance.
Conclusion
Understanding your computer’s RAM specifications is essential for optimizing performance, troubleshooting issues, and planning upgrades. In this article, we have explored five different methods to find your RAM on Windows 10.
Using the Task Manager provides a quick and straightforward way to view basic RAM information, such as total RAM size. If you require more detailed technical specifications, the System Information tool offers comprehensive insights into your RAM configuration.
If you prefer command-line interfaces, both the Command Prompt and PowerShell provide efficient methods to retrieve RAM details, offering additional functionality and data manipulation options.
For users who prefer a graphical user interface, the Control Panel offers a more user-friendly approach to access RAM information and other system-related settings.
Regardless of the method you choose, having knowledge of your computer’s RAM allows you to make informed decisions when it comes to system maintenance, troubleshooting, and upgrading.
So, whether you’re a casual user who wants to satisfy their curiosity or a tech enthusiast looking to optimize their system, use the methods outlined in this article to find your RAM on Windows 10 and gain a better understanding of your computer’s performance capabilities.