Introduction
Welcome to the world of technology, where everything is constantly evolving to meet the needs and demands of users. One important aspect of modern computing is video RAM, which plays a vital role in delivering smooth and high-quality graphical performance. Whether you are a gamer, graphic designer, or a casual user, understanding how to change the video RAM settings on your Windows 10 computer can greatly enhance your visual experience.
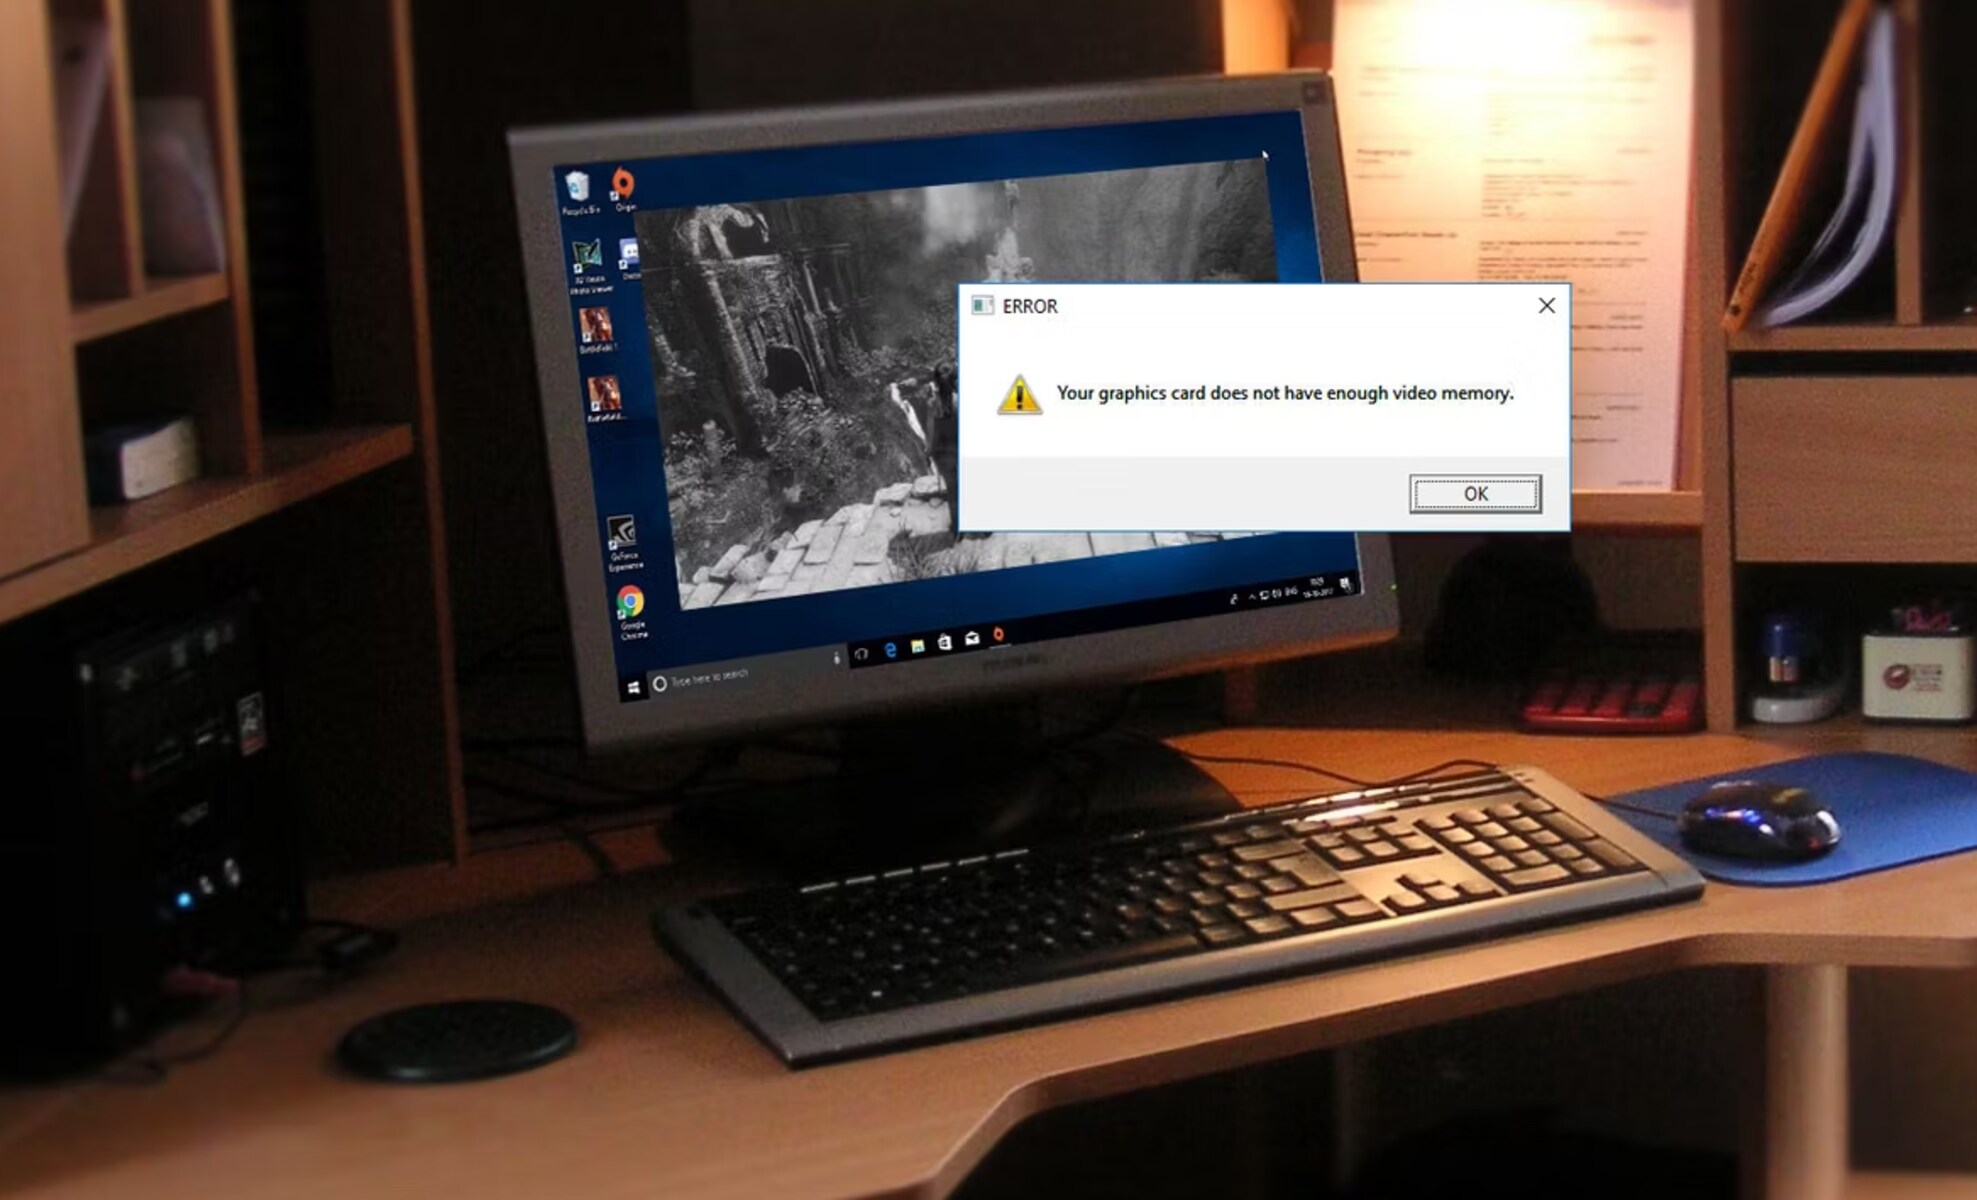
Video RAM, commonly known as VRAM, is a dedicated memory allocated on the graphics card to store and process graphical data. It acts as a buffer, holding the textures, shaders, and other image data required to render graphics on your screen. The more video RAM your system has, the better it can handle complex visual tasks and render high-resolution images and videos without any lag or stuttering.
There are several reasons why you might want to change the video RAM allocation on your Windows 10 computer. For instance, if you are experiencing performance issues while running graphic-intensive applications or games, increasing the video RAM may help alleviate the problem. On the other hand, if you have a system with integrated graphics and want to allocate more RAM to enhance the overall graphical performance, you can also make changes accordingly.
Let’s dive into the process of checking and changing the video RAM settings in Windows 10. Whether you are a beginner or an advanced user, this guide will provide you with step-by-step instructions to help you optimize your system’s video RAM allocation and maximize your visual experience.
What is Video RAM?
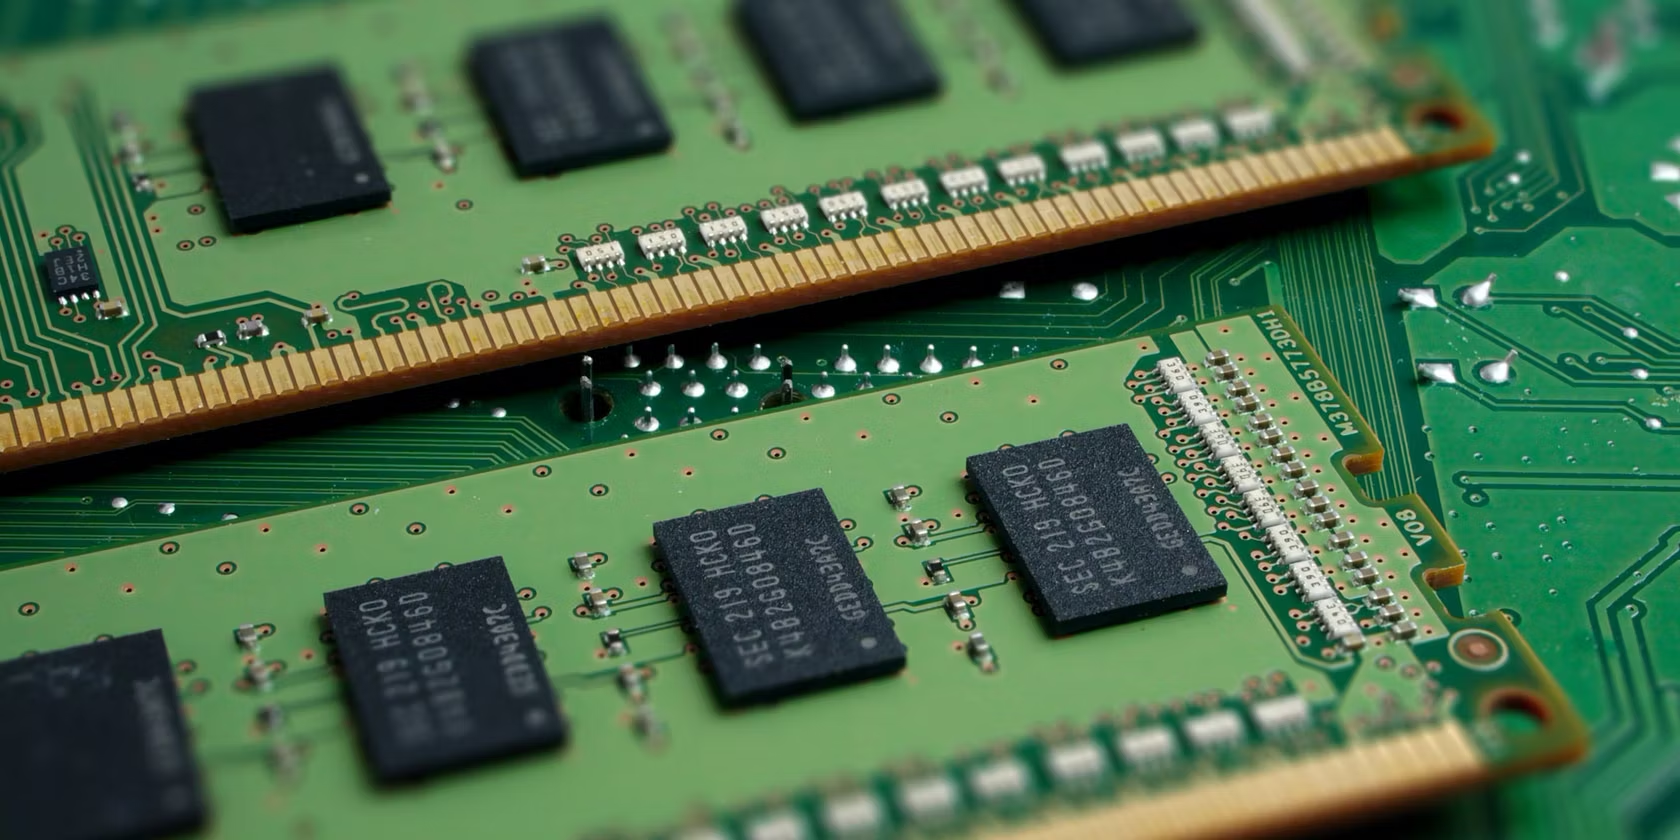
Video RAM, also known as VRAM, is a specialized type of memory that is dedicated to graphics processing. It is a crucial component of a computer’s graphics card, responsible for storing and rapidly accessing visual data that is needed to render images and videos on a display.
Unlike system RAM, which is used for general computing tasks, video RAM is specifically designed to handle the demanding requirements of graphical processing. It is a high-speed memory that allows for quick access and manipulation of large amounts of data, resulting in smooth and seamless display performance.
The primary function of video RAM is to store the textures, shaders, and other graphical elements that are required to render images on a screen. These resources are accessed by the GPU (Graphics Processing Unit) to quickly retrieve and process the data needed for rendering. The GPU can then send the processed information to the display, resulting in the visual content that we see on our screens.
One important characteristic of video RAM is its dedicated nature. Unlike system RAM, which is shared by various components and processes, video RAM is reserved solely for the use of the graphics card. This ensures that the GPU has fast and reliable access to the graphical data it needs, without being affected by other system tasks.
Video RAM also comes in different types, such as GDDR6, GDDR5, and HBM. The type of video RAM used in a graphics card can affect its performance and bandwidth capabilities. Higher-end graphics cards tend to have more advanced and faster video RAM, allowing for smoother and more detailed graphical rendering.
Overall, video RAM is a vital component in any modern computer system, especially for tasks that require intensive graphical processing. Whether you’re gaming, editing videos, or working with complex visual designs, having sufficient and high-quality video RAM can significantly enhance your overall visual experience by providing faster and more efficient graphics rendering.
Why Change Video RAM?
Changing the video RAM allocation on your Windows 10 computer can have several benefits and advantages, depending on your specific needs and usage. Here are some reasons why you might consider changing your video RAM settings:
- Improving Performance: One of the main reasons to change video RAM is to enhance the performance of your system, particularly when running graphics-intensive tasks or applications. By allocating more video RAM, your graphics card can handle larger and more complex graphical data, resulting in smoother and faster rendering of images, videos, and 3D graphics.
- Optimizing Gaming Experience: For gamers, allocating more video RAM can significantly impact the gaming experience. Many modern games require a substantial amount of video RAM to handle high-resolution textures, realistic lighting effects, and detailed 3D models. By increasing the video RAM allocation, you can ensure that your system can deliver the best graphics performance, minimizing lags, stuttering, and visual artifacts.
- Enhancing Multimedia Editing: If you regularly work with multimedia editing software, such as video editing or 3D modeling applications, increasing video RAM can greatly improve the responsiveness and efficiency of these programs. By providing more video RAM to the graphics card, you allow for faster rendering, smoother preview playback, and quicker processing of complex visual effects.
- Maximizing Integrated Graphics: Some Windows 10 computers come with integrated graphics, where the graphics processing is handled by the CPU rather than a dedicated graphics card. Increasing the video RAM allocation for integrated graphics can help boost the overall graphical performance of your system, enhancing the visual quality of everyday tasks, such as web browsing, video playback, and multitasking.
- Customizing Graphics Settings: Changing the video RAM allocation provides you with the flexibility to customize your system’s graphics settings to match your preferences and specific requirements. You can allocate more video RAM to prioritize advanced graphical effects, increase texture resolutions, or allocate less video RAM to conserve system resources for other tasks.
It’s important to note that the benefits of changing video RAM allocation can vary depending on your hardware configuration and the specific applications or games you use. It’s recommended to experiment with different video RAM settings to find the optimal configuration for your needs, while considering the limitations and capabilities of your graphics card.
Now that we understand the reasons for changing video RAM, let’s proceed to the next section to learn how to check the video RAM allocation on your Windows 10 computer.
Checking Video RAM in Windows 10
Before making any changes to the video RAM allocation, it’s essential to check the current video RAM configuration on your Windows 10 computer. Here’s how you can do it:
- Step 1: Right-click on the Windows Start button and select “System” from the contextual menu. Alternatively, you can press the Windows key + Pause/Break key to open the System window.
- Step 2: In the System window, you will find information about your computer’s hardware and operating system. Look for the “Installed RAM” or “System Memory” section. Here, you can see the total amount of RAM installed on your system.
- Step 3: To determine the video RAM allocation, you need to access the “Device Manager.” Right-click on the Windows Start button, and select “Device Manager” from the menu.
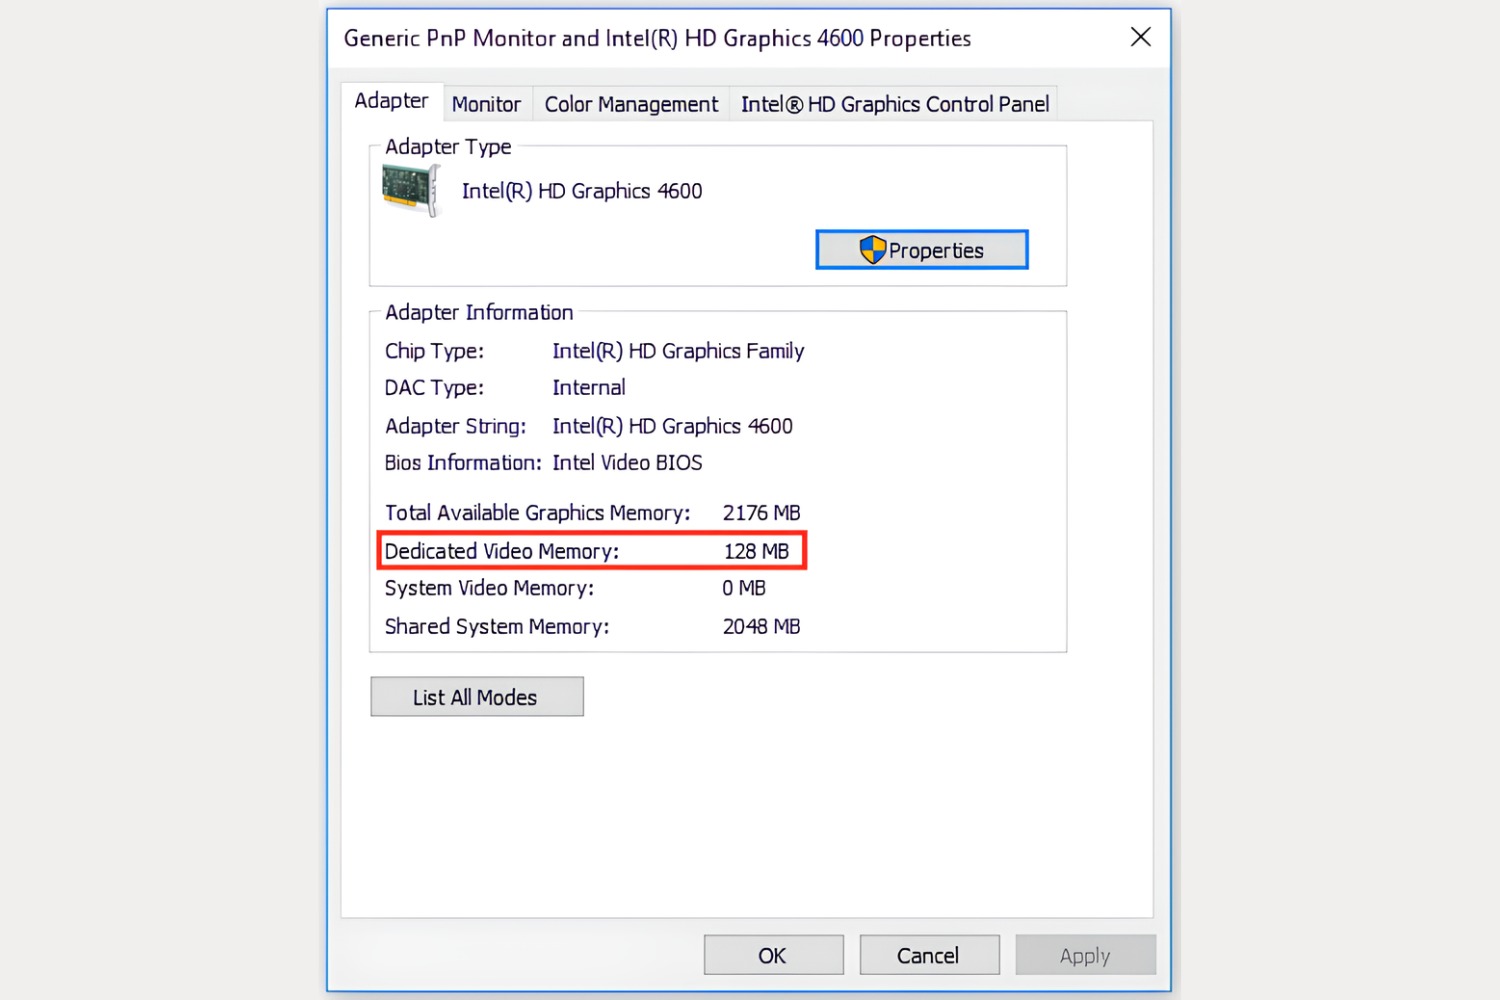
- Step 4: In the Device Manager window, expand the “Display adapters” section by clicking on the arrow icon next to it. This will display the graphics card(s) installed on your computer.
- Step 5: Double-click on your graphics card to open its properties window.
- Step 6: In the properties window, go to the “Adapter” tab. Here you will find detailed information about your graphics card, including the total available video memory (VRAM).
It’s important to note that the video RAM allocation displayed in the Device Manager may not necessarily be the maximum amount of video RAM that your graphics card can utilize. Some graphics cards dynamically allocate video RAM based on the system’s requirements.
By following these steps, you can check the current video RAM allocation on your Windows 10 computer. This information will be helpful when making changes to the video RAM settings in the subsequent sections.
Now that we know how to check the video RAM configuration, let’s move on to learn how to change the video RAM allocation in Windows 10.
Changing Video RAM in Windows 10
If you have determined that you need to change the video RAM allocation on your Windows 10 computer, you can do so by following these steps:
- Step 1: Open the BIOS (Basic Input/Output System) or UEFI (Unified Extensible Firmware Interface) settings on your computer. The method to access these settings may vary depending on your computer’s manufacturer. Commonly, you can press a specific key (such as F2, Del, or Esc) during the boot-up process to access the BIOS or UEFI settings.
- Step 2: Once you’re in the BIOS or UEFI settings, navigate to the “Advanced” or “Performance” section. Look for an option that relates to the graphics settings, such as “Onboard Graphics Configuration” or “Graphics Settings.”
- Step 3: Depending on your system, you may find different options to adjust the video RAM allocation. Look for an option that allows you to set the “Video Memory Size” or “Graphics Memory Allocation.”
- Step 4: Use the arrow keys on your keyboard to increase or decrease the video RAM allocation according to your requirements. Some BIOS or UEFI settings allow you to specify the video RAM amount in megabytes (MB) or as a percentage of the total system RAM.
- Step 5: Once you have made the desired changes, save the settings and exit the BIOS or UEFI. Your computer will then reboot with the new video RAM allocation.
It’s important to note that not all computers provide the option to adjust the video RAM allocation in the BIOS or UEFI settings. Some systems have a fixed video RAM allocation that is automatically managed by the graphics card driver or the system itself.
If you do not find the option to change the video RAM allocation in the BIOS or UEFI settings, you can try alternative methods, such as updating your graphics card driver, which we will explore in the next section.
Remember that changing the video RAM allocation carries a risk, and incorrect settings could potentially cause system instability or problems with graphics performance. It’s always recommended to consult your computer’s user manual or the manufacturer’s website for specific instructions and guidance on adjusting video RAM settings for your particular system.
Now that you know how to change the video RAM allocation in Windows 10, let’s explore another method that can help optimize video RAM management – updating your graphics drivers.
Adjusting Video RAM Allocation in BIOS/UEFI
If you want to adjust the video RAM allocation on your Windows 10 computer, you can do so by accessing the BIOS (Basic Input/Output System) or UEFI (Unified Extensible Firmware Interface) settings. Here’s how:
- Step 1: Restart your computer and access the BIOS or UEFI settings. The process to enter these settings may vary depending on your computer manufacturer. Typically, you can press a specific key (such as F2, Del, or Esc) during the boot-up process to access the BIOS or UEFI.
- Step 2: Once you are in the BIOS or UEFI settings, navigate to the “Advanced” or “Performance” section. Look for an option related to the graphics settings, such as “Onboard Graphics Configuration” or “Graphics Settings.”
- Step 3: Within the graphics settings, you may find an option to adjust the video RAM allocation. This option might be labeled as “Video Memory Size,” “Graphics Memory Allocation,” or something similar.
- Step 4: Use the arrow keys on your keyboard to increase or decrease the video RAM allocation based on your requirements. Some BIOS or UEFI settings allow you to specify the amount of video RAM in megabytes (MB) or as a percentage of the total system RAM.
- Step 5: Once you have made the desired changes, save the settings and exit the BIOS or UEFI. Your computer will restart with the new video RAM allocation.
It’s important to note that not all computer systems provide the option to adjust video RAM allocation in the BIOS or UEFI settings. Some systems have a fixed video RAM allocation that is automatically managed by the system or the graphics card driver.
If you don’t find the option to change the video RAM allocation in the BIOS or UEFI settings, you can try alternative methods such as updating the graphics card driver or contacting the computer manufacturer’s support for further assistance.
Remember, adjusting video RAM allocation requires caution as incorrect settings could potentially cause system instability or issues with graphics performance. It’s always recommended to consult your computer’s user manual or the manufacturer’s support documentation for specific instructions and guidance on adjusting video RAM settings for your particular system.
Now that you know how to adjust video RAM allocation in the BIOS or UEFI settings, let’s explore another method that can help optimize video RAM management – updating your graphics drivers.
Updating Graphics Drivers for Video RAM Management
One effective way to optimize video RAM management on your Windows 10 computer is by keeping your graphics drivers up to date. Graphics drivers are software that enable communication between your operating system and the graphics card, allowing for efficient utilization of video RAM and overall improved graphics performance.
Here’s how you can update your graphics drivers:
- Step 1: Identify the make and model of your graphics card. You can usually find this information in the Device Manager, as explained in the earlier section. Make a note of the manufacturer and specific model.
- Step 2: Visit the website of the graphics card manufacturer. Common graphics card manufacturers include Nvidia, AMD, and Intel. Navigate to their driver download or support section.
- Step 3: Look for the appropriate driver for your graphics card model and Windows 10 operating system. Download the latest stable version of the driver. Make sure to download the correct driver for your architecture (32-bit or 64-bit).
- Step 4: Once the driver file is downloaded, run the installer. Follow the on-screen instructions to install the graphics driver. Make sure to select the “Clean install” or “Custom install” option if provided, as this will remove any previous driver remnants and ensure a clean installation.
- Step 5: After the installation is complete, restart your computer to apply the changes. Your system will now be using the updated graphics driver.
Updating your graphics drivers can bring several benefits, including improved video RAM management, optimized performance, and compatibility with the latest software and games. It can also fix any known issues or bugs in the previous driver versions.
It’s important to note that some graphics card manufacturers provide their own software for managing graphics settings. These software packages often include options to adjust video RAM allocation and optimize graphics performance. You can explore these tools to further enhance your video RAM management.
Regularly updating your graphics drivers is crucial, especially if you experience any graphics-related issues or want to ensure your system is utilizing the full potential of your video RAM. Make it a habit to check for driver updates periodically or enable automatic driver update notifications if available.
With updated graphics drivers, you can ensure that your video RAM is efficiently utilized, leading to better graphics performance, smoother rendering, and an overall improved visual experience on your Windows 10 computer.
Now that we’ve covered updating graphics drivers, let’s conclude this article by recapping the key points and highlighting the importance of effectively managing video RAM on your system.
Conclusion
Video RAM is an essential component for delivering smooth and high-quality graphics performance on your Windows 10 computer. By understanding how to change the video RAM allocation, you can optimize your system for better visual experiences, whether you’re gaming, editing multimedia, or simply browsing the web.
In this article, we discussed the importance of video RAM and the reasons why you might consider changing its allocation. We explored how to check the video RAM configuration in Windows 10 and provided steps to adjust the allocation in the BIOS or UEFI settings. Additionally, we discussed the significance of updating graphics drivers to optimize video RAM management.
By increasing the video RAM allocation, you can improve performance, optimize gaming experiences, enhance multimedia editing, and maximize integrated graphics capabilities. Customizing video RAM allocation allows you to tailor your system’s graphics settings to match your specific requirements and preferences.
However, it’s essential to exercise caution when making changes to video RAM settings. Incorrect configurations may lead to system instability or graphics performance issues. Always refer to your computer’s user manual or manufacturer’s documentation for guidance specific to your system.
Remember, in addition to adjusting video RAM, updating graphics drivers is crucial for efficient video RAM management. By keeping your graphics drivers up to date, you can ensure that your system utilizes video RAM effectively, leading to optimal graphics performance and compatibility with the latest software and games.
Now that you have a good understanding of video RAM, its significance, and how to adjust its allocation, you can take control of your Windows 10 computer’s graphical performance. Enjoy visually immersive experiences with smooth and high-quality graphics!