Introduction
Are you an avid Minecraft player who experiences lag and slow gameplay? One possible solution to optimize your gaming experience is to allocate more RAM to Minecraft. RAM, or Random Access Memory, is a crucial resource that determines how smoothly and efficiently programs like Minecraft run on your computer.
In this guide, we will walk you through the process of allocating more RAM to Minecraft on different operating systems, including Windows, Mac, and Linux. By allocating additional RAM, you can enhance the game’s performance, reduce lag, and enjoy a smoother and more immersive gameplay experience.
Before we dive into the steps, it’s important to note that allocating more RAM to Minecraft is not a guaranteed fix for all performance issues. It can certainly improve gameplay, but other factors such as your computer’s hardware specifications and internet connection can also influence game performance.
To determine whether allocating more RAM is necessary, we will first check your current RAM allocation. Then, we will help you determine how much RAM to allocate based on your system’s specifications. Finally, we will provide detailed instructions for allocating more RAM on Windows, Mac, and Linux.
Ready to enhance your Minecraft gaming experience? Let’s get started by checking your current RAM allocation!
Checking Your Current RAM Allocation
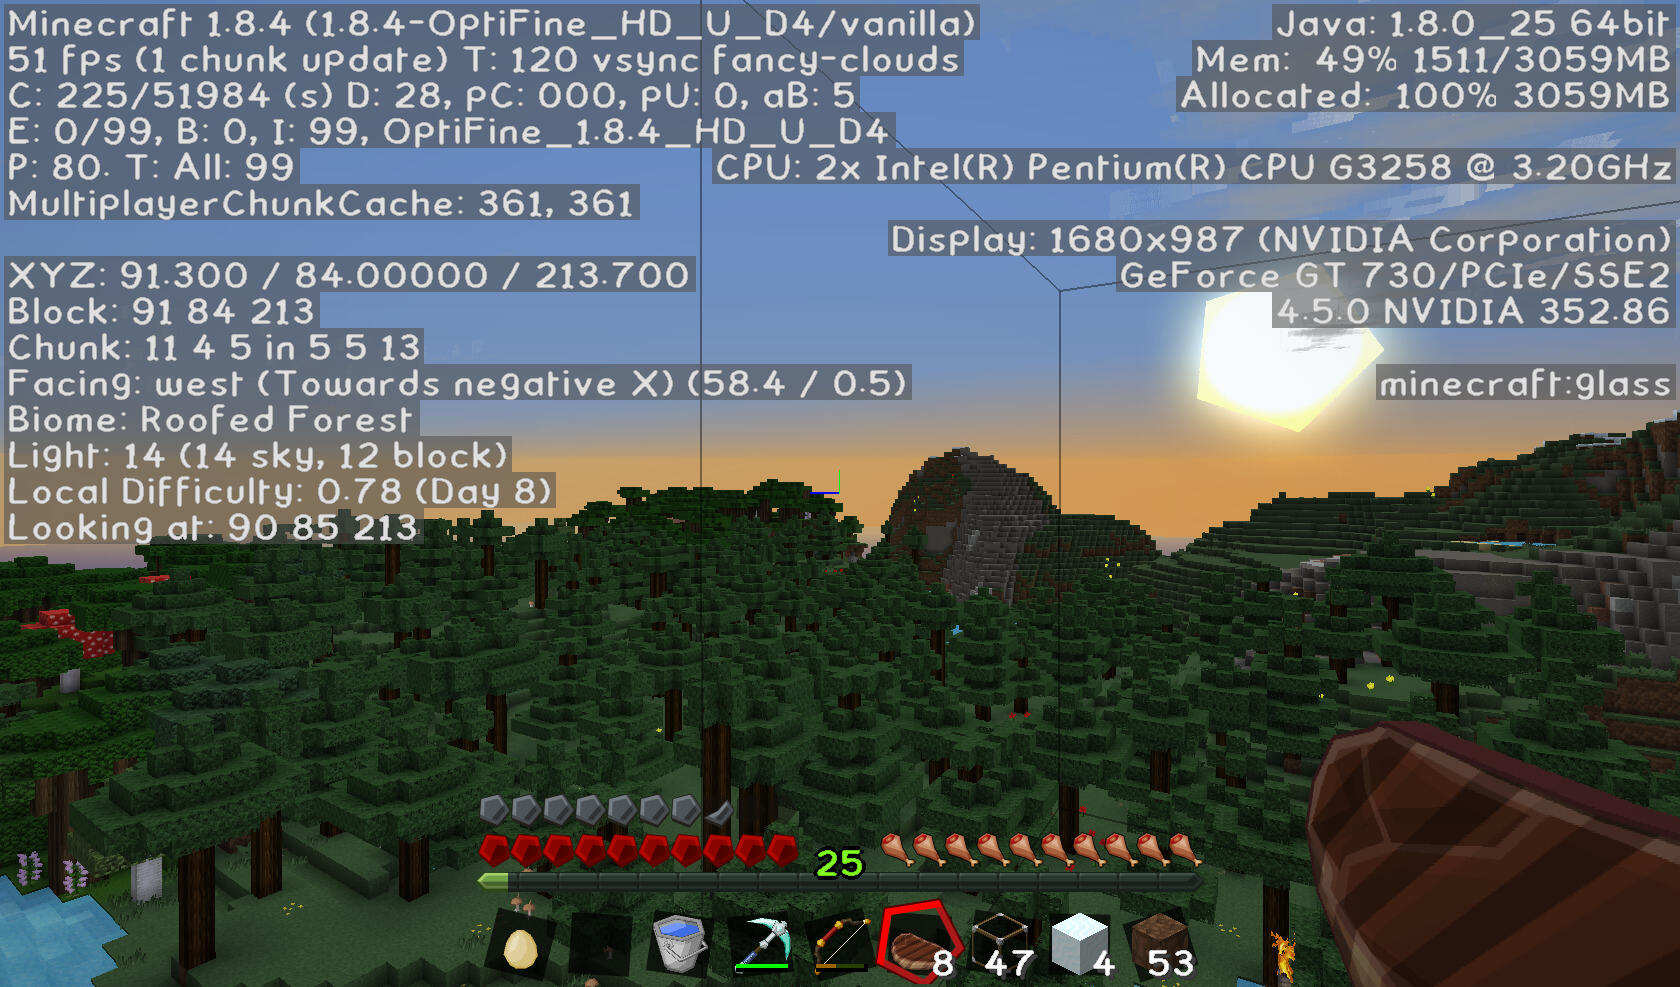
Before you start allocating more RAM to Minecraft, it’s essential to check your current RAM allocation. This will give you a clear idea of how much memory Minecraft is currently using and whether increasing the allocation is necessary.
Here’s how you can check your current RAM allocation:
- Step 1: Launch Minecraft and ensure that you are in the main menu.
- Step 2: Open the options menu by clicking on the “Options” button.
- Step 3: In the options menu, click on “Video Settings”.
- Step 4: Scroll down until you see the “Allocated Memory” option.
- Step 5: Take note of the number displayed next to “Allocated Memory”. This indicates the amount of RAM currently allocated to Minecraft.
Once you have identified the current RAM allocation, consider whether you experience any performance issues or lag while playing Minecraft. If you notice significant lag or frequent freeze-ups, it may indicate that your current RAM allocation is insufficient for smooth gameplay.
Remember, having a higher RAM allocation does not necessarily guarantee better performance if your computer’s hardware cannot handle it. You should always consider your system’s specifications before increasing the RAM allocation.
In the next section, we will help you determine how much RAM to allocate based on your system’s specifications. This will ensure that you optimize Minecraft’s performance without overwhelming your computer’s resources.
Determining How Much RAM to Allocate
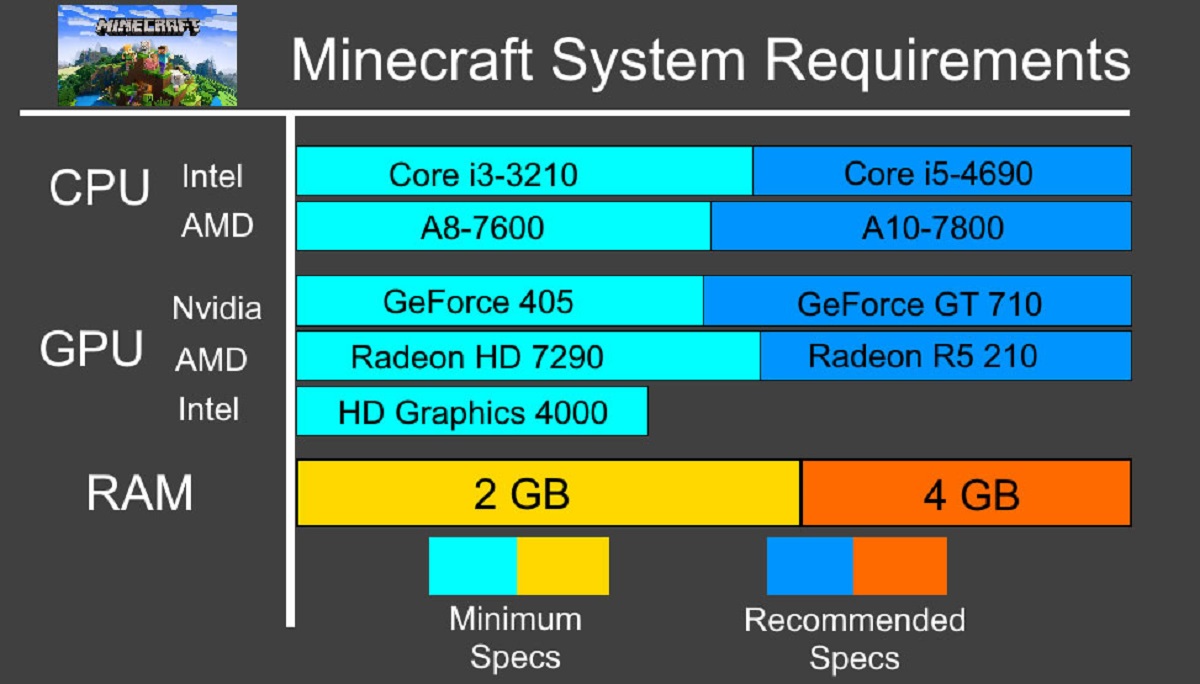
Allocating the right amount of RAM to Minecraft is crucial for achieving optimal performance without overburdening your system. The amount of RAM you should allocate depends on various factors, including your computer’s specifications, the number of mods you’re using, and the desired level of graphics quality. Here’s how you can determine the ideal RAM allocation:
- Check your system’s specifications: Start by checking your computer’s total available RAM. This information can usually be found in your computer’s system settings or task manager. It’s recommended to allocate no more than half of your available RAM to Minecraft.
- Consider the number of mods and resource packs: If you’re using a considerable number of mods or resource packs, you’ll need to allocate more RAM. Mods and high-resolution packs can significantly increase memory usage.
- Balance between performance and visuals: Allocating more RAM can improve performance, but it may not directly impact graphics quality. If you’re primarily concerned about visuals, consider allocating more resources to your GPU instead.
- Trial and error: Every system is different, and what works for one player may not be optimal for another. It’s recommended to start with a modest RAM allocation and gradually increase it until you find the sweet spot for your setup.
Remember that allocating too much RAM can have adverse effects on your system. It may lead to increased memory usage, slower performance in other applications, or even crashes. Thus, it’s crucial to strike a balance and allocate an appropriate amount of RAM based on your system’s capabilities and Minecraft’s requirements.
Now that you understand how to determine the ideal RAM allocation, let’s move on to the next sections, where we’ll guide you through the step-by-step process of allocating more RAM on different operating systems.
Allocating More RAM on Windows
If you’re using Windows and want to allocate more RAM to Minecraft, follow these steps:
- Step 1: Close Minecraft and any other applications running in the background.
- Step 2: Right-click on the Minecraft launcher icon and select “Properties”.
- Step 3: In the Properties window, click on the “Compatibility” tab.
- Step 4: Check the box that says “Run this program as an administrator”.
- Step 5: Click on “OK” to save the changes.
- Step 6: Open the Minecraft launcher and click on “Installations” at the top.
- Step 7: Select the Minecraft version you want to allocate more RAM to.
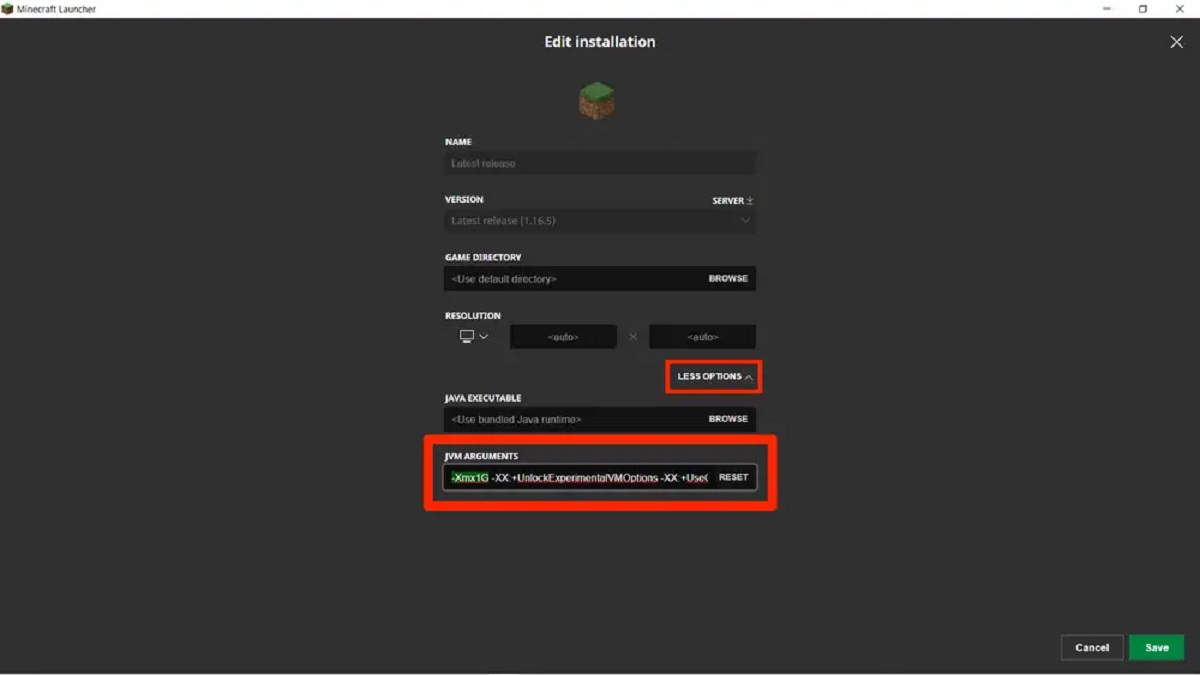
- Step 8: Click on “More Options” and locate the “JVM Arguments” box.
- Step 9: In the JVM Arguments box, you will see a line of code that starts with “-Xmx”. This is where you allocate the RAM.
- Step 10: Increase the amount of RAM by changing the number after “-Xmx”. For example, if it’s set to “-Xmx2G”, you can change it to “-Xmx4G” to allocate 4GB of RAM.
- Step 11: Click on “Save” to apply the changes.
- Step 12: Launch Minecraft and check whether the RAM allocation has been updated.
By following these steps, you can effectively allocate more RAM to Minecraft on Windows, enhancing the game’s performance and reducing lag.
Next, we will go through the process of allocating more RAM on Mac.
Allocating More RAM on Mac
If you’re using a Mac and want to allocate more RAM to Minecraft, follow these steps:
- Step 1: Close Minecraft and any other applications running in the background.
- Step 2: Open Finder and go to the “Applications” folder.
- Step 3: Find the Minecraft launcher, right-click on it, and select “Get Info”.
- Step 4: In the Info window, check the box that says “Open in Low Resolution”.
- Step 5: Close the Info window.
- Step 6: Open the Minecraft launcher and click on “Installations” at the top.
- Step 7: Select the Minecraft version you want to allocate more RAM to.
- Step 8: Click on “More Options” and locate the “JVM Arguments” box.
- Step 9: In the JVM Arguments box, you will see a line of code that starts with “-Xmx”. This is where you allocate the RAM.
- Step 10: Increase the amount of RAM by changing the number after “-Xmx”. For example, if it’s set to “-Xmx2G”, you can change it to “-Xmx4G” to allocate 4GB of RAM.
- Step 11: Click on “Save” to apply the changes.
- Step 12: Launch Minecraft and check whether the RAM allocation has been updated.
By following these steps, you can effectively allocate more RAM to Minecraft on your Mac, allowing for smoother gameplay and improved performance.
Next, we will guide you through the process of allocating more RAM on Linux.
Allocating More RAM on Linux
If you’re using Linux and want to allocate more RAM to Minecraft, follow these steps:
- Step 1: Close Minecraft and any other applications running in the background.
- Step 2: Open a terminal window.
- Step 3: Navigate to the directory where Minecraft is installed. This is usually “/opt/minecraft” or “/home/[your_username]/.minecraft”.
- Step 4: Open the “launcher_profiles.json” file in a text editor.
- Step 5: Find the line that says “-Xmx”. This is where you allocate the RAM.
- Step 6: Increase the amount of RAM by changing the number after “-Xmx”. For example, if it’s set to “-Xmx2G”, you can change it to “-Xmx4G” to allocate 4GB of RAM.
- Step 7: Save the changes and exit the text editor.
- Step 8: Launch Minecraft and check whether the RAM allocation has been updated.
By following these steps, you can effectively allocate more RAM to Minecraft on Linux, optimizing the game’s performance and reducing any potential lag.
Now that you know how to allocate more RAM to Minecraft on different operating systems, you can enhance your gaming experience and enjoy smoother gameplay.
Verifying the New RAM Allocation
After you have successfully allocated more RAM to Minecraft, it’s important to verify that the changes have taken effect. Here’s how you can confirm the new RAM allocation:
- Step 1: Launch Minecraft and go to the main menu.
- Step 2: Access the options menu by clicking on the “Options” button.
- Step 3: Navigate to the “Video Settings” section.
- Step 4: Scroll down until you see the “Allocated Memory” option.
- Step 5: Take note of the number displayed next to “Allocated Memory”. It should reflect the increased RAM allocation you specified earlier.
- Step 6: Close the options menu and proceed to play Minecraft.
While playing, observe whether you experience improved performance, reduced lag, and smoother gameplay compared to before. If you notice a significant difference, then the new RAM allocation has likely been successful.
It’s worth mentioning that allocating more RAM does not guarantee a flawless gaming experience. Other factors, such as your computer’s hardware capabilities and internet connection, can still impact Minecraft’s performance. However, a proper RAM allocation can help optimize the game and enhance your overall gameplay experience.
If you’re still experiencing issues or the new RAM allocation did not have the desired effect, consider adjusting other settings, updating your graphics drivers, or seeking further assistance from online forums or Minecraft support channels.
Now that you have verified the new RAM allocation and are enjoying improved gameplay, you can fully immerse yourself in the world of Minecraft!
Conclusion
Allocating more RAM to Minecraft can significantly enhance your gaming experience by reducing lag, improving performance, and delivering smoother gameplay. In this guide, we walked you through the process of allocating more RAM on different operating systems, including Windows, Mac, and Linux.
We first showed you how to check your current RAM allocation in Minecraft, ensuring that you have a clear understanding of how much memory the game is currently utilizing. We then helped you determine the ideal amount of RAM to allocate based on your system’s specifications, the number of mods and resource packs used, and the desired level of graphics quality.
For Windows users, we provided step-by-step instructions on allocating more RAM by modifying the JVM arguments in the Minecraft launcher properties. Mac users were guided through the process of allocating more RAM by adjusting the Info settings of the Minecraft launcher. Linux users learned how to allocate more RAM by editing the “launcher_profiles.json” file in the Minecraft installation directory.
To ensure that the new RAM allocation is successful, we emphasized the importance of verifying the changes within the Minecraft options menu. This step allows you to confirm that the increased RAM allocation is reflected and observe any improvements in gameplay.
It’s important to remember that allocating more RAM is just one factor in optimizing Minecraft’s performance. Your computer’s hardware specifications, internet connection, and other settings can also impact gameplay. If you continue to experience issues after allocating more RAM, consider exploring additional solutions or seeking further assistance.
With your newfound knowledge and the ability to allocate more RAM, you can now enjoy Minecraft to its fullest potential and immerse yourself in the endless adventures it offers.