Gaming: Minecraft How To Allocate More RAM
When it comes to playing Minecraft, having enough RAM allocated to the game is essential for a smooth and enjoyable experience. If you’ve ever encountered lag or slow performance while playing, chances are you might need to allocate more RAM. In this blog post, we will guide you through the steps to allocate more RAM to Minecraft, ensuring you get the best possible gaming experience.
Key Takeaways:
- Allocating more RAM to Minecraft can improve performance and reduce lag.
- It is important to have enough RAM available for both the operating system and Minecraft.
Why Allocate More RAM?
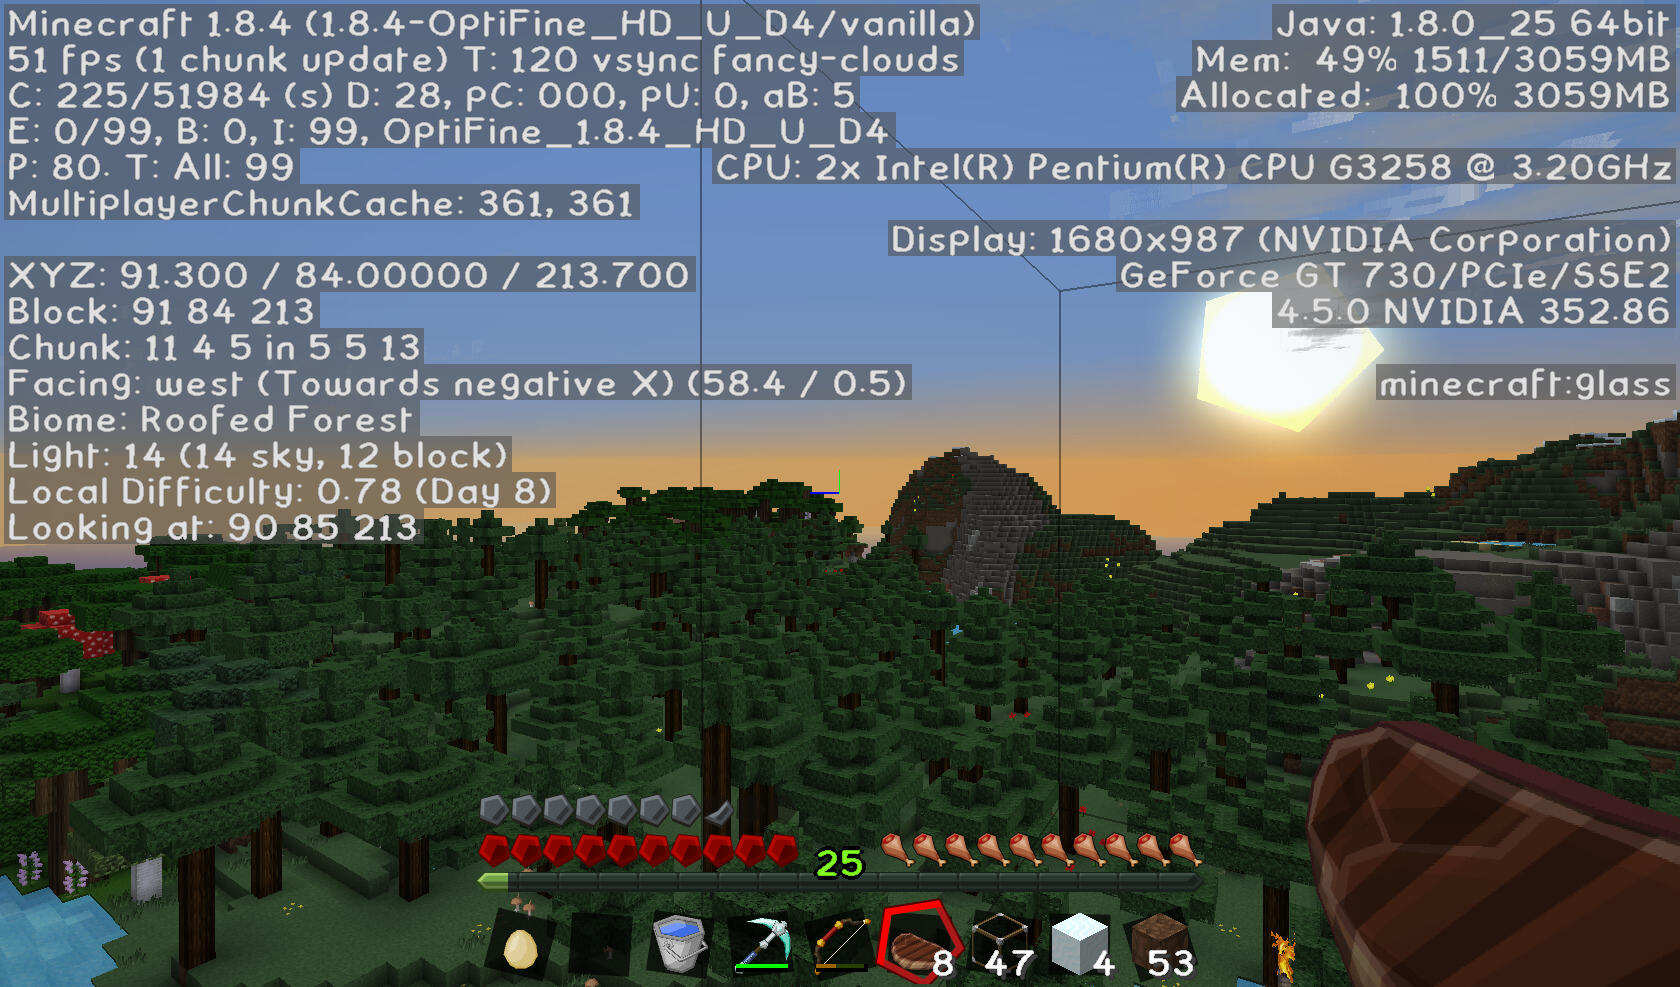
Minecraft is a resource-intensive game that requires a significant amount of RAM to run smoothly. By default, Minecraft is allocated a small portion of your computer’s RAM, which might not be enough for optimal performance. Allocating more RAM allows Minecraft to utilize extra memory, resulting in reduced lag and improved gameplay.
Step-by-Step Guide to Allocate More RAM
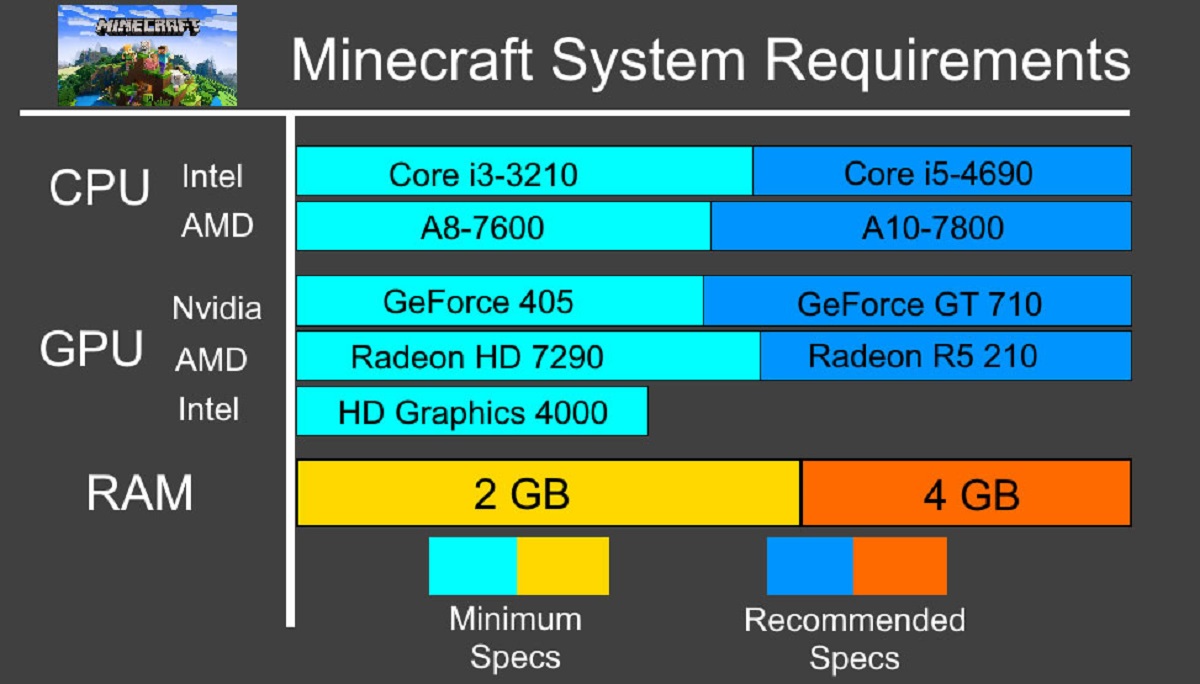
- Check your System Requirements: Before allocating more RAM, make sure your computer meets the minimum requirements for Minecraft. It’s recommended to have at least 8GB of RAM, although higher is always better for a smoother gaming experience.
- Open the Minecraft Launcher: Launch the Minecraft game and open the launcher.
- Select “Installations”: In the launcher, click on the “Installations” tab located at the top.
- Choose the Profile: Choose the profile you want to allocate more RAM to. If you only have one profile, it will be selected automatically.
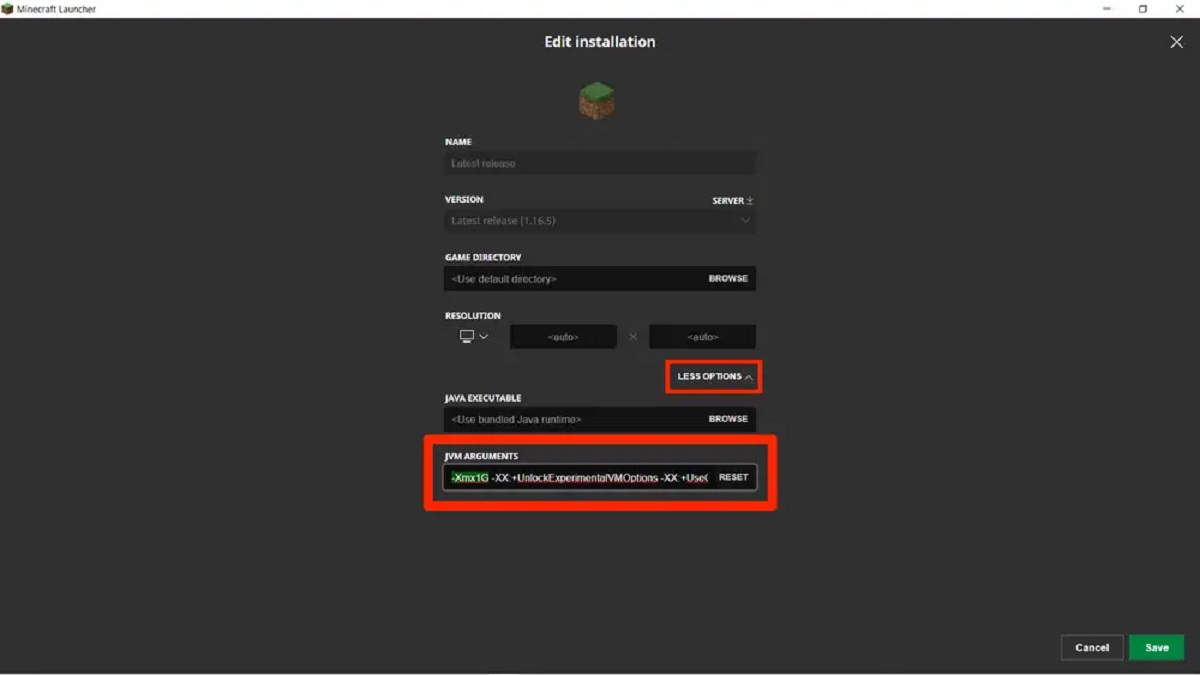
- Click on “More Options”: Under your selected profile, click on the three dots icon (“…”) and select “Edit”.
- Allocate more RAM: In the “JVM Arguments” text box, you’ll see a line of code that starts with “-Xmx”. This code determines the amount of RAM allocated to Minecraft. Increase the value after “-Xmx” to allocate more RAM. For example, if it says “-Xmx2G”, you can change it to “-Xmx4G” to allocate 4GB of RAM. Be cautious not to allocate more RAM than your system can handle.
- Save Changes and Launch: Click “Save” to apply the changes you made. You can now launch Minecraft and enjoy the benefits of the increased RAM allocation.
Conclusion:
Allocating more RAM to Minecraft can greatly enhance your gaming experience by reducing lag and improving overall performance. By following the step-by-step guide provided in this blog post, you can easily allocate more RAM to Minecraft and start enjoying the game at its fullest.
Remember, having enough RAM is crucial not only for Minecraft but for the smooth functioning of your entire system. So, ensure that you have enough RAM available for both the operating system and Minecraft for the best gaming experience possible.