Introduction
Minecraft is a popular sandbox game beloved by millions of players around the world. Whether you’re a casual player or running a dedicated server for a community of gamers, optimizing the performance of your Minecraft server is essential for an enjoyable gaming experience. One way to enhance the server’s performance is by dedicating more RAM (Random Access Memory) to it.
RAM is a critical resource that Minecraft servers rely on to store game data, processes, and player information. By increasing the amount of dedicated RAM, you can ensure smoother gameplay, reduced lag, and improved overall server performance. However, it’s crucial to check the system requirements of your server and consider the limitations of your hardware before allocating more RAM.
In this guide, we will explore different methods to dedicate more RAM to your Minecraft server, ensuring optimal performance and an enhanced gaming experience. Whether you’re using the Minecraft launcher, command line programs, modifying server startup scripts, or utilizing hosting services with adjustable RAM settings, there is a method that suits your needs. We will also address common troubleshooting issues that may arise during the process. So, let’s dive in and explore the world of dedicated RAM for Minecraft servers!
Why should you dedicate more RAM to your Minecraft server?
Dedicating more RAM to your Minecraft server can significantly improve its performance and enhance your gaming experience. Here are a few compelling reasons why you should consider allocating additional RAM:
- Reduced lag: Lag is a common issue in multiplayer Minecraft games, especially when there are numerous players or complex worlds. By dedicating more RAM, you provide the server with the necessary resources to handle the game’s demands, resulting in smoother gameplay and reduced lag.
- Increased player capacity: Allocating more RAM allows your Minecraft server to accommodate a larger number of players simultaneously. This is particularly beneficial if you run a popular server or organize events where many players join at once.
- Better world rendering: Minecraft worlds can be vast and intricate, with diverse landscapes, structures, and biomes. With additional RAM, the server can efficiently load and render the world, minimizing delays and ensuring a seamless exploration experience.
- Enhanced plugin and mod performance: If you use plugins or mods to enhance gameplay features, allocating more RAM can improve their performance. Plugins and mods often require additional resources to function optimally, and increasing RAM allocation can prevent compatibility issues and enhance their overall functionality.
- Future-proofing your server: As Minecraft continues to evolve with updates and new features, the game’s system requirements may increase. By dedicating more RAM to your server now, you ensure that it remains capable of handling future updates and evolving player demands.
It’s important to note that dedicating more RAM is not a magical solution that guarantees flawless performance. Other factors, such as your internet connection, server hardware, and the efficiency of your plugins or mods, also influence the overall server performance. However, increasing RAM allocation is a crucial step towards optimizing your Minecraft server and providing players with a smoother and more enjoyable gaming experience.
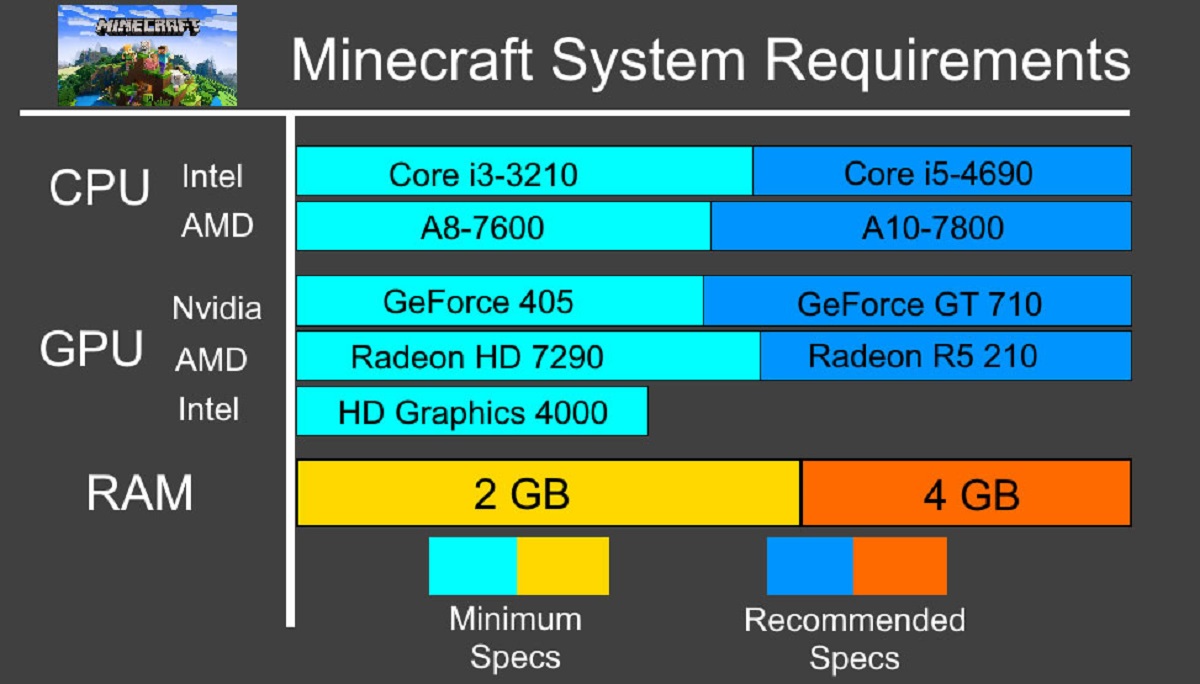
Checking your system requirements
Before dedicating more RAM to your Minecraft server, it’s essential to assess your system requirements to ensure compatibility and prevent any potential issues. Here are a few key factors to consider:
Operating System: Minecraft servers can run on various operating systems, including Windows, macOS, and Linux. Make sure your server’s operating system supports the desired amount of RAM allocation. Additionally, ensure that the operating system itself has adequate resources to handle the increased RAM allocation.
Hardware: Check your server’s hardware specifications, including the processor, available RAM, and storage capacity. Increasing RAM allocation requires sufficient physical memory available on your server. Ensure that you have enough free RAM to allocate without causing performance issues or running out of memory for other essential processes.
Minecraft version: Different Minecraft server versions have varying system requirements. Verify the recommended RAM allocation for the specific version of Minecraft you’re using. Keep in mind that newer versions and modded servers may require more RAM to run smoothly.
Plugin and mod compatibility: If you use plugins or mods on your server, ensure that they are compatible with the increased RAM allocation. Some plugins or mods may require specific resources or have recommendations for optimal RAM allocation. Check the documentation or support forums for compatibility information and recommended settings.
Player capacity: Consider the number of players you expect to have on your server simultaneously. Increasing RAM allocation allows for more players to join without sacrificing performance. Plan accordingly based on your anticipated player capacity.
By thoroughly checking your system requirements, you can ensure that your server is capable of handling and benefiting from the increased RAM allocation. This step is crucial to avoid compatibility issues, hardware limitations, or unexpected performance bottlenecks. Once you have assessed your system’s compatibility, you can proceed with allocating more RAM to your Minecraft server.
Allocating more RAM to your Minecraft server
Once you have confirmed that your system meets the requirements to dedicate additional RAM to your Minecraft server, you can proceed with allocating more memory. There are several methods you can use, depending on your server setup and personal preference. Here are four common methods to allocate more RAM:
- Method 1: Using the Minecraft launcher: If you are running a Minecraft server using the official Minecraft launcher, you can easily allocate more RAM by following these steps:
- Open the Minecraft launcher and go to the “Installations” tab.
- Click on the server profile you wish to allocate more RAM to.
- In the “More options” section, find the “JVM arguments” field.
- Add the following argument at the beginning of the line: -Xmx
G - Save the changes and launch the server.
- Method 2: Using a command line program: If you are comfortable using command line programs, you can allocate more RAM by running the server JAR file with the appropriate JVM arguments. Open your command prompt or terminal and navigate to the server directory. Then, run the following command:
- java -Xmx
G -jar server.jar
- java -Xmx
- Method 3: Modifying the server startup script: Some server hosting services allow you to modify the server startup script, which includes the JVM arguments. Locate and edit the server startup script, usually named “start.sh” or “start.bat”, and add the appropriate JVM argument to allocate more RAM. Save the changes and restart the server for the modifications to take effect.
- Method 4: Using a hosting service with adjustable RAM settings: If you are using a Minecraft server hosting service, they may have a control panel that allows you to easily adjust the RAM allocation. Log in to your server hosting control panel, navigate to the RAM settings, and increase the allocated RAM to your desired amount. Save the changes and restart the server for the adjustments to apply.
After successfully allocating more RAM to your Minecraft server, monitor its performance and test gameplay to ensure that the changes have positively impacted the server’s responsiveness. If you experience any issues or performance degradation, you may need to fine-tune the RAM allocation or consider other optimizations to optimize your server’s performance further.
Method 1: Using the Minecraft launcher
If you are running a Minecraft server using the official Minecraft launcher, allocating more RAM is a straightforward process. Follow these steps to increase the RAM allocation using the Minecraft launcher:
- Open the Minecraft launcher on your computer.
- Navigate to the “Installations” tab.
- Locate the server profile for which you want to allocate more RAM.
- In the “More options” section, find the “JVM arguments” field.
- Add the following argument at the beginning of the line:
-Xmx<your desired RAM allocation>G. - Replace “
” with the amount of RAM you want to allocate. For example, if you want to allocate 4 GB of RAM, the argument would be: -Xmx4G. - Save the changes.
- Launch the server using the modified profile.
By adding the -Xmx argument with the desired RAM allocation, you instruct the Minecraft server to use a specific amount of memory. Keep in mind that you need to specify the RAM allocation in gigabytes (G). For example, if you want to allocate 2 GB of RAM, you would enter 2G.
Increasing the allocated RAM can ensure that your Minecraft server has enough memory to handle demanding gameplay and a larger number of players. However, it’s crucial to strike a balance and allocate an amount that aligns with your system’s capabilities. Allocating an excessive amount of RAM may strain your hardware resources or cause instability.
After modifying the JVM arguments, launch the Minecraft server using the modified profile. Monitor the server’s performance and assess if the increased RAM allocation has improved gameplay responsiveness, reduced lag, or resolved any performance issues. If you encounter difficulties or the changes do not have the desired effect, you may need to fine-tune the RAM allocation or explore other optimization strategies.
Method 2: Using a command line program
If you are comfortable working with command line programs, you can allocate more RAM to your Minecraft server by running the server JAR file with the appropriate JVM arguments. Follow these steps to allocate more RAM using a command line program:
- Open your command prompt or terminal.
- Navigate to the directory where your Minecraft server files are located.
- Run the following command to start the server with increased RAM allocation:
java -Xmx<your desired RAM allocation>G -jar server.jar. - Replace “
” with the amount of RAM you wish to allocate. For example, if you want to allocate 4 GB of RAM, the command would be: java -Xmx4G -jar server.jar. - Hit Enter to run the command and start the server.
By using the -Xmx argument followed by the desired RAM allocation, you specify the maximum amount of memory the server can use. Make sure to specify the RAM allocation in gigabytes (G) for consistency.
Running the server through the command line allows for more flexibility and control over the server’s behavior. You can monitor the output, view any error messages, and easily customize additional parameters if required.
Once you have started the server using the modified command, observe its performance and assess if the increased RAM allocation has improved gameplay, reduced lag, or resolved any performance issues. If you encounter any difficulties or the changes do not have the desired effect, you may need to adjust the RAM allocation or explore other optimization techniques.
Note that if you restart the server in the future, you will need to use the same command to allocate the desired amount of RAM.
Method 3: Modifying the server startup script
Modifying the server startup script is a method to allocate more RAM to your Minecraft server, especially if you are utilizing a server hosting service that allows customization of the startup script. Follow these steps to increase the RAM allocation by modifying the server startup script:
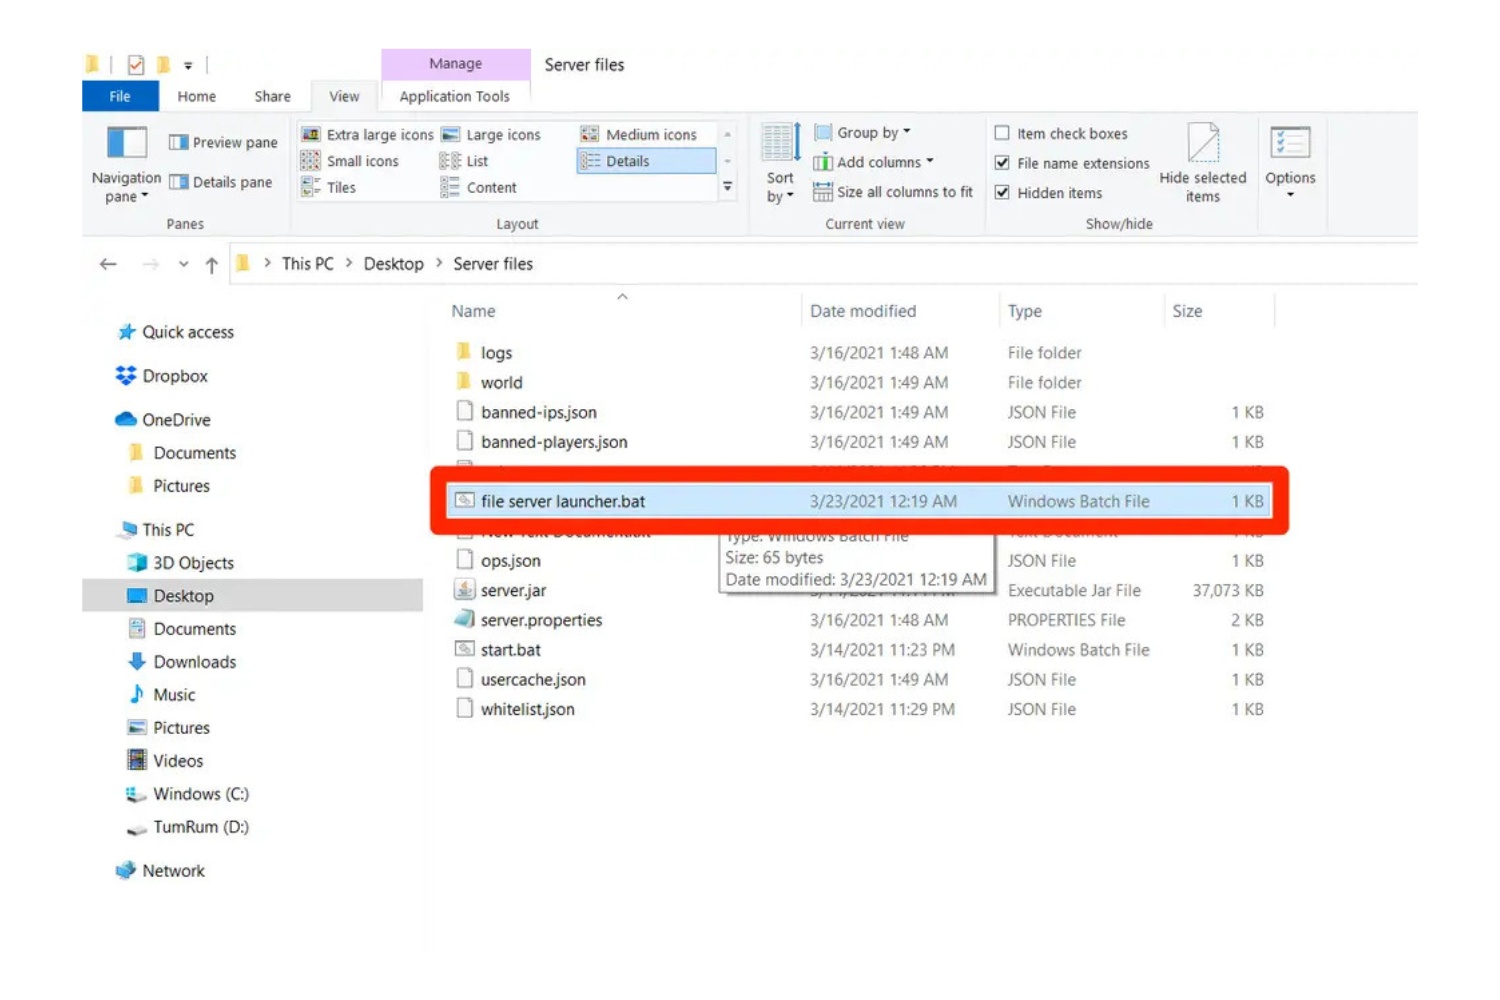
- Access the files of your Minecraft server through a file manager or an FTP client.
- Locate the server startup script, which is usually named “start.sh” for Linux or “start.bat” for Windows.
- Open the script using a text editor.
- Look for a line that contains the JVM arguments, often starting with “
java -Xmx“. - Edit the line to set the desired RAM allocation. Replace the current value after “
-Xmx” with the amount of RAM you want to allocate. For example, if you want to allocate 4 GB of RAM, the line would be as follows:java -Xmx4G -jar server.jar. - Save the modifications to the script.
- Restart the Minecraft server for the changes to take effect.
Modifying the server startup script allows you to have more control over the server’s behavior, including the amount of RAM allocated. By adjusting the -Xmx argument, you specify the maximum amount of memory the server can use. Remember to specify the RAM allocation in gigabytes (G) to maintain consistency.
Once you have saved the modifications and restarted the server, monitor its performance to determine if the increased RAM allocation has improved gameplay responsiveness, reduced lag, or resolved any performance issues. If you encounter any difficulties or the changes do not have the desired effect, you may need to fine-tune the RAM allocation or consider other optimization strategies.
Keep in mind that if you update or reinstall the server software in the future, you may need to reapply the modifications to the startup script to maintain the desired RAM allocation.
Method 4: Using a hosting service with adjustable RAM settings
If you are using a Minecraft server hosting service, you may have access to a control panel that allows you to easily adjust the RAM allocation for your server. This method provides a user-friendly approach to increasing the RAM dedicated to your Minecraft server. Here are the steps to allocate more RAM using a hosting service with adjustable RAM settings:
- Log in to the control panel provided by your hosting service.
- Navigate to the section or tab that allows you to manage server settings or preferences.
- Locate the RAM or memory allocation settings.
- Increase the allocated RAM to your desired amount by adjusting the slider, input field, or selection options provided.
- Save the changes or apply the settings.
- Restart the Minecraft server for the new RAM allocation to take effect.
Using a hosting service with adjustable RAM settings simplifies the process and eliminates the need to modify scripts or manage command line parameters manually. The control panel interface typically allows you to allocate additional RAM with just a few clicks or adjustments.
After increasing the RAM allocation, monitor the server’s performance to evaluate if the changes have positively impacted gameplay responsiveness, reduced lag, or resolved any performance issues. If you encounter any difficulties or the changes do not have the desired effect, you may need to fine-tune the RAM allocation or explore other optimization techniques provided by your hosting service.
Please note that the specific steps and options for adjusting the RAM allocation may vary depending on the hosting service you are using. Consult the documentation or support resources provided by your hosting service for detailed instructions applicable to your specific setup.
Troubleshooting common issues
While allocating more RAM to your Minecraft server can enhance its performance, you may encounter some common issues during the process. Here are a few troubleshooting tips to help you resolve these issues:
- Insufficient available RAM: If you experience performance issues after increasing the RAM allocation, ensure that your system has enough free RAM. Close any unnecessary applications or processes that may be consuming memory and consider allocating a smaller amount of RAM to ensure stability.
- Java version compatibility: Minecraft requires a specific version of Java to run. Ensure that you have the correct Java version installed and that your server and client are using the same Java version. Mismatched Java versions can result in compatibility and performance issues.
- Conflicting plugins or mods: If you are using plugins or mods on your Minecraft server, incompatible or poorly optimized ones can impact server performance. Disable or remove any plugins or mods that may be causing issues and test the server’s performance without them. Gradually add them back one at a time to identify the problematic ones.
- Inadequate server hardware: Allocating more RAM does not solve hardware limitations. If you consistently experience performance issues even with increased RAM allocation, consider upgrading your server hardware, such as the processor, storage, or network capabilities, to better handle the demands of Minecraft.
- Incorrect JVM arguments: Double-check that the JVM arguments, such as
-Xmx, are correctly formatted and properly entered. A small typo or mistake can prevent the server from launching properly or allocating the desired amount of RAM. - Incompatible server version: Ensure that your Minecraft server version is compatible with the version used by the players connecting to the server. Incompatibilities between different Minecraft versions can lead to connectivity issues and gameplay glitches.
If you continue to experience difficulties or encounter other issues while allocating more RAM to your Minecraft server, consult the official Minecraft community forums, hosting provider support, or online resources for guidance. Additionally, make sure to stay updated on the latest Minecraft server software and plugin/mod updates, as they often include performance optimizations and bug fixes.
Remember, troubleshooting is an iterative process, and it may require some experimentation and adjustments to find the optimal RAM allocation and server configuration for your specific setup and player requirements.
Conclusion
Dedicating more RAM to your Minecraft server is a practical way to improve its performance and provide a smoother and more enjoyable gaming experience for you and your players. By increasing the amount of available RAM, you can reduce lag, accommodate more players, enhance world rendering, and optimize plugin and mod performance.
Before allocating more RAM, it’s crucial to check your system requirements, including the operating system, hardware specifications, Minecraft version, and plugin/mod compatibility. Assessing these factors ensures compatibility and prevents potential issues or conflicts.
There are several methods to allocate more RAM, depending on your server setup and preferences. You can use the Minecraft launcher, a command line program, modify the server startup script, or utilize a hosting service with adjustable RAM settings. Each method offers flexibility and allows you to customize the RAM allocation to suit your needs.
During the process, it’s important to monitor the server’s performance and assess the impact of the increased RAM allocation. Fine-tuning may be necessary to achieve optimal results, and troubleshooting common issues, such as insufficient available RAM or conflicts with plugins/mods, may be required.
Remember that increasing RAM allocation is just one aspect of optimizing your Minecraft server. Other factors, such as network connectivity, server hardware, and software optimization, should also be considered to ensure a well-performing and enjoyable gaming environment.
As you embark on the journey of allocating more RAM to your Minecraft server, stay informed, seek assistance when needed, and enjoy the benefits of a smoother and more immersive Minecraft experience for yourself and your community of players.