Introduction
Welcome to the world of Minecraft! Whether you’re a casual player or a seasoned enthusiast, you know how important it is to have a smooth and lag-free gaming experience. One factor that can greatly affect the performance of your Minecraft server is the amount of RAM it has. RAM, or Random Access Memory, is a crucial component that determines how efficiently your server runs.
In this article, we will guide you through the process of adding more RAM to your Minecraft server in version 1.13. With additional RAM, you can handle more players, improve overall server performance, and prevent any lag or crashes.
Before diving into the steps, it’s important to have a basic understanding of RAM and how it relates to Minecraft. RAM serves as a temporary storage space for data that is actively used by the server. When the server runs out of available RAM, it starts using the hard drive, which can significantly slow down the performance.
Minecraft is a highly resource-intensive game, especially when running a server with multiple players. As more players join and interact with the game world, the server requires more RAM to process their actions smoothly. By increasing the amount of RAM allocated to your server, you can ensure a seamless and enjoyable gaming experience for everyone involved.
Now that you understand the importance of RAM for your Minecraft server, let’s take a look at the step-by-step process of adding more RAM and optimizing your server’s performance.
Understanding RAM and Minecraft Server 1.13
RAM, or Random Access Memory, is a vital component of any computer system, including Minecraft servers. It provides temporary storage for data and instructions that the server needs to access quickly. In the context of Minecraft, RAM plays a crucial role in ensuring smooth gameplay, reducing lags, and preventing crashes.
Minecraft Server 1.13 is known for its improved performance and features, but it also demands a significant amount of RAM to function optimally. When players join your server, the server needs to handle their actions, such as mining, crafting, and exploring the game world. These activities require the server to store and process various data, like player positions, block placements, and server-side calculations.
Insufficient RAM can lead to a variety of issues, including lag, delayed actions, and even crashes. When the server runs out of available RAM, it resorts to using the hard drive as virtual memory, which is much slower and can cause severe performance bottlenecks.
Allocating more RAM to your Minecraft server allows it to handle a higher number of players and perform calculations more efficiently. It reduces the strain on the server’s resources and ensures a smooth gameplay experience for all. However, it’s important to note that simply increasing the allocated RAM may not always result in better performance. Proper server optimization, plugin management, and efficient world generation are also crucial factors to consider in improving your server’s performance.
In the next sections, we will guide you through the process of adding more RAM to your Minecraft Server 1.13. This will help you ensure that your server has enough resources to handle the demands of your player base and provide an enjoyable gaming experience for everyone involved.
Step 1: Checking System Requirements
Before you begin the process of adding more RAM to your Minecraft server, it’s crucial to ensure that your system meets the necessary requirements. Insufficient system resources can hinder the effectiveness of adding more RAM and may even cause compatibility issues.
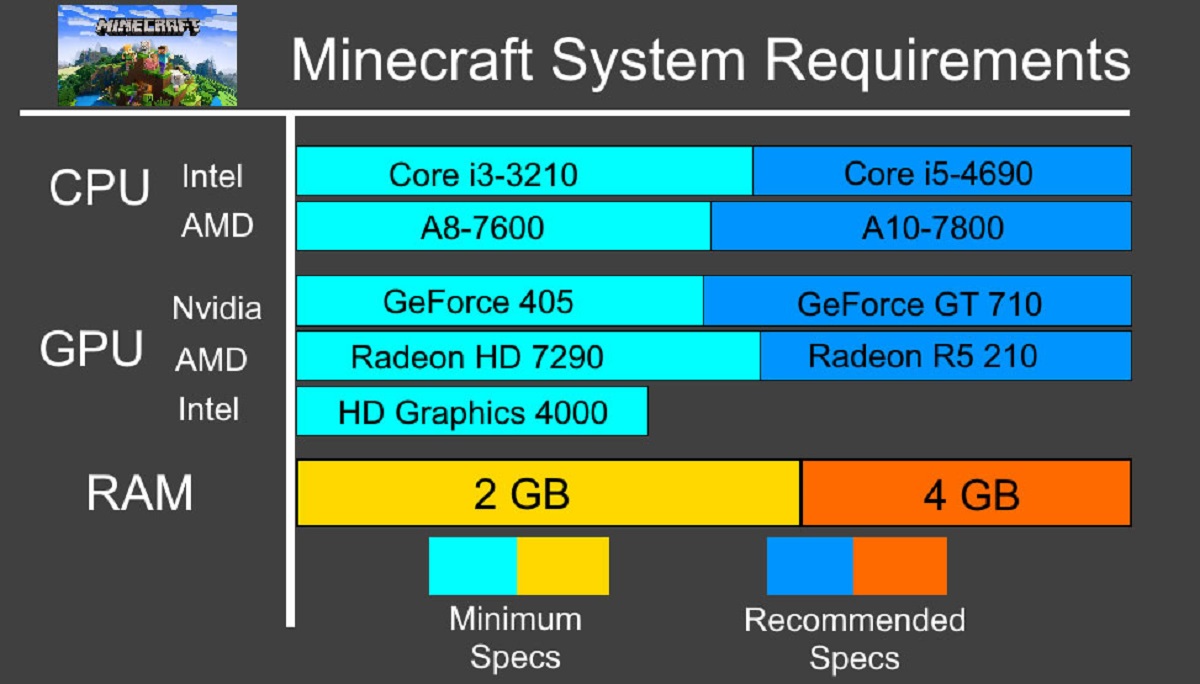
Here are the key system requirements you should check:
- Operating System: Minecraft server is compatible with Windows, macOS, and Linux operating systems. Ensure that your system is running a supported operating system version.
- Processor: Minecraft is a CPU-intensive game, so it’s important to have a capable processor. Check the recommended CPU specifications for Minecraft Server 1.13 and make sure your system meets or exceeds them.
- Available Disk Space: Minecraft server requires disk space to store game data, server files, and world saves. Ensure that you have enough free disk space to accommodate the additional RAM allocation and the growing game world.
- Server Specifications: If you’re using a dedicated server or a hosting service, review the server’s specifications. Ensure that it has sufficient RAM capacity for the desired allocation and that you have administrative access to make changes.
Once you have verified that your system meets these requirements, you can proceed with confidence to the next steps of adding more RAM to your Minecraft server. In the following sections, we will guide you through the process of obtaining additional RAM, backing up your server, and making the necessary changes to optimize server performance.
Step 2: Obtaining More RAM
Adding more RAM to your Minecraft server requires obtaining additional memory modules. The specific steps for obtaining more RAM will depend on the type of system you’re using.
If you’re using a dedicated server or a hosting service, you may need to contact your hosting provider to upgrade your server’s RAM capacity. They will guide you through the process of purchasing and installing additional memory modules.
For those running Minecraft on their personal computer, upgrading the RAM is relatively simple. Here are the general steps:
- Check Your Current RAM: Determine the amount of RAM currently installed in your system. This information can be found in the system settings or by using system diagnostic tools.
- Identify RAM Compatibility: Find out the type and speed of your existing RAM modules. This information is crucial for ensuring compatibility when purchasing new RAM. Look for documentation or use software tools to identify the specifics of your memory modules.
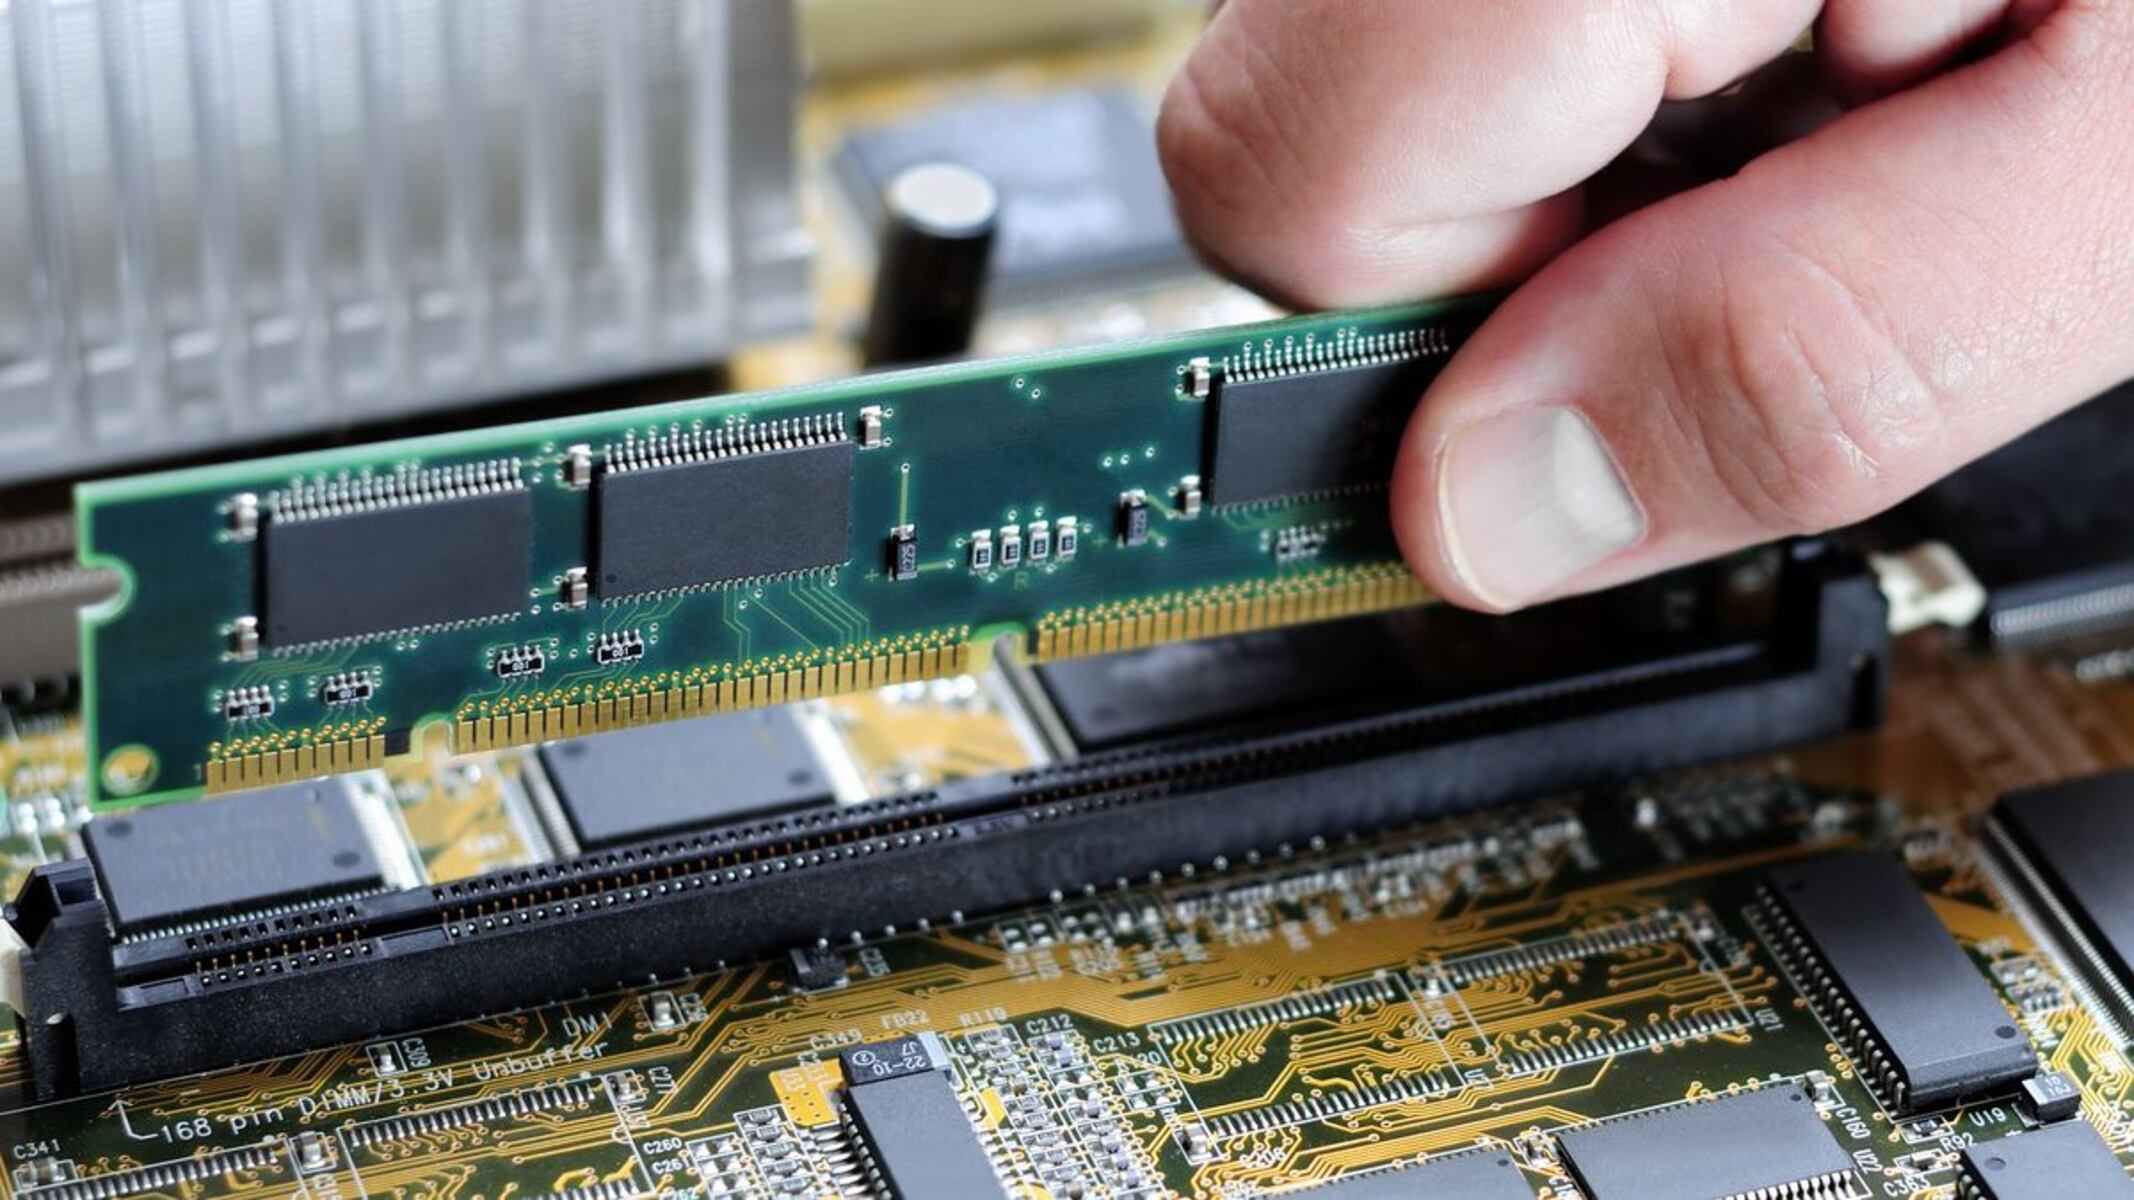
- Purchase Compatible RAM: Shop for additional RAM that matches the type and speed of your existing modules. Be aware of the maximum supported RAM capacity of your motherboard.
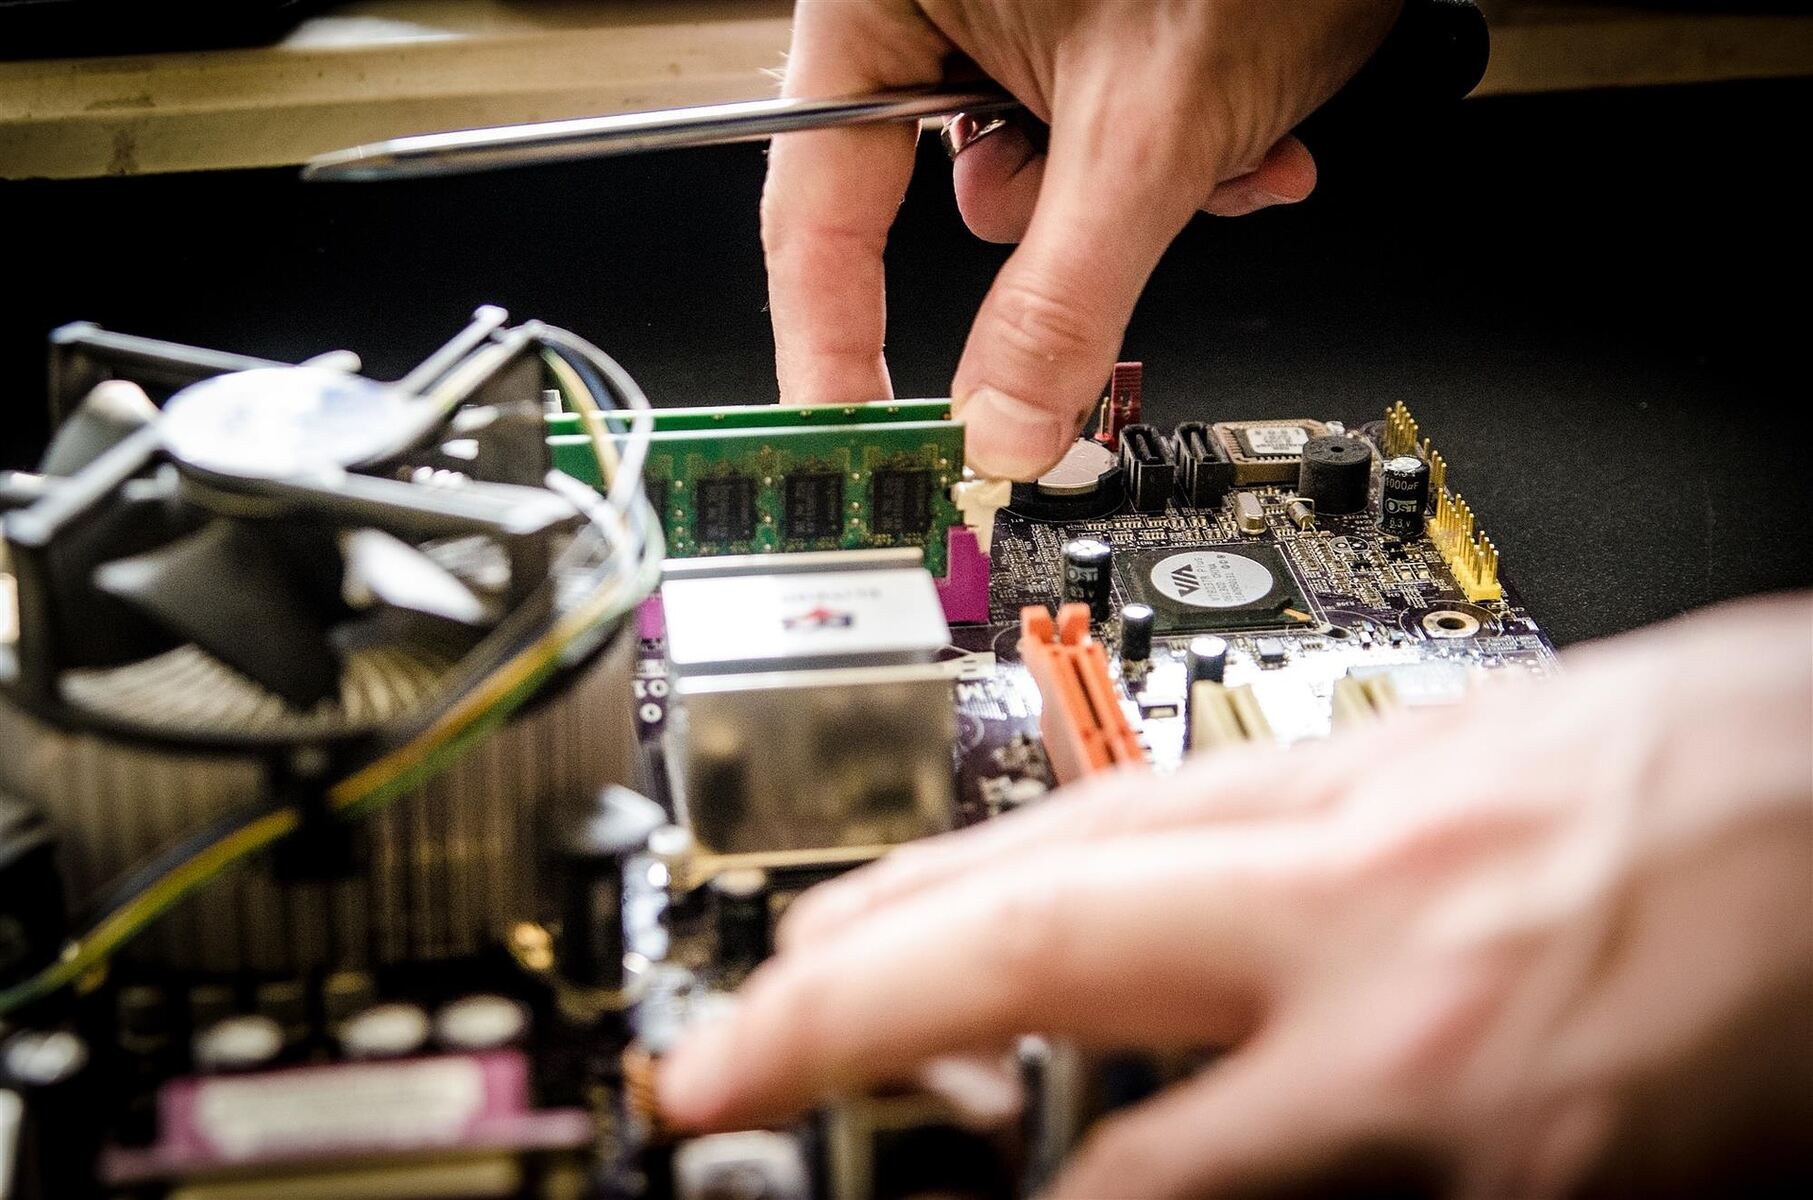
- Install Additional RAM: Carefully install the new RAM modules into your computer following the manufacturer’s instructions. Make sure your computer is turned off and unplugged during the installation process.
- Confirm RAM Installation: Once the new RAM is installed, boot up your system and verify that the added memory is recognized. You can check this in the system settings or use diagnostic tools to confirm the new RAM capacity.
After obtaining more RAM, you can proceed to the next steps of backing up your server and preparing for the allocation process. Adding more RAM will enhance your server’s performance, allowing it to handle more players and processes with improved efficiency.
Step 3: Backing up Your Server
Before making any changes to your Minecraft server, it’s essential to create a backup of all your server files. This ensures that you have a copy of your server in case anything goes wrong during the RAM allocation process or if you need to revert to a previous state.
Here’s how you can back up your Minecraft server:
- Stop the Server: If your Minecraft server is running, gracefully shut it down to prevent any data corruption or incomplete backups.
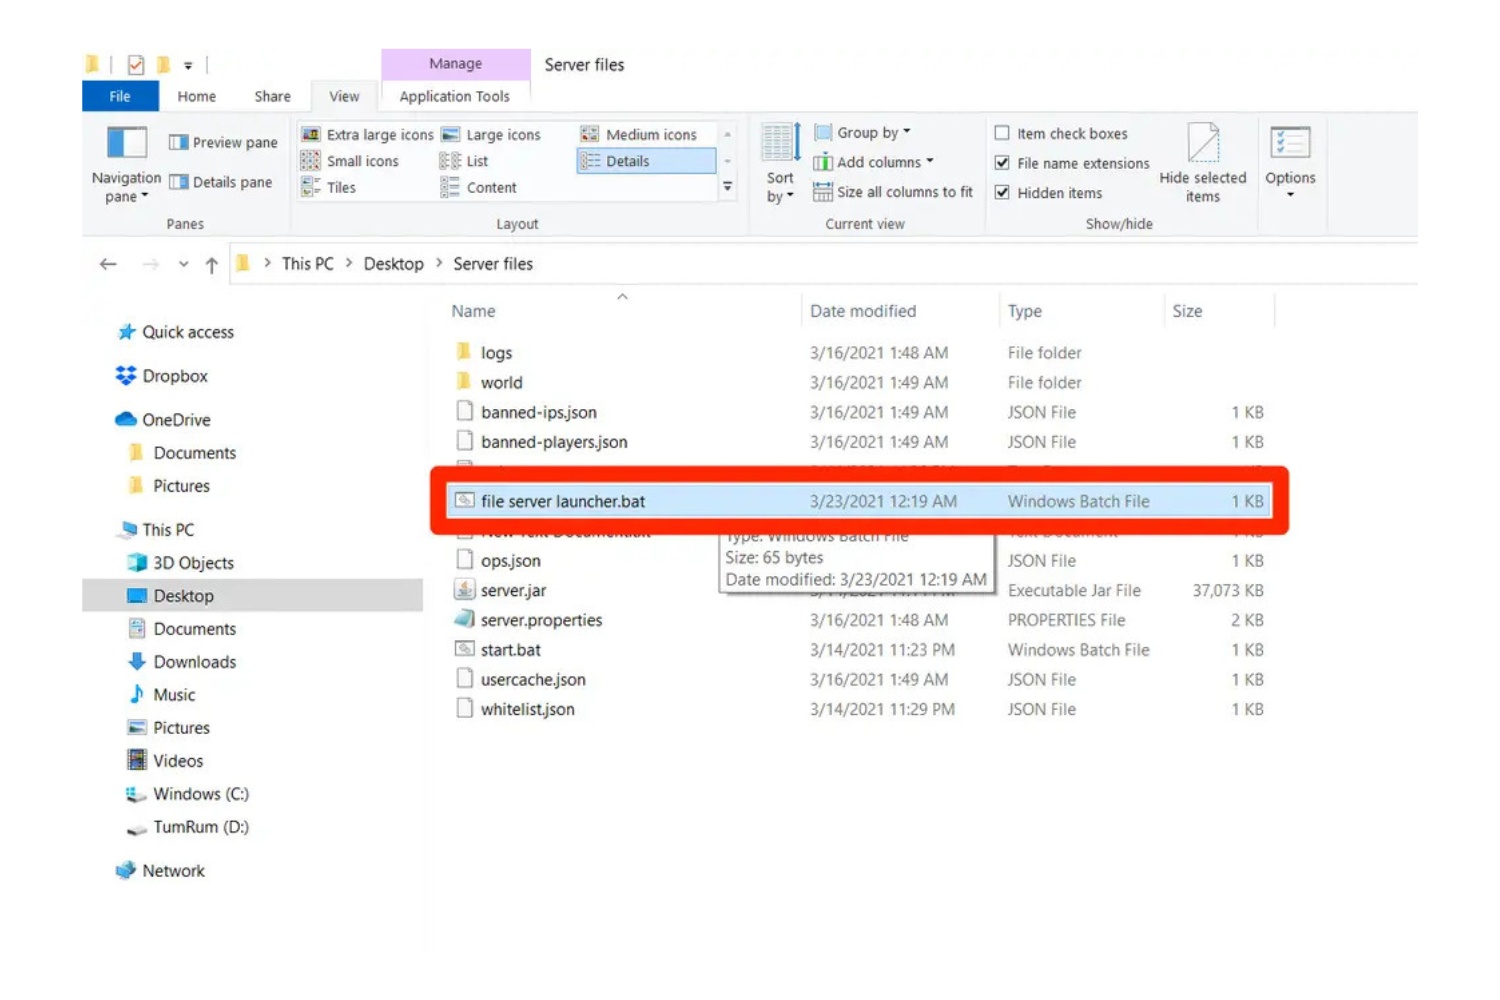
- Locate Server Files: Navigate to the directory where your Minecraft server files are stored. This location can vary depending on your operating system and setup. Typically, the server files are located in a folder named “Minecraft” or “server.”
- Copy Server Files: Select all the files and folders in your Minecraft server directory and make a copy of them. You can do this by right-clicking and selecting “Copy” or by using the appropriate keyboard shortcut.
- Create a Backup Location: Choose a secure location on your computer or an external storage device to store the backup files. It’s recommended to create a new folder specifically for your Minecraft server backups.
- Paste Server Files: Navigate to the backup location you created and paste the copied server files into the new folder. This process may take some time, depending on the size of your server.
- Verify Backup: Once the files are successfully copied, compare the size and content of the original server files with the backup files to ensure that all important data is present and accounted for.
With the backup created, you can proceed with confidence to the next steps of shutting down the server and allocating more RAM. The backup provides you with a safety net in case you need to roll back any changes or restore your server to a previous state.
Step 4: Shutting Down the Server
Before you can allocate more RAM to your Minecraft server, you need to shut it down properly to avoid any data corruption or issues during the process. Here are the steps to shut down your server:
- Notify Players: Inform your players in advance that the server will be temporarily unavailable for maintenance. This will prevent any confusion or frustration when they are unable to connect.
- Save Server Data: All players should save their progress to ensure that no data is lost when the server goes offline. Instruct them to exit the game and wait for the server to come back up.
- Send Server Shutdown Command: Access the server console or administrative panel and gracefully shut down the server. You can do this by typing the appropriate command or using the provided interface.
- Confirm Server Shutdown: Allow some time for the server to shut down completely. You can verify this by checking the server console or panel to ensure that the server has fully stopped.
By shutting down the server correctly, you minimize the risk of data corruption and ensure a smooth transition to the next steps of the RAM allocation process. Remember to communicate with your players and provide them with any necessary updates or information regarding the server maintenance.
Step 5: Allocating More RAM to the Minecraft Server
Now that you’ve backed up your server and shut it down, you can proceed with allocating more RAM to your Minecraft server. This step involves making changes to the server’s startup settings to increase the RAM allocation. Here’s how to do it:
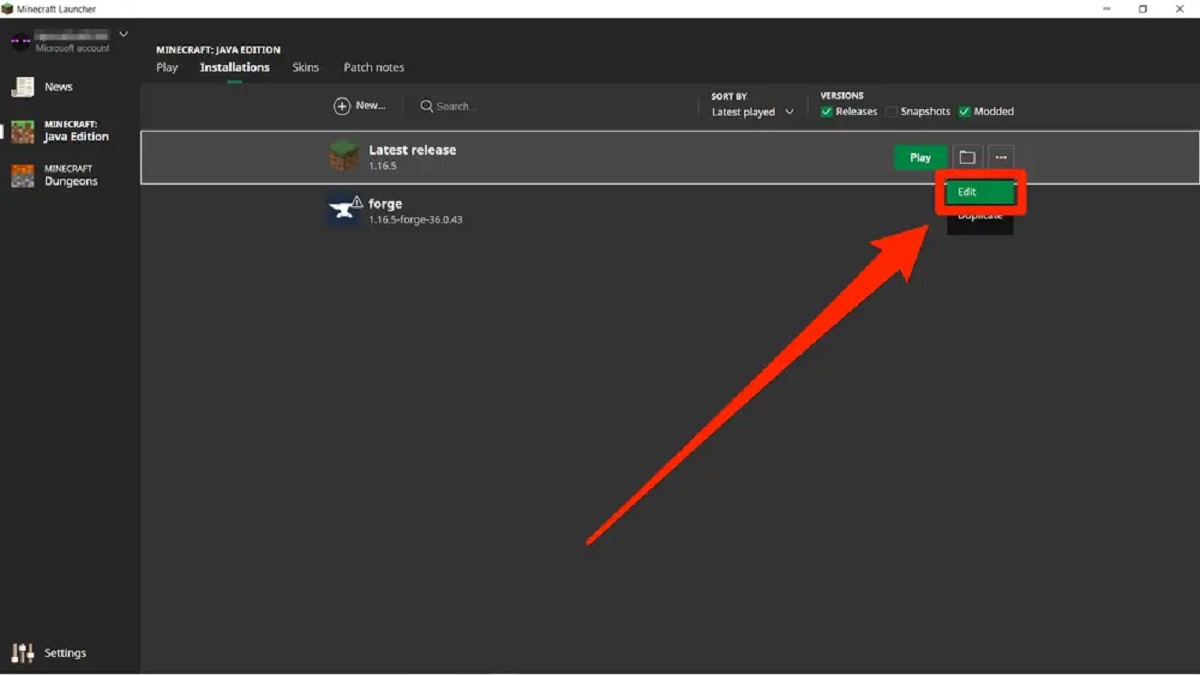
- Locate Server Startup Settings: In your Minecraft server directory, look for a file named “server.properties” or “startup.sh” (for Linux) / “startup.bat” (for Windows). This file contains the settings for starting the server.
- Edit the Startup Settings: Open the file using a text editor, and locate the line that specifies the amount of RAM allocated to the server. It may look similar to “java -Xmx2G -Xms1G -jar minecraft_server.jar”.
- Adjust the RAM Allocation: Modify the value after “-Xmx” to increase the maximum amount of RAM allocated to the server. For example, if it’s currently set to “2G” (gigabytes), you can increase it to “4G” or higher, depending on the available RAM on your system.
- Save and Close the File: After making the necessary changes, save the file and exit the text editor.
By increasing the “Xmx” value, you are allocating more RAM to the Minecraft server, allowing it to utilize the additional memory for improved performance. However, be cautious not to allocate more RAM than your system can handle, as it may cause instability or performance issues.
Once you’ve adjusted the RAM allocation in the startup settings, you’re ready to move on to the next step of restarting the Minecraft server and testing the performance with the increased RAM allocation.
Step 6: Restarting the Server
After allocating more RAM to your Minecraft server, the next step is to restart the server to apply the changes. Restarting the server ensures that the newly allocated RAM is utilized and that the server can run with the updated settings. Here’s how to restart your Minecraft server:
- Savedot: Save any changes you made to the server startup settings file. This is important to ensure that the changes are implemented when the server starts up.
- Close All Server Related Processes: Ensure that there are no remaining Minecraft server processes running in the background. Use the appropriate methods for your operating system to terminate any lingering processes.
- Start the Server: Open the server startup settings file and execute the command to start the Minecraft server. The command may vary depending on your operating system and setup.
- Monitor Server Startup: Watch the server console or logs to ensure that the server starts up without any errors. Look for any messages indicating successful startup and initialization.
- Wait for Server Initialization: Give the server some time to fully initialize and load. Depending on the server’s complexity and world size, this process may take a few moments.
- Verify RAM Allocation: After the server has started up successfully, check the server console or logs to verify that the increased RAM allocation is reflected. Look for a message indicating the amount of allocated memory.
Restarting the Minecraft server is essential to apply the changes you made to the RAM allocation. It ensures that the server can utilize the additional RAM for improved performance and smoother gameplay experiences. Once the server has restarted, you can move on to the next step of verifying the RAM allocation and testing the server’s performance.
Step 7: Verifying the RAM Allocation
After restarting your Minecraft server with the increased RAM allocation, it’s important to verify that the server is indeed utilizing the allocated memory. This step allows you to ensure that the changes you made to the server configuration have been applied correctly. Here’s how you can verify the RAM allocation:
- Access the Server Console: Open the server console or log file, which provides information about the server’s runtime and performance.
- Locate Memory Usage Information: Look for a message or line that displays the server’s current memory usage information. This usually includes the allocated and available memory.
- Check the Allocated Memory: Verify that the allocated memory matches the value you set in the server startup settings. It should reflect the increased RAM allocation.
- Verify Stability and Performance: Observe the server’s performance during gameplay. Pay attention to any improvements in performance, such as reduced lag or smoother gameplay experiences.
- Monitor Resource Usage: Use system monitoring tools to track the server’s resource usage, including CPU and RAM usage. Ensure that the server is using the allocated memory effectively and not encountering any resource bottlenecks.
By verifying the RAM allocation, you can confirm that the Minecraft server is using the increased memory as intended. This step helps you ensure that your server is optimized for performance and can handle a higher player capacity without any issues.
If you notice any discrepancies or encounter performance problems, double-check the server startup settings for any mistakes in the allocated memory value. You can make the necessary adjustments and restart the server to apply the changes correctly.
Once you are satisfied with the verified RAM allocation and the server’s performance, you can proceed to the final step of testing your Minecraft server to assess its stability and overall performance.
Step 8: Testing the Performance of Your Minecraft Server
After allocating more RAM to your Minecraft server and verifying the RAM allocation, it’s crucial to test the server’s performance to assess its stability and overall capability. This step allows you to ensure that the server can handle higher player loads and provide a smooth and enjoyable gameplay experience. Here’s how you can test the performance of your Minecraft server:
- Invite Testers: Gather a group of players or friends who can help you test the server. Ensure that they are available and willing to participate in the testing process.
- Establish Test Scenarios: Discuss with your testers the specific scenarios and gameplay situations you want them to explore during the testing process. This can include tasks like building structures, mining, exploring, or engaging in battles.
- Monitor Server Logs: Pay attention to any error messages or warnings in the server logs. These can indicate issues that need to be addressed for optimal server performance.
- Observe Gameplay: Monitor the gameplay experience of the testers during the testing session. Look for any signs of lag, delayed actions, or other performance-related issues that may indicate the need for further optimization.
- Solicit Feedback: Encourage your testers to provide feedback on their experience while playing on the server. Ask for their input on any performance issues they encountered or suggestions for improving the server’s performance.
- Make Adjustments: Based on the feedback and observations from the testing process, make any necessary adjustments to further optimize the server’s performance. This can include fine-tuning server settings, managing plugins, or optimizing the world generation process.
- Repeat the Testing: After making adjustments, repeat the testing process to evaluate the effectiveness of the changes. This iterative approach allows you to refine the server’s performance until you achieve the desired result.
By thoroughly testing the performance of your Minecraft server, you can identify and address any performance issues or bottlenecks. This allows you to optimize the server for smooth gameplay and ensure a positive experience for all players on your server.
Remember that performance optimization is an ongoing process. Regularly monitor and test your Minecraft server to identify any emerging issues and continually enhance the server’s performance as needed.
Conclusion
Adding more RAM to your Minecraft server is a crucial step in optimizing its performance and ensuring a smooth gameplay experience for all players. By increasing the amount of allocated memory, you provide the server with the resources it needs to handle a higher player capacity and process game data more efficiently.
In this guide, we have walked you through the step-by-step process of adding more RAM to your Minecraft server. We started with understanding the importance of RAM and its relationship to Minecraft Server 1.13. We then guided you through checking system requirements, obtaining more RAM, backing up your server, shutting it down, allocating more RAM, restarting the server, verifying the RAM allocation, and testing the server’s performance.
Throughout this process, it’s important to ensure that your system meets the necessary requirements and that you have the necessary administrative access to make changes. Additionally, it’s crucial to back up your server before making any modifications to minimize the risk of data loss or corruption.
Remember that adding more RAM is just one aspect of optimizing your server’s performance. It’s equally important to regularly monitor and maintain the server, manage plugins, and optimize world generation to ensure optimal performance. Continually testing the server’s performance and seeking feedback from players can help you identify areas for improvement and enhance the overall gameplay experience.
With the increased RAM allocation and proper server optimization, you can create a Minecraft server that can handle more players and provide a seamless and enjoyable gaming experience for all. So, take the time to follow the steps outlined in this guide and unleash the full potential of your Minecraft server!