Introduction
Having a fast and efficient CPU (Central Processing Unit) is essential for a smooth and speedy computing experience. Whether you’re a gamer, a content creator, or simply someone who wants their computer to run faster, there are several steps you can take to improve your CPU performance. In this article, we will explore various ways to optimize your processor and maximize its capabilities.
Your CPU is the brain of your computer, responsible for executing instructions and performing calculations. Over time, it may start to lag or struggle when running demanding tasks and applications. Fortunately, there are several solutions that can help improve the performance of your CPU without having to invest in a new one.
Upgrading your processor is not always necessary, as there are other factors that can contribute to slow CPU performance. By optimizing your operating system, increasing your RAM, cleaning your computer, managing startup programs, using performance-boosting tools, adjusting power settings, and even overclocking your CPU, you can significantly enhance your computer’s processing speed.
Throughout this article, we will delve into each of these methods in detail, providing you with step-by-step instructions and tips to help you get the best performance out of your CPU. Whether you’re a beginner or an advanced user, there’s something for everyone in this guide.
By following these tips and techniques, you can get the most out of your existing CPU and improve the overall performance of your computer. So, let’s get started and explore the various ways you can enhance your CPU performance!
Upgrade Your Processor
One of the most effective ways to improve CPU performance is to upgrade your processor. However, this option may not be feasible for everyone, as it can be quite costly and require technical expertise. Before considering a processor upgrade, it’s crucial to assess your specific needs and determine if it’s the right solution for you.
If you decide to go ahead with a processor upgrade, there are a few steps to follow:
- Research and identify compatible processors: Check your computer’s specifications and motherboard compatibility to find out which processors are compatible with your system. Look for processors that offer higher clock speeds and more cores for improved performance.
- Consider the socket type: Take note of the socket type required for the new processor. This will help ensure that the upgraded processor is compatible with your existing motherboard.
- Purchase the new processor: Once you have identified a suitable processor, purchase it from a reputable retailer or directly from the manufacturer.
- Prepare for installation: Before installing the new processor, make sure to gather the necessary tools, such as thermal paste and a screwdriver. It’s also important to read the instructions provided by the manufacturer.
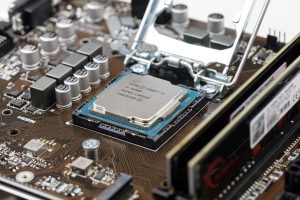
- Install the new processor: Carefully remove the old processor and replace it with the new one. Make sure to apply a thin layer of thermal paste to facilitate heat transfer. Follow the installation guidelines provided by the manufacturer to ensure proper placement and avoid damaging the processor.
- Test and monitor: Once the new processor is installed, boot up your computer and run stress tests or benchmarking tools to ensure that the new processor is functioning correctly. Monitor temperatures and performance to ensure stability.
It’s important to note that upgrading your processor may require additional upgrades, such as a new motherboard or RAM. Consider consulting with a professional or doing thorough research before proceeding with the upgrade.
Upgrading your processor can provide a significant boost in performance, especially if you were previously using an older or lower-end processor. However, it’s important to weigh the costs and benefits before making a decision. In some cases, optimizing your existing processor and implementing other performance-enhancing techniques may be sufficient to meet your needs.
Optimize Your Operating System
To improve CPU performance, optimizing your operating system is crucial. By fine-tuning your system settings and implementing various optimizations, you can maximize the efficiency of your CPU and enhance overall performance. Here are some steps to optimize your operating system:
- Update your operating system: Keeping your OS up to date ensures that you have the latest bug fixes, security patches, and performance improvements. Check for updates regularly and install them as soon as they become available.
- Manage startup programs: Many programs automatically start up when you boot your computer, consuming valuable CPU resources. Identify and disable unnecessary startup programs to reduce the strain on your CPU. You can do this through the Task Manager or by using third-party tools.
- Disable visual effects: Windows and other operating systems often include visual effects that can be resource-intensive. Disabling or reducing these effects, such as animations and transparency, can free up CPU power. In Windows, you can adjust these settings in the Performance Options menu.
- Uninstall unnecessary software: Over time, we accumulate various programs and applications that we no longer need. Uninstalling unnecessary software not only frees up storage space but also reduces the burden on your CPU. Use the Control Panel or specialized uninstaller software to remove unwanted programs.
- Optimize power settings: Adjusting your power settings can have a significant impact on CPU performance. For example, switching to a High-Performance power plan can ensure that your CPU operates at maximum capacity. However, keep in mind that this may result in higher power consumption and increased heat generation.
- Use an SSD for storage: Upgrading from a traditional hard drive to a solid-state drive (SSD) can greatly improve performance, as SSDs provide faster read and write speeds. This can reduce the load on your CPU when opening programs, transferring files, and accessing data.
- Close unnecessary background processes: Some programs and processes run in the background, consuming CPU resources even when you’re not actively using them. Use the Task Manager to identify and close any unnecessary processes that are hogging system resources.
Implementing these optimizations can help maximize the performance of your CPU by reducing unnecessary workload and improving system responsiveness. Regularly maintaining and optimizing your operating system will ensure that your CPU operates at its full potential.
Increase Your RAM
Another effective way to improve CPU performance is by increasing the amount of RAM (Random Access Memory) in your computer. RAM plays a crucial role in storing and accessing data that your CPU needs to process. If your computer has insufficient RAM, it can lead to slow performance and excessive CPU usage. Here are some steps to increase your RAM:
- Determine the maximum RAM capacity: Check the specifications of your computer or motherboard to find out the maximum amount of RAM it supports. This will help you understand the upgrade options available to you.
- Identify the RAM type: Determine the type of RAM your computer uses, such as DDR3 or DDR4. This is important when purchasing new RAM modules to ensure compatibility.
- Purchase additional RAM modules: Once you know the maximum capacity and type of RAM supported, purchase the appropriate RAM modules from a reputable retailer or online.
- Power off your computer: Before installing the new RAM, make sure to shut down your computer and unplug it from the power source. This will prevent any potential damage during the installation process.
- Open your computer case: Depending on your computer’s design, you may need to remove the side panel or access a specific compartment to reach the RAM slots.
- Insert the new RAM modules: Align the notches on the RAM module with the slot on the motherboard and gently insert the module until it clicks into place. Make sure the module is securely seated.
- Close your computer case: Once the new RAM modules are installed, carefully close the computer case and secure any screws or latches.
- Power on your computer: Turn on your computer and check that the new RAM modules are detected. You can verify this by checking the system information in your operating system or using third-party software.
Increasing your RAM can significantly improve CPU performance by allowing your computer to handle more data at once. This reduces the need for your CPU to constantly access and swap data with the storage device, resulting in faster processing speeds and smoother multitasking.
However, it’s important to note that increasing your RAM is not always necessary or possible, particularly on certain laptops or older systems. In such cases, optimizing your existing RAM usage and implementing other performance-enhancing techniques can still help improve CPU performance.
Clean Your Computer
Regularly cleaning your computer is vital for maintaining optimal CPU performance. Over time, dust, dirt, and debris can accumulate inside your computer, blocking airflow and causing the CPU to overheat. Cleaning your computer can help prevent overheating, reduce fan noise, and improve overall efficiency. Here are some steps to clean your computer:
- Power off your computer: Before cleaning, make sure to shut down your computer and unplug it from the power source. This will ensure your safety and prevent any accidental damage.
- Gather cleaning tools: Prepare the necessary tools for cleaning, such as a can of compressed air, a soft brush or microfiber cloth, and a vacuum cleaner with a brush attachment.
- Clean the exterior: Use a soft cloth or microfiber cloth to wipe down the exterior of your computer, removing any dust or fingerprints.
- Clean the keyboard and peripherals: If you notice dirt or debris on your keyboard or other peripherals, gently clean them with a soft brush or microfiber cloth. You can also use compressed air to blow away any trapped particles.
- Open the computer case: Depending on your computer’s design, you may need to remove the side panel or access a specific compartment to clean the internal components.
- Remove dust using compressed air: Use the compressed air can to blow away dust from the CPU cooler, the fans, and other components. Be careful not to hold the can too close or spray too forcefully, as this can cause damage.
- Clean the vents: Look for the vents or grilles on your computer’s case and use the compressed air to blow away any dust buildup. This will help improve airflow and prevent overheating.
- Vacuum the surroundings: Use the brush attachment on your vacuum cleaner to gently clean the area around your computer, removing any loose dust and debris.
- Close the computer case: Once everything is clean and free of dust, carefully close the computer case, ensuring that all screws or latches are properly secured.
- Power on your computer: After cleaning, plug in your computer and power it on. Check that the fans are running smoothly and listen for any unusual noises.
By regularly cleaning your computer, you can ensure that the CPU remains cool and performs optimally. Removing dust and debris allows for better airflow, preventing overheating and potential performance issues. Aim to clean your computer every few months or as needed, depending on the environment and usage patterns.
In addition to physical cleaning, it’s also important to regularly clean up unwanted files, uninstall unnecessary programs, and perform disk cleanup to free up storage space. This can further enhance CPU performance by improving system responsiveness and reducing storage-related bottlenecks.
Manage Your Startup Programs
When you start your computer, several programs and applications may automatically launch and run in the background. This can consume valuable CPU resources and cause your computer to take longer to boot up. By managing your startup programs, you can reduce the strain on your CPU and improve overall performance. Here’s how to do it:
- Access the startup programs list: In Windows, you can access the startup programs list by opening the Task Manager and navigating to the “Startup” tab. On macOS, go to “System Preferences” and choose “Users & Groups” or “Accounts,” then select your user account and click on the “Login Items” tab.
- Identify unnecessary startup programs: Review the list of programs that are set to launch at startup. Take note of any programs that are not essential or that you rarely use.
- Disable unwanted startup programs: In the Task Manager (Windows), right-click on the program you want to disable and select “Disable.” On macOS, uncheck the box next to the program you want to remove from startup.
- Prioritize essential programs: Identify the programs that are crucial for your workflow or that you use frequently. Ensure that they are enabled to start up with your computer.
- Research unfamiliar programs: If you are unsure about the purpose or importance of a particular program, research it online to determine whether it is necessary for startup.
- Restart your computer: After making changes to the startup programs list, restart your computer to apply the changes. Check if the startup time has improved and monitor CPU usage to ensure that unnecessary programs are no longer running in the background.
By managing your startup programs, you can significantly reduce the amount of CPU resources consumed during startup. This allows your computer to boot up faster and ensures that more processing power is available for the tasks and applications you use.
It’s important to note that not all startup programs can or should be disabled. Some programs, such as antivirus software or essential system utilities, are necessary for the proper functioning of your computer. Exercise caution when disabling startup programs and prioritize based on your specific needs.
Regularly reviewing and managing your startup programs will help keep your computer running smoothly and efficiently, without unnecessary software hogging resources in the background.
Use Performance-Boosting Tools
In addition to optimizing your computer’s settings and managing startup programs, utilizing performance-boosting tools can significantly improve CPU performance. These tools are designed to identify and resolve issues that may be affecting your computer’s speed and responsiveness. Here are some performance-boosting tools you can use:
- Antivirus and malware scanners: Regularly scanning your computer for viruses, malware, and other malicious software can help maintain CPU performance. These tools detect and remove potentially harmful programs that can slow down your system.
- Disk cleanup and defragmentation: Over time, your hard drive can become cluttered with temporary files, cached data, and fragmented files. Running disk cleanup and defragmentation tools can free up storage space and optimize file access, resulting in faster disk read and write speeds.
- System optimization suites: There are various system optimization suites available that offer a range of tools and features to enhance CPU performance. These suites often include disk cleanup, registry cleaning, startup program management, and performance monitoring tools.
- Driver updaters: Outdated or incompatible device drivers can cause performance issues. Using driver updater tools can help identify and update outdated drivers, ensuring that your hardware is functioning optimally.
- Hardware monitoring software: Monitoring tools allow you to keep an eye on your CPU temperature, fan speeds, and system performance. They can help you identify any issues with overheating or high CPU usage and take necessary measures to address them.
- Memory management tools: Memory management tools can optimize how your computer uses RAM, freeing up memory and preventing excessive usage. They can also help identify memory leaks and other issues that may affect CPU performance.
- Uninstaller and cleanup utilities: These tools help you uninstall programs completely, removing any residual files or registry entries that may impact CPU performance. They can also clean up junk files and temporary files, freeing up storage space.
When using performance-boosting tools, it’s essential to choose reputable and trustworthy software from known developers. Be cautious of installing multiple optimization tools, as they can sometimes conflict with each other or have redundant features. It’s recommended to research and select a comprehensive suite that suits your needs best.
Remember to regularly update and run these tools to keep your system optimized and maintain optimal CPU performance. However, exercise caution and create backups before making any significant changes to your system, as some tools can modify critical settings that may affect stability.
By utilizing performance-boosting tools, you can proactively address performance issues and ensure that your CPU operates at its full potential.
Adjust Power Settings
Optimizing power settings on your computer can have a significant impact on CPU performance. By adjusting power settings, you can strike a balance between energy efficiency and performance. Here’s how you can adjust power settings:
- Open the Power Options menu: In Windows, you can access the Power Options menu by right-clicking on the battery icon in the system tray and selecting “Power Options.” On macOS, go to “System Preferences” and select “Energy Saver.”
- Choose a power plan: Windows offers different power plans, such as Balanced, Power saver, and High Performance. On macOS, you can choose between optimized and normal power settings.
- Adjust advanced power settings: If available, click on “Change plan settings” or “Advanced settings” to further customize power settings. Here, you can fine-tune CPU performance, screen brightness, hard disk sleep, and other power-related options.
- Set processor power management: In the advanced power settings, navigate to the processor power management section. Adjust parameters such as minimum and maximum processor state to control how much power the CPU consumes and how it scales performance.
- Enable power-saving features: Consider enabling power-saving features like Intel SpeedStep or AMD Cool’n’Quiet, which dynamically adjust the CPU frequency and voltage based on workload, reducing power consumption and heat generation.
- Configure sleep settings: Adjust the sleep settings to ensure that your computer enters sleep or hibernation mode when idle for a specific duration. This can conserve energy and reduce unnecessary CPU usage.
- Save and apply changes: Once you have adjusted the power settings to your preferences, save the changes and exit the Power Options menu.
Choosing the right power plan depends on your usage patterns and priorities. If you require maximum CPU performance at all times, selecting the High Performance power plan can ensure that your CPU operates at its maximum capacity. However, keep in mind that this may result in higher power consumption and increased heat generation. On the other hand, the Power saver plan prioritizes energy efficiency over performance and may limit CPU performance to conserve power.
It’s important to note that adjusting power settings may have a more noticeable impact on laptops and portable devices, as they are typically more power-constrained. Desktop users may have more flexibility in choosing higher-performance settings if power consumption is not a major concern.
By adjusting power settings and finding the right balance between performance and energy efficiency, you can optimize CPU performance and ensure efficient power usage for your computing needs.
Overclock Your CPU
For advanced users seeking maximum CPU performance, overclocking can be an option. Overclocking involves pushing your CPU beyond its default clock speed to achieve higher performance. However, it’s important to note that overclocking carries some risks, such as increased heat generation and potential instability. Here are some steps to safely overclock your CPU:
- Research your CPU: Before attempting to overclock, gather information about your specific CPU model, including its base clock speed, maximum allowable temperature, and known overclocking capabilities. You can find this information on the manufacturer’s website or enthusiast forums.
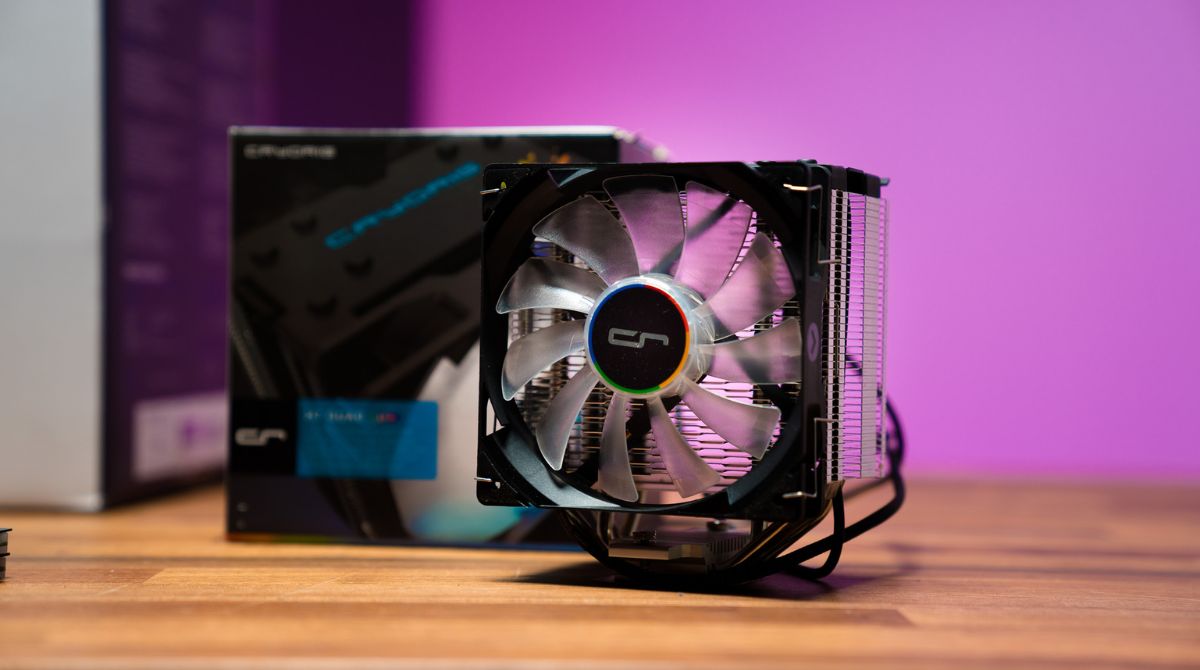
- Ensure proper cooling: Overclocking can significantly increase heat output, so it’s crucial to have adequate cooling in place. This may involve upgrading your CPU cooler, ensuring proper airflow in your case, and applying high-quality thermal paste between the CPU and cooler for efficient heat transfer.
- Access your motherboard BIOS: Restart your computer and access the BIOS or UEFI settings. You can typically do this by pressing a specific key, such as Delete, F2, or F12, during the boot-up process. Consult your motherboard manual or manufacturer’s website for the precise steps.
- Adjust CPU settings: In the BIOS or UEFI settings, locate the CPU or frequency settings. Here, you can make adjustments to the base clock speed, voltage, and multiplier. Incrementally increase the clock speed and voltage, testing stability at each step.
- Stress test: After each adjustment, stress test your CPU using software like Prime95 or Intel Burn Test. These programs put a heavy load on the CPU to ensure stability. Monitor temperatures during stress testing and make sure they stay within safe limits.
- Monitor and fine-tune: Overclocking is an iterative process that requires careful monitoring and fine-tuning. If your system becomes unstable or temperatures exceed safe limits, revert to previous settings or adjust the clock speed and voltage to more conservative values.
- Ensure stability: Once you find a stable overclock, run longer stress tests to ensure stability under extended periods of high load and heavy multitasking. This helps ensure that your system can handle sustained overclocked performance without crashes or errors.
It’s important to note that overclocking voids the warranty of your CPU, and improper overclocking can potentially damage your hardware. Proceed with caution and take your time to understand the process thoroughly before attempting to overclock your CPU.
Overclocking is not recommended for everyone, as it involves considerable technical knowledge and a willingness to accept the risks associated with it. If you’re unsure or uncomfortable with the process, it’s best to avoid overclocking and focus on other methods of improving CPU performance.
By overclocking your CPU responsibly and ensuring adequate cooling, you can potentially achieve significant performance gains and tailor your CPU’s performance to your specific needs.
Conclusion
Improving CPU performance is essential for achieving a faster and more efficient computing experience. Whether you’re a gamer, a content creator, or simply someone who wants their computer to run smoothly, implementing the right techniques can make a significant difference. Throughout this article, we explored various methods to enhance CPU performance without having to invest in a new processor.
We discussed the option of upgrading your processor, weighing the costs and benefits before deciding whether it’s necessary for your specific needs. Additionally, we explored optimizations like optimizing your operating system, increasing your RAM, cleaning your computer, managing startup programs, using performance-boosting tools, adjusting power settings, and even overclocking your CPU for advanced users.
Each method offers its own benefits and considerations. Optimizing your operating system, managing startup programs, and using performance-boosting tools are all practical and accessible for users at any technical level. Increasing your RAM and upgrading your processor require a higher level of expertise and consideration of hardware compatibility.
It’s important to remember that not all methods may be suitable for your unique situation. Assess your specific needs, technical capabilities, and budget before implementing any changes. In some cases, combining multiple techniques may yield the best results.
By following the steps outlined in this article, you can optimize your CPU and enhance overall performance, whether it’s for improved gaming, faster rendering, or smoother multitasking. Regular maintenance, including cleaning and keeping your operating system up to date, will also contribute to a more efficient system.
Remember that while improving CPU performance is important, it’s equally crucial to strike a balance between performance and stability. Monitor temperatures, watch for signs of instability, and make adjustments to ensure the longevity of your hardware.
In the end, the goal is to create a computing environment that suits your needs and allows your CPU to perform at its full potential. Stay informed, stay proactive, and enjoy the benefits of a faster and more efficient computer!