Introduction
The central processing unit (CPU) is the brain of a computer, responsible for executing instructions and performing calculations. As technology advances, CPUs become more powerful and efficient, delivering incredible performance for various tasks. However, one aspect that has always been a concern for computer enthusiasts and gamers is the heat generated by CPUs during operation.
To address this issue, some individuals have turned to a process known as CPU delidding. Delidding involves removing the integrated heat spreader (IHS) that sits on top of the CPU die and replacing it with a more efficient thermal interface material (TIM). This method has gained popularity among overclockers and enthusiasts who aim to achieve better thermal performance and reduce CPU temperatures.
In this article, we explore the concept of CPU delidding and dive into the reasons why you might consider delidding your own CPU. We will walk you through the potential benefits of delidding, the risks involved, and provide some practical tips for safely delidding your CPU if you decide to proceed.
What is CPU Delidding?
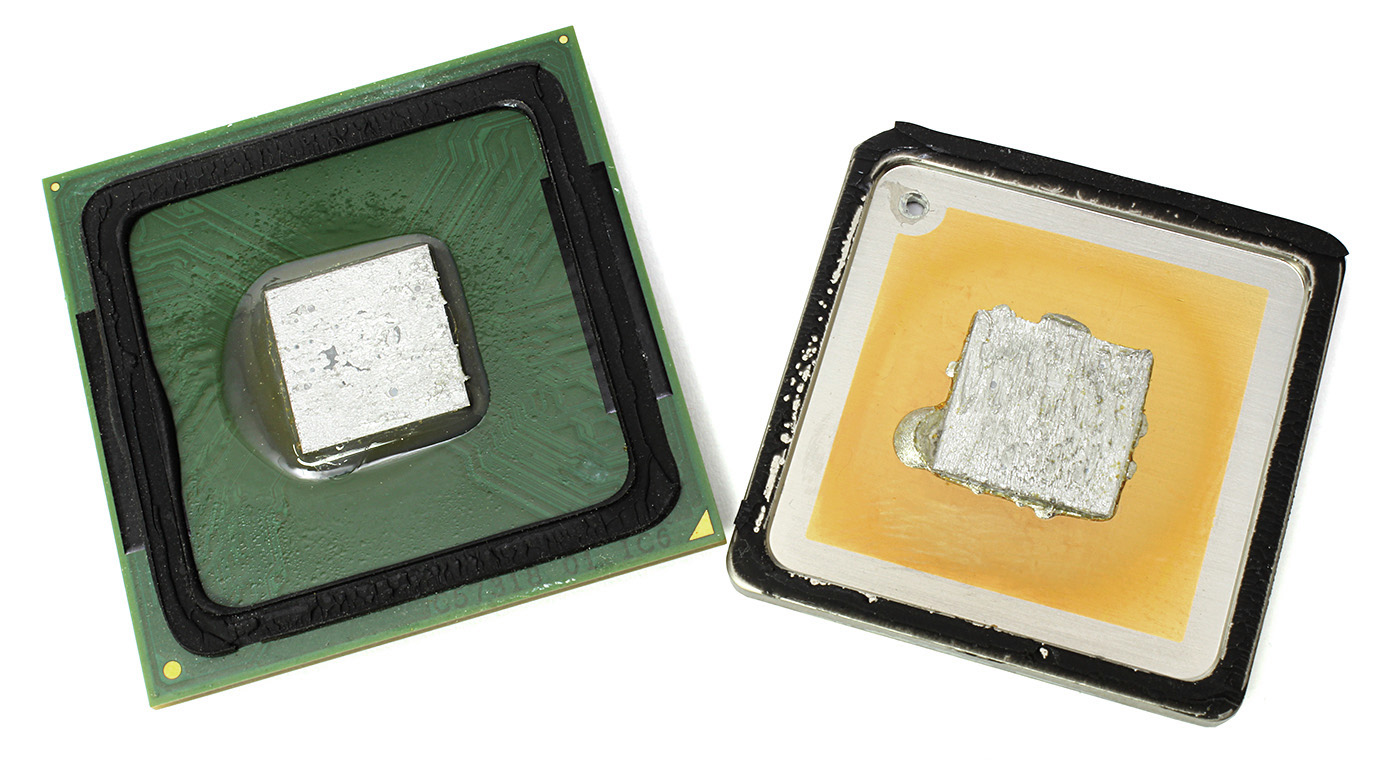
CPU delidding is the process of removing the integrated heat spreader (IHS) from the central processing unit (CPU). The IHS is a metal casing that sits on top of the CPU die and is typically soldered or glued in place. Its purpose is to distribute heat evenly across the surface and protect the delicate CPU components.
The process of delidding involves carefully separating the IHS from the CPU die using specialized tools or techniques. Once removed, the user can replace the stock thermal interface material (TIM) with a higher quality thermal paste or even opt for liquid metal, which has better thermal conductivity. The IHS is then reattached to the CPU using an adhesive or the existing solder.
CPU delidding has gained attention in recent years, primarily driven by the overclocking community. Overclockers push their CPUs beyond their stock frequencies to achieve higher performance. However, this often results in increased heat output and the need for improved cooling solutions. Delidding provides a means to enhance thermal performance and reduce temperatures, allowing for more stable overclocks.
It’s important to note that not all CPUs can be delidded. Some CPUs have soldered IHS that cannot be easily removed without causing damage. In contrast, others have more easily removable IHS components, making delidding a viable option. Therefore, it’s essential to research your specific CPU model before attempting to delid.
Why Delid Your CPU?
There are several reasons why you might consider delidding your CPU. While it may not be suitable for every user, certain benefits make it an attractive option for overclockers, enthusiasts, and those seeking improved thermal performance. Let’s explore these reasons in more detail:
Improved Thermal Performance
Heat dissipation is a critical aspect of CPU performance. When a CPU operates at high temperatures, it can negatively impact its stability and longevity. By delidding your CPU and replacing the stock thermal interface material (TIM) with a higher-quality thermal paste or liquid metal, you can significantly improve heat transfer. This leads to lower temperatures and enhances the overall thermal performance of your CPU.
Overclocking Potential
Overclocking involves increasing the operating frequency of your CPU to achieve higher performance. However, overclocking generates more heat, which can limit the stability and potential of your CPU. Delidding allows for better cooling capabilities, enabling users to push their CPUs further and achieve higher overclocks without compromising stability. The improved thermal performance of a delidded CPU can make a significant difference in reaching higher clock speeds.
Reduced CPU Temperatures
One of the most noticeable benefits of delidding is reduced CPU temperatures. Lower temperatures translate to better overall performance, as CPUs can maintain higher clock speeds without thermal throttling. Additionally, lower temperatures also prolong the lifespan of your CPU by reducing stress on the internal components. Whether you’re a gamer, content creator, or simply a power user looking for a cooler and more efficient system, delidding can make a noticeable difference in temperature reduction.
Decreased Fan Noise
When CPUs operate at high temperatures, cooling fans ramp up to dissipate the heat generated. This often results in increased fan noise, which can be bothersome, especially for those seeking a quieter computing experience. Delidding and optimizing the thermal solution can reduce CPU temperatures, allowing fans to operate at lower speeds and significantly reducing noise levels. This is particularly beneficial for users who value a silent PC or work in noise-sensitive environments.
Overall, delidding your CPU can provide numerous benefits, including improved thermal performance, overclocking potential, reduced CPU temperatures, and decreased fan noise. However, it’s essential to consider the potential risks involved and follow proper precautions when attempting to delid your CPU, as we will explore in the following sections.
Improved Thermal Performance
One of the primary reasons why enthusiasts and overclockers choose to delid their CPUs is to achieve improved thermal performance. CPUs generate heat during operation, and if not adequately dissipated, it can lead to reduced performance and potential damage.
When a CPU is manufactured, a thermal interface material (TIM) is applied between the CPU die and the integrated heat spreader (IHS). However, the stock TIM may not have optimal thermal conductivity, resulting in inefficient heat transfer. By delidding and replacing the stock TIM with a higher-quality thermal paste or liquid metal, heat transfer can be significantly enhanced.
Thermal paste is a common choice for delidding. It is easy to apply and offers better thermal conductivity than the stock TIM. Applicants can choose from various types of thermal paste with different thermal properties, allowing for customization based on their specific needs. Thermal paste offers a balance between improved thermal performance and ease of application.
For those seeking the highest thermal conductivity, liquid metal is an option. Liquid metal consists of a metallic compound that has exceptional thermal conductivity. It offers better heat transfer compared to traditional thermal paste and is often used by extreme overclockers to achieve the lowest possible temperatures. However, liquid metal can be more challenging to apply and requires extra caution due to its conductive properties.
By using an improved TIM, the heat generated by the CPU can be more efficiently transferred to the cooling solution, whether it’s an air cooler or liquid cooling system. This results in lower CPU temperatures, allowing the CPU to maintain higher clock speeds for longer periods without thermal throttling.
In addition to better cooling performance, improved thermal performance can also enhance the overall stability and lifespan of the CPU. High temperatures can degrade the CPU over time, shortening its lifespan and reducing its performance. By keeping the temperatures in check, delidding can extend the life of the CPU and ensure it operates at its optimal performance levels.
It’s important to note that while delidding can provide notable improvements in thermal performance, it is not without risks. During the delidding process, there is a possibility of damaging the CPU if not done carefully. Additionally, certain CPUs have a soldered IHS that makes delidding more challenging or even impossible. Thorough research, proper precautions, and following recommended delidding methods are essential to minimize risks and ensure a successful delidding experience.
Overclocking Potential
Overclocking is the process of increasing the operating frequency of a CPU beyond its stock settings to achieve higher performance. It is a popular practice among computer enthusiasts and gamers who seek to maximize their system’s capabilities. Delidding can play a significant role in enhancing the overclocking potential of a CPU.
When a CPU is overclocked, it generates more heat due to the increased power consumption and higher operating frequencies. As a result, cooling becomes even more critical to maintain stability and prevent thermal throttling. Delidding can provide several advantages in this regard.
By removing the stock integrated heat spreader (IHS) and replacing the thermal interface material (TIM), delidding improves the contact between the CPU die and the cooling solution. This leads to better heat dissipation, as the heat can be efficiently transferred from the CPU die to the cooling solution.
Improved cooling performance allows overclockers to push their CPUs to higher frequencies while maintaining acceptable temperatures. This means that delidding enables users to achieve higher overclocks that were not possible with the stock cooling solution.
In addition to the improved thermal performance, delidding also helps address temperature differentials within the CPU. During the manufacturing process, there can be variations in the thickness and flatness of the stock TIM, leading to uneven heat distribution. Delidding ensures better contact between the CPU die and the cooling solution, reducing hotspots and promoting more uniform heat dissipation.
Moreover, lower temperatures obtained through delidding enable more stable overclocks. When a CPU runs at high temperatures, it may experience thermal throttling, which decreases the clock speed to prevent overheating. Delidding and subsequent cooling enhancements reduce the likelihood of thermal throttling, allowing the CPU to maintain higher clock speeds for longer periods of time.
It is essential to note that delidding alone does not guarantee higher overclocking results. The quality of the CPU’s silicon and the CPU’s overall design also play significant roles. However, delidding can give overclockers an edge by improving the thermal performance and reducing temperature limitations, thus increasing the chances of achieving higher stable overclocks.
Overall, delidding offers overclockers the advantage of improved thermal performance and increased overclocking potential. By optimizing the cooling solution and ensuring efficient heat dissipation, delidded CPUs can handle higher frequencies and maintain stability during demanding tasks. This allows enthusiasts and gamers to squeeze out the maximum performance from their CPUs and experience a boost in overall system responsiveness and performance.
Reduced CPU Temperatures
One of the most noticeable benefits of delidding a CPU is the significant reduction in CPU temperatures. As CPUs operate, they generate heat, and if not efficiently dissipated, it can lead to thermal throttling, reduced performance, and even potential damage to the CPU.
By removing the integrated heat spreader (IHS) and replacing the stock thermal interface material (TIM) with a higher-quality option, delidding improves heat transfer from the CPU die to the cooling solution. This leads to lower CPU temperatures during operation, resulting in several advantages for the user.
One primary advantage of reduced CPU temperatures is improved stability. When a CPU runs at high temperatures, it can become unstable and prone to crashes, errors, and system freezes. By delidding and optimizing the thermal solution, the CPU can maintain lower temperatures, providing a stable environment for running demanding tasks and ensuring the smooth operation of the system.
Lower temperatures also benefit the longevity of the CPU. High temperatures can accelerate the degradation of the CPU’s components and shorten its lifespan. With delidding, the CPU can operate at cooler temperatures, mitigating the risk of thermal stress and prolonging its lifespan. This is particularly important for users who rely on their systems for intensive tasks or those who plan to keep their CPUs for an extended period.
Furthermore, reduced CPU temperatures have a ripple effect on the overall system temperatures. When the CPU runs cooler, it radiates less heat to other components such as the motherboard and the graphics card, potentially reducing their temperatures as well. This can result in a more stable and efficient overall system performance.
Another advantage of lower CPU temperatures is the potential for better performance. CPUs often have built-in mechanisms to prevent thermal throttling, which occurs when the CPU reduces its clock speed to lower heat output and prevent overheating. With delidding and improved cooling, the CPU can maintain higher clock speeds for longer periods, resulting in better performance and responsiveness, especially during CPU-intensive tasks such as gaming, video editing, and rendering.
It’s important to note that the actual temperature reduction achieved through delidding will vary depending on several factors, including the CPU model, cooling solution, and ambient temperature. While some CPUs may experience a more significant temperature drop after delidding, others may see a more moderate improvement. However, even a few degrees Celsius reduction can make a noticeable difference in system stability and overall performance.
In summary, delidding your CPU can lead to reduced temperatures, resulting in improved stability, increased longevity, and potentially better overall system performance. By effectively managing heat dissipation and optimizing the CPU’s thermal solution, delidding allows users to create a cooler and more reliable computing environment for their CPU-intensive tasks.
Decreased Fan Noise
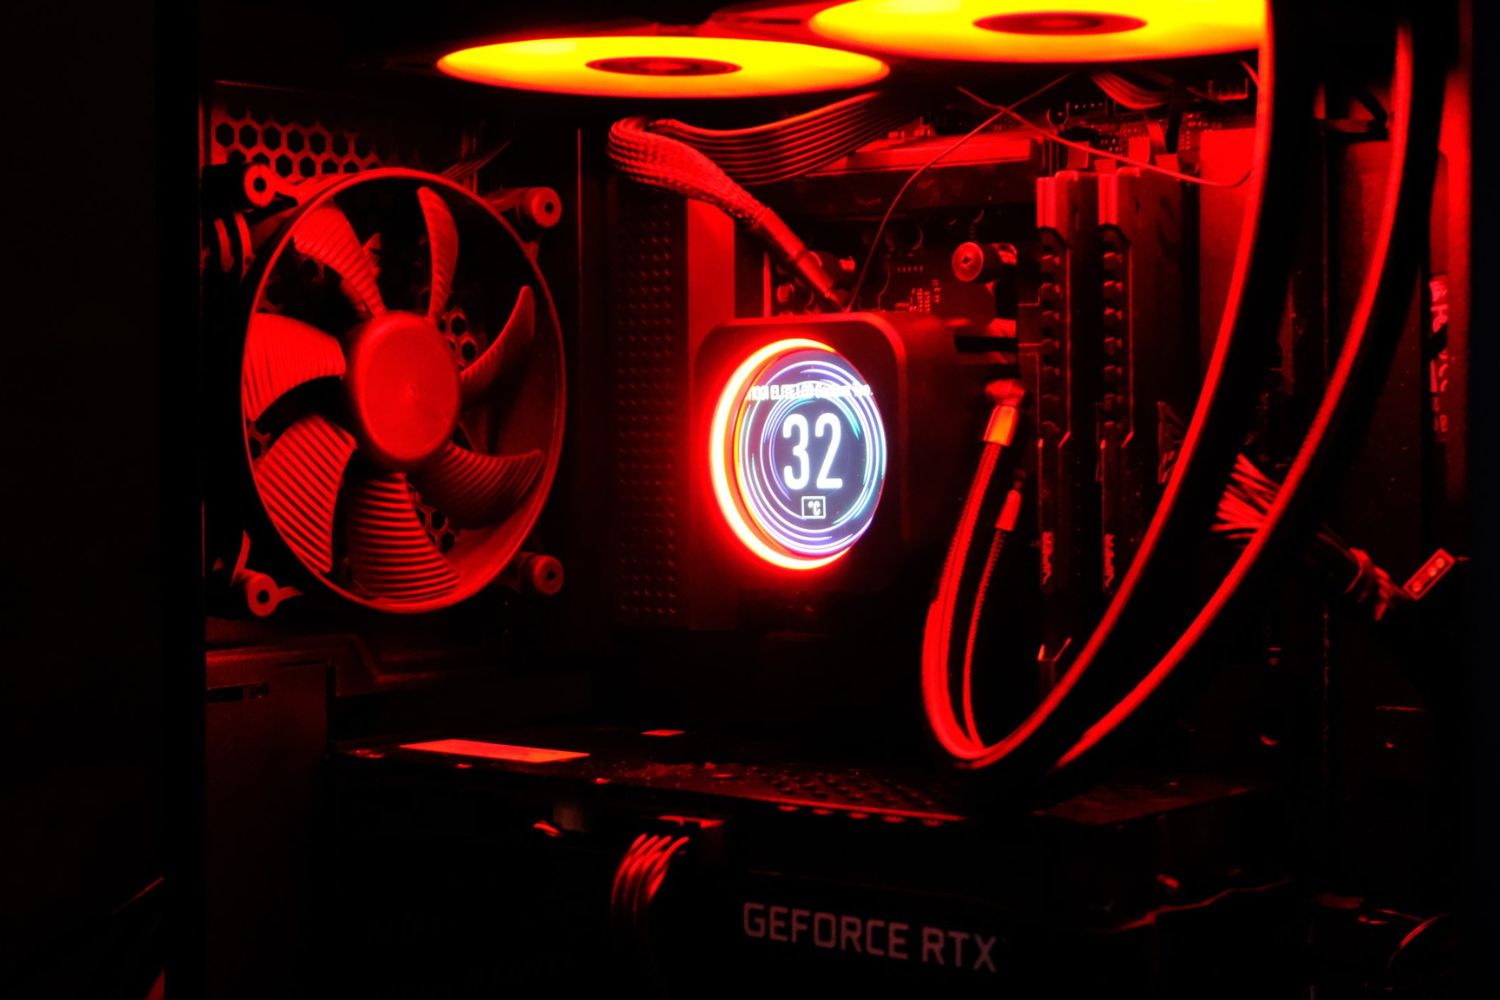
When it comes to computer noise, one of the major contributing factors is the cooling fans. The CPU fan is responsible for dissipating heat generated by the processor, and as the CPU temperature rises, the fan speeds up to provide adequate cooling. However, higher temperatures can lead to increased fan noise, which can be a nuisance, especially for users seeking a quieter computing experience.
Delidding your CPU can help decrease fan noise by improving thermal performance and reducing CPU temperatures. When the CPU runs cooler, there is less heat that needs to be dissipated, resulting in lower fan speeds and quieter operation. This is particularly noticeable during CPU-intensive tasks or when the system is under heavy load.
Lower CPU temperatures achieved through delidding allow the cooling fans to operate at lower speeds without sacrificing performance or risking overheating. As a result, the system remains adequately cooled, but with reduced fan noise levels. This is especially beneficial for users who value a quieter environment, such as content creators, professionals working in noise-sensitive environments, or enthusiasts who prefer a more peaceful computing experience.
In addition to decreased fan noise during normal operation, delidding can also have a positive impact on fan noise under demanding scenarios. With reduced CPU temperatures, the fans may not need to ramp up to higher speeds as frequently or as aggressively, even during intensive tasks or overclocking. This translates to a more consistent and manageable fan noise profile, with less noticeable and sudden increases in fan speed.
Furthermore, delidding can contribute to a cooler overall system temperature, which can indirectly lead to reduced noise from other components. When the CPU operates at lower temperatures, it radiates less heat to other components, such as the graphics card or the motherboard. Consequently, these components can also run cooler and require less fan speed to maintain optimal operating temperatures, resulting in a quieter system overall.
It’s important to note that while delidding can help decrease fan noise, it is not a substitute for a well-designed and efficient cooling system. Proper case ventilation, a high-quality CPU cooler, and optimized fan configurations are essential for effective heat dissipation and noise reduction. Delidding should be seen as a complementary step, enhancing the cooling capabilities of the system to achieve a quieter and more comfortable computing environment.
In summary, delidding your CPU can contribute to decreased fan noise by improving thermal performance, reducing CPU temperatures, and allowing the cooling fans to operate at lower speeds. This results in a more peaceful computing experience, with less fan noise during normal operation and under demanding scenarios. Delidding, combined with a well-designed cooling system, can help create a quieter and more enjoyable computing environment for users who seek a noise-reduced experience.
Potential Risks of Delidding
While delidding can offer significant benefits in terms of improved thermal performance and overclocking potential, it is essential to be aware of the potential risks involved. Delidding your CPU carries certain risks, and it requires careful consideration, proper technique, and adequate precautions to ensure a successful outcome. Here are some of the potential risks associated with delidding:
CPU Damage
The process of delidding involves physically removing the integrated heat spreader (IHS) from the CPU die. If not done with caution, there is a risk of damaging the CPU or other components. Mishandling the CPU during the delidding process, using excessive force, or using improper tools can lead to bent pins, cracked substrate, or even complete CPU failure. It is crucial to follow proper delidding techniques and exercise extreme care to minimize the risk of damaging the CPU.
Voiding Warranty
Delidding your CPU typically involves breaking the seal on the CPU package and physically altering the CPU. This action may void the manufacturer’s warranty, which would no longer cover any potential CPU defects or failures. Before proceeding with delidding, it’s important to consider the warranty implications and whether you are willing to accept the associated risks and potential loss of warranty coverage.
Loss of Integrated Heat Spreader (IHS) Protection
The integrated heat spreader (IHS) serves as a protective layer for the delicate CPU die. Removing the IHS exposes the CPU die to potential damage from mishandling, dust, and environmental factors. The CPU die is fragile and can be easily scratched or damaged if not handled properly. After delidding, extra care needs to be taken to protect the exposed die during re-attachment or when cleaning the CPU surface.
Compatibility Issues
Not all CPUs can be delidded, as some have soldered IHS that cannot be easily removed. It’s important to research and verify if your specific CPU model can be safely delidded before proceeding. Additionally, different CPU generations and architectures may have different delidding methods or require specific tools. Ensuring compatibility and following the recommended delidding process for your particular CPU model is crucial to avoid any complications or damage.
Injury Risk
The delidding process involves using specialized tools and can be intricate and potentially hazardous. Mishandling tools or not following proper safety measures can result in cuts, punctures, or other injuries. It is essential to exercise caution, wear appropriate protective gear, and have a clear understanding of the steps involved in the delidding process to minimize the risk of injury.
It’s crucial to approach delidding with thorough research, careful planning, and a full understanding of the associated risks. If you have any doubts about your ability to safely delid your CPU, it’s recommended to seek assistance from experienced individuals or professional delidding services. Proper precautions, adherence to recommended techniques, and consideration of the potential risks are essential for a successful and safe delidding experience.
How to Delid Your CPU
Delidding your CPU is a delicate process that requires careful planning, proper tools, and cautious execution. If you are confident in your abilities and have decided to proceed with delidding, here is a general step-by-step guide to help you through the process. It’s important to note that these steps may vary depending on your specific CPU model, so always refer to manufacturer recommendations and follow proper safety precautions.
Tools Required
– Delidding tool or razor blade: A specialized tool designed for safely removing the integrated heat spreader (IHS) or a high-quality razor blade.
– Thermal paste/liquid metal: To apply on the CPU die after delidding.
– Isopropyl alcohol and lint-free cloth or cotton swabs: For cleaning the CPU die and IHS surface.
– Adhesive solution (optional): If you plan to re-attach the IHS after delidding.
Step-by-Step Delidding Process
1. Prepare the workstation: Set up a clean and well-lit workspace, preferably with an anti-static mat or wristband to prevent electrostatic discharge (ESD) damage.
2. Remove the CPU from the motherboard: Follow the manufacturer’s instructions on how to safely remove the CPU from the motherboard.
3. Delid the CPU: Use a delidding tool or a razor blade to carefully separate the IHS from the CPU die. Make sure to apply steady and even pressure, working your way around the CPU until the IHS is fully separated.
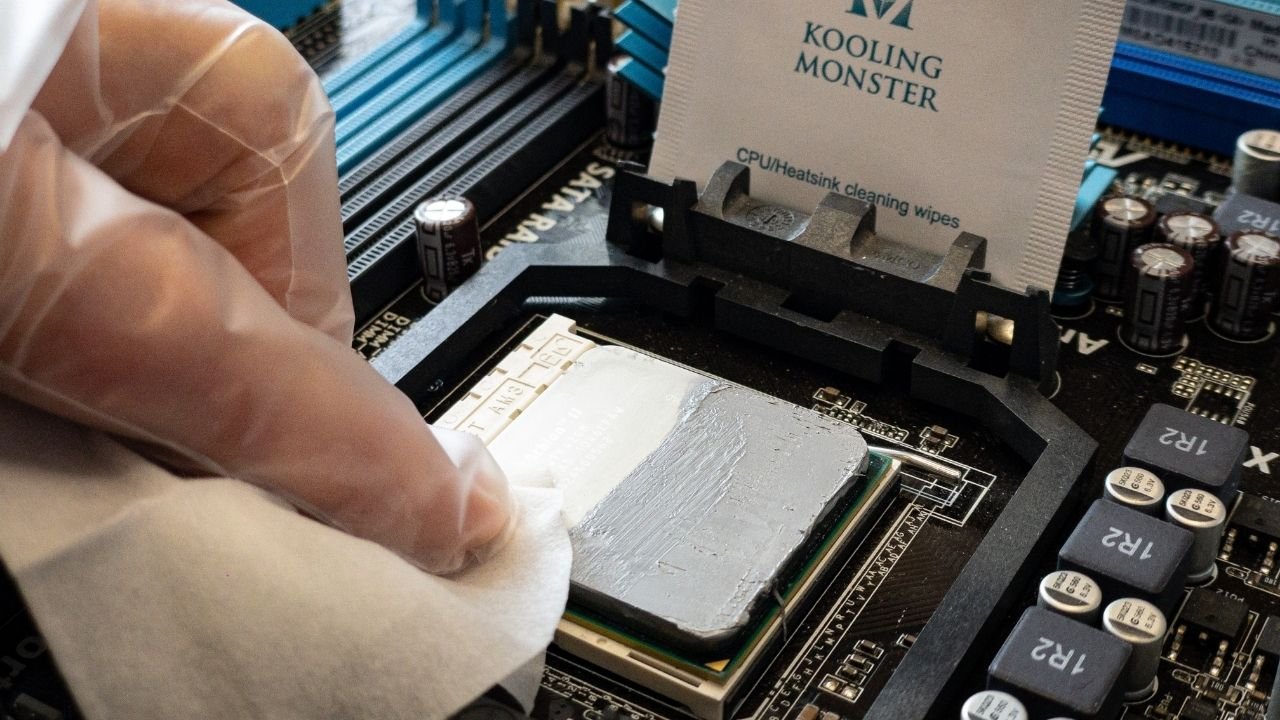
4. Clean the CPU die and IHS: Use isopropyl alcohol and a lint-free cloth or cotton swabs to clean any residual thermal paste or debris from the CPU die and the IHS surface. Ensure both surfaces are clean and dry before proceeding.
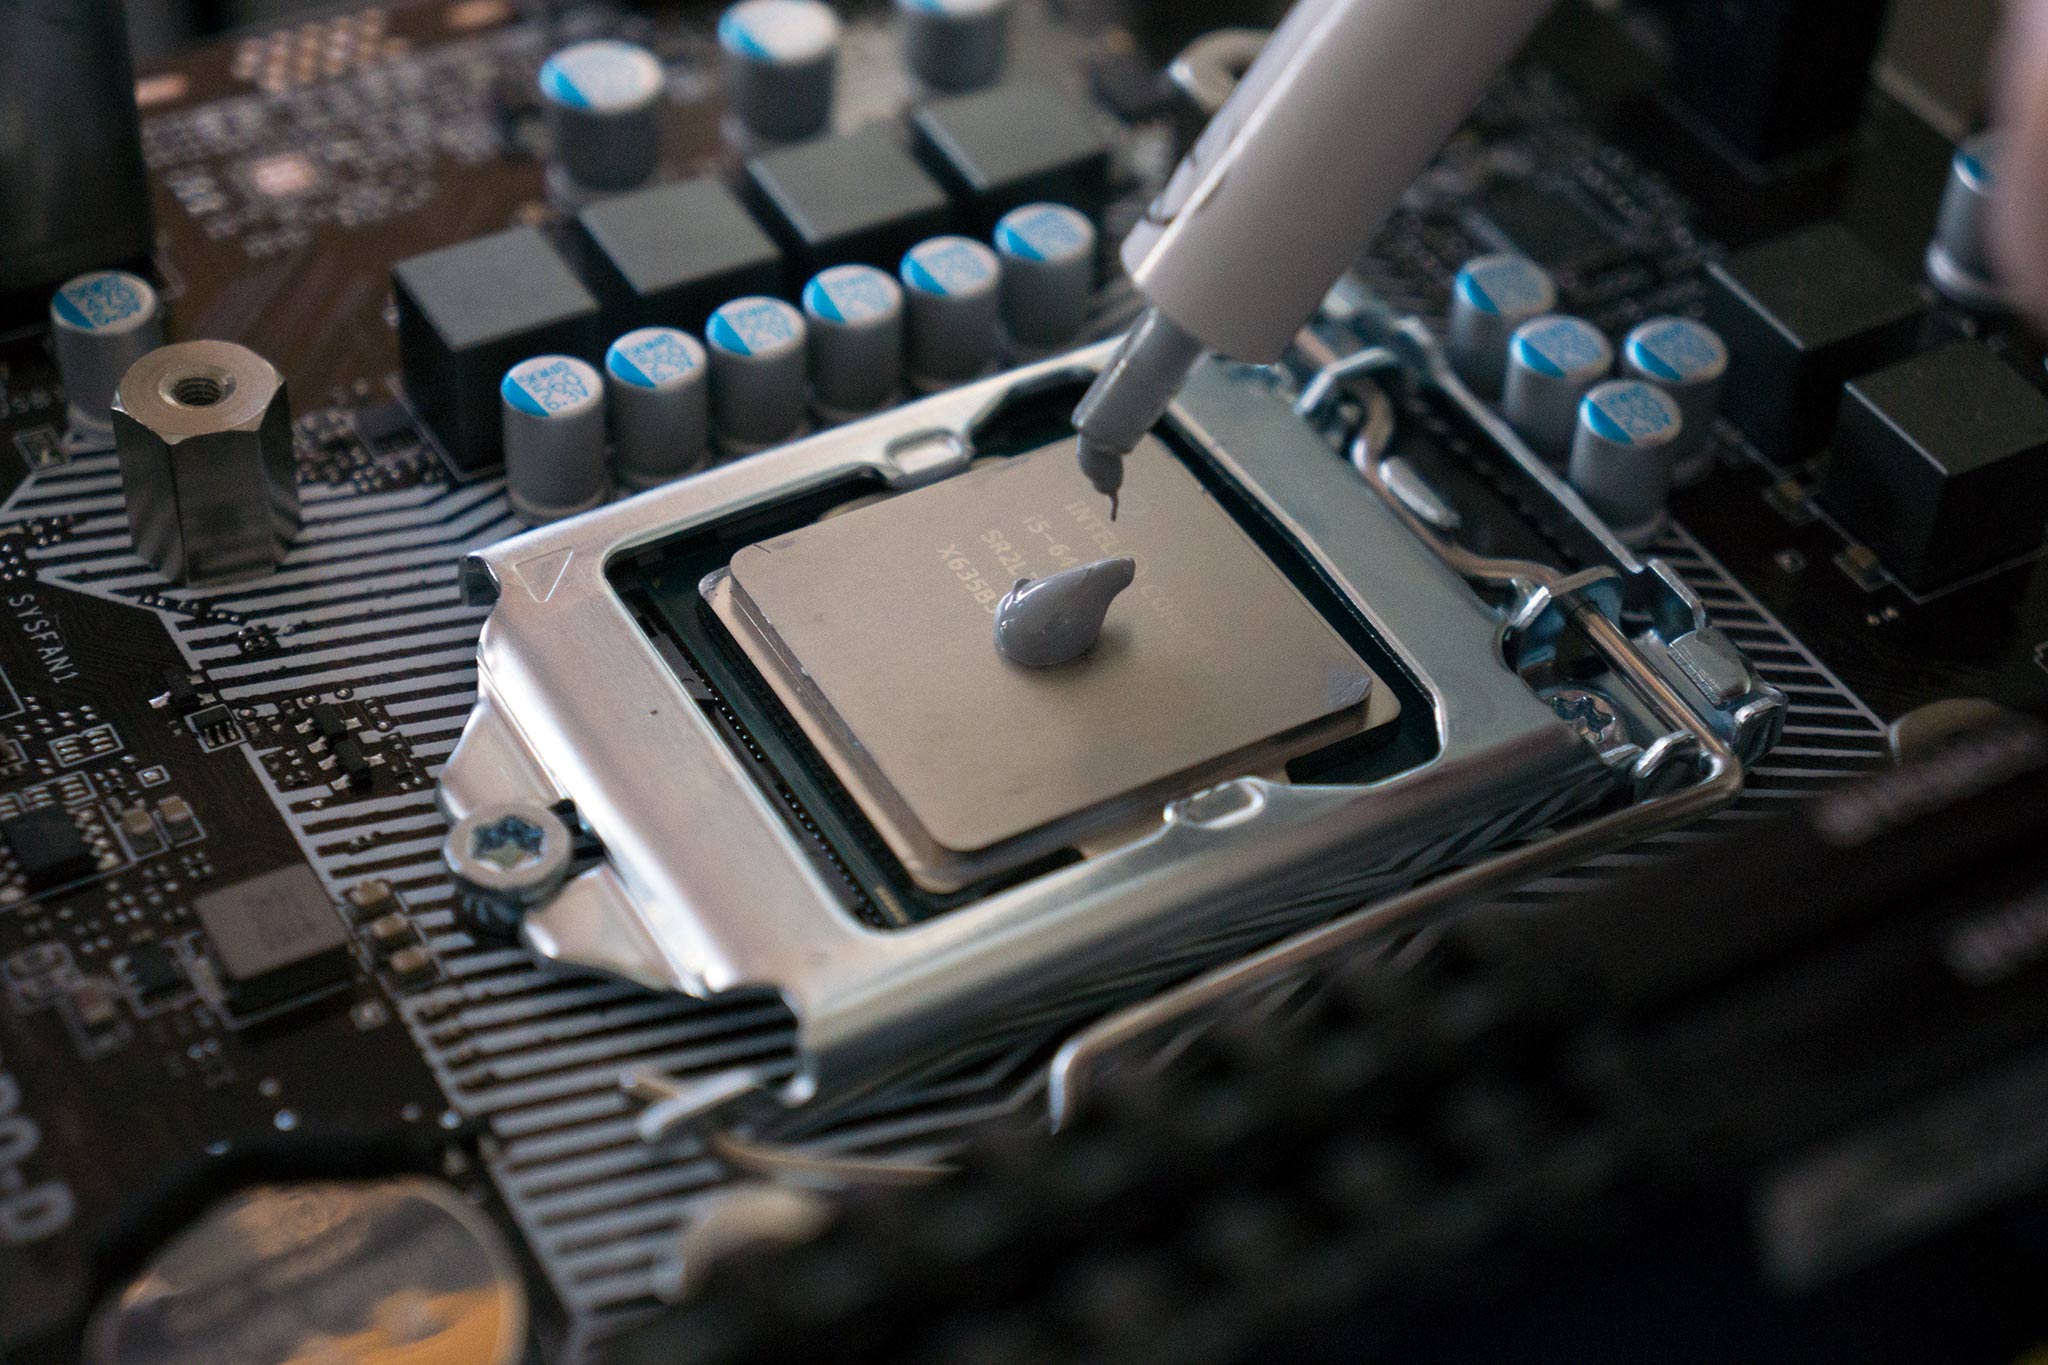
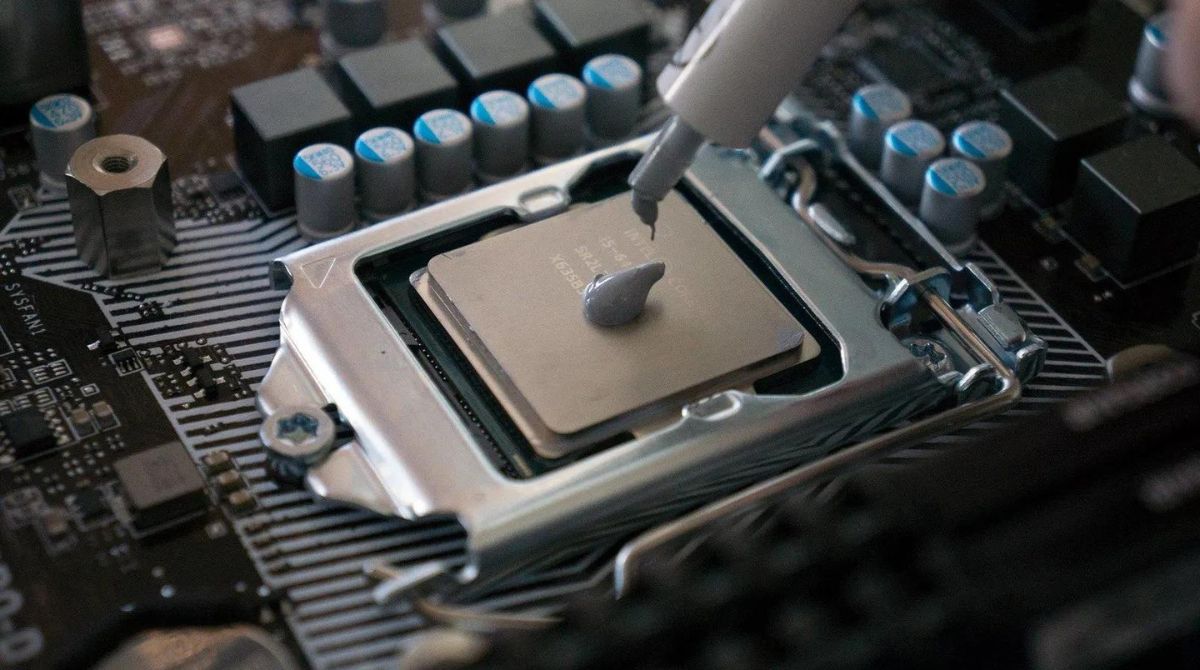
5. Apply thermal paste or liquid metal: Depending on your preference, apply a thin layer of thermal paste or liquid metal to the CPU die. Be careful not to use too much, as excess thermal paste or liquid metal can cause interference or short-circuits.
6. Reattach the IHS (optional): If you choose to reattach the IHS, apply an appropriate adhesive solution to the edges of the IHS, align it with the CPU die, and gently press it down. Be mindful of not applying too much pressure to avoid damaging the CPU or misaligning the IHS.
7. Reinstall the CPU and cooling solution: Properly reinstall the CPU into the motherboard socket, ensuring it is correctly aligned and secured. Apply thermal paste between the CPU and the cooling solution before reattaching the cooler or water block.
8. Test and monitor: Power on your system and monitor temperatures to ensure proper cooling and stability. Run stress tests or perform CPU-intensive tasks to verify that the delidding process was successful and that temperatures are within acceptable ranges.
It is crucial to follow manufacturer guidelines and recommended procedures specific to your CPU model. Additionally, delidding your CPU may void the manufacturer’s warranty, so carefully consider the risks and potential implications before proceeding. If you are unsure or uncomfortable with delidding, it may be wise to seek assistance from experienced individuals or professional delidding services to ensure a safe and successful outcome.
Tools Required
Delidding your CPU requires the use of specific tools to safely and effectively remove the integrated heat spreader (IHS). Here are the essential tools you will need to delid your CPU:
Delidding Tool
A delidding tool is a specialized device designed specifically for the process of removing the IHS from the CPU. These tools provide a safe and controlled way to separate the IHS, minimizing the risk of damaging the CPU. Delidding tools typically consist of a clamp or vice to hold the CPU in place and a mechanism to apply pressure to the IHS, enabling its detachment from the CPU die. It is important to choose a delidding tool that is compatible with your CPU model for optimal results.
Razor Blade
If a delidding tool is not available or you prefer an alternative method, a high-quality razor blade can be used to delid your CPU. When using a razor blade, it is crucial to exercise extreme caution and precision to avoid damaging the CPU. Carefully sliding the razor blade underneath the IHS and applying gentle pressure can loosen the adhesive and allow for its safe removal. However, using a razor blade requires advanced skill and should only be attempted by experienced individuals confident in their abilities.
Thermal Paste or Liquid Metal
After delidding, you will need thermal paste or liquid metal to apply between the CPU die and the IHS. Thermal paste is a common choice and is relatively easier to work with. It fills in microscopic imperfections and enhances heat transfer between the CPU die and the cooler. Liquid metal, on the other hand, offers superior thermal conductivity and can provide even better cooling performance. However, liquid metal is conductive, so extra precaution is required during application to prevent any accidental spills or short circuits.
Isopropyl Alcohol and Lint-Free Cloth or Cotton Swabs
Before reapplying thermal paste or liquid metal, it is important to clean the CPU die and the IHS surfaces. Isopropyl alcohol is an ideal cleaning solution as it effectively removes any residual thermal paste or debris. Use lint-free cloths or cotton swabs to apply the alcohol and gently wipe the surfaces until they are clean and dry. Avoid using materials that may leave lint or fibers behind, as they could interfere with proper heat transfer.
Adhesive Solution (Optional)
If you choose to reattach the IHS after delidding, you may need an adhesive solution to secure it back in place. Some CPUs have adhesive residue on the IHS and the CPU substrate, allowing for easy reattachment. However, if the adhesive is insufficient or missing, you can use an appropriate adhesive solution to secure the IHS. It is important to follow the manufacturer’s instructions for using the adhesive and ensure proper alignment and pressure to avoid damage to the CPU or misalignment of the IHS.
Additional Tools
While the aforementioned tools are the essential ones, you may also require additional tools based on your specific CPU model and delidding method. These may include precision screwdrivers, an anti-static mat or wristband to prevent electrostatic discharge, and specialized cleaning solutions for removing stubborn adhesive residue. Researching and understanding the requirements and recommendations for your particular CPU model is crucial to ensure a successful and safe delidding process.
By gathering the necessary tools and following proper delidding procedures, you can confidently delid your CPU and potentially achieve improved thermal performance and overclocking capabilities. However, remember to exercise caution, follow recommended guidelines, and fully understand the risks involved before attempting to delid your CPU.
Step by Step Delidding Process
Delidding your CPU requires careful execution and attention to detail to ensure a successful outcome. Here is a general step-by-step guide to help you navigate the delidding process:
1. Prepare the workstation: Set up a clean and well-lit workspace with adequate ventilation. Consider using an anti-static mat or wristband to prevent electrostatic discharge that could damage sensitive components.
2. Remove the CPU from the motherboard: Follow the manufacturer’s instructions to safely remove the CPU from the motherboard socket. Take note of any retention mechanisms or locking mechanisms for proper removal.
3. Delid the CPU: Use a delidding tool or a razor blade to carefully separate the integrated heat spreader (IHS) from the CPU die. If using a delidding tool, follow the tool’s instructions for clamping the CPU and applying pressure to safely detach the IHS. If using a razor blade, carefully slide it between the IHS and the CPU die, applying gentle and even pressure until the IHS separates. Take your time and proceed with caution to avoid damaging the CPU.
4. Clean the CPU die and IHS: Use isopropyl alcohol and a lint-free cloth or cotton swabs to thoroughly clean any residual thermal paste or debris from the CPU die and the IHS. Ensure that both surfaces are clean, dry, and free from contaminants to promote optimal heat transfer.
5. Apply thermal paste or liquid metal: Apply a thin and even layer of thermal paste or liquid metal to the CPU die. If using thermal paste, a small pea-sized amount in the center of the CPU die is generally sufficient. If using liquid metal, use an appropriate applicator to spread a thin layer evenly. Exercise caution when applying liquid metal, as it is conductive and can cause short circuits if applied incorrectly.
6. Reattach the IHS (optional): If you choose to reattach the IHS, apply a small amount of adhesive around the edges of the IHS. Be mindful of not using too much adhesive, as it can potentially interfere with component clearance or spill over onto the CPU die. Align the IHS with the CPU die and gently press it down, ensuring proper alignment.
7. Reinstall the CPU and cooling solution: Carefully place the CPU back into the motherboard socket, aligning the CPU with the socket’s orientation markers. Ensure that the CPU is correctly seated and secure it according to the manufacturer’s instructions. Apply thermal paste to the CPU cooler or water block before reattaching it, ensuring proper contact between the CPU die and the cooling solution.
8. Test and monitor: Power on your system and monitor temperatures and stability. Run stress tests or CPU-intensive tasks to ensure that the delidding process was successful and that temperatures are within acceptable ranges. Continuously monitor the temperatures and system performance to ensure optimal cooling and stability.
Throughout the delidding process, exercise caution, follow recommended guidelines, and be mindful of the delicate nature of the CPU and its components. Always refer to the manufacturer’s instructions or seek guidance from experienced individuals if you are uncertain about any step of the delidding process. Remember that delidding comes with inherent risks, and careful execution is essential to minimize these risks and ensure a successful delidding experience.
Precautions to Take
Delidding your CPU requires careful attention to detail and adherence to specific precautions to ensure a successful and safe delidding process. Here are some essential precautions to keep in mind:
Research and Understand Your CPU
Before attempting to delid your CPU, thoroughly research and understand the specific model you are working with. Some CPUs have soldered IHS or different delidding methods, so make sure you are aware of the characteristics and requirements of your particular CPU. Refer to manufacturer guidelines, community forums, and trusted resources to gather detailed information about the delidding process for your CPU model.
Take Electrical Safety Precautions
Electrostatic discharge (ESD) can damage sensitive electronic components, including your CPU. To minimize the risk of ESD, work in a static-free environment and consider wearing an ESD wristband or regularly grounding yourself by touching a grounded metal object. Avoid working on carpeted surfaces and handle the CPU by its edges to avoid direct contact with the delicate pins or components.
Use Proper Tools and Techniques
Ensure that you have the appropriate tools for delidding, such as a delidding tool or a high-quality razor blade. Follow the proper techniques recommended for your specific CPU model, whether using a tool or razor blade. Apply steady and even pressure, without excessive force, to minimize the risk of damaging the CPU or IHS. Remember that using a razor blade requires advanced skill and should only be attempted by those experienced with delicate procedures.
Exercise Caution and Patience
Delidding is a meticulous process that requires patience and utmost care. Take your time and proceed with caution at each step. Rushing or applying excessive force can lead to accidental CPU damage or injury. Avoid hasty movements or actions that could result in a mishap.
Protect the CPU Die
The CPU die is an extremely delicate component that needs to be handled with care. Avoid any direct contact with the CPU die, as any accidental scratches, pressure, or debris can cause irreparable damage. Always protect the CPU die during handling, cleaning, and reattaching the IHS.
Consider the Warranty Implications
Delidding your CPU may void the manufacturer’s warranty. Take this into consideration before proceeding with the delidding process, as you may no longer be eligible for warranty support in case of any CPU-related issues. Assess the risks and weigh the potential benefits against the loss of warranty coverage.
Monitor Temperatures and Stability
After delidding and reattaching the CPU, closely monitor temperatures and system stability. Run stress tests or CPU-intensive tasks to ensure that the CPU remains within acceptable temperature ranges and that the delidding process was successful. Continuously monitor performance and temperatures, making any necessary adjustments to optimize cooling and stability.
Remember that delidding carries inherent risks, and even with precautions, accidents can happen. If you feel uncertain or uncomfortable with the delidding process, it may be best to seek assistance from experienced individuals or professional delidding services to ensure a safe and successful outcome.
Re-attaching the CPU IHS
Once you have delidded your CPU and completed any necessary modifications or improvements, you may choose to reattach the integrated heat spreader (IHS) to the CPU. This step is optional, as some users prefer to leave the IHS off for improved thermal performance. If you decide to reattach the IHS, here are the essential steps to follow:
Clean the IHS and CPU Die Surfaces
Before reattaching the IHS, it’s crucial to ensure that both the IHS and the CPU die surfaces are clean and free from any residue or debris. Use isopropyl alcohol and a lint-free cloth or cotton swabs to carefully clean the surfaces. Ensure that both surfaces are completely dry before proceeding.
Apply Adhesive Solution (If Needed)
Check if your CPU and IHS have adhesive residue on them from the previous attachment. If there is sufficient adhesive remains, you can skip this step. However, if there is no adhesive residue or you want to use a fresh adhesive, apply a small amount of adhesive solution to the edges of the IHS. Be careful not to use too much adhesive, as it can potentially interfere with component clearance and cause spillage.
Align and Gently Press the IHS
Align the IHS carefully with the CPU die, ensuring that the corners and edges are properly aligned. Be mindful not to use excessive pressure when aligning or pressing down the IHS, as this can cause damage to the CPU. Gently press the IHS down, applying even pressure to ensure proper contact between the CPU die and the IHS.
Allow the Adhesive to Cure (If Applicable)
If you used an adhesive solution, follow the manufacturer’s instructions for curing time. Allow sufficient time for the adhesive to bond and cure properly before proceeding with the CPU installation. It’s important to be patient during this step to avoid any potential movement or misalignment of the IHS.
Reinstall the CPU
Carefully place the CPU back into the motherboard socket, ensuring proper alignment with the socket’s orientation markers. Take caution to prevent any accidental movement of the IHS during the CPU installation process. Secure the CPU according to the manufacturer’s instructions, following any retention mechanisms or locking mechanisms.
Apply Thermal Paste and Reattach the Cooler
Apply an appropriate amount of thermal paste onto the CPU die, spreading it evenly using a credit card or an application method recommended by the thermal paste manufacturer. Reinstall the CPU cooler or water block, ensuring proper alignment and secure attachment. Apply the appropriate mounting pressure according to the cooler manufacturer’s guidelines.
Monitor Temperatures and Stability
After the reattachment of the IHS and the installation of the CPU cooler, closely monitor temperatures and system stability. Run stress tests or CPU-intensive tasks to ensure that the cooling performance and thermal management are satisfactory. Continuously monitor temperatures and adjust cooling solutions or thermal settings as needed to maintain optimal CPU performance and stability.
Remember that reattaching the IHS is an optional step, and its benefits may vary depending on your specific CPU and cooling setup. It’s important to carefully consider the potential improvements and risks associated with reattaching the IHS before proceeding. Additionally, always follow manufacturer guidelines, recommended adhesives (if applicable), and usage instructions to ensure a proper and secure reattachment of the IHS.
Alternatives to Delidding
While delidding can provide significant benefits in terms of improved thermal performance and overclocking potential, it is not the only option for addressing CPU temperature concerns. Here are some alternatives to delidding that can help mitigate high CPU temperatures:
Aftermarket CPU Cooler
Upgrading to an aftermarket CPU cooler can have a significant impact on reducing CPU temperatures. High-performance air coolers or all-in-one liquid coolers offer superior cooling capabilities compared to stock coolers. These coolers often feature larger heatsinks, more efficient fans, and improved heat dissipation technology, helping to keep CPU temperatures in check without the need for delidding.
Improved Case Ventilation
A well-ventilated case is crucial for effective heat dissipation. Ensure that your computer case has adequate airflow by utilizing case fans, optimizing fan placement, and removing any obstructions that impede the flow of air. Installing additional case fans, using fan filters, and managing cable clutter can help promote better airflow and reduce CPU temperatures.
CPU Undervolting
CPU undervolting is the process of reducing the voltage supplied to the CPU, which helps to decrease power consumption and, subsequently, heat generation. This can be done through the BIOS settings or using software utilities that allow for voltage adjustments. Undervolting can help achieve lower CPU temperatures and potentially extend the lifespan of the CPU without the need for more drastic measures like delidding.
Thermal Paste Replacement
Replacing the stock thermal paste with a high-quality thermal paste can improve heat transfer between the CPU and the cooler. Over time, the stock thermal paste may degrade or become less effective, leading to increased CPU temperatures. Removing the old thermal paste and applying a fresh layer of high-performance thermal paste can help optimize heat dissipation and lower CPU temperatures.
Enhanced Cooling Solutions
Consider utilizing additional cooling solutions to complement your existing setup. This includes adding case fans, upgrading to more efficient and larger CPU coolers, or employing liquid cooling solutions such as custom-loop water cooling. These enhancements can improve thermal performance and manage CPU temperatures effectively.
Optimizing System Configuration
Other factors such as ambient room temperature, overclocking settings, software adjustments, and power management settings can impact CPU temperatures. Make sure your computer is in a well-ventilated area with appropriate temperature control. Adjusting overclocking settings, optimizing software settings, and managing power profiles can help control heat output and lower CPU temperatures without delidding.
Remember that each CPU and system configuration is unique, and the effectiveness of these alternatives may vary. It’s crucial to research and consider your specific requirements, budget, and skill level when choosing the appropriate alternative to address high CPU temperatures without resorting to delidding.
Conclusion
In conclusion, delidding your CPU can offer several benefits, such as improved thermal performance, enhanced overclocking potential, reduced CPU temperatures, and decreased fan noise. By removing the integrated heat spreader (IHS) and replacing the stock thermal interface material (TIM) with a higher-quality option, heat transfer from the CPU die to the cooling solution is improved, resulting in better overall system performance and stability.
However, it is essential to approach delidding with caution and take the necessary precautions. Delidding carries risks, including potential CPU damage, voiding of the manufacturer’s warranty, and the need for advanced technical skills. Thorough research, understanding your specific CPU model, using proper tools, and following recommended techniques are vital for a safe and successful delidding process.
If you are uncomfortable with the risks or lack the necessary expertise, there are alternative options to consider. Aftermarket CPU coolers, improved case ventilation, CPU undervolting, thermal paste replacement, enhanced cooling solutions, and optimizing system configuration can also help address high CPU temperatures without the need for delidding.
Ultimately, the decision to delid your CPU should be based on a careful assessment of your needs, skills, and willingness to accept the associated risks. Consider the potential benefits, weigh them against the risks involved, and determine if delidding is the right choice for your specific situation.
Remember, CPU delidding should be approached as an advanced technique for experienced users who understand the risks involved. If you are uncertain or uncomfortable with any aspect of the delidding process, seeking assistance from professionals or experienced individuals is recommended.
By making informed decisions, following proper procedures, and taking necessary precautions, you can potentially achieve significant improvements in your CPU’s thermal performance and overall system capabilities.