Introduction
Welcome to the world of school Chromebooks! These lightweight, portable devices have become an essential tool for students to access educational resources and complete their assignments. However, many schools impose restrictions on the internet access of Chromebooks to ensure a safe and controlled environment for students. This can be frustrating when you need to access certain websites or use online resources that are blocked by your school’s network.
But don’t worry, there’s a solution – a VPN (Virtual Private Network). A VPN can bypass these restrictions by encrypting your internet connection and routing it through a server in a different location. This not only allows you to access blocked content but also enhances your online privacy and security.
In this guide, we will walk you through the process of getting a VPN on your school Chromebook. Whether you want to unblock websites, protect your privacy, or bypass internet censorship, we’ve got you covered.
Before we delve into the methods of setting up a VPN on your school Chromebook, let’s take a closer look at what exactly a VPN is and why you need one.
What is a VPN?
A VPN, or Virtual Private Network, is a service that creates a secure and encrypted connection between your device and the internet. It acts as a tunnel through which your internet traffic passes, making it difficult for anyone, including your school’s network administrators, to see or track your online activities.
When you connect to a VPN, your internet traffic is routed through a server located in a different geographic location. This gives you the ability to appear as if you’re browsing from that location, allowing you to bypass any restrictions or censorship imposed by your school or any other network.
Furthermore, a VPN provides an additional layer of security by encrypting your data. This means that even if someone were to intercept your internet traffic, they would only see encrypted gibberish, making it virtually impossible to decipher or access your sensitive information.
Not only that, but a VPN also offers privacy benefits. By masking your IP address and encrypting your connection, it prevents third parties, such as advertisers or malicious actors, from tracking your online activities and collecting your personal data.
In summary, a VPN allows you to:
- Bypass internet restrictions and access blocked content
- Protect your data with encryption
- Preserve your online privacy
- Mask your IP address and prevent tracking
Now that we understand the concept of a VPN, let’s explore why having a VPN on your school Chromebook can be highly beneficial.
Why do you need a VPN on your school Chromebook?
Using a VPN on your school Chromebook can offer several advantages in terms of accessing restricted content, enhancing your privacy, and overcoming online censorship. Let’s take a closer look at why you should consider using a VPN on your school Chromebook:
Accessing blocked websites and content: Many schools impose restrictions on certain websites and content to maintain a focused and productive learning environment. However, these restrictions can be frustrating when you need to access educational resources or research materials that are blocked. With a VPN, you can easily bypass these restrictions and access any website or online content that might otherwise be blocked.
Enhancing online privacy: Your privacy is important, and using a VPN on your school Chromebook can help protect it. When you connect to a VPN, your internet traffic is encrypted, making it extremely difficult for anyone, including your school’s network administrators, to monitor or track your online activities. This added layer of privacy ensures that your personal data, browsing history, and online behavior remain confidential.
Overcoming online censorship: In some cases, schools may implement strict censorship measures to ensure a safe browsing experience for students. While these measures are put in place with good intentions, they can sometimes limit access to valuable educational content or essential online tools. By using a VPN, you can bypass censorship restrictions and gain unrestricted access to the internet, allowing you to explore a wider range of educational resources and online tools.
Protecting personal data on public Wi-Fi networks: When you connect your school Chromebook to public Wi-Fi networks, such as those found in libraries or coffee shops, your data becomes vulnerable to hackers and cybercriminals. Public Wi-Fi networks are often unsecured and can be easily intercepted by malicious actors. However, by using a VPN, your internet connection is encrypted, providing you with a secure tunnel for transmitting your data, even on public Wi-Fi networks.
Bypassing geographic restrictions: There may be instances when you need to access online content or services that are limited to certain geographic regions. With a VPN, you can mask your IP address and connect to a server located in another country, effectively bypassing these restrictions and gaining access to region-specific content or services.
By using a VPN on your school Chromebook, you can unlock a world of possibilities, ensuring unrestricted access to educational resources, protecting your privacy, and overcoming online barriers. Now that you understand why a VPN is essential for your school Chromebook, let’s explore the step-by-step process of getting a VPN on your device.
Step-by-step guide to getting a VPN on your school Chromebook
Setting up a VPN on your school Chromebook is a straightforward process that can be done within minutes. Here’s a step-by-step guide to help you get started:
- Choose a reliable VPN provider: Start by researching and selecting a trustworthy VPN provider that fits your needs. Look for a provider that offers strong encryption, a wide range of server locations, and good customer reviews. Some popular VPN services include ExpressVPN, NordVPN, and CyberGhost.
- Create an account: Visit the website of your chosen VPN provider and sign up for an account. Provide the required information and proceed with the account creation process.
- Download and install the VPN app: Once you’ve created your account, the VPN provider will provide you with the necessary download links. Download and install the VPN app compatible with Chrome OS.
- Launch the VPN app: Launch the VPN app on your school Chromebook. You will be prompted to enter your login credentials (username and password) that you created during the account signup process.
- Select a server: After logging into the VPN app, you will be presented with a list of server locations. Choose a server location based on your preferences or the content you want to access. For example, if you want to access content restricted to the United States, choose a server located in the US.
- Connect to the VPN: Once you have selected a server location, click on the “Connect” button to establish a VPN connection. The app will connect to the chosen server and encrypt your internet traffic.
- Verify your connection: Once connected, you can verify your VPN connection by visiting a website that displays your IP address. If the website shows a different IP address from your school’s network, it means that your VPN is working correctly.
That’s it! You have successfully set up a VPN on your school Chromebook. You can now enjoy unrestricted access to blocked websites and content, secure browsing, and enhanced online privacy.
Please note that the process may vary depending on the VPN provider and the specific VPN app used. Some VPN providers may offer browser extensions instead of dedicated apps, which can also be used on your Chromebook.
Now that you have a VPN on your school Chromebook, let’s explore two popular methods of getting a VPN – using a browser extension and using an Android app.
Method 1: Using a browser extension
If you prefer a simple and convenient way to get a VPN on your school Chromebook, using a browser extension is a popular option. Here’s how you can set it up:
- Select a VPN browser extension: Search for a VPN browser extension compatible with Chrome OS. Some popular options include ExpressVPN, NordVPN, and CyberGhost. Go to the Chrome Web Store and install the VPN extension of your choice.
- Create an account: Once the extension is installed, click on its icon in the Chrome toolbar. You will be prompted to create an account with your chosen VPN provider.
- Login and connect: After creating an account, log in using your credentials within the browser extension. Choose a server location and click on the “Connect” button to establish a VPN connection.
- Verify your connection: To ensure your VPN is active, visit a website that displays your IP address. If the IP address shown is different from your school’s network, it means the VPN is working correctly.
Using a browser extension provides the advantage of a seamless browsing experience, as the VPN will be active whenever your Chrome browser is open. However, it’s important to note that browser extensions may have limited features compared to full VPN apps. If you require more advanced functionalities, consider using the second method – installing an Android app on your school Chromebook.
Now that you know how to set up a VPN using a browser extension, let’s explore the second method – installing an Android app on your school Chromebook to get a VPN.
Method 2: Using an Android app
If you prefer a more comprehensive VPN experience with advanced features and capabilities, installing an Android app on your school Chromebook is a great option. Here’s how you can do it:
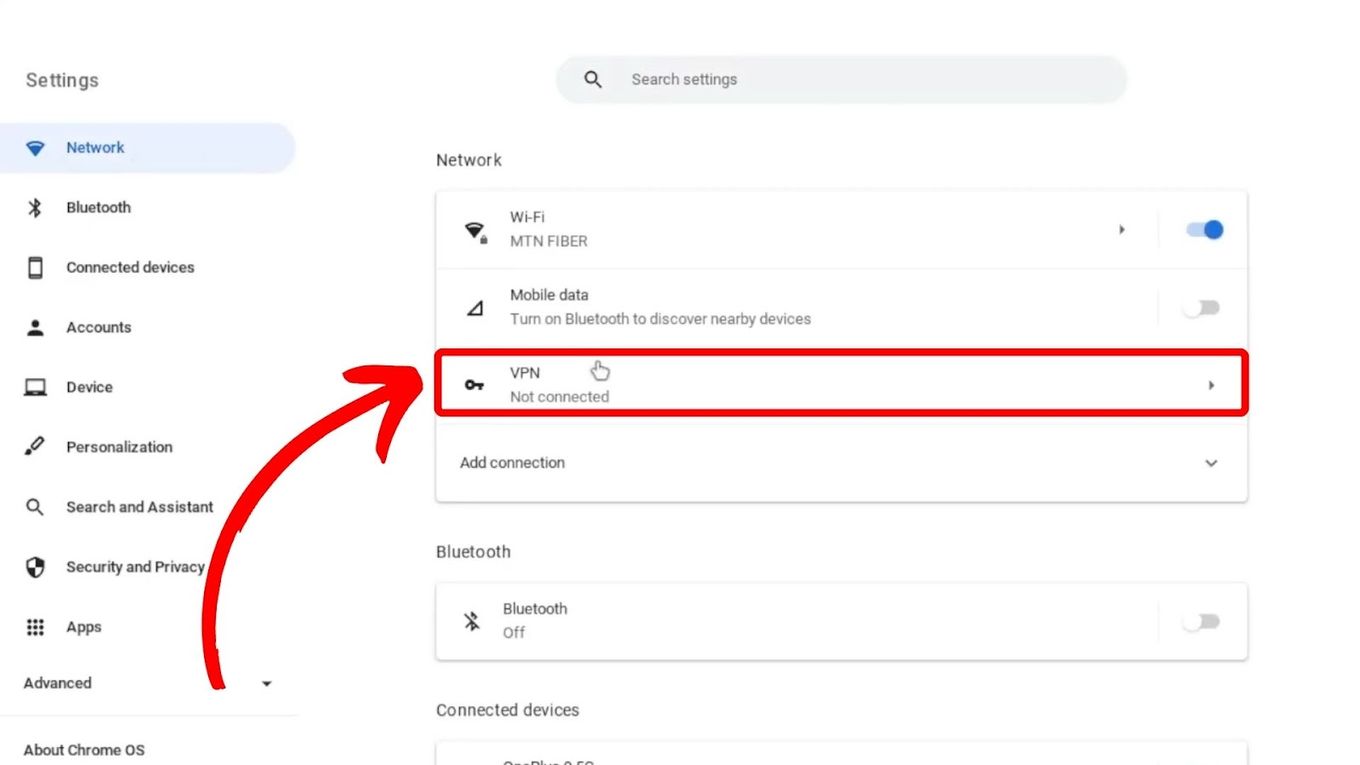
- Check compatibility: Ensure that your school Chromebook supports Android apps. Some older models may not have this capability. To check, go to your Chromebook’s Settings, navigate to the “Apps” or “Play Store” section, and enable the option to install Android apps.
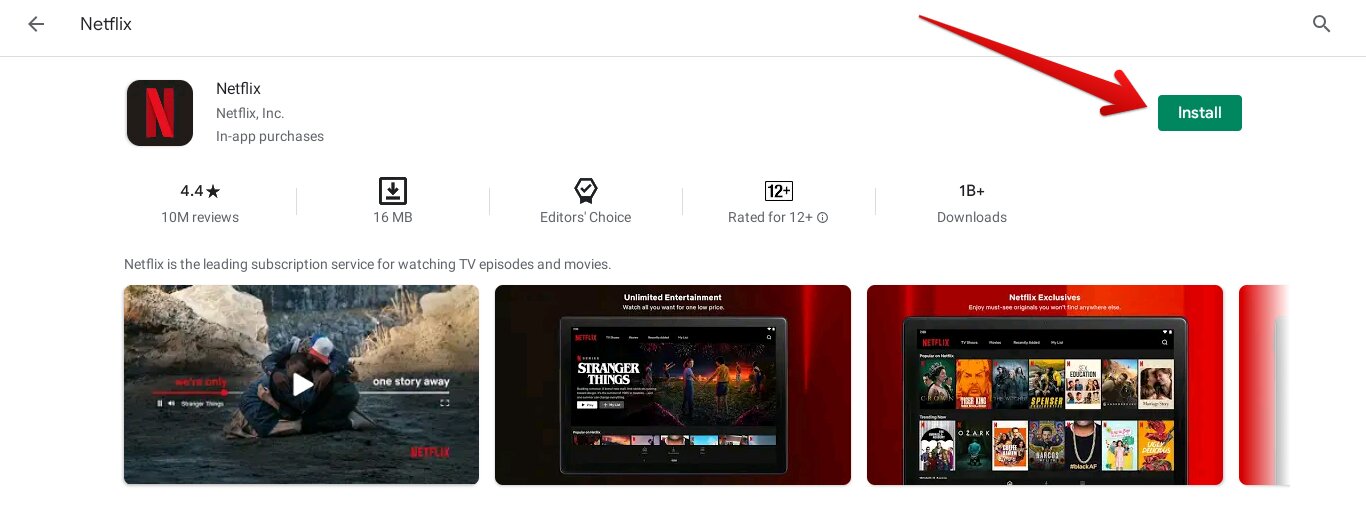
- Choose a VPN app: Go to the Google Play Store on your Chromebook and search for VPN apps. Some popular choices include ExpressVPN, NordVPN, and CyberGhost. Select the VPN app that best fits your needs and install it on your device.
- Launch the VPN app: After installing the VPN app, locate it in your app drawer and open it. You will be prompted to sign in using the account you created with the VPN provider.
- Select a server and connect: Once you’re logged in, choose a server location from the available options. Consider factors such as location and server load. After selecting a server, click on the “Connect” or “On” button to establish a VPN connection.
- Verify your connection: To verify that your VPN is active, visit a website that displays your IP address. If the IP address shown is different from your school’s network, it means the VPN is successfully working.
Using an Android VPN app provides you with a wide range of features and customization options for your VPN connection. You can enjoy enhanced security, bypass geo-restrictions, and have more control over your VPN settings.
Now that you’ve learned how to set up a VPN on your school Chromebook using a browser extension and an Android app, let’s move on to exploring the factors to consider while choosing a VPN for your device.
Things to consider while choosing a VPN for your school Chromebook
When selecting a VPN for your school Chromebook, there are several factors to consider to ensure that you choose the right one for your needs. Here are some important points to keep in mind:
- Security and privacy: Look for a VPN that offers strong encryption protocols such as OpenVPN, as well as a strict no-logs policy. This ensures that your online activities are kept private and your data is secure.
- Server network: A wide range of server locations allows for more flexibility in accessing geo-restricted content. Ensure that the VPN provider has servers in locations that are relevant to your needs.
- Speed and performance: A VPN can potentially slow down your internet connection. Look for VPN providers that offer fast and reliable server speeds to ensure a smooth browsing experience.
- User-friendly interface: An intuitive and user-friendly interface makes it easier to navigate and use the VPN app or browser extension. Look for VPN providers that have a simple and intuitive interface.
- Compatibility: Ensure that the VPN service is compatible with Chrome OS and supports Chromebooks.
- Customer support: It’s important to have reliable customer support in case you encounter any issues or have questions. Look for providers that offer 24/7 customer support through various channels such as live chat or email.
- Pricing and plans: Consider your budget and evaluate the pricing plans provided by different VPN services. Look for providers that offer competitive pricing and flexible plans.
- Additional features: Some VPNs offer additional features such as split tunneling, ad-blocking, or malware protection. Assess your needs and look for VPN providers that offer these extra features if they are important to you.
By considering these factors, you can choose a VPN that best fits your requirements and ensures a seamless and secure browsing experience on your school Chromebook.
Now that you’re well-equipped with the knowledge of getting a VPN on your school Chromebook and selecting the right one for your needs, you can enjoy unrestricted access to online resources, heightened privacy, and enhanced security.
Conclusion
Getting a VPN on your school Chromebook can open up a world of possibilities by providing you with unrestricted access to blocked websites and content, enhancing your online privacy, and bypassing online censorship. Whether you choose to use a browser extension or an Android app, setting up a VPN on your school Chromebook is a straightforward process that can be done within minutes.
By using a VPN, you can bypass restrictions imposed by your school’s network, ensuring that you have access to valuable educational resources, research materials, and online tools. Additionally, a VPN encrypts your internet traffic, protecting your personal data and enhancing your online security on public Wi-Fi networks.
When choosing a VPN for your school Chromebook, it’s important to consider factors such as security, server network, speed, user-friendliness, compatibility, customer support, pricing, and additional features. By selecting the right VPN provider, you can enjoy a secure, private, and seamless browsing experience.
Now that you have the knowledge and tools to get a VPN on your school Chromebook, go ahead and explore the options available to you. Remember to always prioritize your privacy, security, and access to valuable online resources. With a VPN, you can make the most out of your school Chromebook and navigate the internet without limitations.
Happy browsing!