Introduction
Welcome to the guide on how to copy large files to an external hard drive. Whether you’re looking to transfer large media files, backup important documents, or free up space on your computer, knowing how to effectively copy large files is essential. In this article, we will walk you through the process of copying files to an external hard drive, providing you with various methods and tips to ensure a smooth transfer.
Understanding how file sizes work is crucial when dealing with large files. In the digital world, file sizes are typically measured in bytes, kilobytes (KB), megabytes (MB), gigabytes (GB), and terabytes (TB). The larger the file, the more storage space it requires. For example, a high-definition movie can easily take up several gigabytes of space, while a simple text document may only be a few kilobytes.
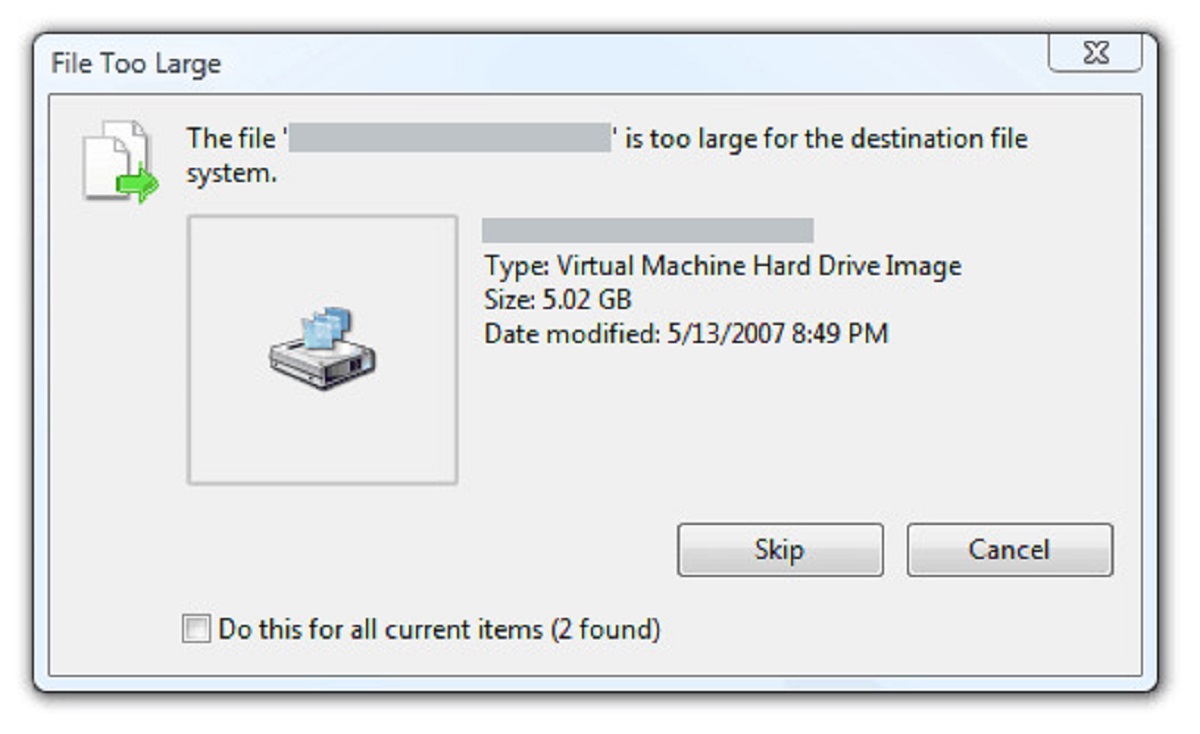
Before you begin the file copying process, make sure your external hard drive is properly prepared. This involves formatting the drive to a compatible file system, such as NTFS or exFAT, depending on your operating system and compatibility needs. Additionally, ensure that your external hard drive has enough available space to accommodate the files you want to copy.
Now that your external hard drive is ready, you need to connect it to your computer. This can be done by plugging the USB cable of the external hard drive into an available USB port on your computer. Once connected, your computer should recognize the external hard drive as a new storage device.
With the external hard drive connected, it’s time to select the files you want to copy. This can be done by locating the files on your computer’s internal storage and selecting them individually or by creating a folder containing all the files you wish to copy.
Understanding File Sizes
When it comes to dealing with large files, it’s important to have a clear understanding of file sizes and how they are measured. File sizes are typically indicated in units such as bytes, kilobytes (KB), megabytes (MB), gigabytes (GB), and terabytes (TB).
At the smallest level, a file is measured in bytes. A single byte represents the smallest unit of information. However, for most files, the size is much larger and is measured in kilobytes (KB), where 1 kilobyte is equal to 1,024 bytes. This unit is commonly used for small text files or basic images.
As files get larger, the use of megabytes (MB) becomes more relevant. One megabyte is equal to 1,024 kilobytes or approximately 1 million bytes. This unit is often used to measure the size of photos, music files, and small videos.
When dealing with even larger files, gigabytes (GB) are used. A gigabyte is equal to 1,024 megabytes or approximately 1 billion bytes. This unit is commonly used for high-definition videos, large software applications, and extensive collections of photos or music.
For massive files or storage capacities, terabytes (TB) come into play. One terabyte is equal to 1,024 gigabytes or approximately 1 trillion bytes. This unit is commonly used for professional video production, extensive digital libraries, and enterprise-level storage solutions.
It’s important to keep in mind that file sizes can vary depending on the type of file format and the contents of the file itself. For example, a text document may only take up a few kilobytes, while a high-resolution image or a video can easily fill several gigabytes.
Understanding file sizes is crucial when copying and transferring large files. It allows you to properly estimate the required storage space on your external hard drive and ensure that you have enough available capacity to accommodate the files you want to copy. It also helps you to manage your storage efficiently and avoid running out of space when dealing with large media or data files.
Preparing Your External Hard Drive
Before you can start transferring large files to your external hard drive, it’s important to ensure that it is properly prepared for the task. Here are some steps to follow in preparing your external hard drive:
- Check compatibility: Make sure your external hard drive is compatible with your computer’s operating system. Most external hard drives support both Windows and macOS, but it’s always a good idea to double-check.
- Format the drive: If your external hard drive is brand new or has data that you don’t need anymore, it’s recommended to format the drive. Formatting erases all existing data on the drive, so make sure you have already backed up any important files. To format the drive, plug it into your computer and open the Disk Management tool on Windows or the Disk Utility on macOS.
- Choose the file system: When formatting your external hard drive, you’ll need to choose a file system. For Windows, it’s recommended to use the NTFS file system, as it provides better compatibility and supports larger file sizes. For macOS, you can use the default Apple File System (APFS) or the exFAT file system, which is compatible with both macOS and Windows.
- Assign a drive letter or name: After formatting, you can assign a drive letter (Windows) or name (macOS) to your external hard drive. This will make it easier to identify and access the drive when you connect it to your computer.
- Create folders: To keep your files organized, create folders on your external hard drive. You can create separate folders for different types of files or based on your preferred organizational structure.
- Set up backup software (optional): If you plan to use your external hard drive for regular backups, consider installing backup software that automates the process. Many external hard drives come with their own backup software, or you can use third-party options like Acronis True Image or EaseUS Todo Backup.
By following these steps, you can ensure that your external hard drive is ready for the task of copying large files. Taking the time to properly prepare your external hard drive will help prevent any compatibility issues and provide you with a reliable and organized storage solution.
Connecting Your External Hard Drive to Your Computer
Once you have prepared your external hard drive, the next step is to connect it to your computer. Follow these steps to ensure a successful connection:
- Locate an available USB port: Identify an available USB port on your computer. Most computers have several USB ports located on the front, back, or sides of the machine.
- Plug in the USB cable: Take the USB cable that came with your external hard drive and connect one end to the USB port on your computer.
- Connect to the external hard drive: Take the other end of the USB cable and connect it to the corresponding port on your external hard drive.
- Power on the external hard drive: If your external hard drive has a power button or switch, make sure it is in the “on” position. Some external hard drives are powered directly through the USB connection and do not require a separate power source.
- Wait for detection: After connecting the USB cable and powering on your external hard drive, give it a few moments to be detected by your computer. Depending on your operating system and the speed of your computer, this process may take a few seconds.
- Confirm detection: Once your external hard drive is detected, you will typically see a notification or an icon representing the drive in your operating system’s file explorer. This indicates that your computer recognizes the external hard drive as a new storage device.
- Access the external hard drive: Open your operating system’s file explorer, such as Windows Explorer on Windows or Finder on macOS, to access the external hard drive. From there, you can navigate to the drive and start transferring files.
It’s important to note that if your external hard drive requires additional power, make sure to connect it to a power outlet using the provided power adapter. Some external hard drives also require specific drivers or software to be installed for compatibility with your operating system.
By following these steps, you can successfully connect your external hard drive to your computer and begin the process of transferring large files. Keep in mind that the specific steps may vary slightly depending on the make and model of your external hard drive, as well as your operating system.
Selecting the Files You Want to Copy
Now that your external hard drive is properly connected to your computer, it’s time to select the specific files you want to copy. Whether you’re transferring important documents, multimedia files, or a mixture of both, follow these steps to select the files:
- Locate the files: Navigate to the location on your computer where the files are stored. This can be your desktop, Documents folder, or any other directory where the files are saved.
- Individual selection: If you want to copy specific files, click on each file while holding the Ctrl key (Windows) or the Command key (macOS). This allows you to select multiple files individually.
- Selecting a range of files: To select a range of files, click on the first file in the range, hold the Shift key, and then click on the last file in the range. This will select all the files in between as well.
- Selecting all files in a folder: If you want to copy all files from a specific folder, simply click on the folder name once to select it. Then, all files and subfolders within that folder will be included in the selection.
- Organize files into folders: If you prefer to copy multiple files, it can be helpful to organize them into folders on your computer before the copying process. This makes it easier to manage and locate the files on your external hard drive.
Keep in mind that the number and size of the files you select will determine the amount of time it takes to copy them. Large files, such as high-definition videos or complex software installations, may take longer to copy than smaller files like text documents or images.
Before proceeding to the next step, double-check your selected files to ensure you have included all the necessary files and excluded any that you do not want to copy. This helps to avoid any confusion or mistakes during the copying process.
By following these steps, you can easily select the specific files you want to copy to your external hard drive. Whether it’s a few important documents or an extensive collection of multimedia files, having the ability to select and organize the files will ensure a smooth and efficient copying process.
Choosing the Right Copying Method
When it comes to copying files to your external hard drive, there are multiple methods you can choose from. The method you select will depend on your personal preference, the size and type of files you are copying, and the operating system you are using. Here are some common copying methods to consider:
- Windows Explorer: One of the simplest and most straightforward methods is to use Windows Explorer (or File Explorer in newer versions of Windows). Simply navigate to the location of the files you want to copy, select them, and then right-click and choose “Copy”. Then, navigate to your external hard drive in Windows Explorer, right-click in the desired location, and choose “Paste” to copy the files.
- Drag and Drop: Another intuitive way to copy files is by using the drag and drop method. In your operating system’s file explorer, select the files you want to copy, click and hold, and then drag them to the desired location on your external hard drive. Once you release the mouse button, the files will be copied to the external hard drive.
- Copy and Paste: Similar to the drag and drop method, you can also use the copy and paste function to copy files. Select the files you want to copy, right-click, and choose “Copy”. Then, navigate to your external hard drive, right-click in the desired location, and choose “Paste” to copy the files.
- File Syncing Software: For more advanced copying needs, you can use file syncing software such as FreeFileSync, SyncToy, or GoodSync. These tools offer more granular control over the copying process, allowing you to synchronize specific folders, update files automatically, and schedule regular backups of your files.
It’s important to note that the copying methods described above are applicable to both Windows and macOS, with minor variations in the user interface.
When selecting the right copying method, consider factors such as the number of files you are copying, the file sizes, and the overall convenience and ease of use. If you are copying a large number of files or want to automate the process, using file syncing software would be a recommended option. If you prefer a simpler and more hands-on approach, relying on Windows Explorer or the drag and drop method may be sufficient.
It’s worth experimenting with different copying methods to find the one that best meets your needs and preferences. Remember to monitor the copying process and ensure that all files are successfully transferred to your external hard drive.
By choosing the right copying method, you can efficiently transfer your files to your external hard drive, ensuring their safety and accessibility for future use.
Copying Files Using Windows Explorer
One of the simplest and most widely used methods to copy files to your external hard drive is by using Windows Explorer. Follow these steps to copy files using Windows Explorer:
- Open Windows Explorer: Open the Windows Explorer by pressing the Windows key + E, or by clicking on the folder icon in the taskbar.
- Navigate to the source location: In Windows Explorer, navigate to the folder or directory where the files you want to copy are located. You can use the file tree in the left-hand panel or manually locate the folder.
- Select the files: Once you are in the source folder, select the files you want to copy. To select multiple files, hold down the Ctrl key and click on each file. Alternatively, you can select all files in a folder by pressing Ctrl + A.
- Copy the files: Right-click on one of the selected files and choose “Copy” from the context menu. Alternatively, you can use the shortcut Ctrl + C to copy the files.
- Navigate to the external hard drive: In Windows Explorer, navigate to the location on your external hard drive where you want to copy the files. You can select an existing folder or create a new one by right-clicking and choosing “New Folder” from the context menu.
- Paste the files: Right-click in the desired location and choose “Paste” from the context menu. Alternatively, you can use the shortcut Ctrl + V to paste the files. The files will now be copied from their original location to the external hard drive.
- Monitor the copying process: Windows will display a progress bar or a file transfer dialogue to indicate the copying process. Monitor this to ensure that all files are successfully copied without any errors.
Using Windows Explorer is a straightforward method to copy files as it is built into the Windows operating system. It provides a familiar interface for navigating and managing files, making it intuitive for most users.
Remember to ensure that your external hard drive has enough available space to accommodate the copied files. If the transfer is interrupted or encounters any issues, you may need to retry the copying process. It’s always a good practice to double-check the files on your external hard drive to confirm that they are complete and intact.
By following these steps, you can easily copy files to your external hard drive using Windows Explorer. Whether you’re copying a few documents or a large collection of multimedia files, this method offers a quick and efficient way to transfer your files.
Copying Files Using Drag and Drop
Another popular and intuitive method to copy files to your external hard drive is by using the drag and drop functionality. Here are the steps to copy files using drag and drop:
- Open Windows Explorer: Open Windows Explorer by pressing the Windows key + E or clicking on the folder icon in the taskbar.
- Navigate to the source location: In Windows Explorer, locate the folder or directory where the files you want to copy are stored.
- Select and hold the files: Click and hold the left mouse button on the first file you want to copy. While holding the mouse button, drag the file towards the external hard drive.
- Drop the files: While still holding the mouse button, move the cursor over the desired location on the external hard drive. Release the mouse button to drop the files into the chosen location.
- Monitor the copying process: As you drag and drop the files, Windows will display a progress bar or a file transfer dialogue to indicate the copying process. Keep an eye on this to ensure the files are being successfully copied.
- Repeat for additional files: If you have more files to copy, repeat the process by selecting and dragging them to the external hard drive. You can select multiple files at once by holding the Ctrl key while clicking on each file.
The drag and drop method allows you to visually manage and organize your files during the copying process. You can easily arrange the files in the desired folders on the external hard drive by dropping them into the appropriate locations.
With drag and drop, you have the flexibility to copy files between different folders on your computer and the external hard drive by simply dragging and dropping them. This method is especially useful when you want to copy files from multiple locations into a single folder on your external hard drive.
During the copying process, ensure that your external hard drive has sufficient storage space to accommodate the copied files. Pay attention to any error messages or interruptions that may occur while dragging and dropping. If any issues occur, simply repeat the process for the affected files.
By following these steps, you can easily copy files to your external hard drive using the convenient drag and drop method. This method offers a visually intuitive way to transfer your files, allowing you to organize them effectively on your external hard drive.
Copying Files Using Copy and Paste
An alternative method to copy files to your external hard drive is by using the copy and paste function. Here’s how you can copy files using copy and paste:
- Open Windows Explorer: Launch Windows Explorer by pressing the Windows key + E or clicking on the folder icon in the taskbar.
- Navigate to the source location: In Windows Explorer, browse to the folder or directory where the files you want to copy are located.
- Select the files: Click on the first file you want to copy and hold down the Shift key. While holding Shift, use the arrow keys or the mouse to highlight the other files you want to copy. Alternatively, hold down the Ctrl key and click on each file you want to copy individually.
- Copy the files: Right-click on one of the selected files and choose “Copy” from the context menu. Another way to copy the files is by using the shortcut Ctrl + C.
- Navigate to the external hard drive: In Windows Explorer, navigate to the location on your external hard drive where you want to paste the files. You can select an existing folder or create a new one by right-clicking and choosing “New Folder” from the context menu.
- Paste the files: Right-click in the desired location and choose “Paste” from the context menu. Alternatively, you can use the shortcut Ctrl + V to paste the files. The files will be copied from their original location to the selected location on the external hard drive.
- Monitor the copying process: As you paste the files, Windows will display a progress bar or a file transfer dialogue to indicate the copying process. Keep an eye on this to ensure that the files are being copied successfully.
The copy and paste method provides a straightforward and familiar way to copy files. It offers greater flexibility than drag and drop as you can use shortcuts and keyboard navigation to select multiple files quickly.
Using copy and paste also allows you to copy and paste files between different drives, making it useful when working with multiple external hard drives or transferring files between different storage devices.
During the copying process, ensure that your external hard drive has enough available space to accommodate the copied files. If any interruptions or errors occur, such as disconnection of the external hard drive, you may need to repeat the paste operation for the affected files.
By following these steps, you can easily copy files to your external hard drive using the copy and paste method. This method provides a reliable and efficient way to transfer your files, allowing you to seamlessly manage and organize them on your external hard drive.
Copying Files Using File Syncing Software
File syncing software provides a comprehensive and automated approach to copying files to your external hard drive. These tools offer advanced features and options for managing and synchronizing your files. Here’s how you can copy files using file syncing software:
- Choose file syncing software: Research and select a file syncing software that suits your needs. Popular options include FreeFileSync, SyncToy, and GoodSync. Download and install the software on your computer.
- Open the file syncing software: Launch the file syncing software by locating its shortcut on your desktop or finding it in the Start menu.
- Select the source folder: In the file syncing software, designate the source folder on your computer where the files you want to copy are located. This can be done through a browse option or by manually entering the folder path.
- Select the destination folder: Specify the destination folder on your external hard drive where you want to copy the files. This should be a folder you have created on the external hard drive specifically for this purpose.
- Choose the syncing method: Select the appropriate syncing method based on your preferences. Options may include one-way syncing (from source to destination), two-way syncing (bidirectional), or mirror syncing (ensuring the destination folder is an exact replica of the source folder).
- Configure additional settings: Depending on the file syncing software you are using, you may have additional options to configure. These can include filter settings to exclude specific file types or advanced synchronization rules.
- Initiate the sync: After configuring the settings, start the synchronization process by clicking on the appropriate button or selecting the sync option. The file syncing software will copy the selected files from the source folder to the destination folder on your external hard drive.
- Monitor the syncing process: Keep an eye on the progress bar or status indicators provided by the file syncing software. This allows you to ensure that the files are being synchronized without any errors.
File syncing software offers additional benefits beyond simple file copying. It enables you to automatically update files between your computer and the external hard drive, ensuring that both remain in sync with the latest versions of the files. Some software also allows you to schedule regular backups or perform incremental syncing to optimize the copying process.
When using file syncing software, it’s important to familiarize yourself with the user interface and settings. Review the software’s documentation or help resources for guidance on setting up and managing the syncing process.
By utilizing file syncing software, you can streamline the copying process and maintain a consistent file structure between your computer and external hard drive. This method is particularly advantageous when dealing with a large number of files or when you need to regularly update and synchronize your data.
Resolving Common Issues
While copying files to an external hard drive, you may encounter certain issues that could disrupt the process. Here are some common issues that may arise and steps to resolve them:
- Insufficient storage space: If you receive notifications indicating that there is not enough space on your external hard drive, double-check the available storage capacity. Remove any unnecessary files or consider upgrading to a larger external hard drive to accommodate your files.
- Slow transfer speed: If the copying process is taking longer than expected, check the USB connection and make sure it is properly plugged in. Additionally, ensure that the USB port and cable you are using support high-speed data transfer. Disconnecting unnecessary USB devices and closing other background tasks can also help improve transfer speed.
- File corruption: If any of the copied files appear to be corrupted or inaccessible, verify the integrity of the original files on your computer. Run file integrity checks or use file recovery software to try to restore the files. If the issue persists, consider recopying the files from the source to the external hard drive.
- File in use or locked: If a file is being used by another application or locked, you may encounter errors while copying. Close any programs that are currently using the file or try to unlock the file by closing applications that may be accessing it. If all else fails, try to copy the file after restarting your computer.
- Unresponsive external hard drive: If your external hard drive is not being recognized or is unresponsive, ensure that it is properly connected to your computer. Try using a different USB port, USB cable, or even a different computer to troubleshoot. Updating the external hard drive’s drivers or firmware may also help resolve any connectivity issues.
- Interference from security software: In some cases, security software or antivirus programs may interfere with the copying process. Temporarily disable such software or add an exception for the copying process to allow it to proceed unhindered.
If you encounter issues that are not addressed by the above suggestions, refer to the user manual or online support resources for your specific external hard drive model or consult with the manufacturer’s customer support for further assistance.
It’s important to note that maintaining regular backups of your files can minimize the impact of potential issues. Regular backups ensure that even if a file transfer encounters a problem, you have a secondary copy available for recovery.
By proactively addressing and resolving common issues that arise during the file copying process, you can ensure a successful and efficient transfer of your files to your external hard drive.
Safely Disconnecting Your External Hard Drive
After you have finished copying files to your external hard drive, it’s important to safely disconnect it from your computer to prevent any data loss or damage to the files. Follow these steps to safely disconnect your external hard drive:
- Close any file explorer windows: Make sure that you have closed all file explorer windows or applications that are accessing files on your external hard drive. This ensures that no files are in use, and all data transfers are completed.
- Eject the external hard drive using the operating system: In Windows, locate the “Safely Remove Hardware” icon in the system tray or notification area and click on it. A list of connected devices will appear. Select your external hard drive from the list and wait for a confirmation message that it is safe to remove the device. In macOS, you can either click on the “Eject” button next to the external hard drive in Finder or drag the external hard drive icon to the trash bin to eject it.
- Physically disconnect the external hard drive: Once you have received the confirmation message or ejected the external hard drive, you can safely disconnect it from your computer. If your external hard drive has a separate power supply, make sure to turn it off before disconnecting.
If you are using a Windows computer, it’s important to note that simply unplugging the external hard drive without properly ejecting it can potentially result in data corruption or loss. This is because the operating system may still be writing data to the external hard drive, and an abrupt disconnection can interrupt the process.
By following the proper procedure to safely disconnect your external hard drive, you ensure that all data transfers are completed and any cached data is written to the external hard drive. This helps to maintain data integrity and prevent potential issues when accessing the files in the future.
It’s a good practice to check that all the files you intended to copy are present and accessible on your external hard drive before disconnecting it. This can be done by opening a few files and verifying their contents.
Remember that when you reconnect your external hard drive to your computer, it may take a few moments for the operating system to recognize and mount the device. Once it is detected, you can access your files as usual.
By safely disconnecting your external hard drive, you ensure the integrity and availability of your copied files, promoting a reliable and consistent data storage process.
Conclusion
Copying large files to an external hard drive is a valuable skill that allows you to efficiently manage and secure your data. Throughout this guide, we have covered various aspects of the file copying process, including understanding file sizes, preparing your external hard drive, connecting it to your computer, selecting files, choosing the right copying method, resolving common issues, and safely disconnecting the external hard drive.
Understanding file sizes helps you gauge the storage capacity needed on your external hard drive and optimize the organization of your files. Preparing your external hard drive involves checking compatibility, formatting the drive, and creating folders for efficient organization.
Connecting your external hard drive to your computer is a straightforward process, while selecting files allows you to choose specific files or folders you wish to copy. Selecting the appropriate copying method, such as using Windows Explorer, drag and drop, copy and paste, or file syncing software, depends on your preference and the complexity of the copying process.
While copying files, it’s essential to be aware of common issues that may arise, such as insufficient storage space, slow transfer speeds, file corruption, file conflicts, unresponsive external hard drives, and interference from security software. By understanding and addressing these issues, you can ensure successful file transfers.
Finally, it’s crucial to safely disconnect your external hard drive to avoid data loss or damage. Following the recommended steps for safely ejecting and physically disconnecting the drive helps maintain the integrity of your files and protects them from potential issues.
In conclusion, with the knowledge and skills gained from this guide, you can confidently copy large files to your external hard drive, establishing an efficient and secure storage solution for your valuable data.


