Introduction
When it comes to troubleshooting issues with a PC, one of the most basic yet essential components to test is the power buttons on the PC case. These buttons serve as the primary means to turn on and off the computer, making them crucial for everyday use. However, like any other mechanical component, power buttons can sometimes fail or become unresponsive.
Testing the power buttons on a PC case is an important step to identify if they are functioning properly or if there is a need for repair or replacement. Fortunately, there are different methods available to test these buttons, ranging from visual inspections to using specialized tools such as multimeters. By undertaking these simple tests, you can quickly determine whether the issue lies with the buttons themselves or if there are other underlying causes for the problem.
This article will guide you through the process of testing the power buttons on a PC case, providing multiple methods to ensure accurate and reliable results. We will discuss the tools required for testing, as well as step-by-step instructions for each testing method. Whether you are an experienced computer technician or a novice enthusiast, this article will equip you with the knowledge needed to effectively troubleshoot power button issues on your PC.
Before diving into the testing methods, it is important to note that in some cases, power button issues may not be due to a fault with the buttons themselves. Other factors, such as faulty wiring, power supply issues, or software malfunctions, can also cause problems with turning on or off the computer. Therefore, it is advisable to rule out these factors before focusing solely on the power buttons.
Understanding the Power Buttons on a PC Case
Before diving into testing the power buttons on a PC case, it is important to have a basic understanding of how these buttons function. The power buttons on a PC case serve as the interface between the user and the computer’s power supply. When pressed, the power buttons send a signal to the motherboard, instructing it to either turn on or shut down the computer.
Most PC cases have two types of power buttons: the main power button and the reset button. The main power button is used to turn the computer on or off, while the reset button is primarily used to restart the computer in the event of a system freeze or software issue.
The power buttons on a PC case are typically connected to the motherboard through a series of wires. These wires are responsible for transmitting the signal from the buttons to the motherboard. It is essential to ensure that the wires are properly connected, as loose or damaged connections can result in power button malfunctions.
Understanding the anatomy of the power buttons is also crucial. Most power buttons have a spring-loaded mechanism that provides tactile feedback when pressed. This feedback ensures that the user can feel when the button is depressed, triggering the appropriate action.
Additionally, some power buttons may incorporate LED indicators to provide visual feedback. These LEDs are typically designed to illuminate when the computer is powered on, serving as a visual confirmation that the button press was successful.
By familiarizing yourself with the basic functioning and structure of the power buttons on a PC case, you can better understand the potential causes of any issues that may arise. This knowledge will be invaluable as you move forward with testing the power buttons and diagnosing any problems that may occur.
Tools Required for Testing the Power Buttons
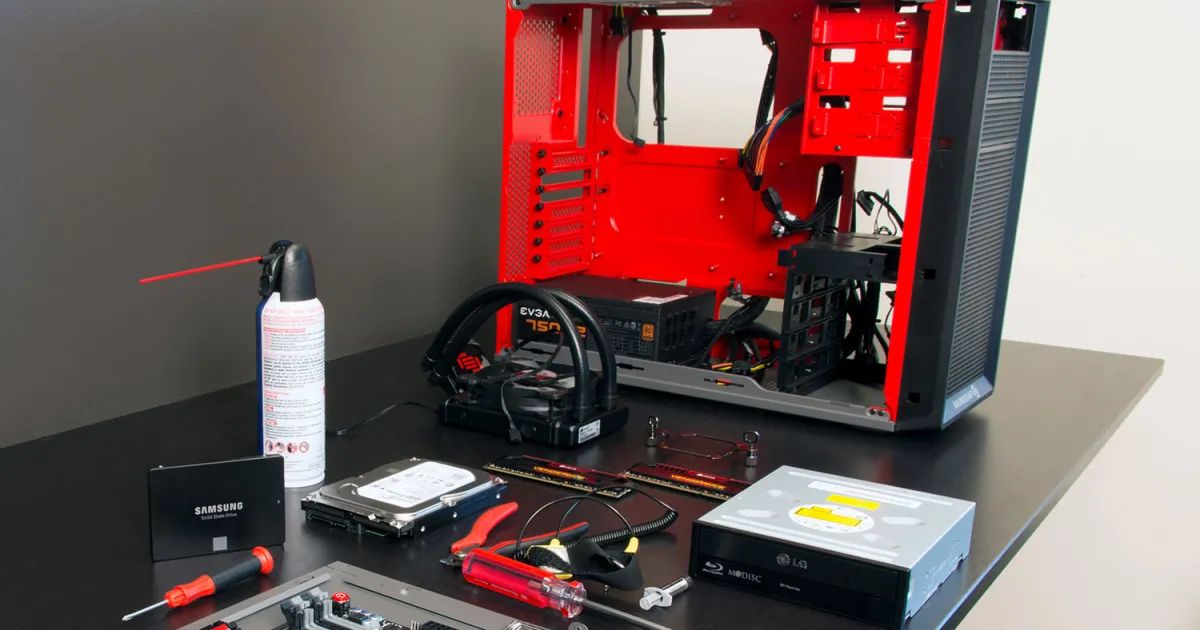
Before you begin testing the power buttons on a PC case, it is important to gather the necessary tools to ensure accurate and reliable results. While some methods may only require basic visual inspection and physical testing, others may involve the use of specialized tools such as a multimeter or software applications. Here are the tools you may need:
1. Screwdriver: A screwdriver is essential for accessing the internal components of the PC case. It is required to remove the screws holding the case panels in place, allowing you to access the power buttons and other components without damaging them.
2. Multimeter: A multimeter is a versatile tool that can be used to measure electrical voltage, current, and resistance. It is particularly useful for diagnosing power button issues by testing the continuity of the button circuit or checking for faulty connections.
3. Software Applications: In some cases, testing the power buttons may involve using software applications to monitor and troubleshoot system power-related issues. These applications can provide useful insights into the overall power state of the computer and help identify any software-related problems.
4. Spare Power Buttons: Having spare power buttons on hand can be helpful if you need to replace a faulty button. This is especially important if you frequently work with computers or plan to perform testing on multiple machines.
5. Anti-static wrist strap: When working with sensitive computer components, it is advisable to use an anti-static wrist strap to prevent damaging the components due to static electricity discharge. This strap ensures that you remain grounded while performing tests, protecting both you and the computer from potential harm.
By having these tools readily available, you can ensure a smooth testing process and quickly identify any power button issues that may be affecting your PC. It is important to note that not all methods will require every tool on the list, but it is beneficial to have them on hand to address various scenarios.
Method 1: Visual Inspection and Physical Testing
One of the simplest and most straightforward methods for testing the power buttons on a PC case is through visual inspection and physical testing. This method allows you to visually examine the buttons and their connections, as well as physically test the button’s responsiveness. Here’s how you can perform this method:
1. Power off your computer: Before starting the testing process, make sure to power off your computer and unplug it from the power source. This ensures your safety and prevents any accidental damage.
2. Open the PC case: Use a screwdriver to remove the screws holding the case panels in place. Carefully remove the panels to expose the internal components of the PC.
3. Locate the power buttons: Identify the power buttons on the front or top panel of the PC case. They are usually labeled as “Power” or have a power symbol. Take note of their position and make sure to handle them with care.
4. Inspect the physical condition: Carefully examine the power buttons for any visible signs of damage, such as cracks, loose connections, or wear and tear. Check if the buttons are securely attached to the case and if there are any obstructions that could affect their functioning.
5. Check the button connections: Follow the wires connected to the power buttons. Ensure that they are securely connected to the motherboard or a dedicated button controller. Verify that the wires are not frayed or damaged.
6. Press the power buttons: Gently press the power buttons while observing their response. The buttons should depress smoothly and spring back when released. Pay attention to any resistance or unusual movements that may indicate a faulty button.
7. Observe LED indicators: If your power buttons have LED indicators, check if they illuminate when the buttons are pressed. This confirms that the buttons are sending the appropriate signal to the motherboard.
8. Test the reset button: If your PC case has a reset button, repeat steps 4 to 7 to inspect and test its functionality.
9. Reassemble the PC: Once you have completed the visual inspection and physical testing, carefully reassemble the PC case by reattaching the panels and tightening the screws.
By performing a thorough visual inspection and physical testing, you can often identify any obvious issues with the power buttons on your PC case. If everything appears to be in order and the buttons are functioning correctly, you can move on to other testing methods to further diagnose any potential problems.
Method 2: Multimeter Testing
Another effective method for testing the power buttons on a PC case is by using a multimeter. A multimeter allows you to measure electrical properties, such as voltage and continuity, and can provide more accurate insights into the functionality of the buttons. Here’s how you can perform multimeter testing:
1. Power off your computer: Before you begin, ensure that your computer is powered off and disconnected from the power source to prevent any electrical accidents.
2. Open the PC case: Use a screwdriver to remove the screws holding the case panels in place. Carefully remove the panels to gain access to the internal components of the PC.
3. Identify the power button connections: Locate the wires connected to the power buttons on the motherboard. They are usually connected to a header labeled “Power SW” or similar.
4. Set up the multimeter: Switch your multimeter to the continuity or resistance mode, depending on the capabilities of your specific multimeter model. Refer to the user manual of your multimeter for instructions on how to set it up correctly.
5. Multimeter probe placement: Take the multimeter probes and touch one probe to the power button’s positive terminal or wire and the other probe to the ground or negative terminal. Alternatively, you can touch one probe to the motherboard’s front panel header pin connected to the power button and the other probe to the ground.
6. Read the multimeter: Observe the reading on the multimeter display. If the power button is functioning correctly, the multimeter will show continuity or a resistance value close to zero. If the reading is significantly different or there is no continuity, it indicates a problem with the power button.
7. Test the reset button: Repeat steps 4 to 6 to perform multimeter testing on the reset button, if applicable.
8. Reassemble the PC: Once you have completed the multimeter testing, carefully reassemble the PC case by reattaching the panels and tightening the screws.
Multimeter testing provides a more precise evaluation of the power buttons’ conductivity. If the multimeter reading indicates a problem with the buttons, it is likely that they need repair or replacement. However, if the readings are normal, you can move on to other testing methods to further diagnose any potential issues with the power buttons.
Method 3: Software Testing
In addition to visual inspection and physical testing, as well as multimeter testing, software testing can also be a valuable method to assess the functionality of the power buttons on a PC case. By utilizing software applications, you can monitor and troubleshoot power-related issues that may be affecting the performance of the buttons. Here’s how you can perform software testing:
1. Research software applications: Look for software applications specifically designed for power management and monitoring. These applications can provide valuable insights into the power state of your computer and help troubleshoot any software-related problems.
2. Download and install the software: Choose a reputable software application that is compatible with your operating system and download it from the official website. Follow the instructions to install the software on your computer.
3. Launch the software: Once the software is installed, launch it and navigate to the power management or monitoring section. The location of this section may vary depending on the software application you are using.
4. Check power button settings: Within the software, verify that the power button settings are configured correctly. Ensure that the power buttons are assigned the appropriate actions, such as shutting down or restarting the computer.
5. Perform power button test: Use the software to initiate a power button test. This will simulate button presses and check if the software accurately detects and responds to these simulated inputs.
6. Observe software feedback: Pay close attention to the feedback provided by the software during the test. It should display the state of the power buttons and indicate whether they are working as expected.
7. Monitor power activity: Utilize the software to monitor the power activity of your computer. Check if it accurately reflects the actions taken when pressing the power buttons, such as powering on or off the system.
8. Troubleshoot software issues: If the software testing reveals any issues with the power buttons or power management, follow the troubleshooting steps provided by the software to resolve the problems. This may involve updating drivers, adjusting settings, or reinstalling the software.
9. Reboot and retest: After troubleshooting, reboot your computer and retest the power buttons using the software. Ensure that the changes made have resolved any previously identified issues.
Software testing can offer valuable insights into the functionality of the power buttons and can help identify any software-related problems that may affect their performance. By utilizing specialized power management applications, you can gain a deeper understanding of how the buttons interact with the software on your computer. If any issues persist, consider seeking further assistance or consulting with a professional technician to address the problem effectively.
Conclusion
Testing the power buttons on a PC case is an essential troubleshooting step when experiencing issues with powering on or off a computer. By following the methods outlined in this article, you can effectively assess the functionality of the power buttons and identify any problems that may be affecting their performance.
Visual inspection and physical testing allow you to visually examine the power buttons for any visible damage or loose connections. Multimeter testing provides a more precise evaluation of the buttons’ conductivity and can indicate whether they are functioning as intended. Software testing offers insights into power management and can help identify any software-related issues that may affect the buttons’ performance.
It is important to be thorough in your testing process and use the appropriate tools and methods to ensure accurate results. Additionally, keep in mind that power button issues may not always be due to a fault with the buttons themselves, but can also arise from wiring problems, power supply issues, or software malfunctions. Consider ruling out these factors before focusing solely on the power buttons.
By successfully testing and diagnosing the power buttons on your PC case, you can determine the necessary steps to address any problems. This may involve repairing or replacing the buttons, resolving wiring issues, or updating software settings. If you are uncertain or encounter complex issues, seeking professional assistance or consulting with a computer technician is recommended.
Remember, regular maintenance and care can prolong the lifespan of your PC components, including the power buttons. By keeping them clean, ensuring proper connections, and promptly addressing any issues, you can maintain a smooth and reliable computing experience.


