Introduction
Checking the RAM (Random Access Memory) on your laptop is an essential task that can help you optimize the performance of your device. RAM plays a crucial role in determining the speed and efficiency of your laptop’s operations. It is responsible for temporarily storing data that your laptop needs to access quickly.
Understanding how much RAM your laptop has and how effectively it is being utilized can be beneficial in various ways. Whether you are a power user who frequently runs resource-intensive applications like video editing software or a casual user who wants to ensure smooth multitasking, knowing how to check your laptop’s RAM can provide valuable insights.
In this article, we will explore different methods to check the RAM on your laptop. We will cover both manual methods using built-in Windows tools and third-party software options. Additionally, we will discuss how to interpret the information obtained and provide some troubleshooting tips if your laptop’s RAM is not showing correctly.
By the end of this article, you will have the knowledge and tools to check your laptop’s RAM and optimize its performance for your specific needs. So, let’s dive in and explore the various methods and techniques to check the RAM on your laptop!
Why is it important to check RAM on your laptop?
Checking the RAM on your laptop is important for several reasons. Here are a few key reasons why understanding your laptop’s RAM is crucial:
- Optimal Performance: RAM directly affects the performance of your laptop. Insufficient RAM can lead to slow system responsiveness, delays in opening applications, and overall sluggish performance. By checking your laptop’s RAM, you can determine if it meets the requirements of the applications you use and ensure that your laptop is operating at its best.
- Effective Multitasking: If you frequently work with multiple applications simultaneously or keep multiple browser tabs open, sufficient RAM is essential for seamless multitasking. Checking your laptop’s RAM capabilities allows you to assess whether it can handle your multitasking requirements without slowing down or freezing.
- Identify Upgrading Opportunities: Checking your laptop’s RAM can help you identify potential upgrade opportunities. If you find that your current RAM is insufficient for your needs, upgrading to a higher capacity can significantly improve your laptop’s performance and allow you to handle demanding tasks more efficiently.
- Detect Hardware Issues: In some cases, RAM-related issues or hardware faults can cause system crashes, blue screens, or unexpected restarts. By checking your laptop’s RAM, you can determine if faulty RAM modules are the root cause of such issues and take appropriate action, such as replacing the faulty RAM modules.
- Software Compatibility: Certain software applications, particularly resource-intensive ones like video editing software or virtual machines, have specific minimum RAM requirements. Checking your laptop’s RAM allows you to verify if it meets the recommended specifications for running these applications smoothly and effectively.
Overall, checking the RAM on your laptop is vital for ensuring optimal performance, effective multitasking, and detecting any potential hardware issues. By understanding your laptop’s RAM capabilities, you can make informed decisions about upgrading, optimizing, and troubleshooting to enhance your overall computing experience.
Different methods to check RAM on your laptop
There are various methods to check the RAM on your laptop, ranging from built-in Windows tools to third-party software. Let’s explore these methods below:
- Method 1: Using Windows Task Manager: The easiest way to check your laptop’s RAM is by using the Windows Task Manager. Simply press Ctrl + Shift + Esc to open the Task Manager and navigate to the Performance tab. Here, you will find the total amount of RAM installed on your laptop, as well as its current usage.
- Method 2: Using System Information: Another built-in tool in Windows is the System Information utility. You can access it by typing msinfo32 in the Run dialog box (press Win + R to open it). In the System Information window, navigate to the System Summary section, and you’ll find details about your laptop’s installed memory (RAM).
- Method 3: Using Command Prompt: The Command Prompt also provides a simple way to check your laptop’s RAM. Open the Command Prompt by typing cmd in the search bar, and then type wmic MemoryChip get Capacity. This command will display the capacity of each installed RAM module.
- Method 4: Using third-party software: If you prefer a more comprehensive analysis of your laptop’s RAM, there are several third-party software options available. Tools like CPU-Z, Speccy, and HWiNFO provide detailed information about your laptop’s hardware, including the RAM capacity, type, and speed.
These methods provide different levels of information about your laptop’s RAM, allowing you to choose the one that suits your needs. Whether you prefer a quick overview using built-in tools or a more in-depth analysis with specialized software, these methods will help you check your laptop’s RAM effectively.
Method 1: Using Windows Task Manager
The Windows Task Manager is a built-in tool that allows you to monitor and manage various aspects of your laptop’s performance, including your RAM usage. Follow these steps to check your laptop’s RAM using the Windows Task Manager:
- Press Ctrl + Shift + Esc, or right-click on the taskbar and select Task Manager.
- In the Task Manager window, click on the Performance tab.
- At the top of the window, you will see several options. Click on Memory to view detailed information about your laptop’s RAM.
- Under the Memory section, you will find the total amount of RAM installed on your laptop, as well as the amount currently in use.
The Windows Task Manager provides a straightforward way to check your laptop’s RAM usage in real-time. It allows you to monitor if your laptop is reaching its RAM capacity and if there is a need to upgrade to improve performance.
Additionally, the Task Manager provides a graphical representation of your laptop’s current RAM usage through a visual meter. This visual representation can help you quickly identify if any particular applications or processes are consuming excessive amounts of RAM, which can help pinpoint potential issues or optimize resource allocation.
Remember that the information displayed in the Task Manager is dynamic and will change as your laptop’s usage fluctuates. The Task Manager is an invaluable tool for monitoring and managing your laptop’s performance, including keeping track of your RAM usage.
Method 2: Using System Information
System Information is a built-in utility in Windows that provides detailed information about your laptop’s hardware and software configurations. To check your laptop’s RAM using the System Information utility, follow these steps:
- Press Win + R to open the Run dialog box.
- Type msinfo32 and hit Enter. This will open the System Information window.
- In the System Information window, on the left-hand side, you will find a list of categories. Click on System Summary to expand it.
- Scroll down to find the Physical Memory (RAM) section.
- Here, you can view the total installed RAM on your laptop, as well as other details such as the RAM type and speed.
The System Information utility provides a comprehensive overview of your laptop’s hardware information, making it a reliable method to check your RAM. It displays the installed RAM capacity, which allows you to ensure that your laptop meets the requirements of the software you use.
Moreover, System Information also provides additional information such as the manufacturer, model, and BIOS version of your laptop. This information can be useful for troubleshooting or if you need to provide detailed system specifications for technical support.
Using the System Information utility gives you access to detailed information about your laptop’s RAM, which is essential for understanding its capabilities and making informed decisions about potential upgrades or optimizations.
Method 3: Using Command Prompt
Command Prompt is a powerful command-line interface in Windows that allows you to execute various commands and access system information. To check your laptop’s RAM using Command Prompt, follow these steps:
- Open the Run dialog box by pressing Win + R.
- Type cmd and press Enter to open the Command Prompt.
- In the Command Prompt window, type the following command:
wmic MemoryChip get Capacity- Press Enter to execute the command.
- A list will be displayed showing the capacity of each installed RAM module in kilobytes (KB).
Using Command Prompt to check your laptop’s RAM provides a quick and straightforward method to obtain information about the installed RAM modules. The output will display the capacity of each RAM module separately, allowing you to determine the total RAM capacity of your laptop.
This method is particularly useful if you need to check the specific capacity of each individual RAM module in case you are considering upgrading or troubleshooting hardware issues. It provides accurate information directly from the hardware.
Additionally, Command Prompt offers various other commands that can assist in system monitoring and diagnostics. You can explore additional commands to check details such as memory speed, form factor, or manufacturer information by consulting Windows documentation or online resources.
With Command Prompt, you can quickly retrieve detailed information about your laptop’s RAM without relying on external software or utilities.
Method 4: Using third-party software
If you prefer a more comprehensive analysis of your laptop’s RAM, there are several third-party software options available. These tools provide detailed information about your laptop’s hardware, including the RAM capacity, type, speed, and other relevant details. Some popular third-party software options for checking your laptop’s RAM are:
- CPU-Z: CPU-Z is a lightweight and user-friendly software that offers in-depth information about your laptop’s hardware. It provides detailed information about the RAM modules installed in your laptop, including the capacity, type, speed, and timings.
- Speccy: Speccy is a versatile system information tool that provides comprehensive details about your laptop’s hardware configuration. It offers a user-friendly interface and displays detailed information about your RAM, including the capacity, type, speed, and even the temperature.
- HWiNFO: HWiNFO is a powerful system information and diagnostic tool that provides extensive details about your laptop’s hardware components. It offers comprehensive information about your RAM, allowing you to view not only the capacity and type but also advanced details like the number of memory channels and the voltage level.
Using third-party software to check your laptop’s RAM provides more advanced and detailed information compared to the built-in Windows tools. These software options offer a range of additional features and performance monitoring capabilities, making them a popular choice among tech enthusiasts and professionals.
Furthermore, third-party software may offer real-time monitoring, allowing you to track your RAM usage, identify potential issues, and optimize resource allocation. Some software even includes benchmarking capabilities, allowing you to compare your laptop’s RAM performance with other systems.
When using third-party software, it is essential to download and install it from reputable sources to ensure the software is safe and reliable.
Overall, third-party software options provide a comprehensive and detailed analysis of your laptop’s RAM, allowing you to make informed decisions about upgrades, optimizations, and troubleshooting.
How to interpret the information obtained
Interpreting the information obtained from checking your laptop’s RAM is essential for understanding its capabilities and making informed decisions. Here are some key points to consider when interpreting the information:
- Total RAM Capacity: The total RAM capacity indicates the maximum amount of data your laptop can store and access at any given time. It is important to ensure that the installed RAM meets the requirements of the applications you use. If the total capacity seems insufficient for your needs, you may consider upgrading to a higher capacity RAM module or adding additional modules.
- RAM Usage: Monitoring your RAM usage is crucial for efficient performance. Ideally, your laptop should have enough RAM to accommodate the applications and tasks you frequently use without running out of available memory. If you consistently observe high RAM usage or frequent memory-related performance issues, it may indicate the need for additional RAM or optimizing your system’s resource allocation.
- RAM Type and Speed: Understanding the type and speed of your laptop’s RAM helps ensure compatibility and optimal performance. Different generations and types of RAM (e.g., DDR3, DDR4) have varying speeds and capabilities. If you plan to upgrade or replace your RAM, it is important to match the new module(s) with your laptop’s supported RAM type and speed for optimal compatibility.
- Memory Channels: Some laptops support dual-channel or quad-channel memory configurations, which can enhance memory performance. If your laptop supports multiple memory channels, leveraging this feature can provide a boost in memory bandwidth and improve overall system performance. Make sure to install compatible RAM modules and distribute them appropriately across the memory channels.
- Memory Timings: Memory timings refer to the delays between memory commands and play a role in RAM performance. While it may not be critical for average users, performance enthusiasts or gamers may consider tweaking memory timings to achieve optimal performance. However, tampering with memory timings requires advanced knowledge and caution to avoid system instability.
Interpreting the information obtained from checking your laptop’s RAM provides valuable insights into its performance and potential areas for improvement. It helps you make informed decisions about upgrading, optimizing resource utilization, and troubleshooting memory-related issues.
Remember that the specific interpretation will vary based on individual needs and use cases. It is important to consider the specific requirements of the applications and tasks you frequently use to determine the adequacy of your laptop’s RAM configuration.
Common troubleshooting tips if RAM is not showing correctly
If you encounter issues where the RAM on your laptop is either not showing correctly or not being detected at all, there are several troubleshooting tips you can try. Here are some common solutions to resolve RAM detection issues:
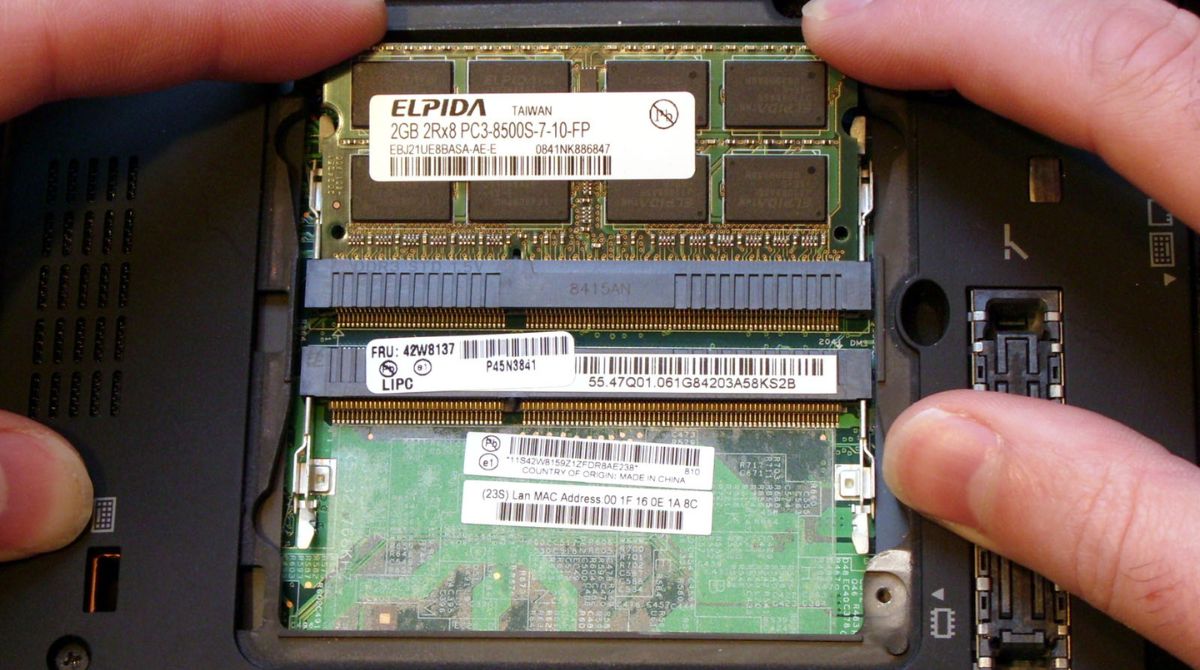
- Reinstall RAM modules: Sometimes, a loose connection between the RAM modules and the motherboard can result in detection issues. Try removing and reseating the RAM modules firmly into their slots to ensure a proper connection.
- Clean RAM contacts: Over time, dust or dirt can accumulate on the RAM contacts, causing poor connectivity. Carefully remove the RAM modules and clean the gold contacts using a soft, lint-free cloth or an eraser. Make sure the modules are fully dry before reinstalling them.
- Check for compatibility: Ensure that the RAM modules you have installed are compatible with your laptop’s motherboard. Refer to your laptop’s documentation or manufacturer’s website to verify the supported RAM specifications.
- Update BIOS: Outdated or incompatible BIOS firmware can sometimes cause issues with RAM detection. Check the manufacturer’s website for BIOS updates specific to your laptop model and install the latest version to ensure proper RAM recognition.
- Test with one module at a time: If you have multiple RAM modules, try testing each module individually by installing one at a time. This can help identify whether a specific module is faulty or causing detection issues.
- Reset CMOS: Resetting the CMOS (Complementary Metal-Oxide-Semiconductor) settings can sometimes resolve RAM detection problems. To do this, locate the CMOS battery on your laptop’s motherboard and temporarily remove it. Leave it out for a few minutes before reinserting it. This will reset the BIOS settings to their default state.
- Seek professional assistance: If the above steps do not resolve the issue, it may be necessary to seek professional help. Reach out to a computer technician or contact the laptop manufacturer’s support for further assistance and diagnostics.
Remember to exercise caution when working with hardware components and follow proper safety procedures, such as grounding yourself to prevent static discharge, while troubleshooting RAM issues.
By following these troubleshooting tips, you can address common RAM detection problems and ensure that your laptop recognizes and utilizes the installed RAM correctly.
Conclusion
Checking the RAM on your laptop is a crucial task for optimizing its performance and ensuring smooth multitasking. By understanding your laptop’s RAM capabilities, you can make informed decisions about upgrading, troubleshooting, and maximizing its efficiency.
In this article, we explored different methods to check your laptop’s RAM. We discussed using built-in Windows tools like the Task Manager and System Information, which provide quick and convenient ways to obtain information about your RAM. We also covered the Command Prompt method for those who prefer a command-line interface.
Additionally, we looked at the option of using third-party software, which offers more detailed insights into your laptop’s RAM specifications and performance. Tools like CPU-Z, Speccy, and HWiNFO provide comprehensive information for advanced users and enthusiasts.
Interpreting the information obtained from these methods is essential for understanding your laptop’s RAM capabilities. It enables you to assess whether your laptop’s RAM meets the requirements of the applications you use and identify any potential issues such as high RAM usage or memory-related performance problems.
If you encounter problems with RAM detection, we provided common troubleshooting tips, such as reseating the RAM modules, cleaning the contacts, and checking for compatibility. Following these steps can help resolve issues and ensure accurate RAM detection.
Remember that upgrading or replacing RAM modules should be done with caution and proper research. Always consult your laptop’s documentation or manufacturer’s website for specific RAM compatibility information.
In conclusion, checking the RAM on your laptop is essential for optimizing its performance and ensuring efficient multitasking. By utilizing the methods and tips provided in this article, you can confidently check and interpret your laptop’s RAM information to make informed decisions about upgrades, troubleshooting, and overall system optimization.