Introduction
Welcome to this guide on how to check RAM timings. RAM (Random Access Memory) is a vital component of any computer system, responsible for temporarily storing data that the CPU (Central Processing Unit) needs to access quickly. RAM timings refer to the specific settings that determine how quickly the RAM can read and write data. While these timings may seem technical and complex, understanding and optimizing them can help improve your computer’s performance.
RAM timings are measured in nanoseconds or clock cycles, and they include primary timings and secondary timings. Primary timings encompass parameters such as CAS latency, RAS to CAS delay, and RAS precharge delay, while secondary timings include parameters like tRFC, tRRD, and tFAW. Each timing plays a crucial role in determining the overall speed and efficiency of your RAM.
In this guide, we will explore how to check RAM timings on both Windows and macOS operating systems. We will provide step-by-step instructions using built-in tools, such as Task Manager and Command Prompt on Windows, and Activity Monitor and Terminal on macOS. By following these methods, you can easily retrieve the RAM timings of your system.
Furthermore, we will discuss how to interpret RAM timings and understand their significance. By grasping the meaning behind these numbers, you can gain insight into the performance of your RAM and identify areas for potential improvement. Additionally, we will offer tips on how to optimize RAM timings, ensuring that your system operates at its maximum potential.
Whether you are a tech enthusiast, a gamer, or simply someone looking to enhance the performance of your computer, understanding and checking RAM timings is a valuable skill to have. So, let’s get started and dive into the world of RAM timings, exploring how they can impact your computer’s performance and how you can optimize them for the best results.
What are RAM Timings?
RAM timings are specific settings that determine the speed at which the RAM module can read and write data. They refer to the delay in clock cycles or time taken in nanoseconds for various operations to be performed by the RAM chips. These timings play a crucial role in the overall performance of your computer.
The primary timings, also known as the main timings or CAS latency (CL) timings, include parameters such as CAS latency, RAS to CAS delay (tRCD), and RAS precharge delay (tRP). CAS latency is the most well-known primary timing and represents the number of clock cycles the RAM takes to respond to a command. RAS to CAS delay is the number of clock cycles required for the RAM to address a column after receiving a command, while RAS precharge delay is the number of clock cycles required for the RAM to close a row after completing its activities.
In addition to the primary timings, there are secondary timings that contribute to the overall performance of the RAM. These timings include parameters such as tRFC, tRRD, and tFAW, which affect the refresh and synchronization of data between different memory banks.
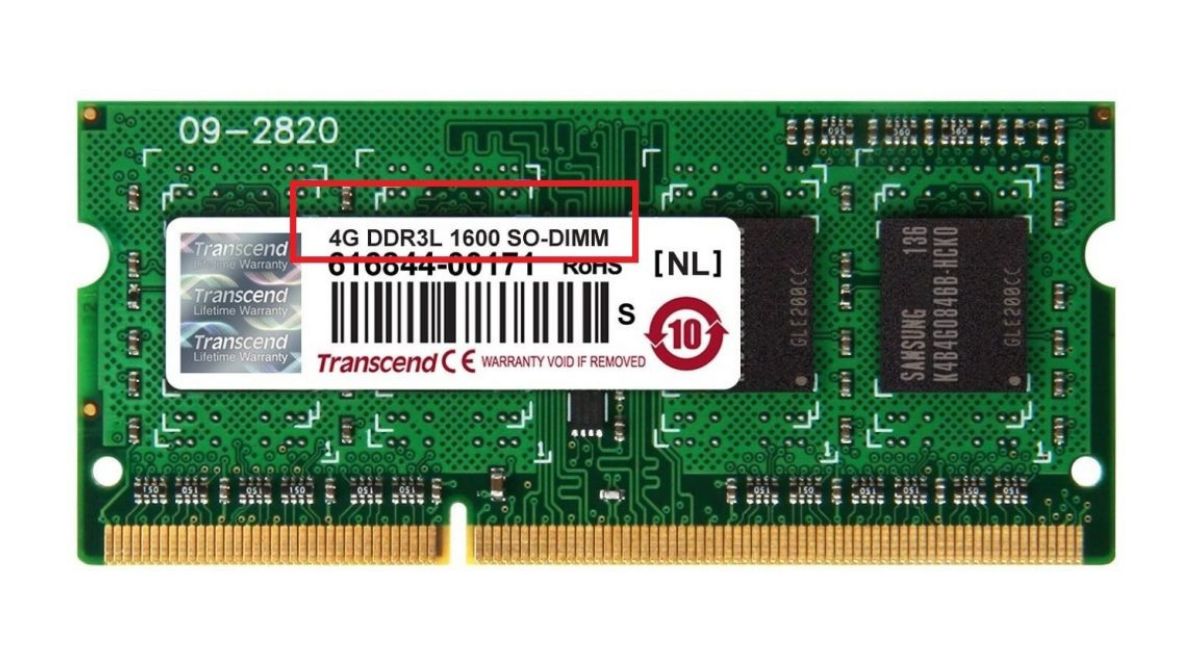
RAM timings are usually represented as a series of numbers such as 16-18-18-36 or 15-15-15-35. Each number corresponds to a specific timing value and dictates the speed at which the RAM performs various operations. Lower timing values indicate faster performance.
It is essential to note that RAM timings are specific to the RAM module you are using. Different RAM modules may have different default timings, and certain modules are designed to handle more overclocking, allowing for improved performance at the cost of increased voltage and heat generation.
Understanding RAM timings can be beneficial when it comes to upgrading or optimizing your computer’s performance. By checking and adjusting these timings, you can potentially improve the speed and efficiency of your RAM, leading to better overall system performance. In the following sections, we will explore how to check and interpret RAM timings on various operating systems, as well as provide tips on optimizing these timings for optimal performance.
Why are RAM Timings Important?
RAM timings are an essential aspect of your computer’s overall performance. They directly impact how quickly and efficiently your RAM can access and process data. Understanding the importance of RAM timings can help you make informed decisions when it comes to system upgrades and optimizations. Here are several reasons why RAM timings are important:
1. Memory Performance: RAM timings affect the overall speed and latency of your computer’s memory. Lower timings indicate faster response times and reduced latency, resulting in quicker data access and improved performance for applications and processes that rely heavily on RAM.
2. System Stability: Properly configured RAM timings contribute to system stability. Incorrect or misconfigured timings can lead to system crashes, blue screens, and other stability issues. Optimizing RAM timings ensures that your system runs smoothly and reliably under heavy workloads.
3. Overclocking Potential: RAM timings play a crucial role when overclocking your RAM. Overclocking involves pushing the RAM beyond its default speed to achieve higher performance. By adjusting the timings, you can find a balance between stability and performance, maximizing the overclocking potential of your RAM.
4. Gaming Performance: In gaming, every millisecond matters. RAM timings can impact the loading times, frame rates, and overall smoothness of gaming performance. Lower timings can reduce input lag and provide a more responsive gaming experience.
5. Multi-tasking and Productivity: RAM timings have a significant impact on multi-tasking and productivity. Faster RAM timings allow for quick switching between applications, smoother operation during resource-intensive tasks, and improved overall system responsiveness when running multiple programs simultaneously.
6. Compatibility: RAM timings compatibility is crucial when upgrading or adding new RAM modules to your system. Matching or properly configuring RAM timings ensures compatibility and avoids potential issues such as system instability or failures to boot.
Overall, understanding and optimizing RAM timings can greatly enhance the performance and responsiveness of your computer system. It allows you to make the most out of your RAM module’s capabilities, ensuring smooth operation, stability, and improved overall user experience. In the next sections, we will explore how to check RAM timings on different operating systems and how to interpret and optimize them for optimal performance.
How to Check RAM Timings on Windows
If you are using a Windows operating system, there are a few different methods you can use to check your RAM timings. In this section, we will explain two common methods: using Task Manager and using Command Prompt.
Method 1: Using Task Manager
Task Manager is a built-in tool in Windows that provides information about the processes and performance of your system. Here’s how you can check RAM timings using Task Manager:
- Open Task Manager by pressing Ctrl + Shift + Esc or right-clicking on the taskbar and selecting “Task Manager.”
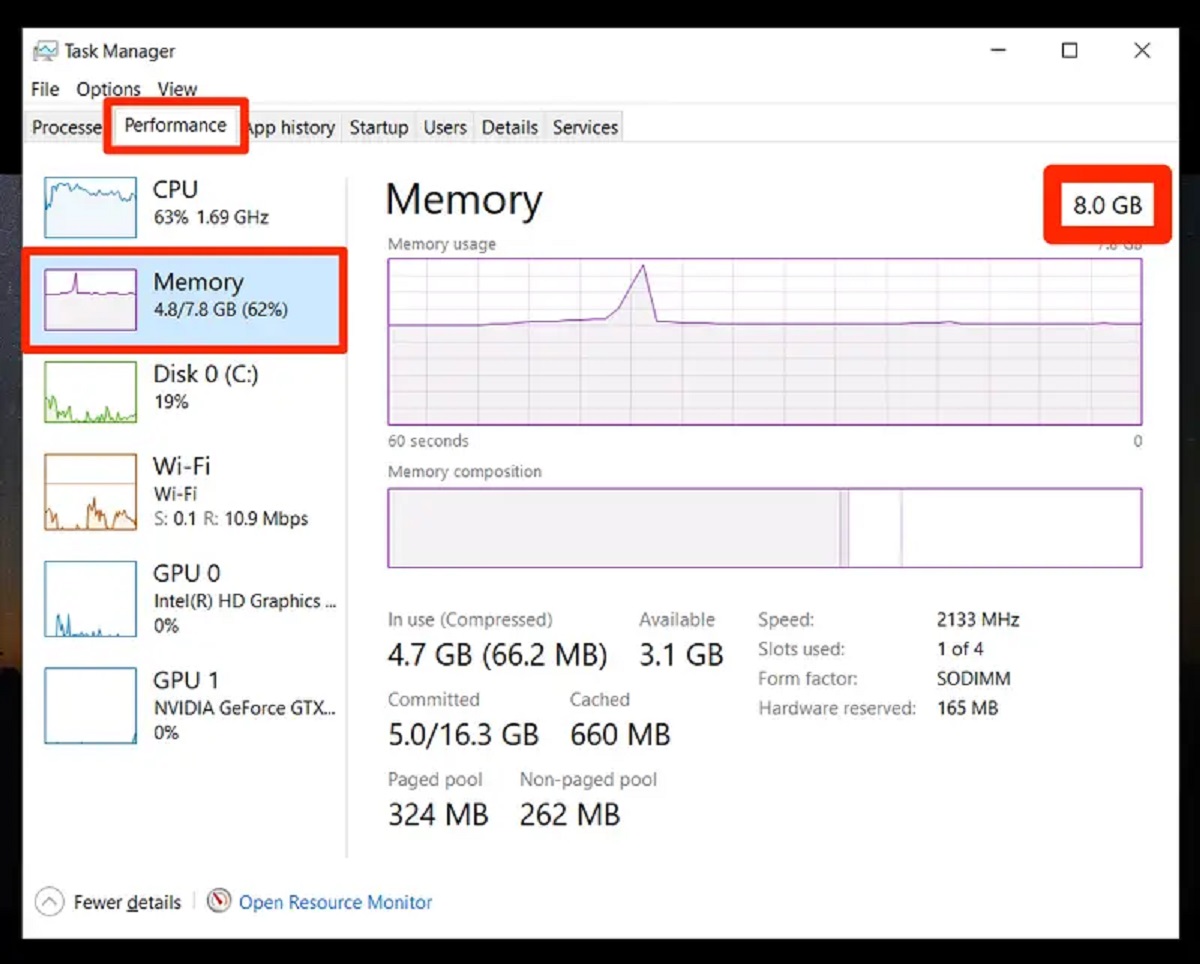
- Click on the “Performance” tab in the Task Manager window.
- In the left sidebar, click on “Memory”.
- Look for the “Speed” entry. This represents your RAM speed in megahertz (MHz).
- Below the speed, you may find other information such as the “Manufacturer,” “Part Number,” and “Form Factor.” While these details are useful, they may not provide the exact timings.
Method 2: Using Command Prompt
Another way to check your RAM timings is by using Command Prompt. Follow these steps:
- Open Command Prompt by pressing Win + R and typing “cmd” in the Run dialog box, then press Enter.
- In the Command Prompt window, type the following command: wmic memorychip get Speed, MemoryType, Manufacturer, PartNumber, ConfiguredClockSpeed, ConfiguredVoltage
- Press Enter to execute the command.
- You will see a list of information about your RAM modules, including the “ConfiguredClockSpeed.” This represents your RAM speed in megahertz (MHz) and can be used as a reference for the timings.
With these methods, you can easily check your RAM speed, which can help determine the default timings. However, to retrieve more detailed information about the RAM timings, such as CAS latency and other primary and secondary timings, you may need to use third-party software designed specifically for this purpose.
Now that you know how to check your RAM timings on Windows, let’s move on to the next section, where we will explore how to check RAM timings on macOS.
Method 1: Using Task Manager
Task Manager is a built-in tool in Windows that provides information about the processes and performance of your system. It also allows you to check various hardware details, including your RAM timings. Here’s how you can check your RAM timings using Task Manager:
- Open Task Manager by pressing Ctrl + Shift + Esc or right-clicking on the taskbar and selecting “Task Manager.”
- Click on the “Performance” tab in the Task Manager window.
- In the left sidebar, click on “Memory”.
- Look for the “Speed” entry. This represents your RAM speed in megahertz (MHz).
- Below the speed, you may find other information such as the “Manufacturer,” “Part Number,” and “Form Factor.” While these details are useful, they may not provide the exact RAM timings.
While Task Manager provides basic information about your RAM, it does not display the exact timings such as CAS latency or other primary and secondary timings. To access more detailed RAM timing information, you will need to use specialized software specifically designed for this purpose.
By using Task Manager, you can quickly check the speed of your RAM module. This information can serve as a reference when looking up the default timings specified by the RAM manufacturer. Having a general understanding of your RAM’s speed can help you determine potential areas for optimization and upgrades when it comes to your system’s memory performance.
Now that you are familiar with how to check your RAM timings using Task Manager, let’s explore an alternative method using Command Prompt in the next section.
Method 2: Using Command Prompt
Another way to check your RAM timings on Windows is by using Command Prompt. Command Prompt is a command-line interpreter that allows you to execute commands and access various system information. Here’s how you can check your RAM timings using Command Prompt:
- Open Command Prompt by pressing Win + R and typing “cmd” in the Run dialog box, then press Enter.
- In the Command Prompt window, type the following command: wmic memorychip get Speed, MemoryType, Manufacturer, PartNumber, ConfiguredClockSpeed, ConfiguredVoltage.
- Press Enter to execute the command.
- A list of information about your RAM modules will be displayed, including the “ConfiguredClockSpeed.” This represents your RAM speed in megahertz (MHz) and can be used as a reference for the timings.
Using Command Prompt allows you to retrieve additional details about your RAM, such as the speed and other related information. While this method provides the RAM speed, it does not display the exact timings.
To access more specific timings, such as CAS latency or other primary and secondary timings, you may need to utilize specialized software designed explicitly for checking and monitoring RAM information. These third-party programs can provide a comprehensive overview of your RAM timings and performance.
By using Command Prompt, you can quickly gather valuable information about your RAM, including the speed. This information serves as a reference point when investigating the default timings specified by the RAM manufacturer. Having awareness of your RAM’s speed allows you to make informed decisions when it comes to optimizing and upgrading your system’s memory performance.
Now that you know how to check your RAM timings using Command Prompt, let’s move on to the next section, where we will explore how to check RAM timings on macOS.
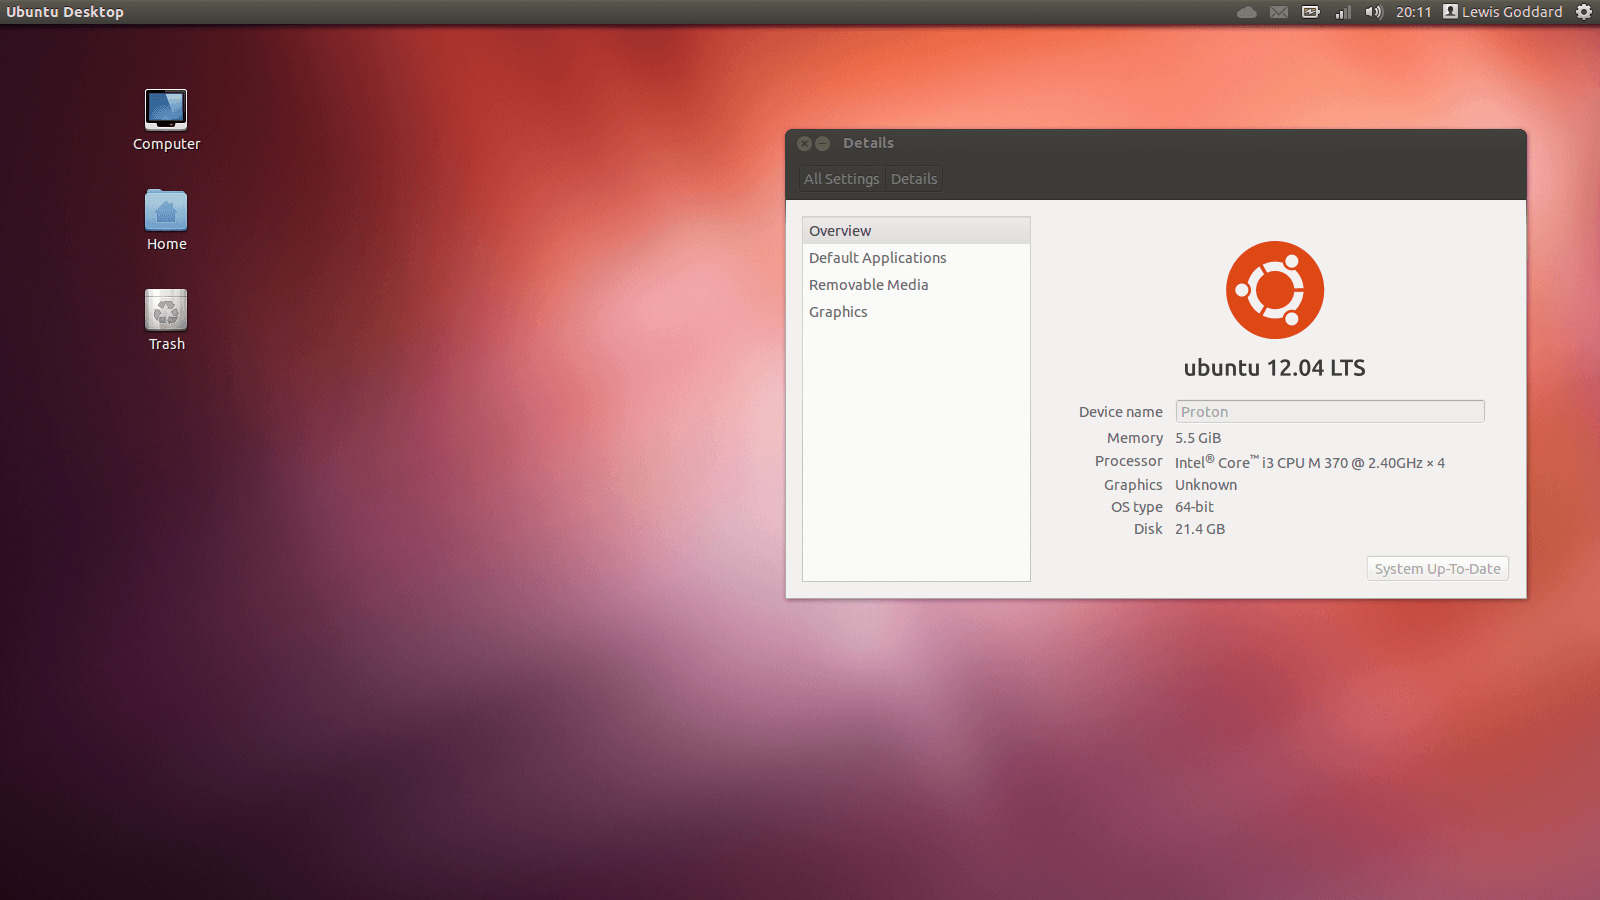
How to Check RAM Timings on macOS
If you are using a macOS operating system, you can check your RAM timings using built-in tools. In this section, we will explain two common methods: using Activity Monitor and using Terminal.
Method 1: Using Activity Monitor
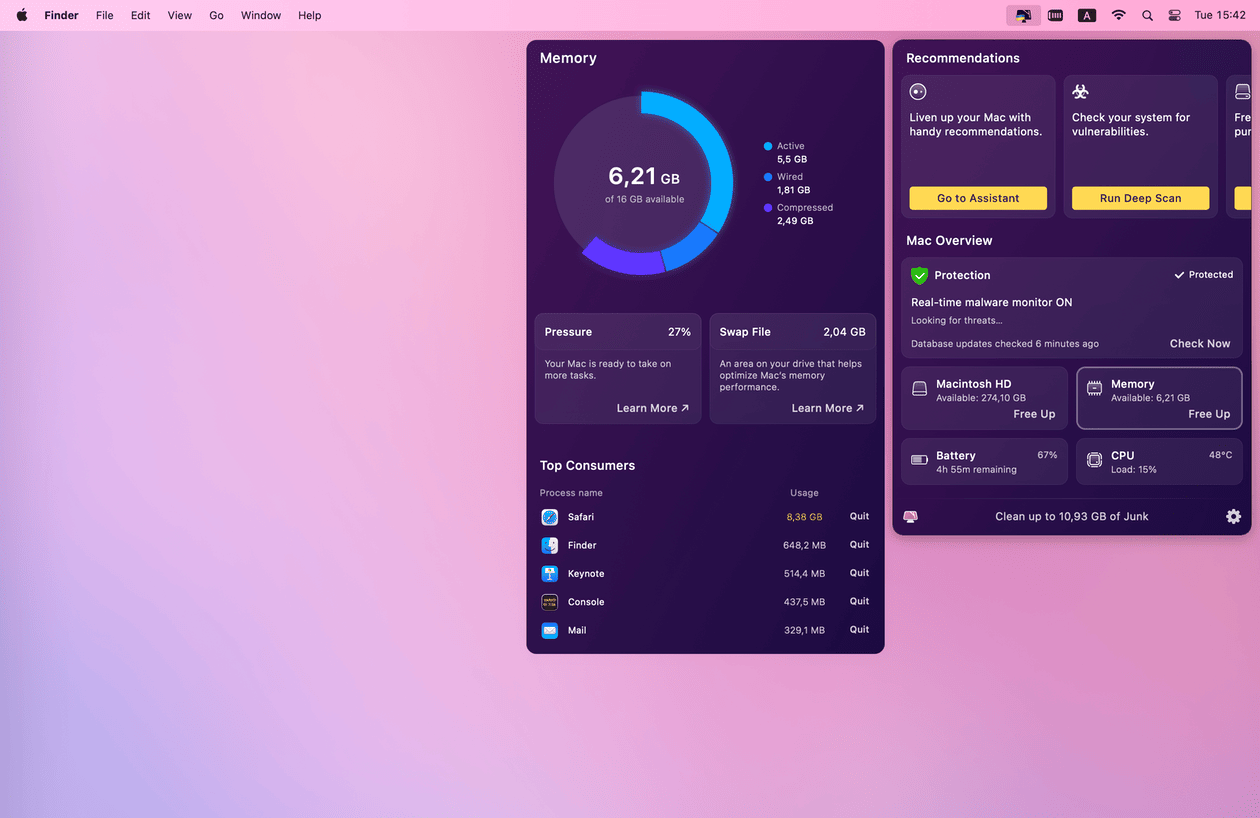
Activity Monitor is a utility on macOS that provides information about the processes and performance of your system. Here’s how you can check your RAM timings using Activity Monitor:
- Open Activity Monitor by navigating to Applications, then Utilities, and selecting Activity Monitor.
- Click on the “Memory” tab at the top of the Activity Monitor window.
- Look for the “Speed” entry. This represents your RAM speed in megahertz (MHz).
- While Activity Monitor provides information about the RAM speed, it does not display detailed RAM timings such as CAS latency or other primary and secondary timings.
Method 2: Using Terminal
Another way to check your RAM timings on macOS is by using Terminal, which is a command-line interface tool. Follow these steps:
- Open Terminal by navigating to Applications, then Utilities, and selecting Terminal.
- In the Terminal window, type the following command: sudo system_profiler SPDDataType | grep -E “Memory Type|Speed|Manufacturer|Part Number|Module Manufacturer|Timings|Type|\[empty\]|Size”.
- Press Enter to execute the command.
- You will see a list of information about your RAM modules, including the “Speed” and “Timings.” This provides details about the RAM speed and the default timings specified by the manufacturer.
While Terminal allows you to access more detailed information about your RAM, including the timings, interpreting the output may require some technical knowledge. Additionally, there are third-party tools available for macOS that can provide a comprehensive overview of your RAM timings and performance if you prefer a more user-friendly interface.
Now that you are familiar with how to check your RAM timings on macOS, let’s move on to the next section, where we will explore how to interpret these timings.
Method 1: Using Activity Monitor
Activity Monitor is a built-in utility on macOS that provides valuable insights into the processes and performance of your system. It can also be used to check your RAM timings. Here’s how you can do it:
- Open Activity Monitor by navigating to Applications, then Utilities, and selecting Activity Monitor.
- Click on the “Memory” tab at the top of the Activity Monitor window.
- Look for the “Speed” entry. This represents the speed of your RAM in megahertz (MHz).
- While Activity Monitor provides the RAM speed, it does not display detailed RAM timings such as CAS latency or other primary and secondary timings.
Using Activity Monitor, you can quickly find the speed of your RAM module. This information can serve as a reference when researching the default timings specified by the RAM manufacturer. By having a general understanding of your RAM’s speed, you can assess potential areas for optimization and make informed decisions when it comes to your system’s memory performance.
It is important to note that while Activity Monitor is a useful built-in tool for monitoring system resources, if you require more detailed information about your RAM timings, you may need to consider utilizing specialized third-party software specifically designed for checking and monitoring RAM information.
Now that you know how to check your RAM timings using Activity Monitor, let’s move on to the next section, where we will explore another method using Terminal on macOS.
Method 2: Using Terminal
Another way to check your RAM timings on macOS is by using Terminal, a command-line interface tool. By executing specific commands, you can retrieve detailed information about your RAM modules, including the timings. Here’s how you can do it:
- Open Terminal by navigating to Applications, then Utilities, and selecting Terminal.
- In the Terminal window, type the following command: sudo system_profiler SPDDataType | grep -E “Memory Type|Speed|Manufacturer|Part Number|Module Manufacturer|Timings|Type|\[empty\]|Size”.
- Press Enter to execute the command.
- You will see a list of information about your RAM modules, including the “Speed” and “Timings.” This provides details about the RAM speed and the default timings specified by the manufacturer.
Using Terminal allows you to access more detailed information about your RAM, including specific timings. The command provided above retrieves specific RAM details, making it easier to interpret the output. However, understanding and analyzing the timings might require some technical knowledge and research.
If you prefer a more user-friendly interface, there are also third-party tools available for macOS that can provide a comprehensive overview of your RAM timings and performance. These tools often present the information in a more readable and intuitive format.
Now that you know how to check your RAM timings using Terminal on macOS, you have access to more detailed information about your RAM modules. This knowledge can be valuable for understanding your RAM’s capabilities and optimizing your system’s memory performance.
In the next section, we will explore how to interpret the RAM timings and understand their significance.
How to Interpret RAM Timings
Interpreting RAM timings allows you to understand the performance and behavior of your RAM modules. By familiarizing yourself with the different timing parameters, you can assess the responsiveness and efficiency of your system’s memory. Here are some key aspects to consider when interpreting RAM timings:
Understanding Primary Timings:
The primary timings are the most crucial timing parameters that directly impact the overall performance of your RAM. These timings include CAS latency (CL), RAS to CAS delay (tRCD), and RAS precharge delay (tRP). Here’s what they mean:
- CAS Latency (CL): It refers to the number of clock cycles it takes for the RAM to respond after receiving a command. Lower CAS latency values indicate better performance.
- RAS to CAS Delay (tRCD): It represents the number of clock cycles required for the RAM to address a column after receiving a command. Lower tRCD values indicate faster data retrieval.
- RAS Precharge Delay (tRP): It signifies the number of clock cycles needed for the RAM to close a row after completing its operations. Lower tRP values indicate faster closing of rows.
These primary timings play a critical role in determining the speed and efficiency of data access within the RAM module.
Understanding Secondary Timings:
In addition to the primary timings, there are secondary timings that also contribute to the overall RAM performance. These timings include parameters such as tRFC, tRRD, and tFAW. Although not as directly impactful as primary timings, understanding them can provide a more comprehensive view of your RAM’s behavior.
Comparing Timings:
When comparing RAM modules or considering upgrades, it’s important to compare their timings. Lower timings generally indicate faster performance, but keep in mind that modules with higher clock speeds may have slightly higher timings while still providing excellent overall performance.
Manufacturer’s Specifications:
Each RAM module has specific timings specified by the manufacturer. These timings represent the recommended settings for the module’s optimal performance. Comparing your RAM’s actual timings to the manufacturer’s specifications can help identify any deviations or potential areas for optimization.
Interpreting RAM timings allows you to evaluate the responsiveness and efficiency of your system’s memory. While lower timings generally lead to improved performance, it’s important to understand the specific timings of your RAM module and how they compare to the manufacturer’s specifications.
Now that you know how to interpret RAM timings, let’s explore how you can optimize them for better performance in the next section.
Understanding Primary Timings
Primary timings are crucial parameters that affect the overall performance and responsiveness of your RAM. They play a significant role in determining how quickly your RAM can access and retrieve data. Here are the primary timings commonly found in RAM modules:
- CAS Latency (CL): CAS latency represents the number of clock cycles it takes for the RAM to respond to a command. It is often the most prominent timing parameter and is expressed as a number, such as CL15 or CL18. Lower CAS latency values indicate faster response times and improved memory performance.
- RAS to CAS Delay (tRCD): RAS to CAS delay refers to the number of clock cycles it takes for the RAM to access a column after activating the row. It reflects the time required for the RAM to retrieve data from the memory cell. Like CAS latency, lower tRCD values indicate faster data retrieval and better memory performance.
- RAS Precharge Delay (tRP): RAS precharge delay represents the number of clock cycles it takes for the RAM to close a row after completing a read or write operation. A lower tRP value means that the RAM can quickly free up a row for the next access, resulting in improved memory efficiency.
The primary timings work together to optimize the speed and efficiency of your RAM module. Adjusting these timings can directly impact the overall performance and responsiveness of your system’s memory.
It is important to note that the ideal primary timings for your RAM module are specific to the manufacturer’s specifications. Deviating too far from these recommended timings may result in instability or decreased performance. While lower primary timings generally lead to better performance, it is essential to ensure compatibility and stability when adjusting these settings.
Understanding primary timings can help you make informed decisions when upgrading or optimizing your RAM. By comparing different RAM modules and their primary timings, you can choose the one that aligns best with your system’s requirements and desired performance level.
Now that you have a better understanding of primary timings, let’s delve into the secondary timings in the next section to gain a more comprehensive understanding of RAM performance.
Understanding Secondary Timings
In addition to primary timings, secondary timings are essential parameters that contribute to the overall performance and stability of your RAM. While primary timings focus on the key aspects of data access and retrieval, secondary timings deal with the synchronization and coordination between different memory banks. Here are some common secondary timings:
- tRFC (Refresh Cycle Time): tRFC represents the time it takes for a row to be refreshed before it can be accessed again. It ensures data integrity and stability. Lower tRFC values indicate faster row refresh cycles, leading to improved memory efficiency.
- tRRD (Row to Row Delay): tRRD signifies the minimum time required to switch from accessing one row to another row within the same bank. Lower tRRD values result in faster row-to-row switching and improved memory performance.
- tFAW (Four Activate Window): tFAW is the minimum time required between four or more active rows (activated by different commands) within the same bank. Lower tFAW values allow for quicker activation of multiple rows and enhanced memory performance for complex memory operations.
These secondary timings work in conjunction with primary timings to optimize the overall efficiency and speed of your RAM. Ensuring appropriate values for secondary timings can improve memory performance and stability.
It is worth noting that secondary timings are often interdependent, meaning that adjusting one timing might have an impact on other timings. Therefore, it is crucial to ensure proper compatibility and stability when modifying secondary timings.
Understanding secondary timings provides a more comprehensive view of the behavior and capabilities of your RAM module. By analyzing and fine-tuning these timings, you can achieve optimal performance and stability for your system’s memory.
Now that you have gained an understanding of both primary and secondary timings, let’s proceed to the next section, where we will explore how to optimize RAM timings for better performance.
How to Optimize RAM Timings
Optimizing your RAM timings can lead to improved performance and responsiveness in your system. While every system and RAM module is unique, here are some general tips for optimizing your RAM timings:
1. Research and Understand Your RAM: Familiarize yourself with the manufacturer’s specifications for your RAM module. Check the recommended timings and voltage settings for optimal performance.
2. Enable XMP/DOCP Profiles: Many RAM modules come with XMP (Extreme Memory Profile) or DOCP (Direct Overclock Profile) profiles. Enabling these profiles in your system BIOS can automatically configure the optimal timings and voltage based on the manufacturer’s specifications.
3. Gradually Adjust Timings: If you prefer manual optimization, adjust one timing parameter at a time. Start with the primary timings, such as CAS latency (CL), and gradually lower the value while stress testing for stability. It is crucial to find the balance between performance and stability.
4. Test Stability: After each adjustment to the timings, thoroughly test the stability of your system. Use benchmarking software and stress tests to ensure that the changes do not cause crashes or errors.
5. Consider Temperature and Voltage: Lowering timings might require a slightly higher voltage, but ensure that the voltage remains within safe limits. Additionally, keep an eye on the temperature of your RAM modules, as lower timings can generate more heat. Ensure proper cooling and ventilation to maintain stable operation.
6. Consult Community and Guides: Seek advice from enthusiast forums or online communities dedicated to overclocking and RAM optimization. Experienced users can often provide valuable insights and guidance specific to your system and RAM module.
Remember that optimizing RAM timings can involve experimenting and fine-tuning. Not all systems or RAM modules can achieve significant gains, especially if the modules are already running at their maximum performance. It is essential to find the right balance between performance, stability, and the capabilities of your specific hardware.
Lastly, keep in mind that modifying RAM timings might void the warranty of your RAM module. Always ensure that you understand the risks involved and proceed with caution.
By optimizing your RAM timings, you can enhance the performance and responsiveness of your system’s memory. Experimenting with different settings and finding the optimal configuration can result in noticeable improvements in various computing tasks and applications.
In the next section, we will wrap up our guide on checking and optimizing RAM timings with a concluding summary.
Conclusion
Understanding and optimizing RAM timings play a vital role in maximizing the performance and efficiency of your computer’s memory. By checking your RAM timings on both Windows and macOS operating systems, you can gain insights into the speed and capabilities of your RAM modules.
While Task Manager and Activity Monitor provide basic information about RAM speed, more detailed timing parameters such as CAS latency, tRCD, and tRP can be obtained through specialized software or using command-line tools like Command Prompt or Terminal.
Interpreting RAM timings involves understanding primary timings like CAS latency, RAS to CAS delay, and RAS precharge delay, as well as secondary timings such as tRFC, tRRD, and tFAW. Lower timings generally result in improved performance, but it is crucial to balance performance with compatibility and stability.
Optimizing RAM timings can enhance your system’s memory performance. This can be achieved through research, enabling XMP/DOCP profiles, gradually adjusting timings, testing for stability, considering temperature and voltage, and seeking advice from knowledgeable communities.
It is important to note that overclocking or manually adjusting RAM timings may void the warranty and can potentially result in system instability if not done properly. Proceed with caution and always ensure that your system remains stable during testing.
By taking the time to understand, check, and optimize RAM timings, you can unlock the full potential of your computer’s memory, leading to improved overall system performance, faster application loading times, and a smoother computing experience.
Remember that RAM timings are just one element in optimizing your system’s performance. Considering other factors like processor, graphics card, and storage can also contribute to a well-rounded and efficient computing setup.
We hope this guide has provided you with the knowledge and tools to check and optimize your RAM timings effectively. Now, it’s time to explore and experiment with your RAM module to tailor it to your system’s needs and unleash its full potential.