Introduction
Welcome to the beginner’s guide on how to upgrade the RAM on your laptop! RAM (Random Access Memory) plays a crucial role in the performance of your laptop, as it allows for faster data storage and retrieval, ultimately enhancing overall system speed.
Whether you’re a student, professional, or avid gamer, upgrading your laptop’s RAM can significantly boost its multitasking capabilities and improve the overall user experience. With a few simple steps and the right tools, you can expand your laptop’s memory capacity and ensure smoother and more efficient performance.
Before diving into the upgrade process, it’s important to mention that not all laptops are upgradeable, as some models come with integrated RAM that cannot be replaced. To save you time and frustration, we’ll first guide you through the process of checking your laptop’s compatibility.
In this article, we’ll walk you through the step-by-step process of upgrading your laptop’s RAM. From checking compatibility to installing the new RAM modules, we’ve got you covered. So, let’s get started!
Overview of RAM
Before we delve into the upgrading process, it’s essential to have a clear understanding of what RAM is and how it affects your laptop’s performance.
RAM, or Random Access Memory, is a type of volatile memory that temporarily stores data that the computer is actively using. It works hand-in-hand with the processor to provide quick access to applications, files, and tasks, allowing your laptop to run smoothly and efficiently.
The more RAM your laptop has, the more data it can store for quick retrieval, which is particularly important when running multiple applications simultaneously or handling resource-intensive tasks like video editing or gaming.
When your laptop’s RAM is insufficient, it may lead to slow performance, frequent freezes, and an overall sluggish user experience. Upgrading your laptop’s RAM can provide an instant solution to these issues, giving your laptop the ability to handle more demanding tasks without sacrificing speed or performance.
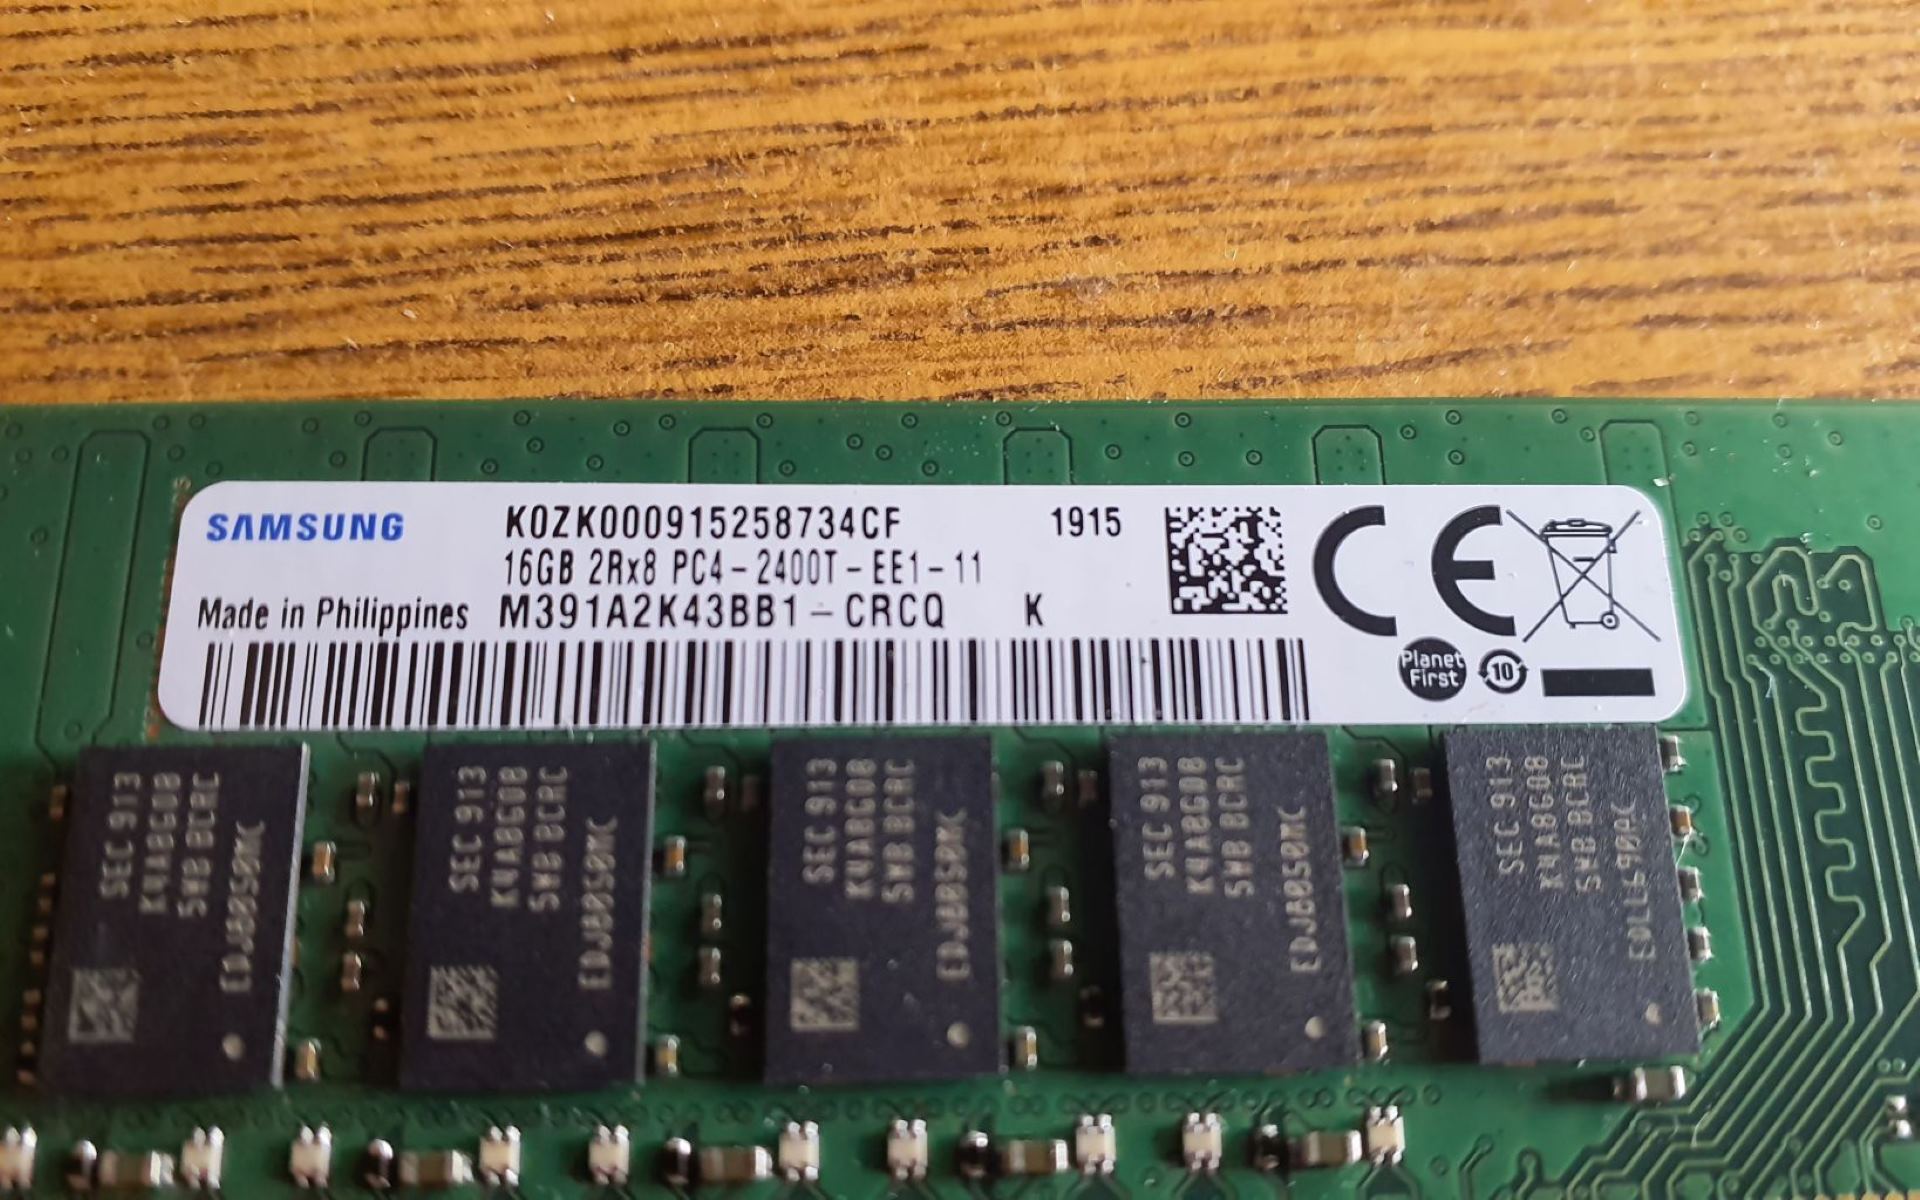
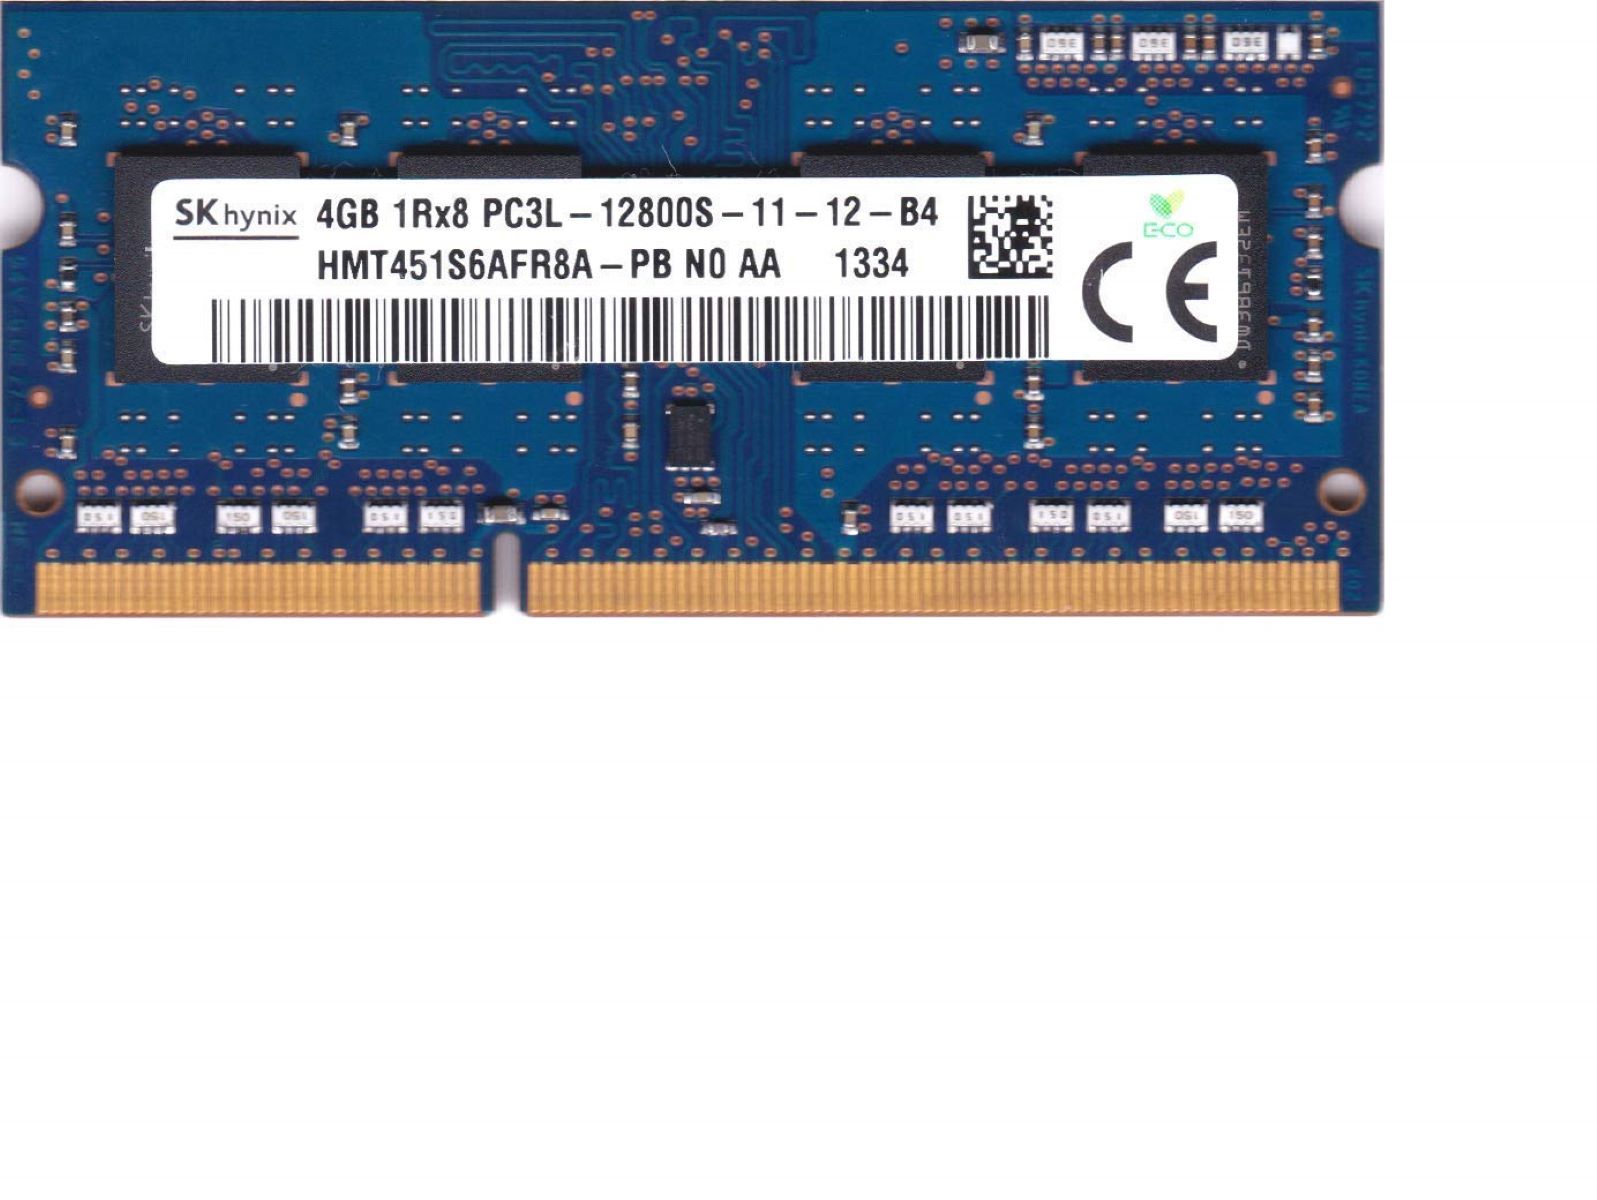
When considering a RAM upgrade, two crucial factors to keep in mind are the type and capacity of the RAM modules. Laptop RAM typically comes in the form of small memory modules known as SODIMMs (Small Outline Dual Inline Memory Modules), which are specifically designed for laptops.
The most common types of laptop RAM are DDR3 and DDR4. DDR4 RAM is the newer and faster variant, offering enhanced performance and increased data transfer rates compared to DDR3. However, it’s important to check your laptop’s specifications and ensure compatibility before purchasing new RAM modules.
As for capacity, it’s recommended to upgrade to at least 8GB of RAM for smooth multitasking and general day-to-day use. However, if you’re into heavy gaming, video editing, or other demanding tasks, consider upgrading to 16GB or even 32GB for optimal performance.
Now that we have a basic understanding of RAM and its importance to your laptop’s performance, let’s move on to the step-by-step guide on how to upgrade your laptop’s RAM.
Step 1: Check Compatibility
Before you proceed with upgrading your laptop’s RAM, it’s crucial to ensure that the new RAM modules you purchase are compatible with your laptop. Here’s how:
- Consult your laptop’s manual: The first step is to refer to your laptop’s user manual or visit the manufacturer’s website to check the maximum supported RAM capacity and the type of RAM your laptop supports (e.g., DDR3 or DDR4).
- Check the existing RAM: If your laptop already has RAM installed, you can check the type and capacity of the existing RAM by accessing the System Information utility on your laptop. To do this, simply press the Windows key + R, type “msinfo32” in the Run dialog box, and press Enter. In the System Information window, navigate to the “Installed Physical Memory” section to view the details of your laptop’s RAM.
- Research your laptop model: Alternatively, you can search for your laptop model online and look for specifications or product details on the manufacturer’s website. This information should include the supported RAM type and the maximum capacity your laptop can handle.
- Check for available RAM slots: Additionally, find out how many RAM slots your laptop has. This information will allow you to determine how many RAM modules you should purchase. Some laptops have only one slot, while others have two or more.
Once you have gathered this information, you will be able to determine the exact specifications of the RAM modules you need to purchase for your laptop’s upgrade. This step is essential to avoid compatibility issues and ensure that the new RAM modules will work seamlessly with your laptop’s hardware.
Now that you have checked the compatibility and know what type and capacity of RAM modules your laptop supports, it’s time to move on to the next step: gathering the necessary tools.
Step 2: Gather the Necessary Tools
Before you can start upgrading your laptop’s RAM, it’s important to gather all the necessary tools and equipment to ensure a smooth and successful installation process. Here’s a list of the tools you’ll need:
- Screwdriver: Depending on your laptop model, you may need a small Phillips screwdriver or a Torx screwdriver to remove the screws holding your laptop’s back panel in place.
- Anti-static wristband or mat: To prevent damaging sensitive electronic components, it’s highly recommended to use an anti-static wristband or mat when working inside your laptop. This will help to discharge any static electricity and protect your laptop from potential damage.
- RAM modules: Purchase the appropriate RAM modules based on the compatibility information you found in the previous step. Make sure to buy the correct type (DDR3 or DDR4) and capacity (e.g., 8GB, 16GB) as required by your laptop.
- Clean, lint-free cloth: It’s always a good idea to have a clean, lint-free cloth on hand to wipe away any dust or dirt that may have accumulated inside your laptop.
Having these tools readily available will ensure that you have everything you need to safely and efficiently upgrade your laptop’s RAM. It’s important to note that some laptops may require additional tools or have specific requirements, so be sure to consult your laptop’s manual or manufacturer’s website for any model-specific instructions.
Once you have gathered all the necessary tools, you are ready to proceed to the next step: shutting down your laptop.
Step 3: Shut Down Your Laptop
Before you begin working on your laptop’s internals, it’s important to shut it down properly to avoid any potential damage or data loss. Here are the steps to follow:
- Save your work: Make sure to save any open documents or files you are working on. If there are any unsaved changes, be sure to save them before proceeding.
- Close all applications: Close any open applications or programs running on your laptop. This will ensure a smooth shutdown process without any conflicts or data loss.
- Disconnect from power: If your laptop is connected to a power source, unplug the power adapter from the laptop. This will prevent any electrical hazards and ensure you’re working on your laptop safely.
- Turn off your laptop: Press and hold the power button on your laptop until it completely shuts down. This may take a few seconds, but make sure that the laptop is completely powered off and not in sleep or hibernate mode.
Double-check that your laptop is powered off before proceeding to the next step. It’s important to ensure that there is no power running through the system to prevent any potential electrical shocks or damage to the components.
Now that your laptop is safely shut down, you’re ready to move on to the next step: locating the RAM slots.
Step 4: Locate the RAM Slots
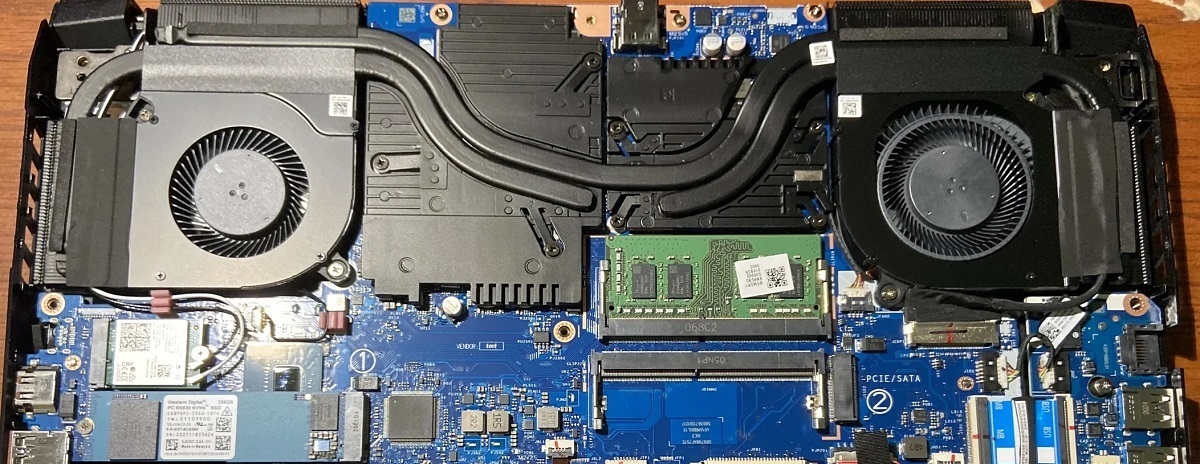
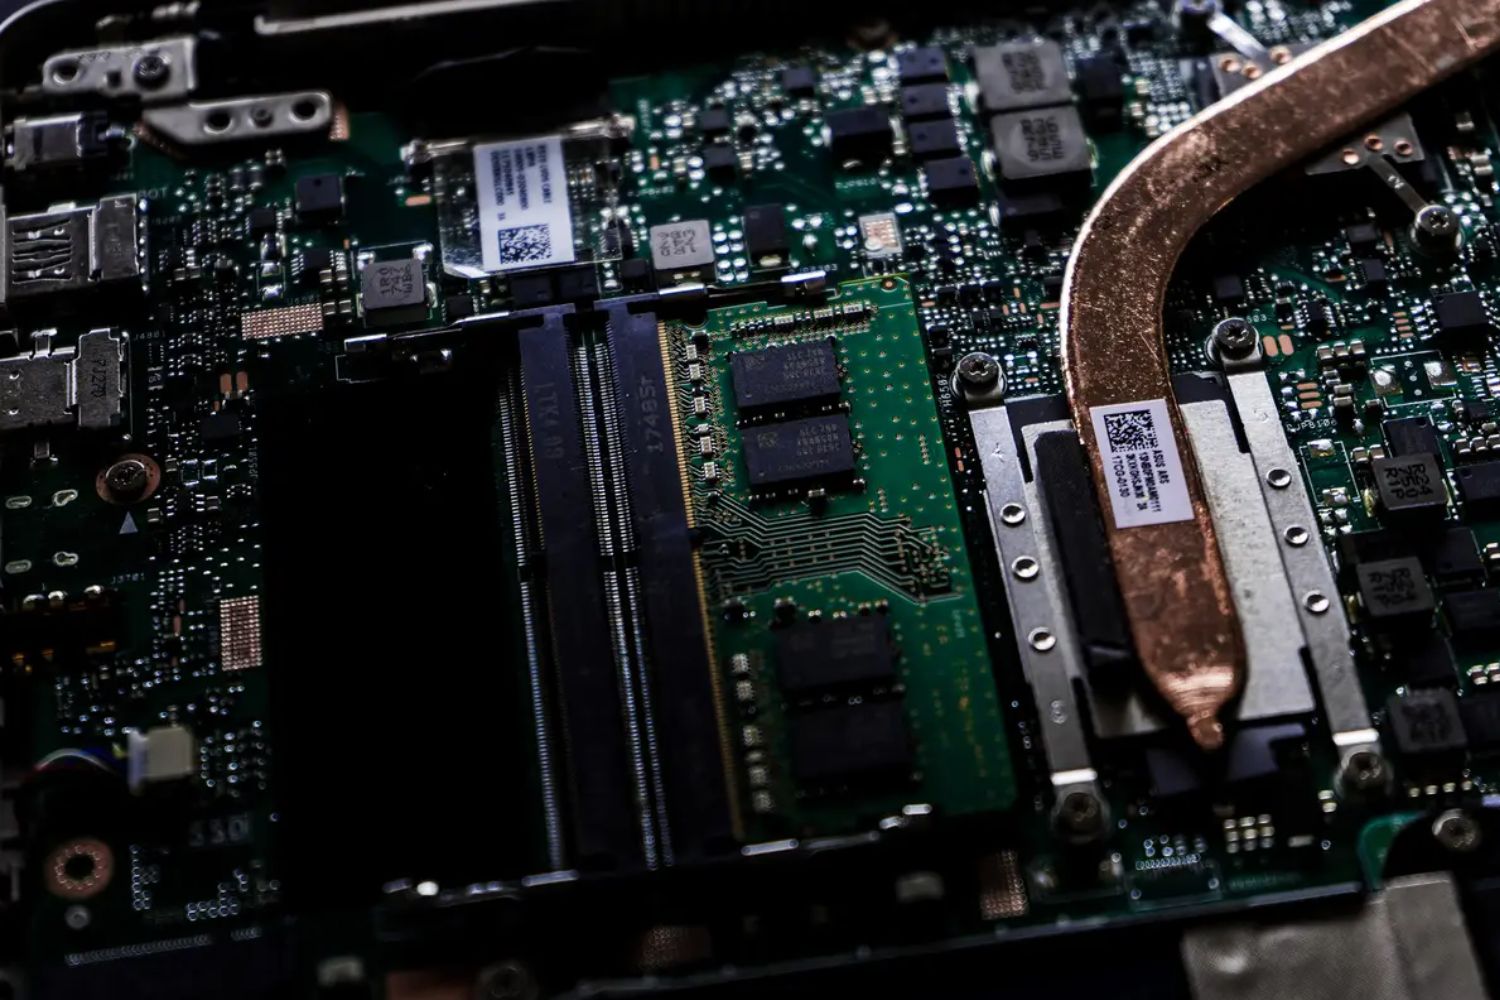
In order to upgrade your laptop’s RAM, you need to locate the RAM slots where the new RAM modules will be installed. The exact location of the RAM slots will vary depending on your laptop model, but here are a few general steps to help you find them:
- Refer to your laptop’s manual: The first and most reliable source of information is your laptop’s user manual. It will usually provide detailed instructions on how to access the internal components, including the RAM slots.
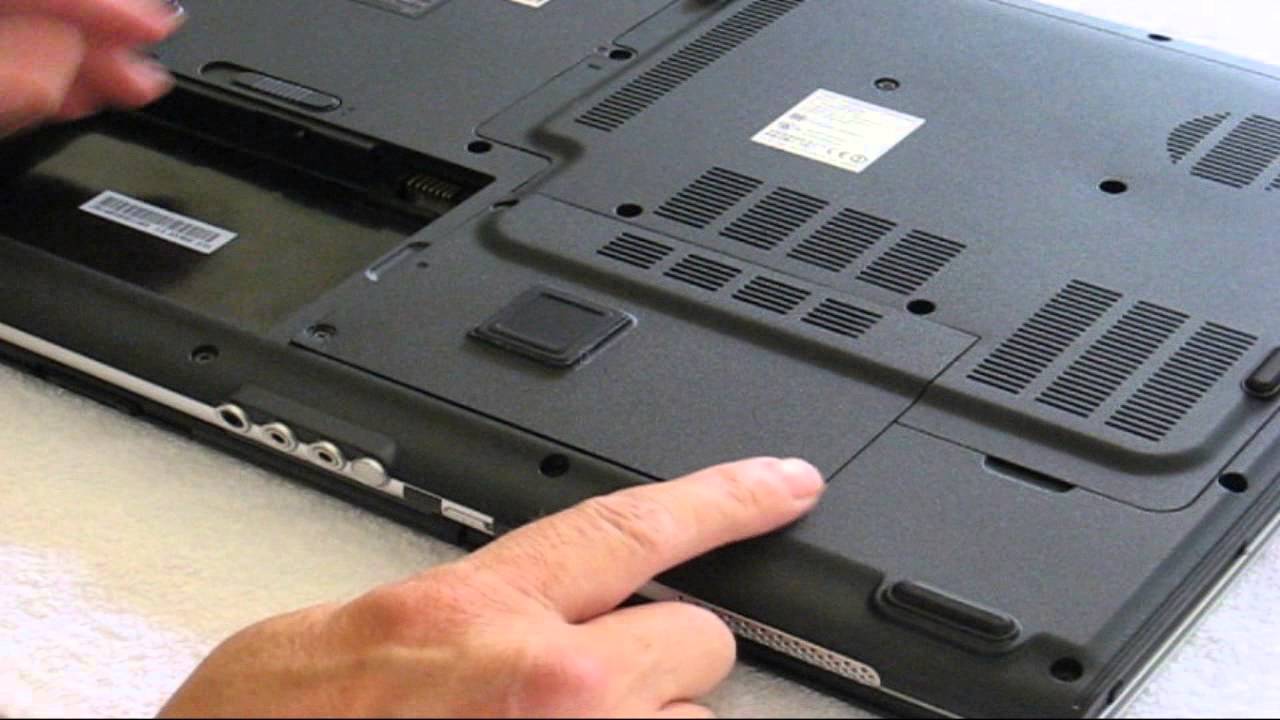
- Check the bottom panel: In most laptops, the RAM slots are located underneath a removable bottom panel. You may need to remove a few screws holding the panel in place and carefully pry it open using a screwdriver. Look for a rectangular opening with one or more memory module slots.
- Inspect the keyboard deck: Some laptops have their RAM slots accessible from the keyboard deck. Check if there are any screws securing the keyboard, and if so, remove them to gently lift the keyboard and expose the RAM slots.
- Search online: If you’re unable to find the RAM slots using the methods above, a quick online search using your laptop model and terms like “RAM slot locations” or “replace RAM” can often yield helpful results. Forums and manufacturer support pages are often good resources for finding specific information about your laptop’s internals.
Remember to take your time and be cautious when accessing the internal components of your laptop. If you’re unsure or uncomfortable with the process, it’s always a good idea to consult a professional or seek further guidance from your laptop’s manufacturer.
Once you’ve successfully located the RAM slots, it’s time to move on to the next step: removing existing RAM (if applicable).
Step 5: Remove Existing RAM (if Applicable)
If your laptop already has RAM installed, you will need to remove it before installing the new RAM modules. Follow these steps to safely remove the existing RAM:
- Locate the existing RAM modules: Refer to the previous step to find the exact location of the RAM slots in your laptop.
- Release the module(s) locking mechanism: Depending on your laptop model, the RAM modules may be held in place by clips, tabs, or screws. Carefully release the locking mechanism to loosen the existing RAM. This may involve gently pushing the clips outward or unscrewing the screws holding the module in place.
- Remove the RAM module(s): Once the locking mechanism is released, carefully pull out the RAM module(s) from the slot(s) at a slight angle. Take note of the orientation of the module(s) so that you can install the new RAM correctly later on.
- Handle the RAM modules with care: RAM modules are fragile, so it’s important to handle them delicately. Avoid touching the gold contacts and only hold them by the edges to prevent any damage from static electricity or physical mishandling.
- Place the removed RAM modules in an anti-static bag or container: To protect the removed RAM modules, store them in an anti-static bag or container. This will prevent any static discharge or physical damage while you continue with the upgrade process.
Remember to exercise caution when handling the internal components of your laptop. If you encounter any difficulties or resistance while removing the existing RAM, double-check the locking mechanism and ensure that you’re using the correct technique for your laptop model.
With the existing RAM removed, you’re now ready to proceed to the next step: installing the new RAM modules.
Step 6: Install the New RAM
Now that you have successfully removed the existing RAM modules, it’s time to install the new RAM modules into your laptop. Follow these steps to ensure a proper installation:
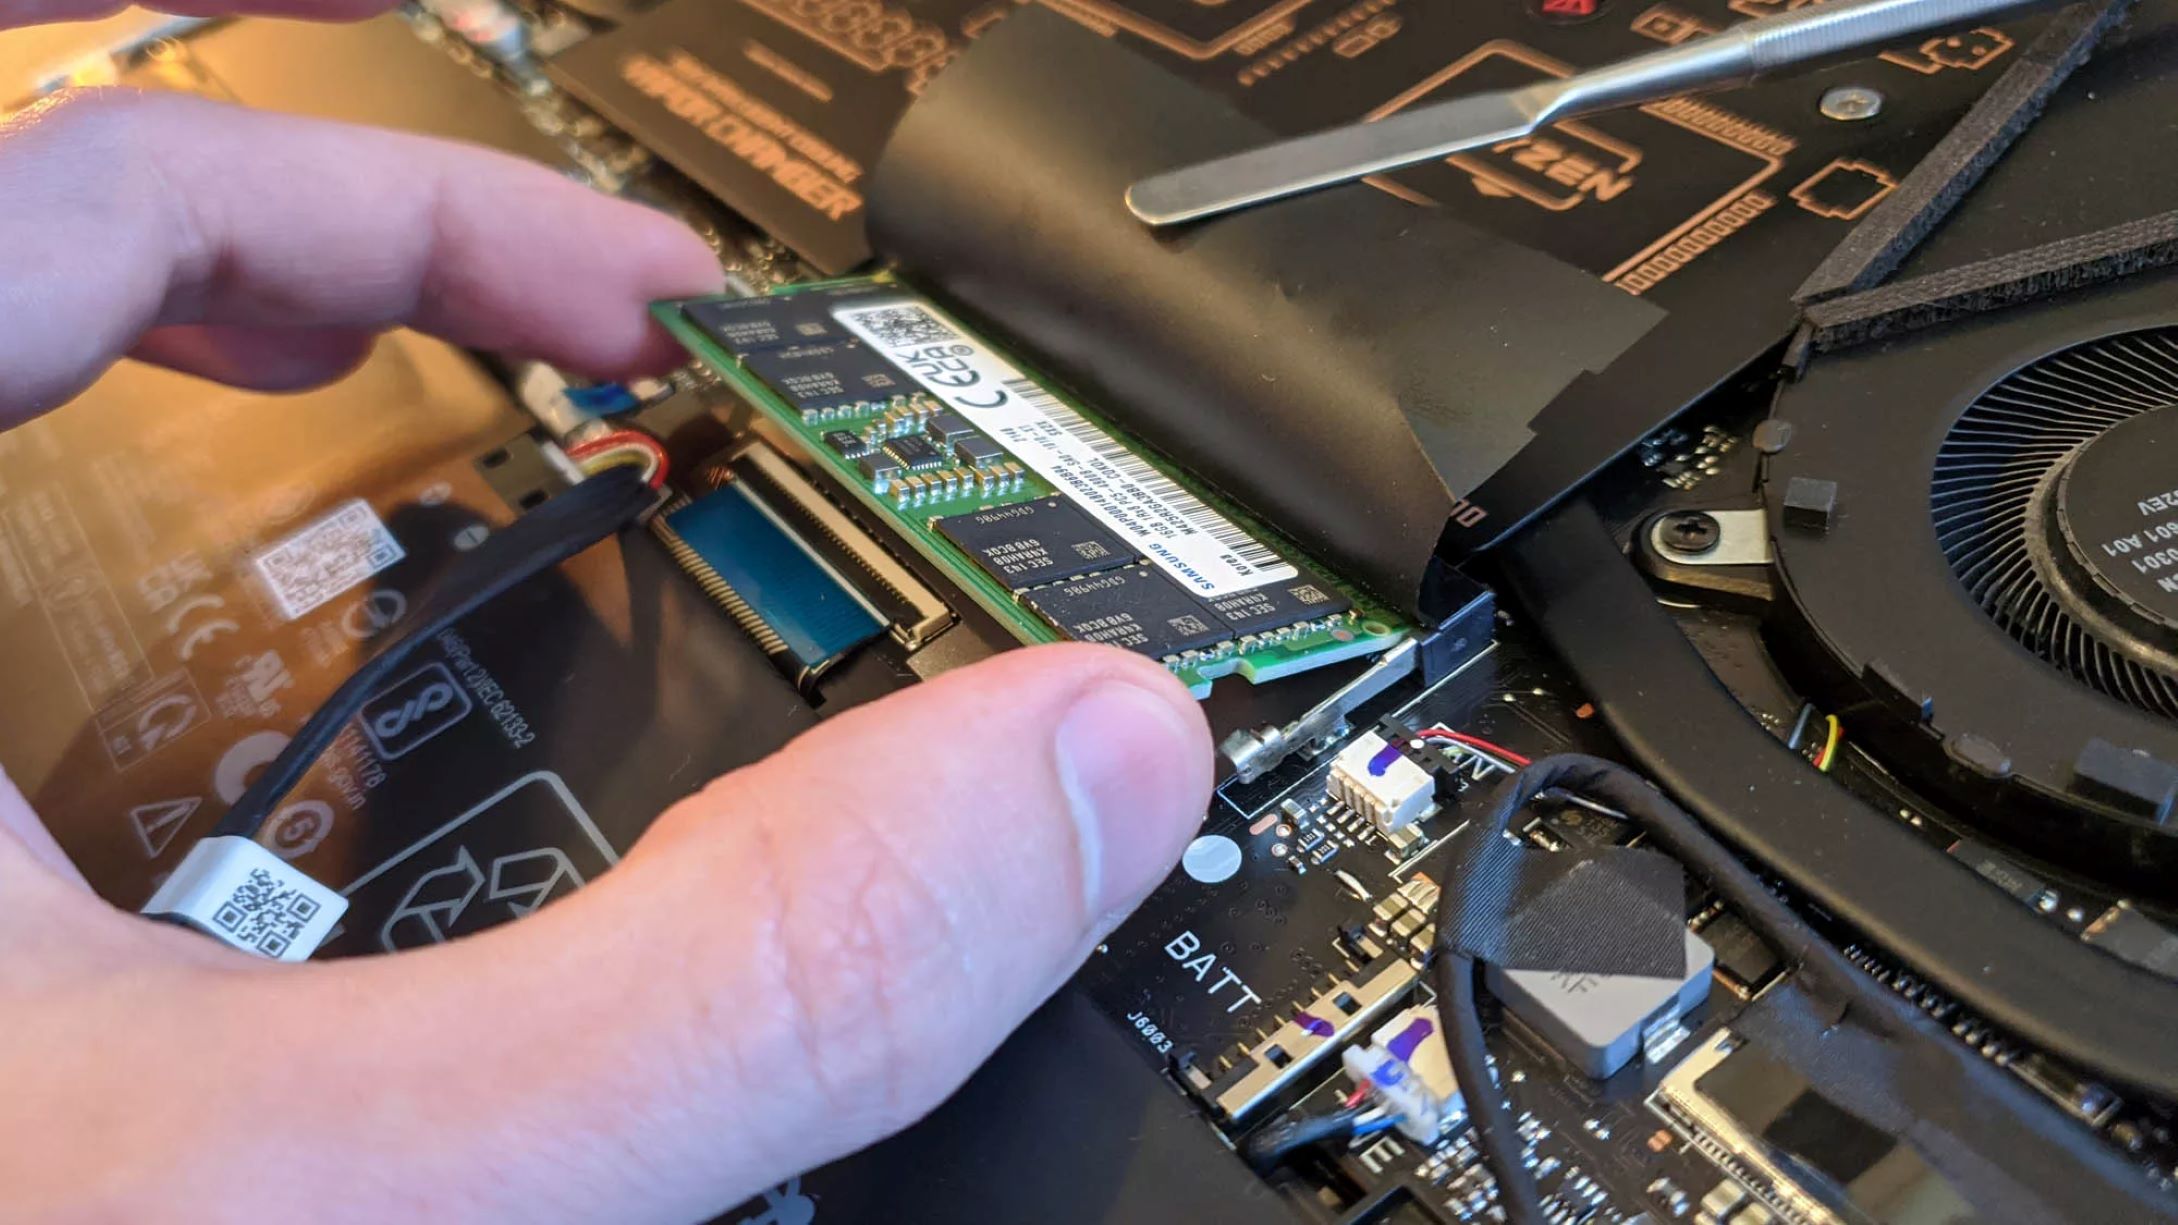
- Take out the new RAM modules from the anti-static bag or container: Carefully remove the new RAM modules from the packaging. Ensure that you are holding them by the edges and avoid touching the gold contacts.
- Align the RAM module(s) correctly: Examine the RAM slot(s) and align the new RAM module(s) with the slot(s). Be sure to match the notches on the module(s) with the keys in the slot(s) to ensure proper alignment.
- Insert the RAM module(s) into the slot(s): With the RAM module(s) properly aligned, gently insert them into the slot(s) at a slight angle. Apply even pressure on both ends of the module(s) until they are fully seated in the slot(s).
- Secure the module(s) in place: If your laptop has clips or tabs, make sure they snap into place, holding the RAM module(s) securely. If there are screws, use the appropriate screwdriver to tighten them without applying excessive force.
- Double-check the installation: Once the new RAM module(s) are securely in place, verify that they are fully inserted by gently pressing down on them. They should be level with the slot(s) and not protrude or feel loose.
It’s important to note that the installation process may vary slightly depending on your laptop model. Refer to your laptop’s manual or manufacturer’s website for any specific instructions or precautions that may apply to your particular model.
With the new RAM module(s) successfully installed, you’re now ready to move on to the next step: closing up your laptop.
Step 7: Close Up Your Laptop
Now that you have installed the new RAM modules, it’s time to close up your laptop and secure the internal components. Follow these steps to ensure everything is properly closed:
- Check for loose connections: Before closing up your laptop, take a quick look inside to make sure there are no loose cables or components. Ensure that the RAM modules are securely seated in their slots and that all connections are intact.
- Replace the bottom panel or keyboard: If you removed the laptop’s bottom panel or keyboard to access the RAM slots, carefully put it back in place. Align any tabs or screws correctly and gently press it into position until it’s secure.
- Tighten any screws: If you had to remove any screws to access the RAM slots, ensure that they are properly tightened without over-tightening. This will prevent the panel or keyboard from being loose and potentially causing any issues.
- Power off any external components: If you disconnected any external devices during the RAM upgrade, such as a keyboard or mouse, ensure that they are powered off and correctly reconnected if necessary.
- Plug your laptop back in: Connect the power adapter to your laptop and plug it into a power source. Ensure that the charger is properly inserted and that you have a stable power connection.
- Double-check all connections: Take a final moment to double-check that all connections, including power and USB cables, are properly connected and secure.
Once you have closed up your laptop and verified that all components and connections are in place, you’re ready to proceed to the final step: powering on your laptop and verifying the new RAM.
Step 8: Power On and Verify the New RAM
With your laptop closed up, it’s time to power it on and ensure that the new RAM is recognized and functioning correctly. Follow these steps to verify the new RAM:
- Press the power button: Press the power button on your laptop to turn it on. Wait for it to boot up and reach the desktop.
- Check the system information: Once your laptop is powered on, access the System Information utility to verify that the new RAM is recognized. You can do this by pressing the Windows key + R, typing “msinfo32” in the Run dialog box, and pressing Enter. In the System Information window, navigate to the “Installed Physical Memory” section and ensure that the new RAM’s capacity is displayed correctly.
- Verify improved performance: Open several applications or perform memory-intensive tasks to test the performance of your laptop with the newly installed RAM. Observe if there is a noticeable improvement in multitasking capabilities and overall speed. Tasks that used to be slow or laggy should now run smoother and faster.
- Monitor system stability: Keep an eye on your laptop’s stability and performance over time. Ensure that there are no crashes, freezes, or other issues after the RAM upgrade. If you encounter any problems, it may indicate an incompatibility or other underlying issue.
- Run a benchmark test (optional): If you want a more accurate assessment of your laptop’s performance before and after the RAM upgrade, consider running a benchmark test. This will provide quantitative data to measure the impact of the RAM upgrade on your laptop’s performance.
By following these steps, you can confidently verify that the new RAM is properly installed and functioning as intended. Enjoy the improved performance and enhanced multitasking capabilities that come with the increased RAM capacity!
Conclusion
Congratulations! You have successfully upgraded the RAM on your laptop. By following the step-by-step guide, you have expanded your laptop’s memory capacity, allowing for better multitasking capabilities and improved overall performance.
Remember, upgrading your laptop’s RAM is a cost-effective way to enhance its speed and responsiveness, whether you’re a student, professional, or gamer. With the right tools and a little patience, you can easily tackle this upgrade on your own.
Throughout this guide, we covered crucial steps such as checking compatibility, gathering the necessary tools, shutting down your laptop, locating the RAM slots, removing existing RAM (if applicable), installing the new RAM, closing up your laptop, and verifying the new RAM.
Always consult your laptop’s manual or manufacturer’s website for specific instructions and precautions tailored to your laptop model. Additionally, make sure to handle the RAM modules with care, using anti-static measures to avoid damaging the components.
After the RAM upgrade, power on your laptop, verify the new RAM is recognized, and test its performance by running multiple applications and memory-intensive tasks. Enjoy the smoother multitasking experience and increased speed that the additional RAM provides.
With this newfound knowledge, you can confidently upgrade the RAM on your laptop as needed and continue to optimize its performance for years to come. Happy computing!