Introduction
Welcome to our guide on how to remove a motherboard. Whether you’re upgrading your computer or troubleshooting hardware issues, removing the motherboard is a crucial step in the process. The motherboard, also known as the mainboard or system board, is the central component that connects all the various devices and components of a computer system. Removing the motherboard may be necessary when replacing it, upgrading components, or troubleshooting hardware problems.
While the prospect of removing a motherboard may seem daunting, with the right tools and knowledge, it can be a relatively straightforward process. In this guide, we will take you through the step-by-step instructions on how to safely remove a motherboard from your computer case.
Before we dive into the step-by-step process, it’s important to note that removing a motherboard requires a certain level of technical expertise and caution. It is essential to follow the instructions carefully and take necessary precautions to avoid damaging the components or causing harm to yourself. If you are unsure about any step or lack the necessary skills, it’s always recommended to seek professional assistance.
Additionally, before proceeding with the motherboard removal, make sure you have a clear workspace with ample lighting, as well as the appropriate tools and materials necessary for the task. This includes a screwdriver set, anti-static wrist strap, thermal paste (if you plan to reinstall the CPU cooler), and any other specific tools required by your computer case.
Now that we’ve covered the general precautions, let’s get started with the step-by-step process of removing a motherboard.
Items Needed
Before you begin removing the motherboard, it’s important to gather all the necessary tools and materials. Here’s a list of items you will need:
- Screwdriver set: You will need a screwdriver set that includes both a Phillips and flathead screwdriver. This will allow you to remove the screws securing the motherboard to the case and any other components that need to be disconnected.
- Anti-static wrist strap: To protect your components from static electricity, it’s recommended to wear an anti-static wrist strap. This will ground you and prevent any static discharge that could potentially damage the sensitive electronic components.
- Thermal paste: If you plan to reinstall the CPU cooler after removing the motherboard, you will need thermal paste. This paste helps to transfer heat between the CPU and the cooler, ensuring efficient cooling.
- Optional: Additional tools or materials specific to your computer case. Depending on your case design, you may need specific tools to access certain components or to remove the motherboard.
It’s essential to have these items ready before you begin the motherboard removal process. This will ensure that you have the necessary tools on hand and prevent any delays or interruptions during the process.
Before proceeding, it’s also a good idea to make sure you have a clear and clutter-free workspace. This will provide you with ample room to work and help prevent any small components or screws from getting lost or misplaced.
With the required tools and materials gathered and a well-organized workspace, you’re now ready to start the motherboard removal process. In the following steps, we will guide you through each stage, ensuring you can successfully remove the motherboard from your computer case.
Step 1: Gather necessary tools and materials
Before you begin the process of removing the motherboard, it is important to ensure you have all the necessary tools and materials at hand. Having everything ready beforehand will help streamline the process and prevent any unnecessary delays or interruptions. Here are the tools and materials you will need:
- Screwdriver set: Prepare a set of screwdrivers with various sizes and types, including Phillips and flathead screwdrivers. These will be used to unscrew and remove the screws that secure the motherboard to the computer case.
- Anti-static wrist strap: To protect the sensitive electronic components of your motherboard from static electricity, it is advisable to wear an anti-static wrist strap. This will help to ground any static charges in your body, preventing them from damaging the components.
- Thermal paste: If you plan to reinstall the CPU cooler after removing the motherboard, you will need thermal paste. This paste helps to improve the thermal conductivity between the CPU and the cooler, ensuring efficient heat dissipation.
- Optional: Depending on your computer case and motherboard, you may require additional tools or materials. For example, some cases may have specific screws or attachments for securing the motherboard, so it is good to check the case manual or manufacturer’s website for any specific requirements.
It is also important to ensure that you have a clean and organized workspace. Clear any clutter and ensure there is enough space to maneuver around the computer case comfortably. Having good lighting in the area will also aid visibility and make the process easier.
By gathering these tools and materials and preparing your workspace, you will be well-equipped to begin the process of removing the motherboard. Remember to take your time, follow proper procedures, and exercise caution while handling the delicate components.
Step 2: Power down and disconnect everything
Before you start removing the motherboard, it is crucial to power down your computer and disconnect all the necessary components. This step ensures your safety and prevents any potential damage to the motherboard or other components. Here’s what you need to do:
- Power down your computer: Start by shutting down your computer through the operating system. Once it’s fully powered off, unplug the power cord from the wall socket to ensure there is no residual power.
- Disconnect all cables: Identify all the cables connected to the motherboard and carefully unplug them. This includes the power supply cables, data cables for storage devices such as hard drives and SSDs, as well as any peripheral devices like keyboard, mouse, and monitor.
- Remove any expansion cards: If you have any expansion cards such as graphics cards, sound cards, or network cards installed, remove them by gently pressing down on the release lever or unscrewing the retention screw, depending on the card type. Carefully pull the card straight out of its slot.
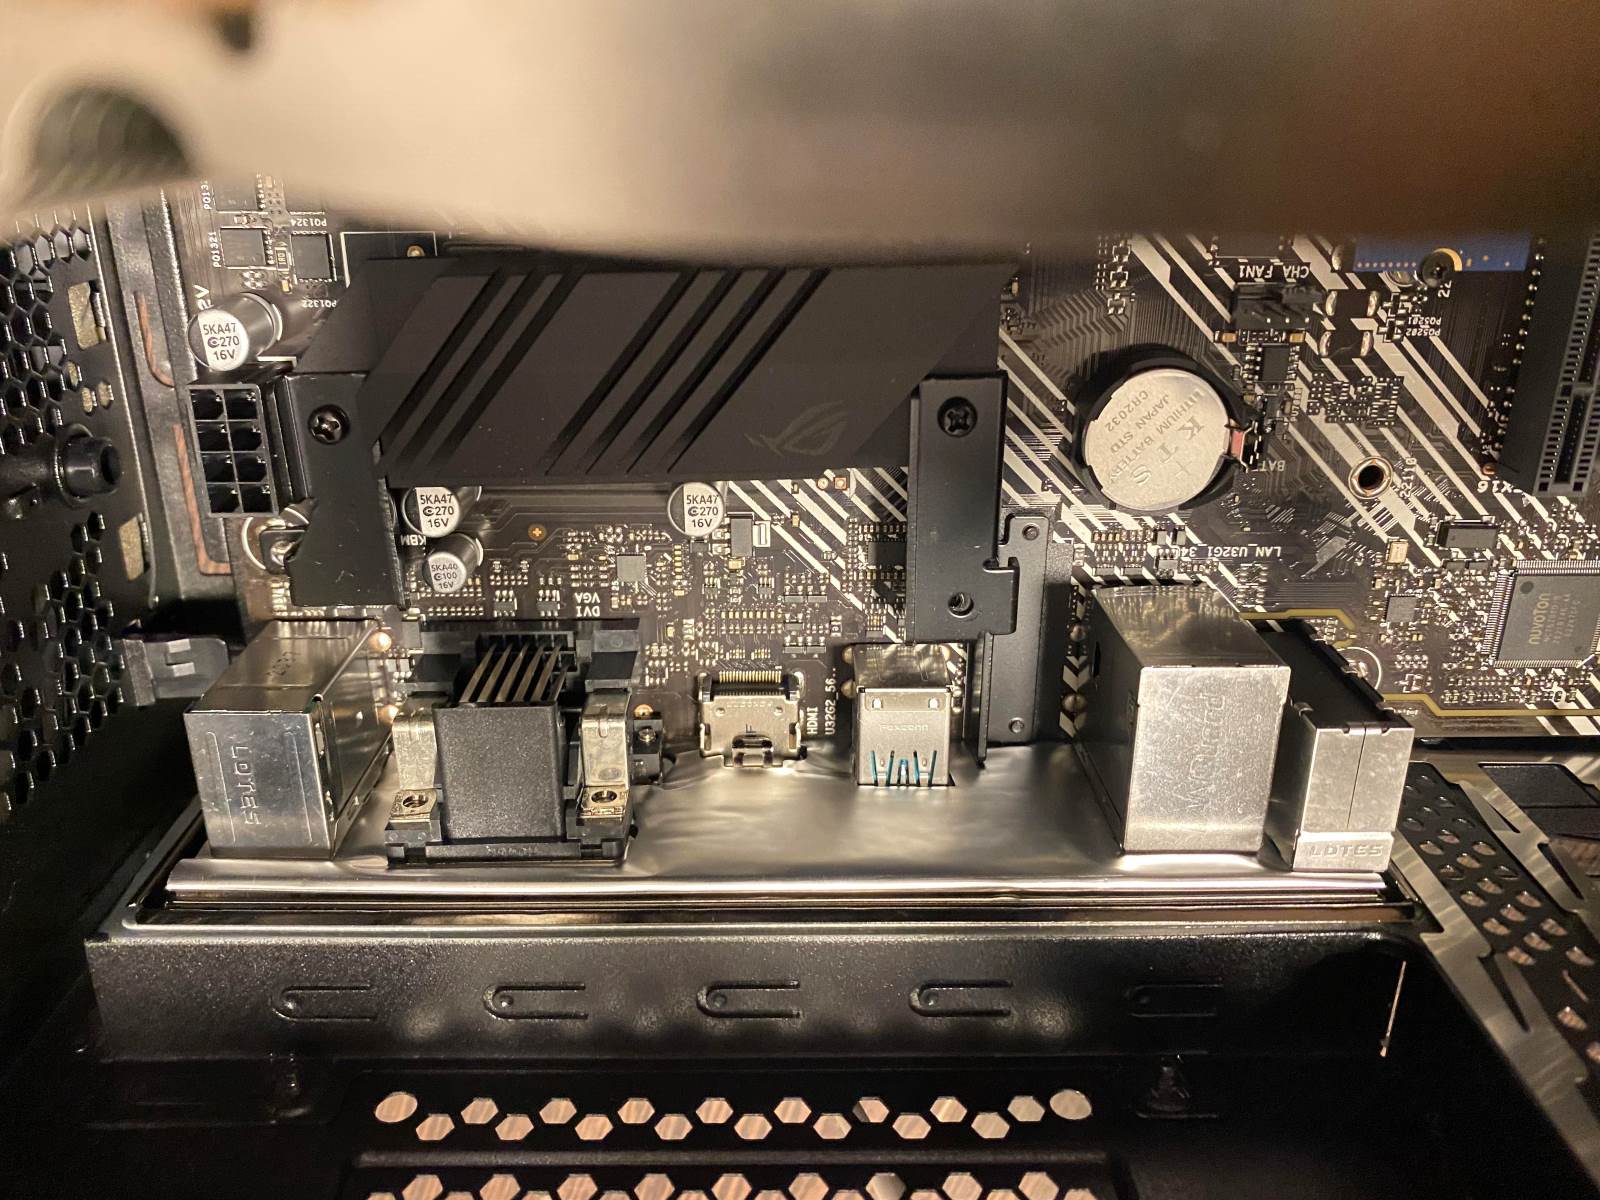
- Disconnect front panel connectors: If your computer case has front panel connectors for USB ports, audio jacks, or power buttons, disconnect them from the motherboard. Refer to your motherboard manual for the specific locations of these connectors.
- Remove CPU cooler: If the CPU cooler is attached to the motherboard, it needs to be removed before you can proceed. The process of removing the CPU cooler varies depending on the type of cooler. Refer to the manufacturer’s instructions or your motherboard manual for guidance.
By following these steps, you will ensure that all the necessary components are properly disconnected from the motherboard, minimizing the risk of damage or accidental disconnection during the removal process. Remember to handle the components with care and avoid applying excessive force when disconnecting cables or removing expansion cards.
Once you have completed this step, you are ready to move on to the next phase of removing the motherboard.
Step 3: Remove the CPU cooler
Before removing the motherboard, it is essential to remove the CPU cooler. The CPU cooler is responsible for dissipating heat generated by the processor, and it is typically attached to the motherboard. Here’s how you can safely remove the CPU cooler:
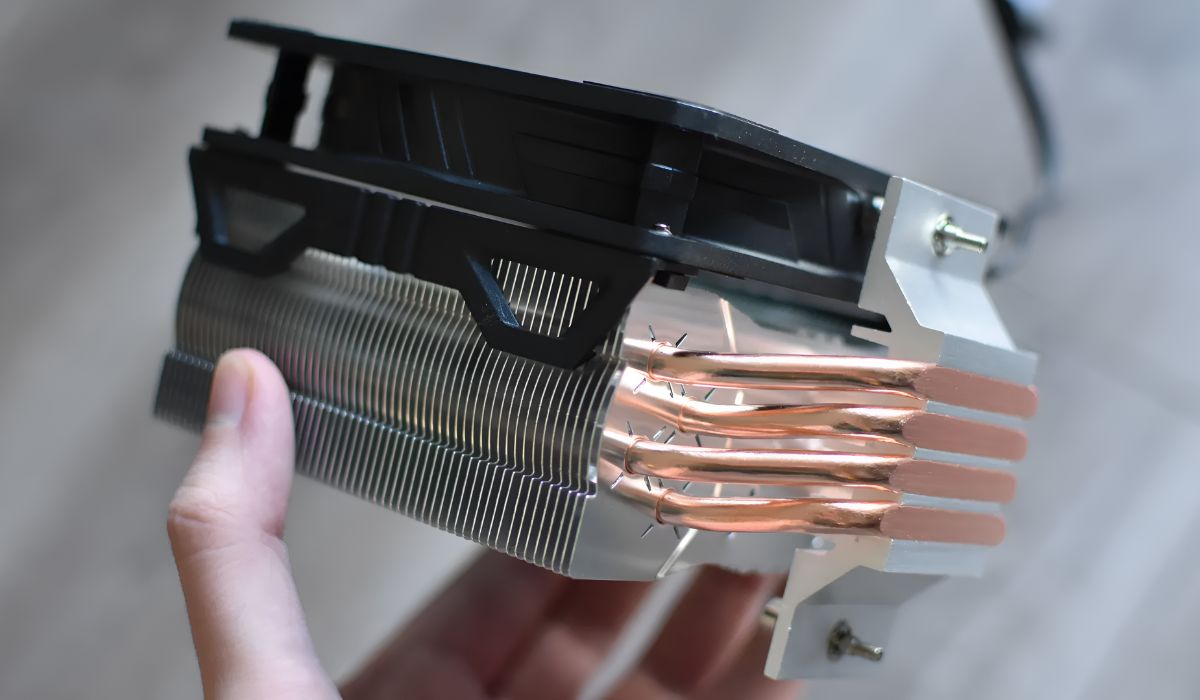
- Identify the CPU cooler: Locate the CPU cooler, which is typically a large heatsink with a fan attached to it. It may also have brackets or screws holding it in place.
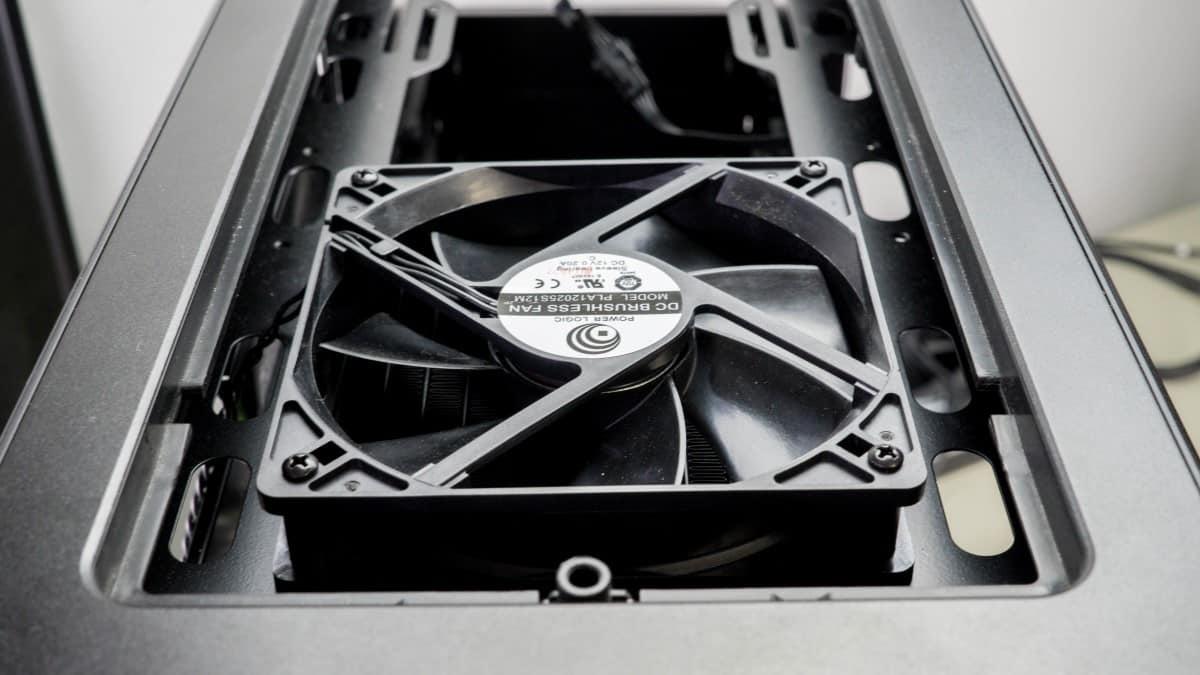
- Disconnect the fan cable: Locate the fan header connected to the motherboard and gently disconnect the fan cable. Take note of any clips or tabs that may be securing the cable in place and release them if necessary.
- Loosen the screws or brackets: Depending on the type of CPU cooler, it may be held in place by screws or brackets. Use a screwdriver or other appropriate tool to carefully loosen and remove these fasteners from the motherboard.
- Remove the CPU cooler: Once the fasteners are removed, gently lift the CPU cooler away from the motherboard. Be cautious not to apply too much force or twist the cooler, as this could damage the CPU or the motherboard components.
When removing the CPU cooler, it is important to note that the cooler may have thermal paste applied between the cooler’s base and the CPU. Take care not to spread or smear the thermal paste over other components during removal. If you plan to reuse the CPU cooler, you will need to clean off the old thermal paste using isopropyl alcohol and apply fresh thermal paste when reinstalling it on the new motherboard.
Some CPU coolers may have additional mounting mechanisms or specialized designs. It’s important to refer to the manufacturer’s instructions specific to your CPU cooler model to ensure correct removal.
By following these steps, you can safely remove the CPU cooler from your motherboard. Once you have successfully removed the CPU cooler, you can now proceed to the next step in the motherboard removal process.
Step 4: Disconnect all cables and connectors
Now that the CPU cooler is removed, it’s time to disconnect all the remaining cables and connectors attached to the motherboard. This step ensures that the motherboard can be safely removed without any obstructions or potential damage to the components. Here’s how you can disconnect the cables and connectors:
- Identify the cables: Take a close look at the cables connected to the motherboard. Some common cables include the main power cable, SATA cables for storage devices, USB headers, audio headers, and front panel connectors.
- Disconnect the main power cable: The main power cable, usually a thick 24-pin connector, supplies power to the motherboard. To disconnect it, locate the latch or clip on the side of the connector and gently press it down while pulling the cable away from the motherboard.
- Detach SATA cables: SATA cables connect the storage devices to the motherboard. To disconnect them, gently pull the cables straight out of the SATA ports on the motherboard. Take care not to bend the pins or force the connectors.
- Disconnect USB and audio headers: If your case has front panel USB ports and audio jacks, they are typically connected to the motherboard via headers. Refer to your motherboard manual to identify the location of these headers and gently unplug the cables connected to them.
- Detach front panel connectors: The front panel connectors include power buttons, LED lights, and reset buttons. Refer to your motherboard manual to locate these connectors and carefully detach them.
- Disconnect any other cables: If there are any other cables or connectors attached to the motherboard, such as fan connectors or specialized device connectors, disconnect them following the manufacturer’s instructions or guidelines.
When disconnecting the cables and connectors, it is important to handle them with care and avoid applying excessive force. Take your time to ensure that you disconnect each cable cleanly without bending any pins or damaging the connectors.
By following these steps, you will disconnect all the necessary cables and connectors from the motherboard, allowing you to proceed with the next stages of removing the motherboard from the computer case.
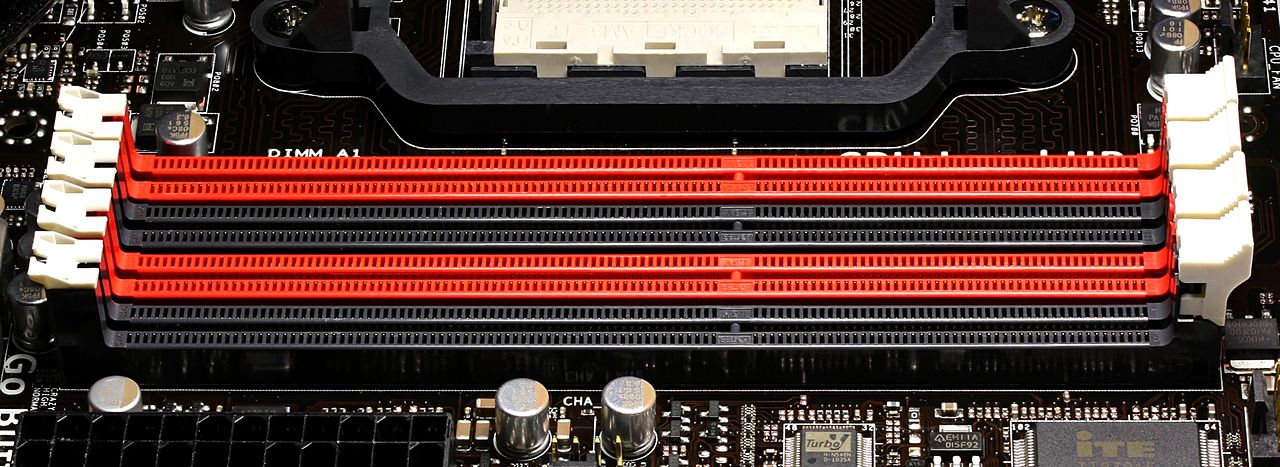
Step 5: Remove the RAM modules
Next in the process of removing the motherboard is removing the RAM modules. RAM, also known as Random Access Memory, is responsible for temporarily storing data that the processor needs to access quickly. Here’s how you can safely remove the RAM modules:
- Locate the RAM modules: Identify the RAM modules installed on the motherboard. RAM modules are long, thin sticks that are inserted into the memory slots on the motherboard.
- Release the retaining clips: On each side of the RAM slots, you will find retaining clips. Gently press these clips outward to release the RAM module.
- Remove the RAM module: Once the retaining clips are released, the RAM module will pop up at a slight angle. Hold the module by its edges and lift it straight out of the slot.
- Repeat for other modules: If you have multiple RAM modules installed, repeat the process for each one until all the modules are removed from their slots.
It’s important to note that RAM modules are delicate components, so handle them with care. Avoid touching the gold contacts on the bottom of the module, as oils from your fingers can interfere with their performance. When removing the modules, ensure that you lift them straight out without placing excessive force or bending them.
If you plan to reinstall the RAM modules on the new motherboard, make sure to keep them in a safe place away from static electricity and other sources of damage.
By carefully following these steps, you will be able to remove the RAM modules from your current motherboard, a necessary step before proceeding with the motherboard removal process.
Step 6: Remove any other expansion cards
In addition to the RAM modules, your computer system may have other expansion cards installed, such as graphics cards, sound cards, or network cards. These cards are inserted into PCIe or other expansion slots on the motherboard and need to be removed before taking out the motherboard. Here’s how you can safely remove any other expansion cards:
- Identify the expansion cards: Take note of all the expansion cards that are installed in the PCIe slots on the motherboard. Common examples include graphics cards, sound cards, Wi-Fi cards, or any other expansion cards you may have.
- Release the retention mechanism: Depending on the type of expansion slot and the card design, there may be a retention mechanism that secures the card in place. This could be a release lever or screw that needs to be loosened or removed.
- Remove the card: Once the retention mechanism is released, carefully grasp the edges of the expansion card and pull it straight out of its slot. Be cautious not to apply excessive force or bend the card.
- Repeat for other expansion cards: If you have multiple expansion cards, repeat the process for each one until all the cards are safely removed from their slots.
It is important to handle expansion cards with care, as they can be sensitive and easily damaged. Avoid touching the exposed components or delicate circuitry on the cards. Additionally, it’s advisable to keep the removed cards in an anti-static bag or on a non-conductive surface to prevent any static discharge or accidental damage.
Once all the expansion cards have been removed, you can proceed to the next step in the motherboard removal process, confidently knowing that there are no obstructions left to hinder the process.
Step 7: Remove the power and data cables from the drives
Before you can remove the motherboard, it is necessary to disconnect the power and data cables from the drives. These cables connect the hard drives, solid-state drives (SSDs), and optical drives to the motherboard or power supply unit (PSU). Here’s how you can safely remove the cables:
- Identify the power and data cables: Locate the power and data cables connected to your storage drives. The power cables have multiple connectors and usually come from the PSU, while the data cables are narrower and connect to the motherboard.
- Disconnect the power cables: For each storage drive, gently pull out the power cables from the connectors on the drive. The connectors may vary depending on the drive type but are usually rectangular in shape.
- Detach the data cables: To remove the data cables, locate the connectors on the motherboard that correspond to each drive. Gently squeeze the tabs on the side of the connectors and pull the cables straight out.
When removing the cables, it’s important to handle them with care and avoid pulling or twisting them too forcefully. Take note of the connectors’ orientations and make sure to detach them straight and evenly to avoid damaging the connectors or ports.
If you have multiple drives, repeat the process for each one until all the power and data cables are disconnected. Remember to keep the cables in a safe place for reinstallation if needed.
With the power and data cables detached, the drives are now ready to be safely handled during the motherboard removal process.
Step 8: Unscrew the motherboard from the case
Now that you have disconnected all the necessary components, it’s time to unscrew the motherboard from the computer case. The motherboard is typically secured to the case with screws to ensure stability and proper grounding. Here’s how you can safely unscrew the motherboard:
- Identify the screws: Take note of the screws that secure the motherboard to the case. These screws are usually located around the perimeter of the motherboard and may vary in size depending on your case design.
- Prepare your screwdriver: Depending on the screw type, you may need a Phillips or flathead screwdriver. Ensure that the screwdriver blade matches the screw head size for a snug fit and optimal control.
- Begin unscrewing: Starting from one corner, carefully unscrew each screw by turning them counterclockwise. It’s best to work in a diagonal pattern, gradually loosening the screws on each opposing corner to maintain balance and avoid undue stress on the motherboard.
- Keep screws in a safe place: As you remove each screw, place them in a small dish or container to keep them organized and prevent them from getting lost. This will also make it easier for you to reassemble the system later, if needed.
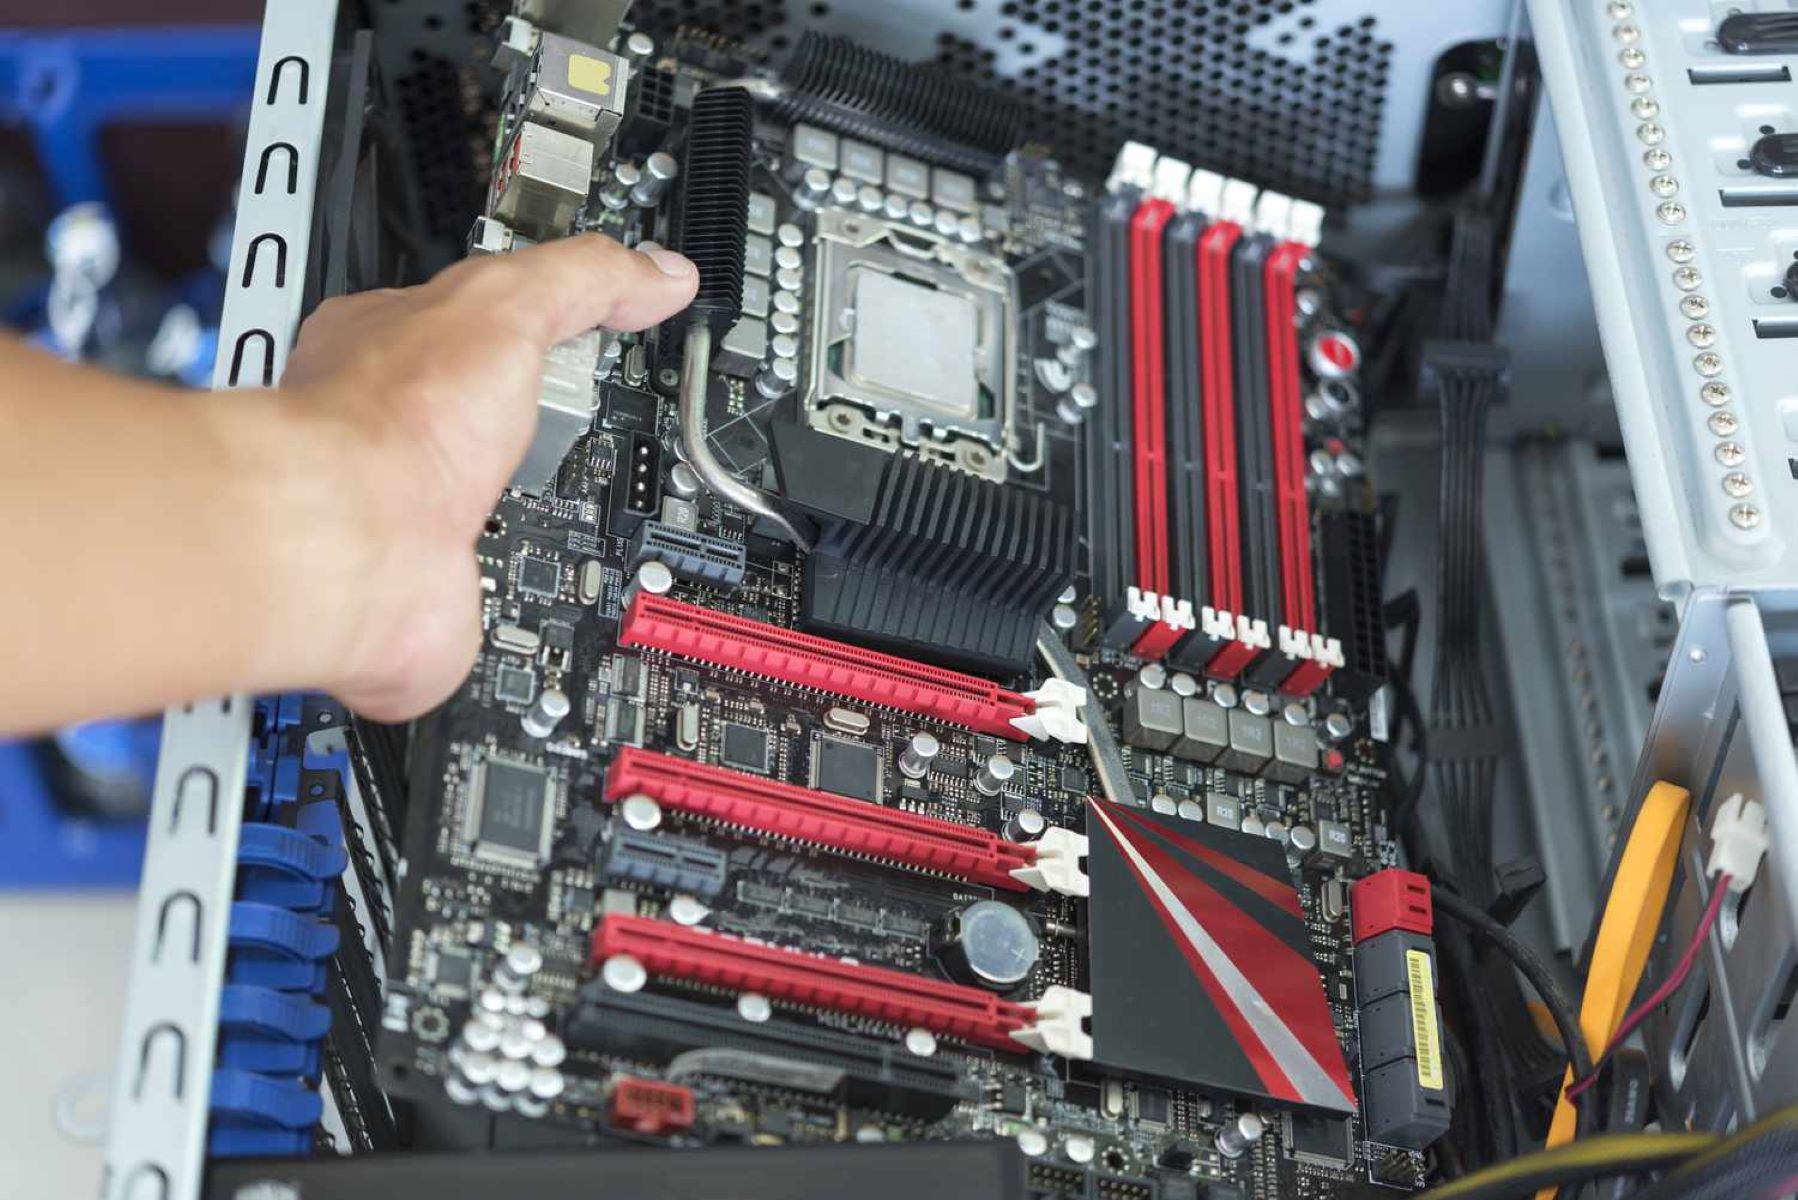
- Handle the motherboard with care: Once all the screws are removed, you can gently lift the motherboard away from the case. Take care not to apply excessive force or bend the motherboard during the lifting process.
It’s important to exercise caution when unscrewing the motherboard to avoid accidentally dropping screws onto the motherboard or damaging any components. Take your time and be patient throughout this process.
With the motherboard now detached from the case, you have successfully completed the step of unscrewing the motherboard and are ready to proceed with the final step of removing the motherboard from the case.
Step 9: Lift and remove the motherboard
Now that the motherboard is unscrewed from the case, it’s time to lift and remove it. This step requires careful handling to ensure the safety of the motherboard and other components. Here’s how you can lift and remove the motherboard:
- Take precautionary measures: Before lifting the motherboard, make sure you are properly grounded by wearing an anti-static wrist strap or by touching a grounded metal surface to discharge any static electricity.
- Identify any additional connections: Check if there are any additional connectors, such as audio or USB headers, that may still be attached to the motherboard. Gently disconnect these connectors following the manufacturer’s instructions to avoid any damage.
- Lift the motherboard: Place your hands on either side of the motherboard, near the edges, ensuring that you have a firm grip. Slowly and carefully lift the motherboard straight up, taking care not to apply excessive force or unintentionally bend or damage the delicate components.
- Inspect for any obstructions: As you lift the motherboard, pay attention to any cables or wires that may still be connected underneath it. Carefully lift and maneuver the motherboard to ensure there are no obstructions before fully removing it from the case.
- Place the motherboard in a safe location: Once the motherboard is completely lifted, place it in a safe and static-free location, such as on an anti-static mat or in an anti-static bag. This will protect the motherboard from any potential damage while it is out of the case.
Removing the motherboard requires gentle and precise handling to prevent any damage to the delicate components, circuitry, or connectors. Take your time and be mindful of the motherboard’s weight and fragility throughout the process.
With the motherboard successfully lifted and removed from the case, you have completed the process of removing the motherboard. Congratulations! You are now ready to proceed with your desired action, whether it be upgrading the motherboard, replacing components, or troubleshooting hardware issues.
Conclusion
Removing a motherboard may seem like a daunting task, but with the right tools, knowledge, and careful attention, it can be successfully accomplished. By following the step-by-step instructions outlined in this guide, you have learned how to safely remove a motherboard from your computer case.
Throughout this process, it is important to exercise caution, handle components delicately, and take necessary precautions to avoid static discharge. Remember to gather all the necessary tools and materials before starting, disconnect all cables and components properly, and unscrew the motherboard from the case methodically. Finally, lift and remove the motherboard with care, ensuring a safe transition from the case to a static-free environment.
Whether you are upgrading your computer, replacing components, or troubleshooting hardware issues, knowing how to remove a motherboard is an essential skill for any computer enthusiast or technician. Just be sure to refer to your motherboard manual or seek professional assistance if you encounter any specific challenges or uncertainties.
Now that you have successfully removed the motherboard, you can proceed with your desired actions, whether it involves installing a new motherboard, upgrading components, or addressing any hardware issues that may have led you to this process in the first place.
We hope this guide has been helpful in assisting you as you remove your motherboard. Good luck, and happy troubleshooting or upgrading!