Introduction
Welcome to our guide on how to set up dual-channel RAM! If you’re looking to boost your computer’s performance, dual-channel RAM can be a great upgrade option. By harnessing the power of two memory modules working in tandem, you can experience faster data transfer rates and improved multitasking capabilities. In this article, we will explain what dual-channel RAM is, discuss its benefits, and guide you through the process of installation.
Random Access Memory (RAM) is a critical component of your computer’s hardware. It serves as temporary storage for data that your computer is actively using. Dual-channel RAM, as the name suggests, allows two memory modules to work simultaneously, doubling the available bandwidth compared to single-channel configurations.
One of the primary benefits of dual-channel RAM is improved memory performance. With two modules working together, the computer can access and process data at a faster rate. This results in smoother operation, reduced latency, and faster load times for applications and files. Whether you’re a casual computer user or a hardcore gamer, the performance boost from dual-channel RAM can enhance your overall computing experience.
Furthermore, dual-channel RAM is particularly advantageous for tasks that require extensive memory usage. Multitasking, video editing, graphic design, and gaming are examples of activities that can benefit significantly from the increased memory bandwidth offered by dual-channel configurations. If you frequently find yourself running resource-intensive applications simultaneously, upgrading to dual-channel RAM can make a noticeable difference in your system’s responsiveness.
What is Dual Channel RAM?
Dual-channel RAM is a memory configuration that enables two memory modules to work in parallel, delivering improved data transfer rates compared to single-channel setups. In a dual-channel configuration, the memory controller in the computer’s motherboard divides the data being accessed into two equal parts, which are then sent to two separate memory modules. This allows for simultaneous data access and processing, resulting in faster overall performance.
Each memory module in a dual-channel setup typically has the same capacity, speed, and timings to ensure compatibility and optimal performance. For example, if you have a 16GB dual-channel RAM configuration, you would have two 8GB memory modules. It’s important to note that both memory modules must be installed in the correct slots on the motherboard to enable dual-channel operation.
Dual-channel RAM operates in a synchronous mode, meaning that both memory modules are synchronized and operate at the same frequency and timings. This synchronization ensures that data is transferred accurately and consistently between the memory modules and the processor. The increased memory bandwidth provided by dual-channel configurations improves system performance by reducing memory bottlenecks and allowing for more efficient data transfers.
To take advantage of dual-channel RAM, your computer’s motherboard must support this feature. Most modern motherboards, especially those designed for gaming or high-performance use, include dual-channel memory architecture. However, it’s essential to check your motherboard’s specifications to ensure compatibility.
In summary, dual-channel RAM is a memory configuration that utilizes two memory modules working in parallel to deliver increased memory bandwidth and improved performance. By enabling simultaneous data access and processing, dual-channel RAM helps to reduce memory bottlenecks and enhance overall system responsiveness. In the next sections, we will explore the benefits of dual-channel RAM and guide you through the installation process.
Benefits of Dual Channel RAM
Dual-channel RAM offers several benefits that make it a worthwhile investment for enhancing your computer’s performance. Let’s take a closer look at these advantages:
- Improved Memory Performance: One of the primary benefits of dual-channel RAM is its ability to enhance memory performance. By utilizing two memory modules simultaneously, dual-channel configurations provide higher memory bandwidth, allowing for faster data transfer rates. This results in quicker load times for applications, smoother multitasking, and improved overall system responsiveness.
- Enhanced Multitasking: Dual-channel RAM is particularly beneficial for tasks that involve heavy multitasking. Whether you’re running multiple applications simultaneously, editing large files, or streaming content while gaming, dual-channel configurations can handle the increased memory demands more efficiently. This results in smoother multitasking and reduced lag, allowing you to work or play without interruptions.
- Improved Gaming Performance: Gamers can reap significant benefits from dual-channel RAM. Many modern games require substantial memory resources, and dual-channel configurations ensure that the data can be accessed and processed quickly. This results in smoother gameplay, reduced stuttering, and faster loading times, providing a more immersive and enjoyable gaming experience.
- Efficient Data Transfer: Dual-channel RAM allows for simultaneous data access and processing, reducing memory bottlenecks and improving data transfer efficiency. This is especially beneficial for memory-intensive tasks such as video editing, graphic design, and 3D rendering, where large amounts of data need to be processed quickly. Dual-channel configurations ensure that the memory bandwidth is maximized, enabling faster file rendering and editing workflows.
- Upgrade Flexibility: Dual-channel RAM offers flexibility when it comes to upgrading your system’s memory. If you initially install a single memory module, you can later add another module to take advantage of dual-channel configurations. This allows you to gradually expand your system’s memory capacity while also enjoying the benefits of increased memory bandwidth.
In summary, dual-channel RAM provides improved memory performance, enhanced multitasking capabilities, and smoother gaming experiences. It facilitates efficient data transfer, especially for memory-intensive tasks, and offers flexibility for future memory upgrades. By investing in dual-channel RAM, you can unlock the full potential of your computer and enjoy a faster and more responsive computing experience.
Compatibility and Requirements for Dual Channel RAM
Before diving into the installation process of dual-channel RAM, it’s crucial to ensure compatibility with your computer system and understand the requirements for this memory configuration.
Motherboard Compatibility: The first requirement for setting up dual-channel RAM is a compatible motherboard. Most modern motherboards, especially those designed for gaming or high-performance computing, support dual-channel memory architecture. However, it’s essential to check your motherboard’s specifications to ensure compatibility. Refer to the motherboard’s documentation or the manufacturer’s website to determine if it supports dual-channel memory configuration.
Memory Module Match: To achieve dual-channel operation, it’s crucial to use matching memory modules. Both memory modules must have the same capacity, speed, and timings. For example, if you have a 16GB dual-channel RAM configuration, you should use two 8GB memory modules. Mismatched memory modules can result in issues such as instability or failure to enable dual-channel mode.
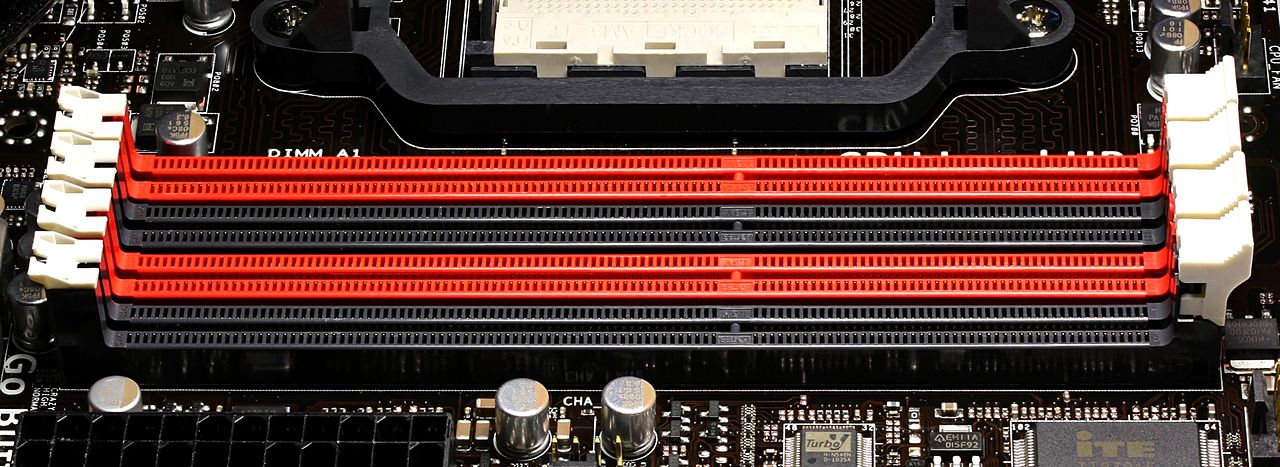
Slot Configuration: Properly installing the memory modules in the correct slots is necessary for dual-channel operation. Most motherboards label the memory slots to indicate which slots should be used for dual-channel configurations. Typically, the slots are color-coded, with pairs of slots having the same color. For example, the slots might be color-coded as black and gray, indicating the pairs for dual-channel memory. Consult your motherboard’s documentation to identify the correct memory slots for dual-channel configuration.
Memory Speed: Another consideration for dual-channel RAM is the memory speed. For optimal performance, it’s recommended to use memory modules with identical clock speeds. While it’s possible to mix modules with different speeds, the memory controller will adjust the clock speed to match the slowest module, potentially limiting the overall memory performance. To maximize the benefits of dual-channel RAM, it’s best to use memory modules with the same speed.
BIOS Settings: In some cases, you may need to adjust BIOS settings to enable dual-channel mode. However, most modern motherboards automatically detect and enable dual-channel configuration when the matching memory modules are installed in the correct slots. If you encounter any issues, consult your motherboard’s documentation or the manufacturer’s website for instructions on enabling dual-channel mode through the BIOS settings.
In summary, to ensure compatibility and meet the requirements for dual-channel RAM, you need a compatible motherboard that supports dual-channel memory architecture. It’s essential to use matching memory modules with the same capacity, speed, and timings. Properly installing the memory modules in the correct slots, as indicated by the motherboard, is crucial. By adhering to these compatibility and requirements, you can successfully set up dual-channel RAM and enjoy the benefits of increased memory performance.
Checking Motherboard Compatibility
Before proceeding with the installation of dual-channel RAM, it’s crucial to confirm the compatibility of your computer’s motherboard with this memory configuration. Here are the steps to check motherboard compatibility:
- Identify Your Motherboard: Determine the exact model of your motherboard. You can usually find this information on a sticker or printed directly on the motherboard itself. If you’re unsure about the model, you can use system information utilities or check the documentation that came with your computer.
- Visit the Manufacturer’s Website: Once you have identified your motherboard model, visit the manufacturer’s website. Look for a support or downloads section where you can find detailed information about the motherboard’s specifications.
- Locate the Specifications: Search for the specifications of your motherboard on the manufacturer’s website. Look for information related to memory support, memory channels, and maximum supported memory capacity.
- Check for Dual-Channel Memory Support: In the specifications, look for any mention of dual-channel memory support. Manufacturers usually indicate whether the motherboard supports dual-channel memory architecture. If you find this information, it means your motherboard is compatible with dual-channel RAM.
- Check the Number of Memory Slots: Note the number of memory slots available on your motherboard. Dual-channel RAM requires at least two memory slots to function properly. If your motherboard has fewer than two slots, it may not support dual-channel memory configurations.
- Note Memory Speed Support: Pay attention to the supported memory speeds mentioned in the motherboard specifications. Ensure that the maximum speed matches or exceeds the speed of your dual-channel RAM modules to ensure optimal performance.
- Consult the Manual: If you’re still unsure about the compatibility of your motherboard with dual-channel RAM, consult the motherboard’s manual. The manual should provide detailed information about memory configurations and compatibility.
By following these steps, you can confidently determine whether your motherboard supports dual-channel RAM. If your motherboard is compatible, you can proceed with the installation process outlined in the subsequent sections. However, if your motherboard doesn’t support dual-channel memory architecture, you may need to explore other options to upgrade your system’s memory performance.
Installing Dual Channel RAM
Now that you’ve checked the compatibility of your motherboard and confirmed its support for dual-channel RAM, it’s time to proceed with the installation process. Follow the steps below to install dual-channel RAM:
- Step 1: Power Off Your Computer: Before beginning any hardware installation, ensure that your computer is powered off, and disconnect the power cable.
- Step 2: Open the Computer Case: Depending on your computer’s case design, remove the screws or clips to access the internal components. Slide or lift off the side panel of the case to reveal the motherboard and other hardware.
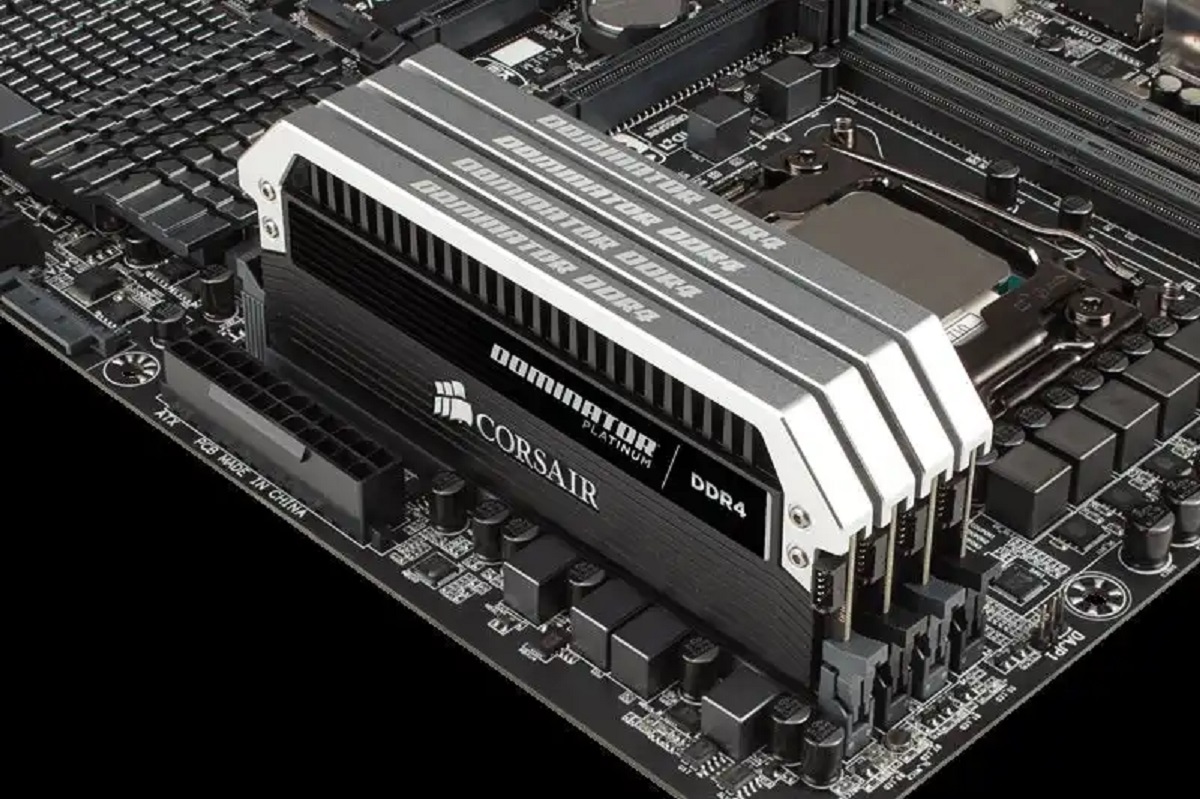
- Step 3: Locate the RAM Slots: Locate the memory slots on your motherboard. They are typically long, rectangular slots located near the CPU socket. Refer to your motherboard’s manual if you need assistance in identifying the RAM slots.
- Step 4: Remove Existing RAM (If Applicable): If your computer already has RAM installed and you’re replacing it with the new dual-channel RAM modules, gently press the tabs on either side of the existing RAM module to release them. Carefully remove the module from the slot.
- Step 5: Insert the Dual Channel RAM: Take the matching dual-channel RAM modules and align the notches on the bottom of the module with the keys in the memory slot. Ensure that the module is oriented correctly by matching the notch in the module with the corresponding tab in the slot. Apply gentle and equal pressure to both ends of the module until it clicks into place.
- Step 6: Reassemble the Computer: Once the dual-channel RAM modules are securely inserted, reattach the computer case’s side panel using screws or clips. Ensure that all connections and cables are properly reconnected.
- Step 7: Power On Your Computer: Plug the power cable back into your computer and power it on. The system should detect the newly installed dual-channel RAM automatically.
Once you’ve completed these steps, you will have successfully installed dual-channel RAM in your computer. To confirm that dual-channel mode is enabled, you can check your computer’s BIOS settings or use system information utilities to verify the memory configuration. Enjoy the improved memory performance and enhanced multitasking capabilities provided by your new dual-channel RAM setup!
Step 1: Power Off Your Computer
The first step in installing dual-channel RAM is to power off your computer. This precautionary measure ensures your safety and prevents any potential damage to the hardware components. Follow these steps to power off your computer:
- Save Your Work: Before shutting down your computer, save any unsaved work or documents. Closing any running applications or programs will help prevent data loss and ensure a smooth shutdown process.
- Exit Programs: Exit any open programs or applications that may be running in the background. This includes web browsers, word processors, media players, and any other software currently in use.
- Shut Down Your Operating System: Depending on your operating system, you can initiate the shutdown process through a few different methods. On Windows, click the “Start” button, then the power icon, and choose “Shut Down.” On macOS, click the Apple menu, select “Shut Down,” and confirm the action.
- Wait for the Shutdown Process: After initiating the shutdown process, wait for your computer to power off completely. You may see a screen indicating that Windows is shutting down or a similar message on other operating systems. Allow the process to complete before proceeding to the next steps.
- Unplug Your Computer: Once your computer has shut down, unplug the power cable from the back of your computer or disconnect the power adapter if you are using a laptop. This ensures that no power is flowing to the system and reduces the risk of electrical shocks during the installation process.
- Ground Yourself: To further prevent any static electricity discharge that can damage sensitive components, ground yourself by touching a grounded metal surface. This helps to discharge any static electricity buildup on your body before handling the computer’s internal components.
By following these steps to power off your computer, you are taking the necessary precautions to ensure the safety of both yourself and your hardware. With the computer shut down and unplugged, you can proceed with the next steps of installing dual-channel RAM without any risk of electrical damage or harm.
Step 2: Open the Computer Case
After safely powering off your computer, the next step in installing dual-channel RAM is to open the computer case. Opening the case will provide access to the internal components, including the motherboard and memory slots. Follow these steps to open the computer case:
- Gather Necessary Tools: Before proceeding, make sure you have the necessary tools on hand. This usually includes a screwdriver or any other tool required to remove screws or fasteners holding the computer case together.
- Unplug Power Cable: Ensure that the computer is completely powered off and unplugged from the power source. This is essential to prevent any electrical shocks while working on the internal components.
- Identify the Computer Case: Take a moment to identify the type of computer case you have. There are various types, including tower cases, desktop cases, and compact form-factor cases. The specific procedure for opening the case may vary depending on the case design.
- Locate Case Access Points: Examine the computer case to locate the access points for opening it. Most cases will have screws, levers, or clips securing the side or top panel. Look for any visible screws or fasteners that need to be removed.
- Remove Screws or Fasteners: Use the appropriate tool, such as a screwdriver, to remove any screws or fasteners holding the case panel in place. Turn the screws counterclockwise to loosen them, then set them aside in a safe place for reassembly later.
- Open the Case: With the screws or fasteners removed, gently slide, lift, or pivot the case panel to open it. Take care not to force it, as different cases may have different mechanisms for opening. Refer to the case manual for any specific instructions if needed.
- Inspect Inside the Case: Once the case is open, take a moment to inspect the inside for any potential obstructions or loose cables that may interfere with the installation process. Clear any clutter or cables to ensure a smooth installation.
By following these steps to open the computer case, you will gain access to the internal components. Keep in mind that the exact procedure may vary depending on the case design. Ensure that you handle the case and internal components with care to avoid any damage. With the case open, you can now proceed with the installation of dual-channel RAM.
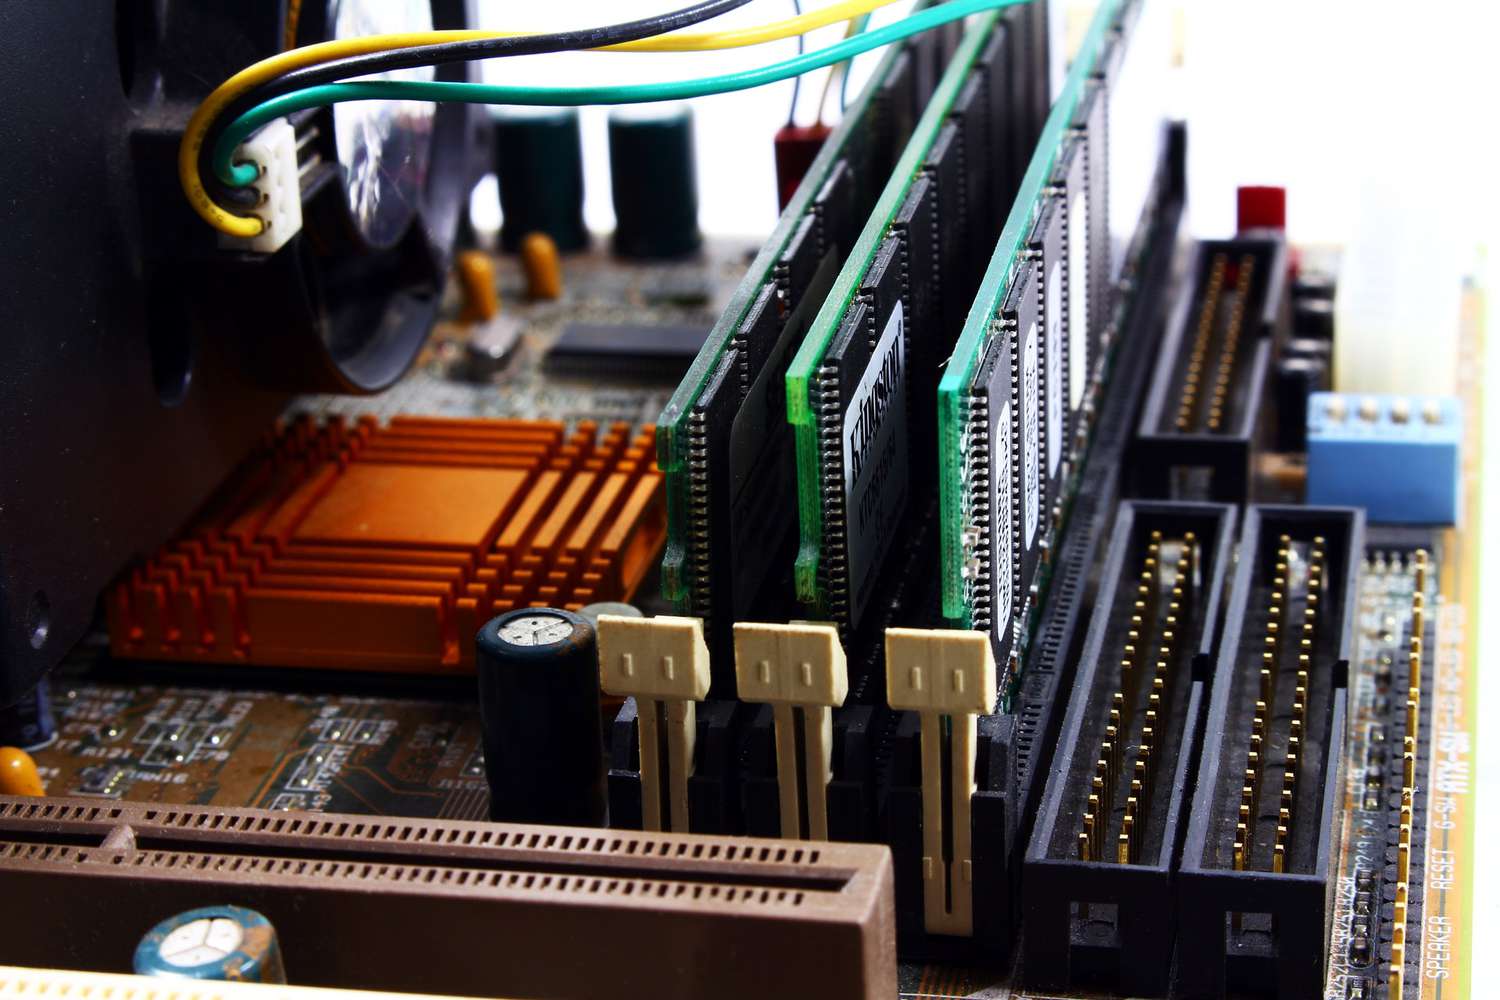
Step 3: Locate the RAM Slots
After opening the computer case, the next step in installing dual-channel RAM is to locate the RAM slots on the motherboard. The RAM slots are where the memory modules will be inserted. Follow these steps to identify the RAM slots:
- Observe the Motherboard: Take a close look at the motherboard, which is the large circuit board inside the computer case. The RAM slots are typically located near the center or upper portion of the motherboard.
- Identify the RAM Slot Type: There are different types of RAM slots, depending on the generation and form factor of the motherboard. The most common type is the DDR4 or DDR3 slots, but there may be others, such as DDR2 or DDR5, depending on the motherboard’s specifications.
- Count the RAM Slots: Examine the motherboard to determine the number of RAM slots available. Most motherboards have four slots, while some may have only two. The number of slots can affect the maximum memory capacity supported by the motherboard.
- Refer to the Motherboard Manual: If you’re having trouble identifying the RAM slots or determining the type and number of slots, consult the motherboard’s manual. The manual provides detailed information about the layout and specifications of the motherboard, including the RAM slots.
- Note the Slot Configuration: Pay attention to any specific slot configuration requirements for dual-channel memory. Some motherboards have specific color-coding or slot pairing to indicate the proper installation for dual-channel RAM. Refer to the motherboard manual or markings on the motherboard itself to identify the correct slots for dual-channel configuration.
- Take Precautions: While locating the RAM slots, it’s important to handle the motherboard and other internal components with care. Avoid touching the circuitry and connectors to prevent static electricity damage, and ground yourself by touching a grounded metal surface or wearing an anti-static wrist strap.
By following these steps and observing the motherboard, you can locate the RAM slots on your particular motherboard. Identifying the correct RAM slots and understanding their configuration is crucial for successfully installing dual-channel RAM. Once you have located the RAM slots, you can proceed to the next step of the installation process – removing any existing RAM, if applicable.
Step 4: Remove Existing RAM (If Applicable)
If your computer already has RAM installed and you are replacing it with the new dual-channel RAM modules, you will need to remove the existing RAM modules. Follow these steps to remove the existing RAM:
- Handle the RAM Modules with Care: Before removing the RAM modules, it’s important to handle them with care. Avoid touching the gold pins or any sensitive components. Hold the modules by their edges and avoid applying excessive force.
- Identify the Existing RAM Modules: Observe the installed RAM modules within the RAM slots. Take note of the number of modules and their layout within the slots.
- Release the Module Retention Clips: On each side of the RAM module, locate the small retention clips. These clips are designed to hold the RAM modules securely in place. Gently press the clips outward until they release the module, allowing it to pop up slightly.
- Remove the RAM Modules: Once the retention clips are released, carefully grasp the module by its edges and pull it directly upward. The module should easily slide out of the RAM slot.
- Set Aside the Removed RAM Modules: Place the removed RAM modules on an anti-static surface or in a safe location. If you plan to keep the modules as backups or for future use, handle them with care to avoid any damage.
- Inspect the RAM Slots: After removing the existing RAM modules, take a moment to inspect the RAM slots for any dust, debris, or obstructions. Use compressed air or an anti-static brush to gently clean out any accumulated debris, ensuring a clean and clear installation area for the new dual-channel RAM modules.
By following these steps, you can safely remove the existing RAM modules from your computer. Remember to handle the modules with care and avoid touching their sensitive components. Keep the removed modules in a safe place, as they can serve as backups or be reused in the future. With the existing RAM removed, you can now proceed to the next step of the installation process – inserting the new dual-channel RAM modules.
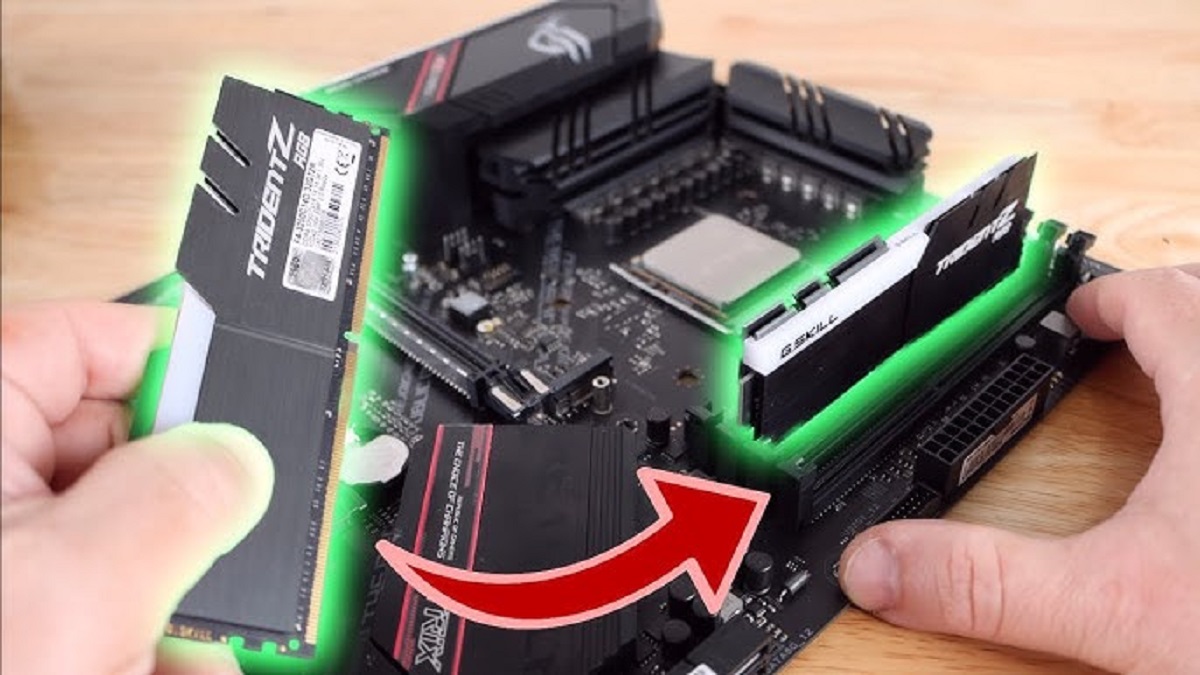
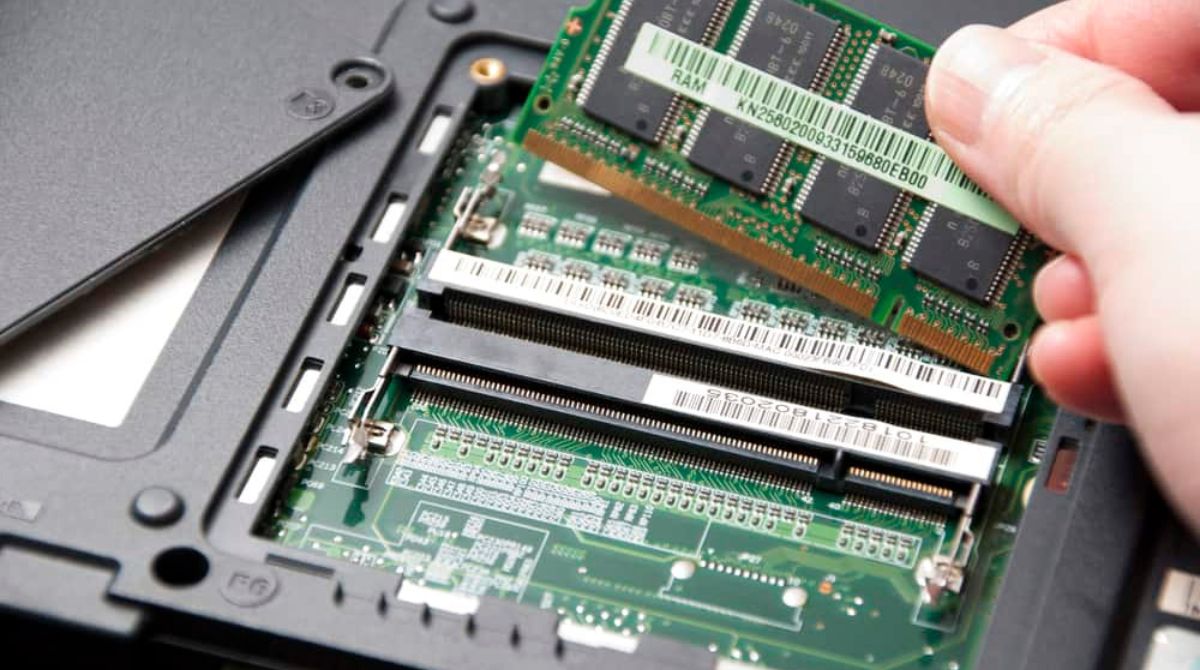
Step 5: Insert the Dual Channel RAM
With the existing RAM modules removed, it’s time to insert the new dual-channel RAM modules. Follow these steps to properly insert the RAM modules into the designated slots:
- Position the Dual Channel RAM Modules: Take the first dual-channel RAM module and align it with the corresponding slot on the motherboard. Ensure that the notch on the bottom of the module lines up with the key in the slot.
- Insert the RAM Module: Gently press the RAM module straight down into the slot until both ends click securely into place. Apply equal pressure to both ends of the module to ensure a proper insertion.
- Repeat the Process: If you have a second dual-channel RAM module, repeat the previous steps with the remaining module, aligning it with the appropriate slot and securely inserting it.
- Verify Proper Insertion: After inserting both RAM modules, ensure that they are seated correctly in the slots. The modules should be level and fully inserted, with the retention clips on either side securing them in place.
- Apply Firm Pressure (If Required): In some cases, you may need to apply firm pressure to the ends of the modules to ensure a secure connection. However, exercise caution and avoid using excessive force, as this can damage the modules or the motherboard.
- Double-Check Slot Configuration: Confirm that the dual-channel RAM modules are installed in the correct slots for dual-channel operation. Some motherboards indicate specific slot configurations for dual-channel memory, often using color-coded slots or labeling near the slots.
- Clean Up: Once the RAM modules are securely inserted, recheck the surrounding area for any loose debris or debris dislodged during installation. Use compressed air or an anti-static brush to gently remove any debris from the motherboard or RAM slots.
By following these steps, you can successfully insert the new dual-channel RAM modules into the designated slots on the motherboard. Take care to align the modules properly and ensure a secure and level insertion. Double-check the slot configuration to confirm that the modules are installed in the correct slots for dual-channel operation. With the RAM modules securely inserted, you can proceed to reassembling the computer case in the next step of the installation process.
Step 6: Reassemble the Computer
Now that you have successfully inserted the new dual-channel RAM modules, it’s time to reassemble your computer. Follow these steps to put the computer case back together:
- Retrieve the Case Panels: Locate the side panel or top panel that you removed earlier to access the internal components. Retrieve any screws or fasteners that you set aside.
- Align and Secure the Case Panels: Align the case panel with the corresponding slots or hinges on the computer case. Slide or pivot the panel back into place, ensuring that it sits flush with the rest of the case structure.
- Fasten the Screws or Fasteners: Insert the screws or fasteners into their respective holes and tighten them using the appropriate tool. Be careful not to overtighten, as this can damage the case or strip the screws.
- Double-Check the Connections: Take a moment to double-check that all cables and connections are securely reattached. Ensure that power cables, data cables, and any other connectors are properly seated and latched.
- Inspect for Loose Components: Perform a visual inspection of the internal components to ensure that nothing was accidentally dislodged or left loose during the reassembly process. Gently press any connectors or components that appear loose to ensure a secure connection.
- Clean the External Case (Optional): If needed, use a clean cloth or anti-static brush to remove any dust or fingerprints from the external surface of the computer case. Keeping the case tidy can help maintain optimal airflow and prevent overheating.
- Plug in Power Cable: Once you are confident that everything is properly reassembled and secure, plug the power cable back into the computer. Ensure that it is firmly seated in the power socket.
With these steps completed, you have successfully reassembled your computer after installing the new dual-channel RAM. Take a moment to confirm that all connections are secure and that the case is properly closed. It’s now time to move on to the final step – powering on your computer and verifying that the dual-channel RAM is working correctly.
Step 7: Power On Your Computer
After reassembling your computer, it’s time to power it on and verify that the dual-channel RAM is working correctly. Follow these steps to power on your computer:
- Double-Check Connections: Before powering on, double-check that all cables are securely connected. Ensure that the power cable is plugged into the computer and the power source, and that all other necessary cables are properly attached.
- Ground Yourself: To prevent static electricity discharge, ground yourself by touching a grounded metal surface or wearing an anti-static wrist strap. This will help prevent damage to your computer’s components.
- Plug In and Turn On: Once you have confirmed all connections and grounded yourself, plug in the power cable and press the power button on the computer case to turn on your computer.
- Observe the Boot Process: As your computer powers on, pay attention to the screen to observe the boot process. You may see a manufacturer’s logo, a screen displaying system information, or a loading screen depending on your computer’s settings.
- Check System Information: Once your computer has booted into the operating system, go to the system information utility to verify that the dual-channel RAM is recognized. On Windows, you can access the system information by pressing the Windows key + R, then typing “msinfo32” in the Run dialog box and pressing Enter. On macOS, click the Apple menu, select “About This Mac,” and click “System Report.”
- Verify Dual-Channel Configuration: In the system information utility, navigate to the memory or RAM section. Verify that the installed RAM is recognized and that it is running in dual-channel mode.
- Perform Memory Tests (Optional): If desired, you can run memory diagnostic tools or stress tests to further ensure that the new dual-channel RAM is functioning properly. Several third-party software applications are available for conducting comprehensive memory tests.
- Monitor System Performance: Once your computer is up and running, pay attention to system performance. You should notice improved memory performance, faster loading times, and smoother multitasking with the newly installed dual-channel RAM.
By following these steps, you can power on your computer and verify that the dual-channel RAM is working correctly. Confirming that the RAM is recognized and running in dual-channel mode in the system information utility provides assurance that the upgrade was successful. Enjoy the enhanced performance provided by the new dual-channel RAM!
Verifying Dual Channel RAM is Working
After installing dual-channel RAM, it’s important to verify that it is functioning correctly. Follow these steps to confirm that your dual-channel RAM is indeed working:
- Check System Information: Access the system information utility on your computer. This can usually be done by opening the “System” or “About This Mac” section in the operating system settings or using specific key combinations.
- Navigate to the Memory/RAM Section: Locate the memory or RAM section within the system information utility. This section provides detailed information about your computer’s installed memory.
- Confirm Installed RAM: Review the information that is displayed regarding your computer’s RAM. Verify that the total installed RAM matches the capacity of your dual-channel RAM configuration.
- Check Memory Speed and Channels: Look for details on memory speed and channels. Confirm that the memory modules are running at the intended speed, and make sure it indicates that it is operating in dual-channel mode or using multiple channels.
- Run Memory Diagnostic Tools (Optional): If desired, you can use memory diagnostic tools to perform more comprehensive tests on your dual-channel RAM. These tools can identify any potential issues or errors with your RAM.
- Monitor System Performance: After verifying the proper functioning of your dual-channel RAM, monitor your computer’s performance during normal usage. Notice if there is an improvement in multitasking, application loading times, or overall system responsiveness.
- Benchmarking (Optional): If you want more detailed information about the performance of your dual-channel RAM, you can use benchmarking software to measure its performance. These tools provide metrics that allow you to compare your RAM’s performance against other systems.
- Revisit Games and Applications: Depending on your usage, revisit games or resource-intensive applications that you frequently use. Observe if there is a noticeable improvement in performance or reduced latency, particularly in memory-intensive tasks.
By following these steps, you can effectively verify that your dual-channel RAM is working as intended. Confirming the presence of the installed RAM, checking the memory speed and channels, and running tests if desired will provide you with confidence in the successful installation. Monitoring system performance and revisiting games or applications will allow you to experience the benefits of the improved memory performance provided by dual-channel RAM.
Conclusion
Congratulations! You have successfully learned how to set up dual-channel RAM and experienced the benefits of improved memory performance. By utilizing two memory modules working in tandem, dual-channel RAM allows for faster data transfer rates, enhanced multitasking capabilities, and smoother overall system performance.
In this guide, we discussed what dual-channel RAM is and why it is beneficial for your computer. We explored the compatibility requirements, checked motherboard compatibility, and went through the step-by-step installation process.
By following the installation steps, including powering off your computer, opening the computer case, locating the RAM slots, removing any existing RAM, inserting the dual-channel RAM modules, reassembling the computer, and powering it on, you have successfully upgraded your system’s memory configuration.
After the installation, we discussed how to verify that the dual-channel RAM is working as intended. By checking the system information utility, confirming the installed RAM, monitoring system performance, and, if desired, running memory diagnostic tools or benchmarking tests, you were able to ensure that the dual-channel RAM is properly recognized and providing the expected performance boost.
Now that you have completed the installation and verification process, enjoy the enhanced memory performance and improved multitasking capabilities. Whether you use your computer for gaming, content creation, or everyday tasks, the upgrade to dual-channel RAM will provide a noticeable boost in overall system responsiveness and efficiency.
Remember to keep your dual-channel RAM and other computer components clean, protect them from static electricity, and stay updated with the latest drivers and software updates to maintain optimal performance. Should you need to troubleshoot any issues or explore further upgrades, consult the manufacturer’s documentation or seek assistance from reputable sources.
Enjoy your upgraded computing experience with the power of dual-channel RAM!