Introduction
Welcome to this informative guide on RAM slots and their configuration. If you’re a tech enthusiast or someone who wants to upgrade their computer’s performance, understanding how to properly install RAM is crucial. RAM, or Random Access Memory, plays a vital role in the overall speed and efficiency of your computer.
Adding more RAM to your system can help improve multitasking capabilities, enhance gaming experience, and boost overall performance. However, knowing where to install the RAM modules can be confusing, especially if you’re unfamiliar with the inner workings of your motherboard.
In this article, we will explore the purpose of RAM slots, delve into the different types of RAM configurations, and guide you through the process of determining the appropriate placement for your RAM modules. Whether you’re a beginner or have some experience in computer hardware, this article will provide you with the necessary knowledge to make informed decisions when it comes to RAM installation.
Before we dive into the specifics of RAM slots and configurations, it’s important to note that different motherboards can have varying layouts and capabilities. Therefore, it’s crucial to consult your motherboard manual for accurate and detailed information tailored to your specific model. With that said, let’s begin our journey into the world of RAM slots and how to optimize them for peak performance.
RAM Slots and their Purpose
RAM slots are physical connectors on the motherboard designed to hold and provide power to RAM modules. These slots play a crucial role in the overall functioning of your computer’s memory. The number of RAM slots on a motherboard can vary, depending on the model and manufacturer.
The primary purpose of RAM slots is to allow the installation of RAM modules, which store and provide quick access to data that your computer needs to perform various tasks. When you open applications or perform operations on your computer, the data required for those tasks is temporarily stored in RAM for quick access, allowing for faster processing speeds.
RAM slots also provide power to the installed RAM modules, ensuring they receive the necessary voltage to operate effectively. Each slot is designed to support a specific type and speed of RAM, so it’s important to check your motherboard’s specifications to ensure compatibility when upgrading or installing new RAM modules.
It’s worth noting that modern motherboards typically support dual-channel memory configurations, which involve installing RAM modules in specific slot combinations to take advantage of increased bandwidth and improved performance. We will delve deeper into this topic in later sections.
In summary, RAM slots serve two primary purposes: to hold the RAM modules securely on the motherboard and to provide power to those modules. Understanding the role of RAM slots is essential when it comes to correctly installing and optimizing your computer’s memory.
Determining the RAM Configuration on your motherboard
Before you start installing or upgrading your RAM, it’s important to determine the RAM configuration supported by your motherboard. This information can be found in your motherboard’s manual or by visiting the manufacturer’s website for specifications.
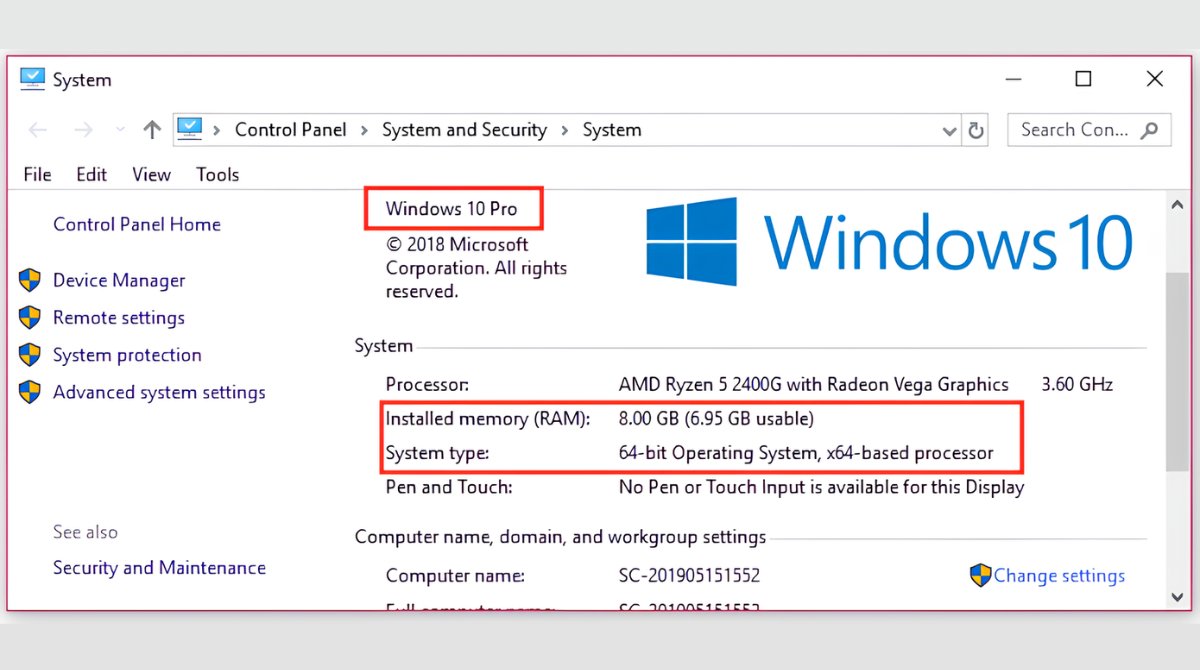
First, identify the maximum amount of RAM that your motherboard can support. This information is usually listed in the specifications section of the manual or on the manufacturer’s website. It’s important to note that older motherboards may have limitations on the maximum amount of RAM they can handle.
Next, determine the type of RAM supported by your motherboard. Common types include DDR4, DDR3, and DDR2. This information is crucial as it will dictate the type of RAM modules you can install. Mixing different types of RAM is not recommended as it can lead to compatibility issues and potentially harm your system.
Another factor to consider is the maximum speed supported by your motherboard. RAM modules come in different speeds, such as 2400MHz or 3200MHz. It’s important to match the speed of the RAM modules to the maximum supported speed of your motherboard to ensure optimal performance.
Additionally, check the number of RAM slots available on your motherboard. This will determine the maximum number of RAM modules you can install. Some motherboards may have four slots or more, while others may have only two. Keep in mind that the total amount of RAM you can install is influenced by both the number of slots available and the maximum capacity supported by your motherboard.
Lastly, consider the memory channels supported by your motherboard. This determines the configuration of memory modules that will provide the best performance. Most modern motherboards support dual-channel memory, which requires installing RAM modules in pairs, following specific slot placement guidelines. Some high-end motherboards even support quad-channel memory, but this is less common.
By determining the RAM configuration supported by your motherboard, you can ensure compatibility and make informed decisions when purchasing and installing RAM modules. Now that you have a clearer understanding of your motherboard’s capabilities, let’s explore the difference between single-channel and dual-channel RAM configurations in the next section.
Single-Channel vs. Dual-Channel RAM Configuration
When it comes to RAM configuration, there are two primary options: single-channel and dual-channel. These configurations refer to how the RAM modules are installed in the motherboard’s RAM slots.
In a single-channel configuration, the RAM modules are installed individually in separate slots. This means each module functions independently, accessing and transferring data to and from the CPU. While this configuration is the simplest and most common, it generally offers lower memory bandwidth compared to dual-channel configurations.
Dual-channel configuration, on the other hand, provides higher memory bandwidth by installing matching pairs of RAM modules in specific slots. This allows the CPU to access data from two modules simultaneously, effectively doubling the bandwidth. The matching pairs should be installed in specific slots to enable dual-channel mode.
It’s important to consult your motherboard manual or manufacturer’s website to determine the exact slot configuration required for dual-channel mode. Typically, the slots are color-coded to indicate which modules should be paired together. For example, on some motherboards, the two slots with the same color should be populated with identical RAM modules.
The increased bandwidth offered by dual-channel configuration translates into improved performance, particularly in memory-intensive tasks. This can result in faster data transfers, reduced latency, and enhanced overall system responsiveness. Applications that rely heavily on memory, such as video editing software or gaming, can benefit significantly from dual-channel RAM.
It’s worth mentioning that while dual-channel configuration offers advantages in certain scenarios, not all applications or tasks will see a significant performance boost. For everyday computing tasks that are not memory-intensive, the difference may not be as noticeable.
It’s important to note that if you have an odd number of RAM modules, such as three, you will not be able to achieve a complete dual-channel configuration. In such cases, the motherboard will switch to asynchronous dual-channel mode or operate in single-channel mode. If you plan to upgrade your RAM, it’s generally recommended to do so in matching pairs to take full advantage of dual-channel configuration.
In the next section, we will explore the guidelines for installing RAM modules in different motherboard types, including single-channel and dual-channel configurations.
Where to Install RAM on Different Motherboard Types
The placement of RAM modules on a motherboard can vary depending on the type of motherboard you have. Whether it’s a single-channel or dual-channel configuration, understanding the specific guidelines for your motherboard type is crucial to ensure optimal performance.
In a single-channel configuration, each RAM module is typically installed in a separate slot, with no need for specific pairing or slot placement. You can simply insert the RAM modules into any available slot on the motherboard. However, it’s important to refer to your motherboard manual or manufacturer’s website for any specific recommendations or restrictions.
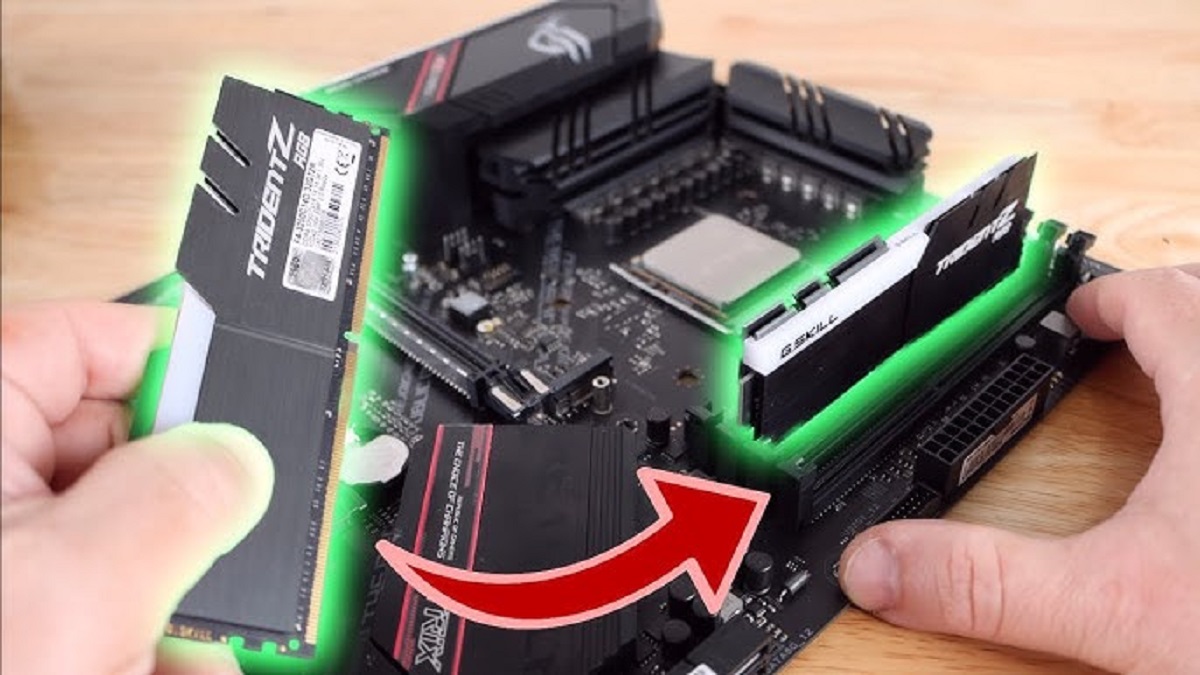
For dual-channel configurations, the placement of RAM modules is more critical. Most dual-channel motherboards have two pairs of RAM slots, often color-coded, indicating which slots should be populated for each dual-channel memory pair. Common color configurations are blue and black or gray and black, but this can vary depending on the motherboard manufacturer.
To achieve a dual-channel configuration, you should install matching RAM modules in the corresponding colored slots. For example, if your motherboard has blue and black slots, you would install one RAM module in a blue slot and another matching module in a black slot. This pairing ensures that the memory channels are utilized correctly.
It’s important to follow the specific dual-channel installation guidelines for your motherboard, as incorrect placement may result in the system operating in single-channel mode, diminishing the performance benefits of dual-channel memory.
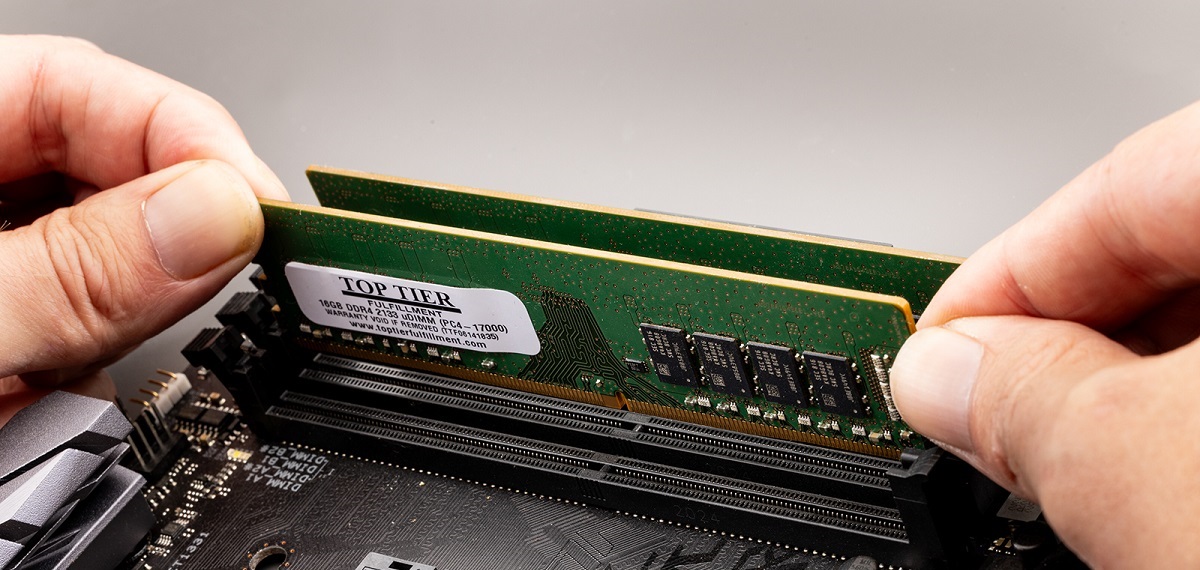
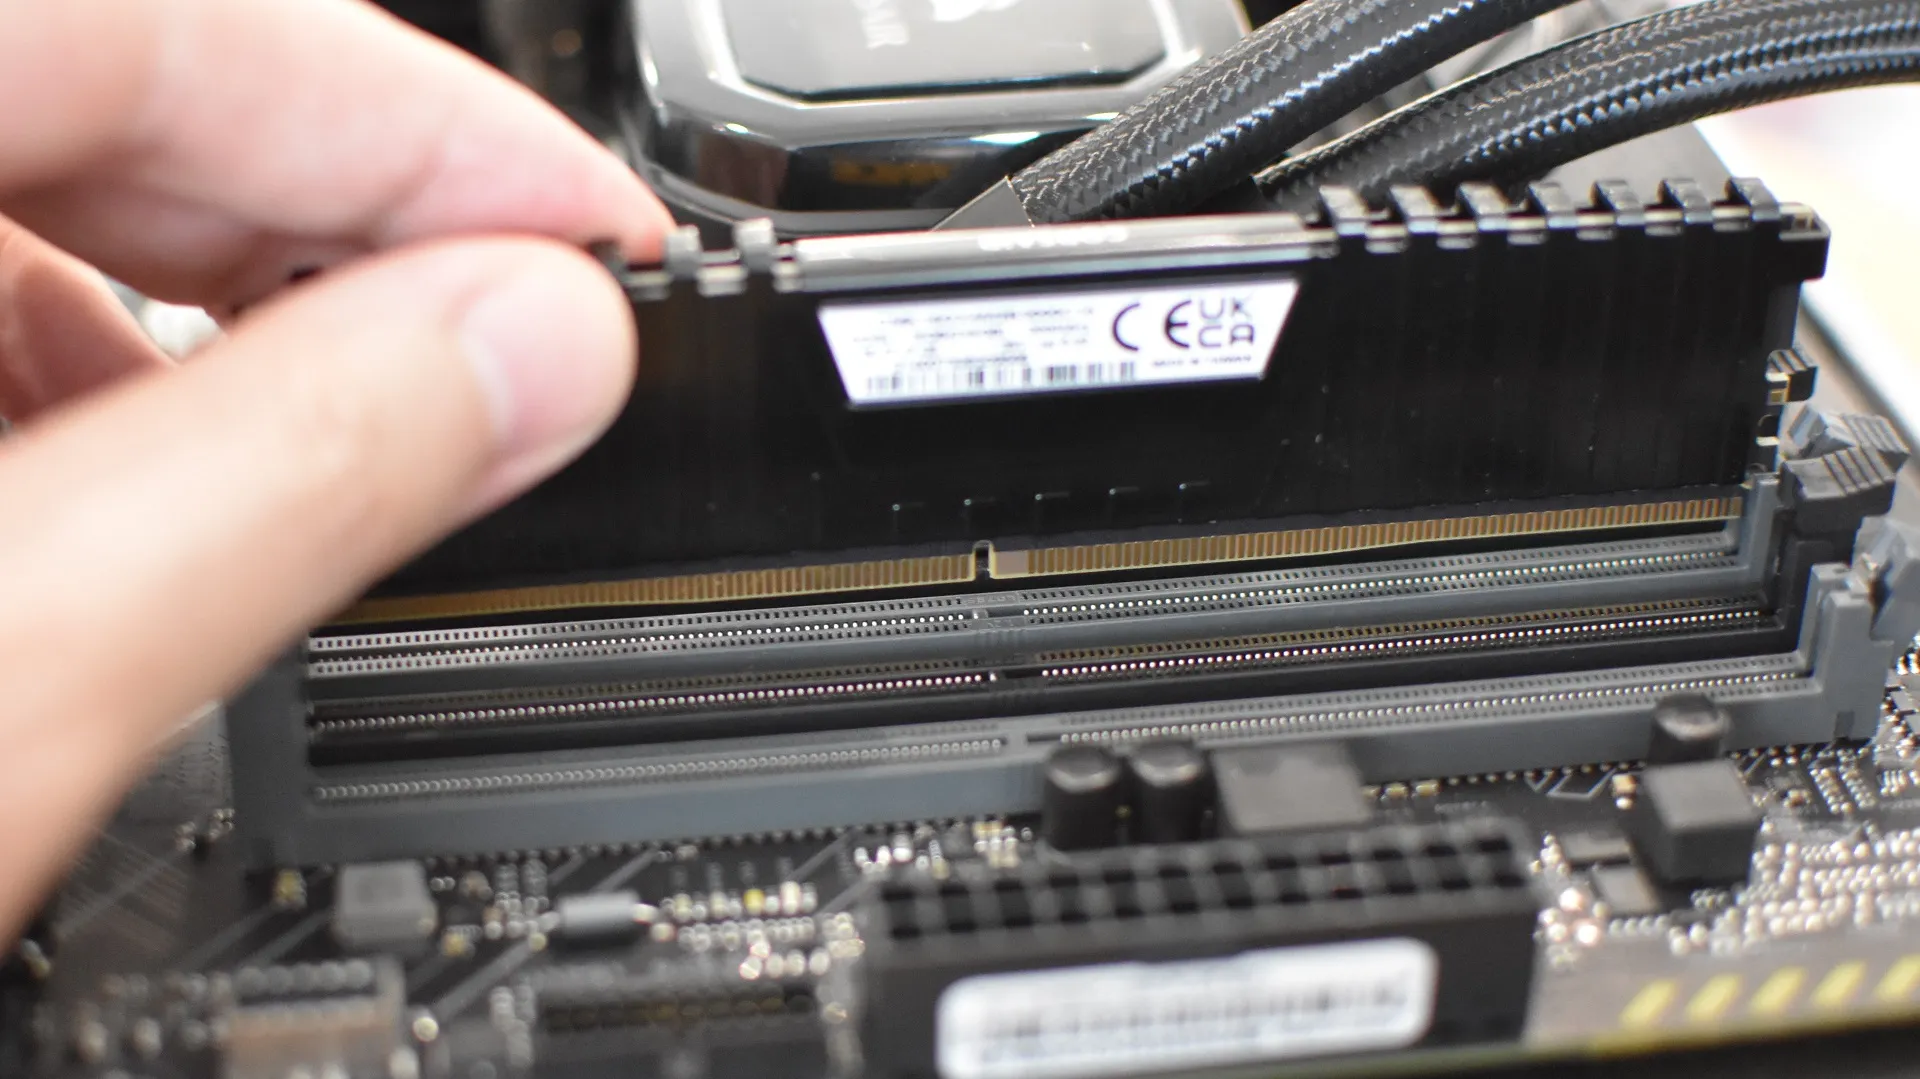
In addition to considering slot placement, make sure that the RAM modules are fully inserted and securely seated in the slots. Apply moderate pressure evenly on both ends of the module until it clicks into place. Proper installation guarantees a stable connection and ensures optimal performance.
Lastly, if you’re adding or upgrading RAM modules, remember to turn off your computer, unplug it from the power source, and ground yourself properly to prevent any static electricity from damaging the components.
Overall, understanding the specific guidelines for RAM placement on different motherboard types is essential to maximize performance and ensure stable operation. Refer to your motherboard manual or manufacturer’s website for accurate and detailed instructions tailored to your specific model.
Next, we will discuss the slot placement guidelines for a dual-channel configuration, which can further optimize your computer’s memory performance.
Slot Placement Guidelines for Dual-Channel Configuration
When it comes to dual-channel configuration, proper slot placement is essential to ensure that the RAM modules function in tandem, providing increased memory bandwidth and optimal performance. Different motherboard manufacturers may have slight variations in slot placement guidelines, so it’s crucial to consult your motherboard manual for specific instructions. However, some general guidelines apply across most dual-channel configurations.
The first step is identifying the paired slots on your motherboard. These are typically color-coded or labeled to indicate which slots should be populated with matching RAM modules. For example, you may find blue-colored slots labeled as “A1” and “B1,” and black-colored slots labeled as “A2” and “B2.” The pairing typically follows an “A1-B1, A2-B2” scheme.
Once you’ve identified the correct paired slots, you should install matching RAM modules in those slots. Ensure that the modules are fully seated, with the notch on the module aligned with the corresponding dividers in the slot. Apply gentle pressure on both ends of the module until it clicks into place.
It’s vital to note that installing RAM modules in non-paired slots or mismatched slots will prevent the system from functioning in the dual-channel mode. In such cases, the system may operate in single-channel mode, which can impact memory performance.
If you have an odd number of RAM modules and you’re unable to achieve a complete dual-channel configuration, consult your motherboard manual to determine the optimal placement. Some motherboards may suggest placing the odd module in a specific slot, such as “A2” or “B2,” to maintain the best possible memory performance.
Remember to double-check the slot placement before securing your motherboard back into the case. Inspect the module connections to ensure they are firmly in place and aligned correctly. Incorrectly seated modules can cause instability or booting issues.
It’s important to reiterate that the dual-channel configuration offers improved memory bandwidth and performance, particularly in memory-intensive tasks. However, the benefits may not be noticeable in everyday computing tasks that do not heavily rely on memory operations.
With the RAM modules properly installed in the correct slots, your computer is ready to take advantage of the increased memory performance offered by the dual-channel configuration. Next, we will explore potential RAM slot configuration issues and how to troubleshoot them effectively.
Potential RAM Slot Configuration Issues
While installing RAM modules and configuring them in the appropriate slots is generally a straightforward process, there are some potential issues that can arise. Here are a few common RAM slot configuration issues and tips on how to troubleshoot them effectively.
1. Incorrect Slot Placement: One of the most common issues is installing the RAM modules in the wrong slots. This can lead to the system operating in single-channel mode or causing instability. To troubleshoot this, consult your motherboard manual and ensure that you have followed the recommended slot placement guidelines for your specific motherboard type.
2. Incompatible RAM Modules: Mixing different types or speeds of RAM modules can result in compatibility issues. It’s crucial to ensure that all installed RAM modules are compatible with each other and with your motherboard. Check the manufacturer’s specifications and consider using RAM modules from the same brand and series to minimize compatibility concerns.
3. Improperly Seated RAM Modules: If the RAM modules are not fully seated in the slots, it can cause instability or prevent the system from booting. Make sure that the modules are firmly inserted into the slots, with the notch on the module aligned with the dividers in the slot. Apply even pressure on both ends of the module until it clicks into place.
4. RAM Slot Damage: Occasionally, a RAM slot may become damaged or faulty, preventing the proper functioning of the RAM module installed in that slot. To identify this issue, try swapping the RAM modules between slots to determine if the issue persists. If a particular slot consistently causes problems, it may indicate a faulty RAM slot that requires professional assistance or motherboard replacement.
5. BIOS Settings: In some cases, the system may not detect the installed RAM modules due to incorrect BIOS settings. Access the BIOS settings by restarting your computer and pressing the designated key (usually Del, F2, or F10) during the boot process. Once in the BIOS, navigate to the memory settings and ensure that they are configured correctly, including the memory frequency and timings.
By being aware of these potential RAM slot configuration issues and following the recommended troubleshooting steps, you can ensure a smooth and stable RAM installation process. Remember to consult your motherboard manual or seek professional assistance if you encounter persistent issues that you are unable to resolve.
Now that we have explored RAM slot configuration issues and their troubleshooting, let’s summarize the key points discussed in this article.
Conclusion
Understanding how to properly configure and install RAM modules is essential for optimizing your computer’s performance. Through this guide, we have explored the purpose of RAM slots, the different RAM configurations, and how to determine the RAM configuration supported by your motherboard.
We learned about the differences between single-channel and dual-channel RAM configurations and the benefits of dual-channel memory in terms of increased memory bandwidth and performance. We also discussed the slot placement guidelines for both configurations, emphasizing the importance of following the specific instructions provided by your motherboard manufacturer.
Additionally, we highlighted potential RAM slot configuration issues such as incorrect placement, incompatible RAM modules, improper seating, RAM slot damage, and BIOS settings. By being aware of these issues and following the troubleshooting steps, you can ensure a successful RAM installation process.
Remember to consult your motherboard manual or manufacturer’s website for accurate and detailed instructions tailored to your specific motherboard model. These resources provide valuable information regarding maximum RAM capacity, RAM type and speed compatibility, and specific slot placement guidelines.
Upgrading or installing RAM modules can greatly enhance your computer’s multitasking capabilities, gaming performance, and overall speed. It’s a cost-effective way to boost your system’s performance without having to replace the entire motherboard.
We hope this guide has provided you with the knowledge and confidence to navigate the world of RAM slots and configurations. By correctly installing and configuring your RAM modules, you can unlock the full potential of your computer’s memory, ensuring smooth operation and improved performance in a variety of tasks.
As technology evolves, it’s essential to stay informed and keep up with the latest advancements in RAM technology and motherboard specifications. This will enable you to make informed decisions when upgrading or expanding your computer’s memory in the future.
Remember, if you encounter any difficulties during the installation or configuration process, it is always recommended to seek professional assistance or consult with tech support for further guidance.