Check for Compatibility
Before installing RAM, it is crucial to ensure compatibility with your system. RAM modules come in different types, speeds, and capacities, and not all are compatible with every computer. Here are some essential factors to consider:
1. Type of RAM: Determine the type of RAM supported by your motherboard. The most common types are DDR3, DDR4, and DDR5. Check your computer’s specifications or consult the motherboard manual to identify the compatible RAM type.
2. Physical Compatibility: Ensure that the RAM modules you intend to install fit into the available slots on your motherboard. Different RAM modules have varying sizes and form factors, such as DIMM or SO-DIMM, so double-check the slot type and module size compatibility.
3. Maximum Capacity: Check the maximum RAM capacity supported by your motherboard. Exceeding the maximum capacity may result in compatibility issues and potential stability problems. Refer to the motherboard documentation or manufacturer’s website for this information.
4. Speed Compatibility: RAM modules operate at different speeds, measured in megahertz (MHz). Ensure that the speed of the RAM you plan to install matches or is supported by your system. Mismatched RAM speeds can lead to system instability.
5. Operating System Compatibility: Verify that your operating system can support the amount of RAM you intend to install. Older 32-bit operating systems have limitations on the maximum RAM they can address. Consult your operating system’s documentation for more information.
By taking the time to check for compatibility before installing RAM, you can avoid potential issues and ensure a smooth and stable system upgrade. Be sure to consult your system’s documentation and manufacturer’s specifications for detailed compatibility information. Once you have confirmed compatibility, it’s time to move on to the next steps.
Verify Proper Installation
After installing RAM into your computer, it is crucial to verify that it has been properly installed to ensure optimal performance and stability. Here are the steps to verify the proper installation of RAM:
- Power off your computer: Before beginning any hardware installation, it is important to shut down your computer and unplug the power cable.
- Ground yourself: Ground yourself by touching a metal surface or wearing an anti-static wristband to prevent any static electricity from damaging the components.
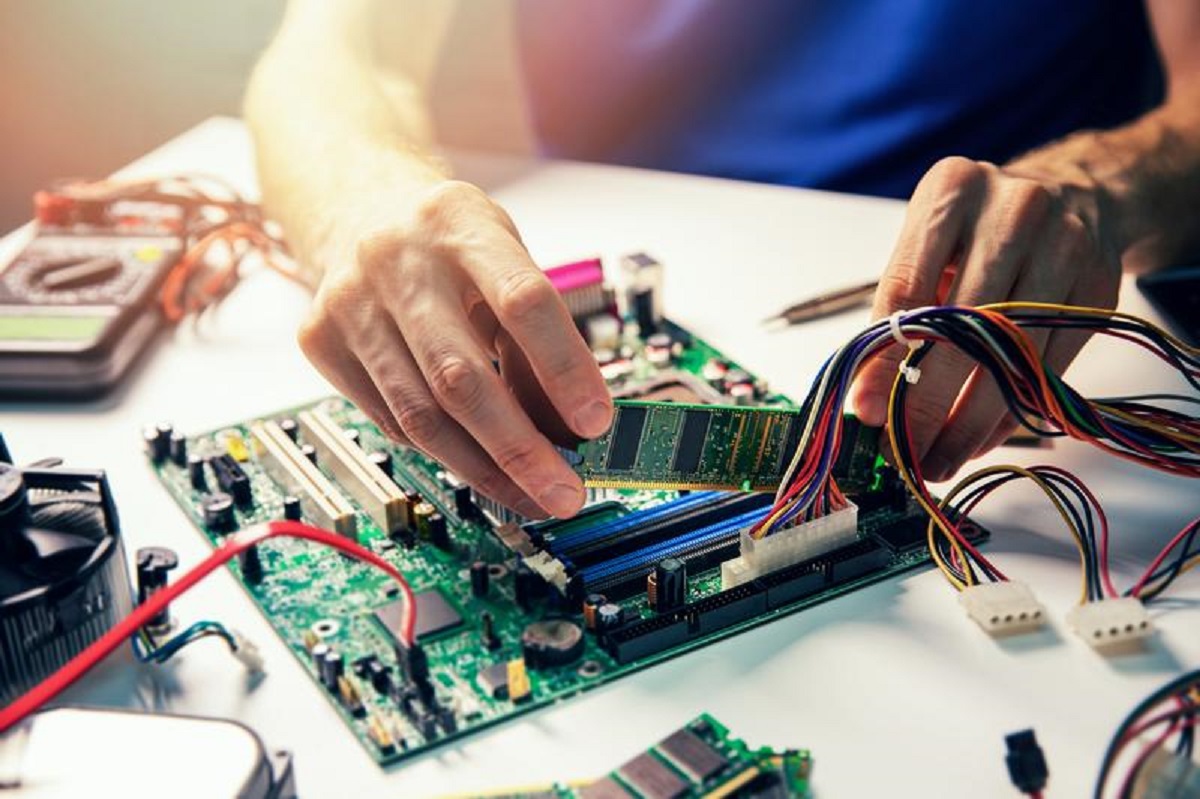
- Access the motherboard: Open your computer case and locate the motherboard. Depending on the computer model, you may need to remove a side panel or unscrew specific components to access the motherboard.
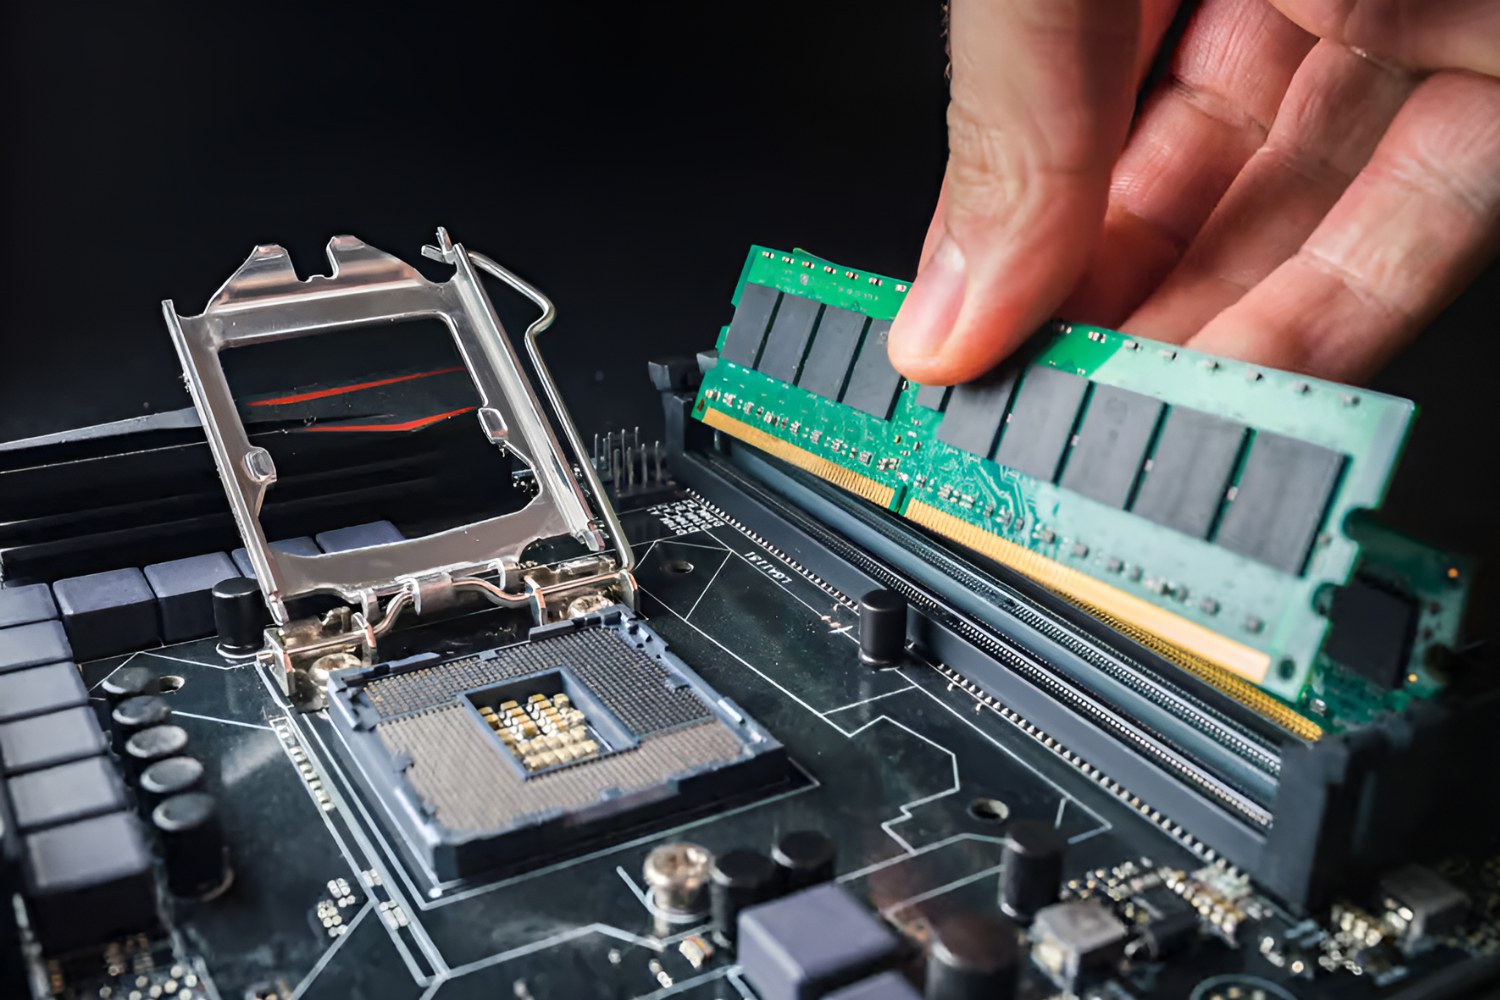
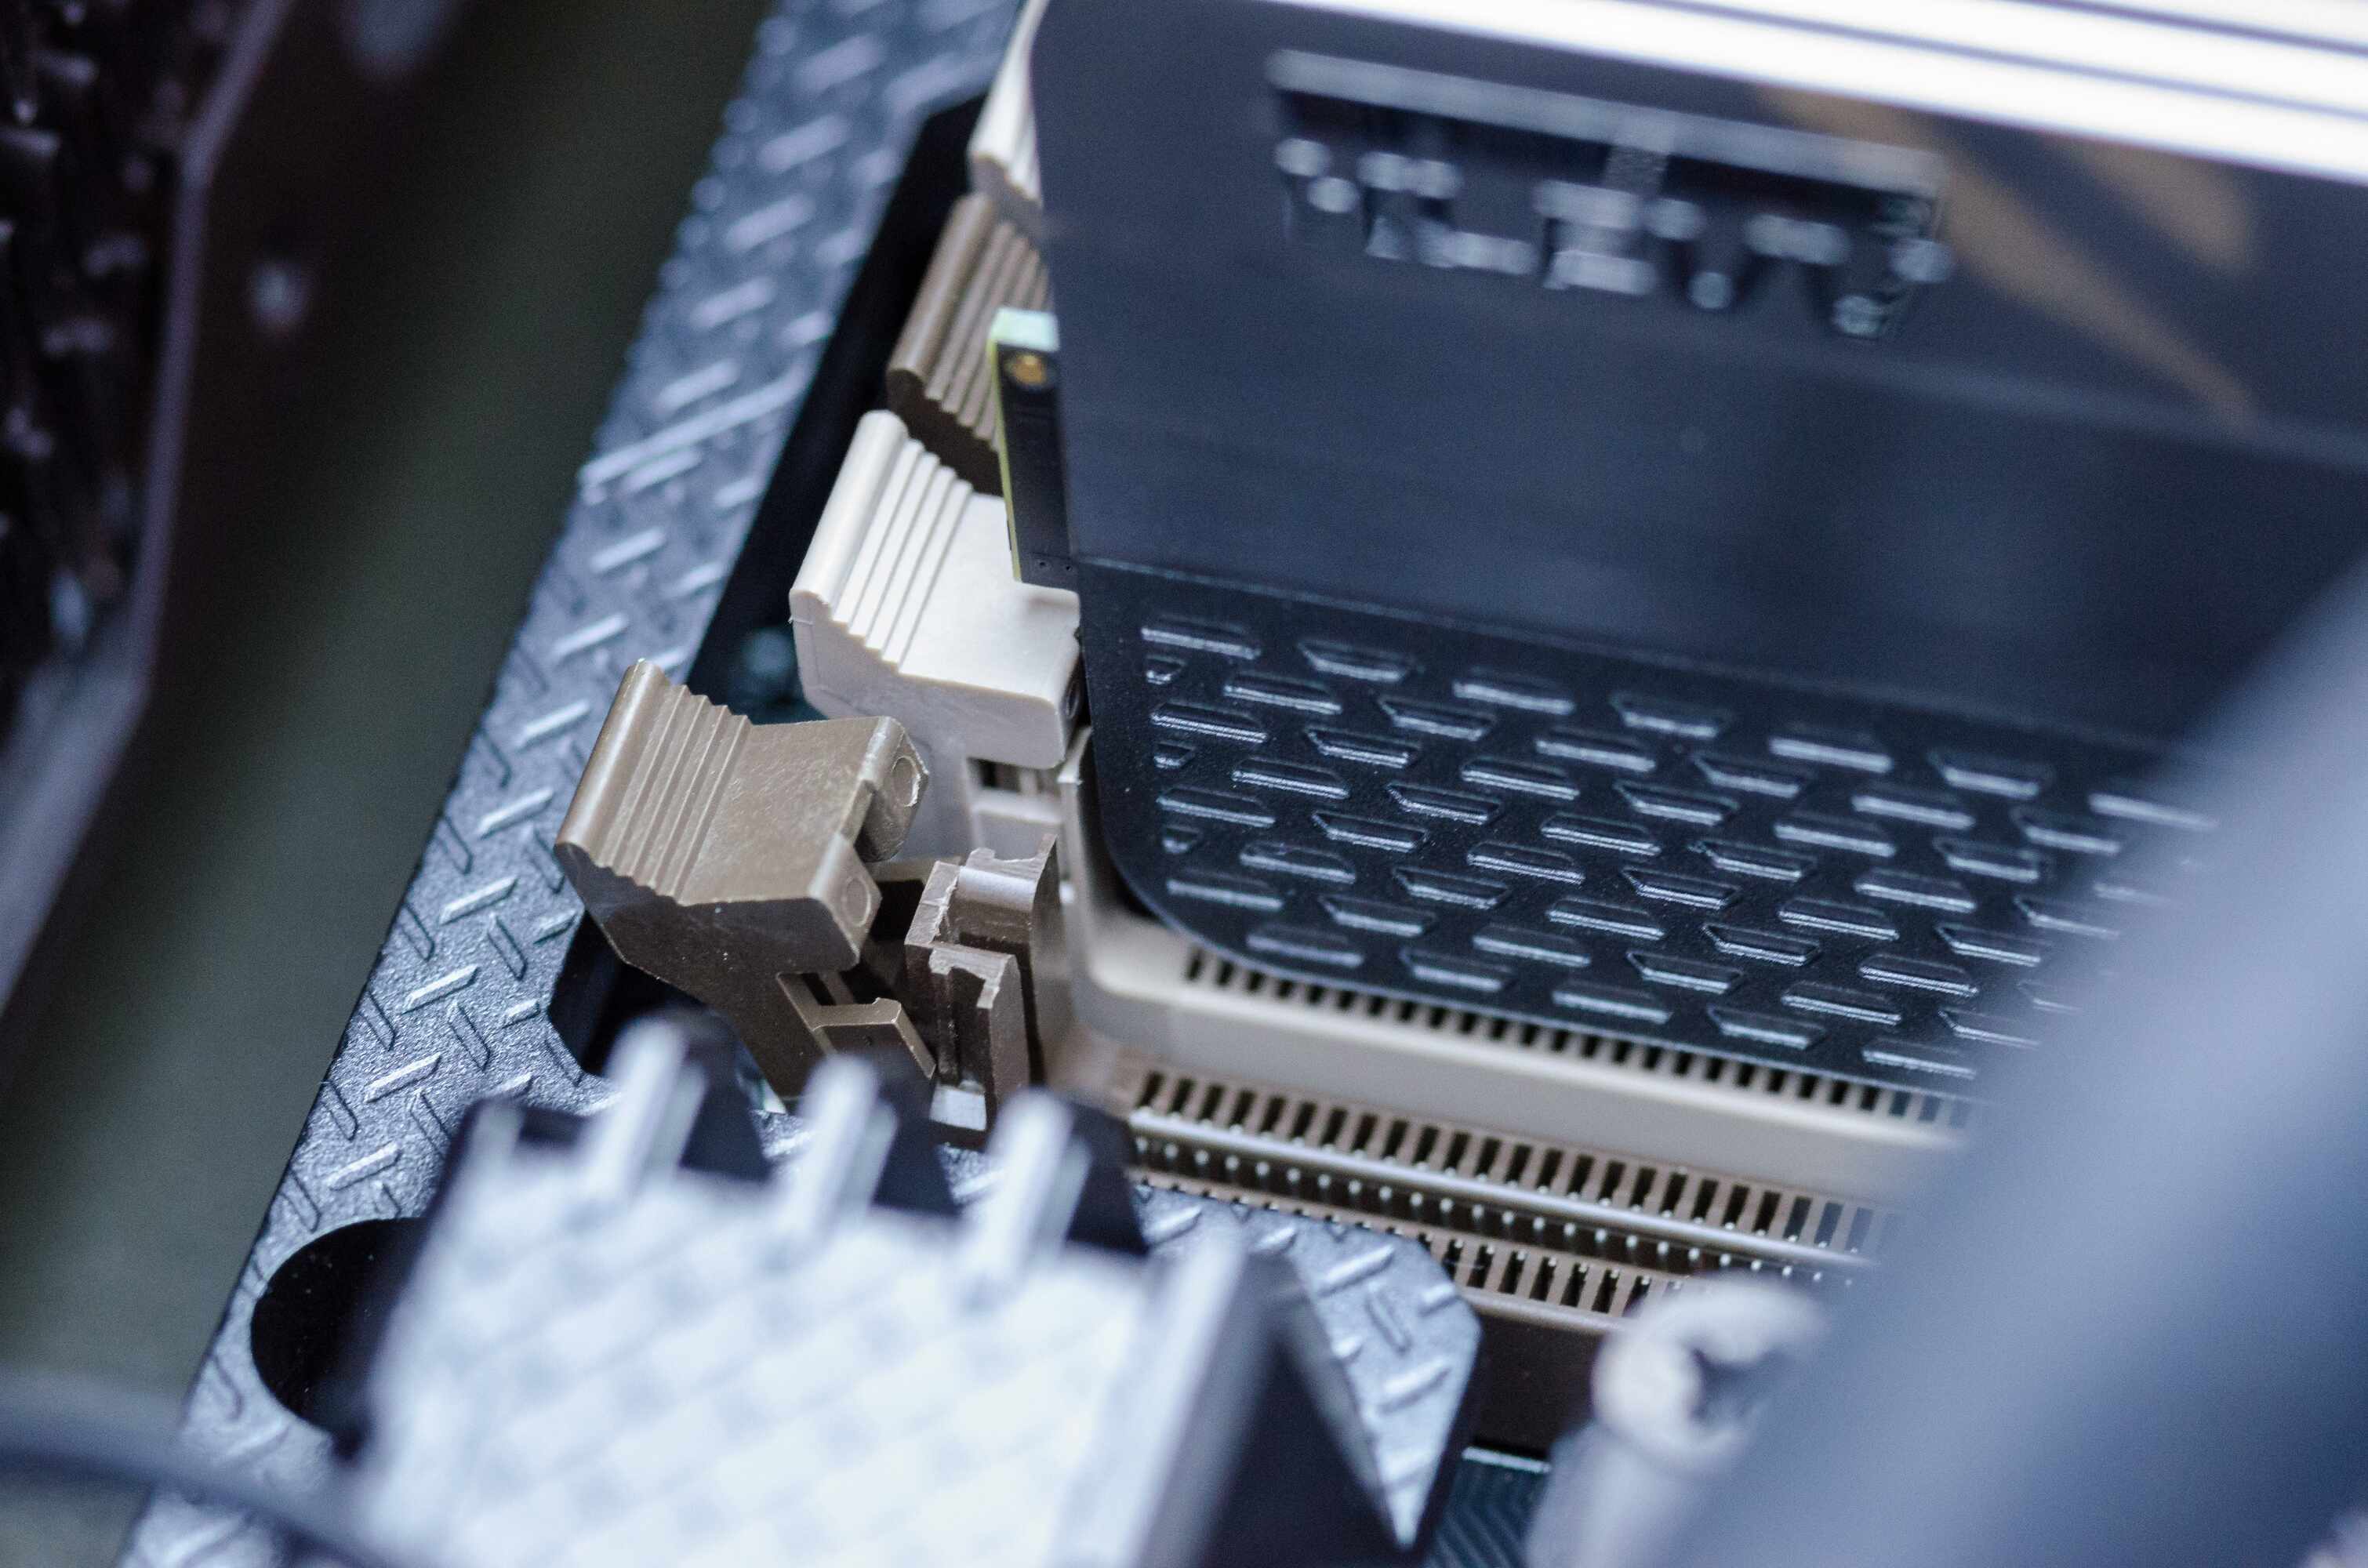
- Identify RAM slots: Locate the RAM slots on the motherboard. Typically, these slots are located near the CPU socket and are labeled for easy identification.
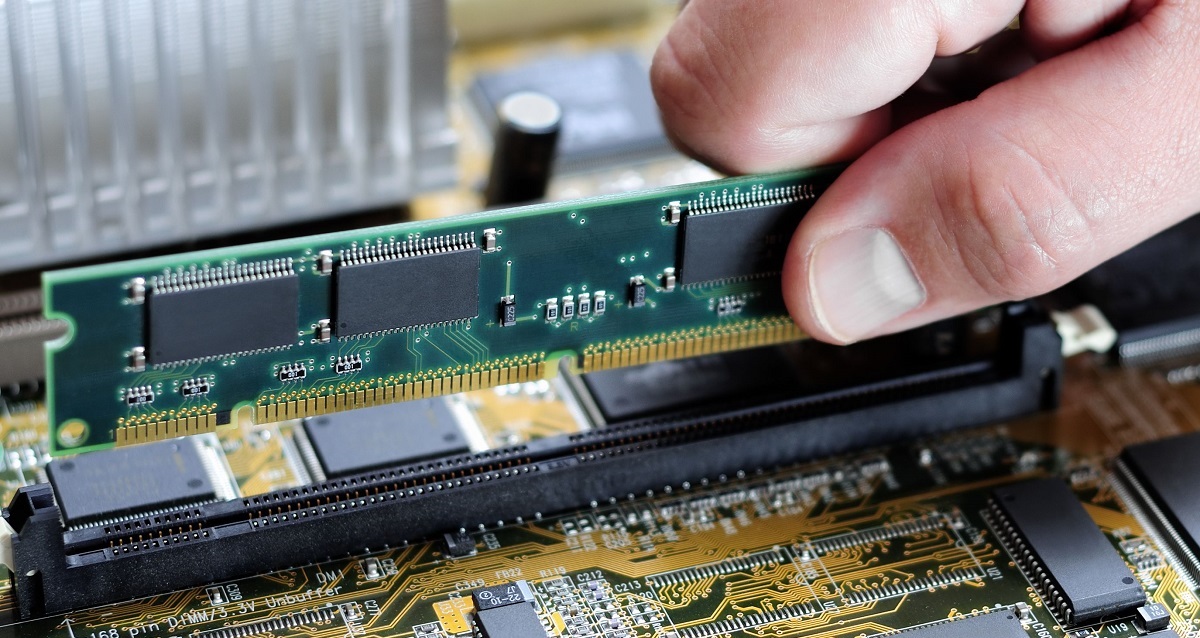
- Seat the RAM modules: Gently press the RAM module into the slot at a slight angle, ensuring that the notches on the module align with the ridges in the slot. Apply even pressure until the module clicks into place.
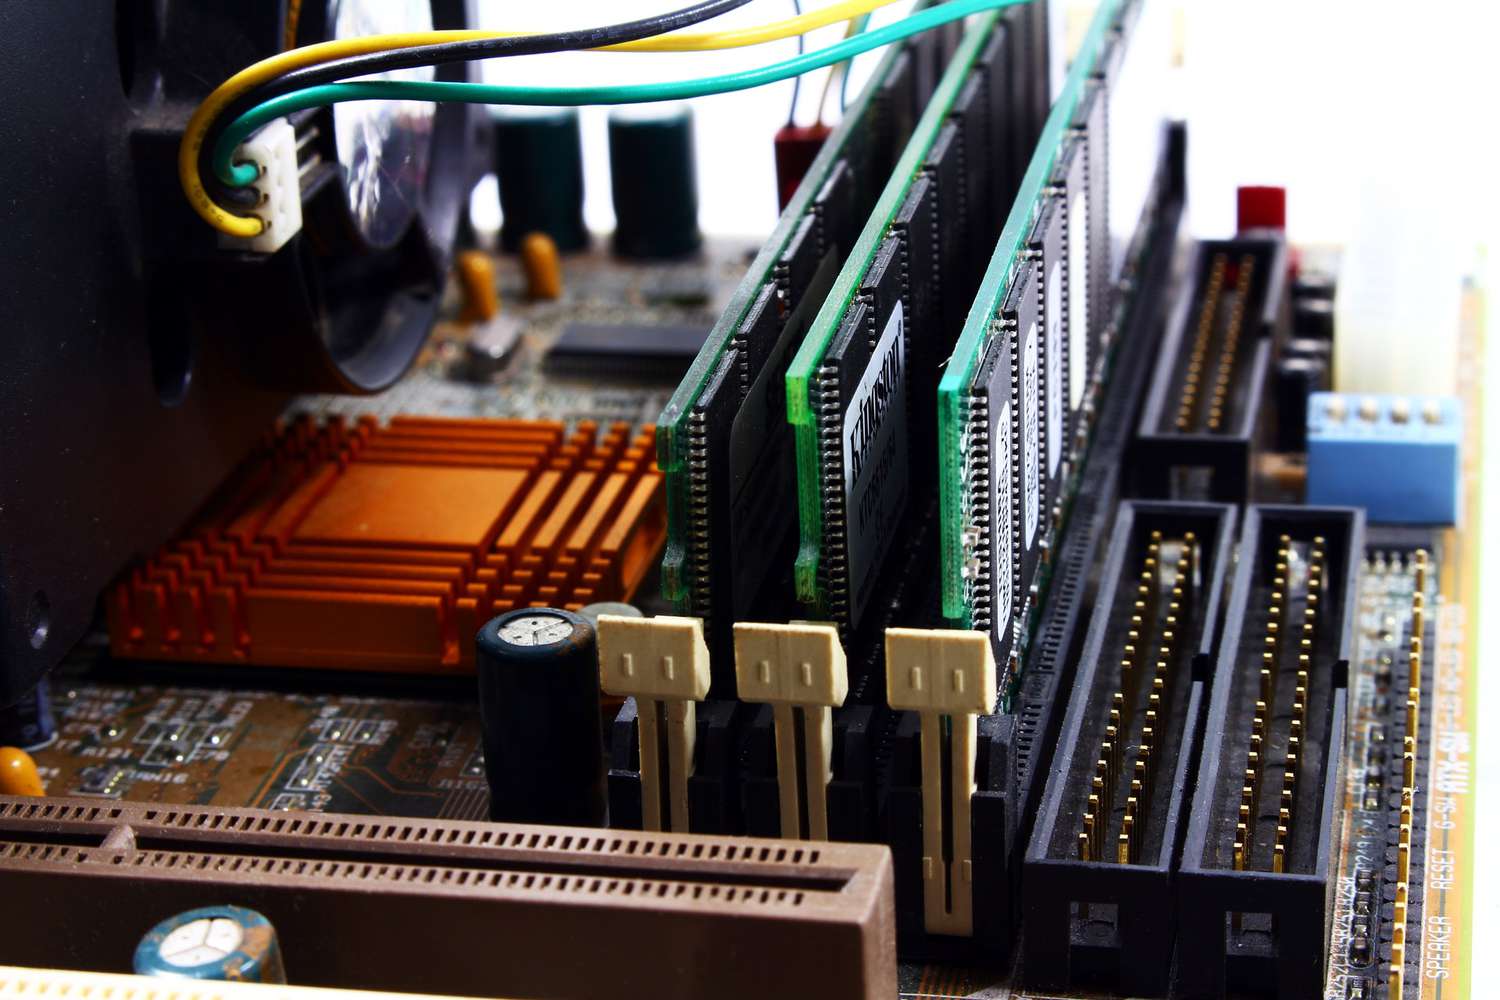
- Secure the module: Depending on the motherboard design, you may need to push down on retention clips or lock the module into place using screws or latches.
- Power on the computer: Reconnect the power cable and turn on your computer.
- Check the BIOS: During the boot process, press the designated key (usually Del or F2) to enter the BIOS setup. Look for the RAM information to confirm that the system recognizes the newly installed RAM modules.
- Verify system stability: Once your computer boots into the operating system, use it normally for a while to ensure that there are no crashes, errors, or performance issues.
By following these steps, you can ensure that your RAM has been properly installed. If you encounter any issues during the verification process, it is advisable to double-check the installation and consult the motherboard manual for further guidance. Now that the RAM has been verified, it’s time to move on to configuring the RAM settings in the BIOS.
Update RAM Settings in BIOS
After installing new RAM modules, it is essential to update the RAM settings in the BIOS to ensure optimal performance and compatibility. The BIOS (Basic Input/Output System) is firmware that controls various hardware settings on your computer, including RAM configuration. Here’s how you can update the RAM settings in the BIOS:
- Access the BIOS: Restart your computer and press the designated key (often Del or F2) during the boot process to enter the BIOS setup.
- Navigate to memory settings: Use the arrow keys on your keyboard to navigate through the BIOS menu. Look for a section that relates to memory or RAM settings.
- Check for XMP/DOCP Profile: Many modern motherboards support XMP (Extreme Memory Profile) or DOCP (DRAM Overclocking Profile). Enabling XMP/DOCP allows the motherboard to automatically configure the RAM settings for optimal performance. If available, select the appropriate XMP/DOCP profile.
- Adjust RAM frequency and timings: If XMP/DOCP is not available or you prefer manual control, you can adjust the RAM frequency and timings manually. Make sure to refer to the RAM manufacturer’s specifications for the recommended frequency and timings and input them accordingly.
- Save and exit: Once you have made the necessary changes, save the settings and exit the BIOS. The computer will reboot with the updated RAM settings.
Updating the RAM settings in the BIOS allows the system to properly recognize and utilize the new RAM modules. It ensures that the RAM is running at its rated speed and stability. Remember that incorrect settings or overclocking can cause system instability, so be cautious while making changes to the BIOS settings.
If you are unsure about the specific RAM settings or how to configure them in the BIOS, refer to the motherboard manual or consult the manufacturer’s website for detailed instructions and recommendations. With the RAM settings updated, the next step is to update the drivers to ensure compatibility and performance optimization.
Update Drivers
After installing new RAM and updating the RAM settings in the BIOS, it’s important to update your drivers to ensure compatibility and optimal performance. Drivers are software programs that allow your operating system to communicate with your hardware devices, including the RAM. Here’s how you can update your drivers:
- Identify the drivers: Determine which drivers need to be updated. In this case, focus on the drivers related to your motherboard and RAM. Visit the manufacturer’s website to find the latest drivers for your specific model.
- Download the latest drivers: Locate the download page for the drivers on the manufacturer’s website. Ensure that you download the correct drivers for your operating system version.
- Install the drivers: Once the drivers are downloaded, run the installer and follow the on-screen instructions to install the updated drivers. It’s recommended to close all other programs and restart your computer after the installation is complete.
- Check for automatic updates: Some drivers can be automatically updated through Windows Update or third-party software. Make sure automatic updates are enabled to keep your drivers up-to-date in the future.
Updating your drivers ensures that your operating system can effectively communicate with the new RAM modules and provides optimal performance. Outdated drivers can lead to compatibility issues, system instability, and decreased performance. By regularly updating your drivers, you can avoid these problems and maintain a smooth running system.
Remember to check for updates from time to time, as manufacturers may release new drivers to address bugs, improve stability, or provide additional features. Now that the drivers are updated, it’s time to test the system stability with the new RAM configuration.
Test System Stability
After installing new RAM modules and updating the necessary settings, it’s important to test the system stability to ensure that everything is functioning properly. Testing the stability ensures that the new RAM configuration is compatible with your system and that it can handle demanding tasks without crashes or errors. Here’s how you can test the system stability:
- Run a memory test: Use a reliable memory testing tool, such as MemTest86 or Windows Memory Diagnostic, to verify the integrity of your RAM. These tests will check for any errors or issues with the RAM modules.
- Perform stress tests: Stress testing software, like Prime95 or AIDA64, can put your system under intense workload to evaluate its stability. These tests can help identify any potential issues with the RAM or other hardware components.
- Monitor system temperatures: Use temperature monitoring software to keep an eye on your system’s temperatures during the stress testing. High temperatures can cause instability, so ensure that your cooling system is sufficient to handle the workload.
- Check for system crashes or errors: While running heavy tasks or playing demanding games, monitor your system for any crashes, blue screens, or errors. If you encounter any issues, it may indicate a problem with the RAM or other components.
- Observe system performance: Pay attention to the overall performance of your system after the RAM installation. If you notice a significant improvement in multitasking, faster program execution, or smoother gameplay, it indicates a successful RAM upgrade.
By thoroughly testing the stability of your system, you can ensure that the new RAM configuration is functioning properly and that there are no compatibility issues. If you encounter any errors, crashes, or performance problems during the testing, it may be necessary to recheck the RAM installation, update drivers, or adjust the settings in the BIOS.
Once you have confirmed the stability of your system with the new RAM, it’s time to optimize the RAM usage to further enhance your computer’s performance.
Optimize RAM Usage
Once you have installed and tested your new RAM, it is important to optimize its usage to maximize the performance of your computer. Here are some tips to help you optimize your RAM:
- Close unnecessary programs: Keep an eye on the programs running in the background and close any unnecessary ones. This frees up RAM resources and allows applications that you are actively using to perform better.
- Disable startup programs: Some programs automatically start up when you boot your computer. Disabling unnecessary startup programs can free up RAM and improve your computer’s boot time.
- Manage background processes: Check the Task Manager or Activity Monitor (depending on your operating system) to identify resource-intensive background processes. Consider closing or disabling these processes to reduce RAM usage.
- Remove unnecessary browser tabs and extensions: Running multiple browser tabs and extensions can consume significant amounts of RAM. Close any unnecessary tabs and disable or uninstall extensions that you don’t regularly use.
- Manage virtual memory: Virtual memory is a portion of the hard drive that the operating system uses as additional RAM. Ensure that your virtual memory settings are properly configured for optimal performance.
- Keep your system updated: Regularly update your operating system and software to ensure that you have the latest performance optimizations and bug fixes. These updates can help improve overall system performance, including RAM usage.
- Consider upgrading to an SSD: If you’re still using a traditional hard drive, consider upgrading to a solid-state drive (SSD). SSDs offer faster data access and improve overall system responsiveness, including the speed at which RAM is utilized.
- Monitor RAM usage: Keep an eye on your RAM usage using the Task Manager or Activity Monitor. This will help you identify any unexpectedly high RAM usage and troubleshoot potential issues.
By optimizing your RAM usage, you can ensure that your computer performs at its best and makes the most out of the installed RAM modules. Remember that every computer system is unique, and the RAM optimization methods that work best for one system may not be the same for another. Experiment and find the optimal configuration that suits your specific requirements.
With your RAM optimized and your computer performing at its peak, you may consider overclocking your RAM for additional performance gains, but this step is optional and should only be attempted by experienced users who understand the risks involved.
Overclocking Your RAM (Optional)
Overclocking your RAM can provide additional performance gains by running it at speeds higher than the manufacturer’s specifications. However, it’s important to note that overclocking is an advanced technique and should only be undertaken by experienced users who understand the risks involved. Here’s a guide to overclocking your RAM:
- Research your RAM’s overclocking potential: Before attempting to overclock your RAM, research the specific model and its overclocking capabilities. Look for user experiences, reviews, and guides to get an idea of the potential overclocking limits.
- Access the BIOS: Restart your computer and enter the BIOS setup by pressing the designated key (often Del or F2) during the boot process.
- Adjust RAM frequency and timings: Locate the RAM settings in the BIOS and manually adjust the frequency and timings. Incrementally increase the values while testing the stability of your system. Use stress testing software, such as Prime95 or memtest86, to check for any errors or instability.
- Monitor system temperatures: Overclocking can result in higher CPU and RAM temperatures. Ensure that your cooling system can handle the increased heat before proceeding with overclocking. Monitor the temperatures using software like HWMonitor or CPU-Z.
- Test for stability: After applying the overclocked settings, stress test your system for an extended period to ensure stability. Monitor for any crashes, errors, or abnormal behavior. If you encounter issues, revert to the previous settings or adjust the overclocked settings for better stability.
- Keep an eye on voltage: Overclocking may require increasing the voltage to maintain stability. However, be cautious when adjusting the voltage, as excessive voltage can damage your RAM or other components. Incrementally increase voltage if necessary, while monitoring system temperatures and stability.
- Document your settings: Once you have achieved a stable overclock, document the settings (frequency, timings, and voltage) for future reference. This will be helpful if you need to reset or reconfigure the RAM settings at any point.
Keep in mind that overclocking your RAM may void warranty and can potentially cause system instability or damage if not done properly. Ensure that you have adequate knowledge, experience, and cooling capabilities before attempting to overclock your RAM. If you are unsure or uncomfortable with the process, it is recommended to leave your RAM at the manufacturer’s specifications.
Now that you have optimized your RAM usage and overclocked (if desired) for better performance, you can enjoy the improved speed and responsiveness of your computer. However, be vigilant and monitor your system regularly for any signs of instability or issues with the overclocked RAM.
Frequently Asked Questions About RAM Installation
Here are some commonly asked questions about RAM installation:
- 1. How do I know how much RAM my computer can support?
- 2. Can I mix different types or speeds of RAM?
- 3. Do I need to remove my old RAM before installing new RAM?
- 4. How do I clean the RAM slots?
- 5. Can I install more RAM than the maximum specified by the manufacturer?
- 6. How can I check if my RAM is recognized by the system?
- 7. Can I install RAM without any technical knowledge?
To determine the maximum amount of RAM your computer can support, refer to the documentation provided by the motherboard manufacturer or visit their website. You can also use tools like CPU-Z or Speccy to find this information.
While it is possible to mix different types or speeds of RAM, it is not recommended. Mismatched RAM modules can lead to compatibility issues and may result in system instability or reduced performance. It’s best to use RAM modules that are identical in type, speed, and capacity.
If you are upgrading your existing RAM, you generally do not need to remove the old RAM modules. However, it is essential to ensure that the new RAM is compatible with the existing RAM modules in terms of type, speed, and capacity.
If you need to clean the RAM slots, make sure your computer is powered off and unplugged. Use a can of compressed air to blow out any dust or debris from the slots. Avoid using any liquid cleaners or brushes that may cause damage to the sensitive components.
Installing more RAM than the maximum specified by the manufacturer can result in compatibility issues and potential system instability. It’s essential to follow the manufacturer’s guidelines and not exceed the suggested maximum RAM capacity.
You can check if your RAM is recognized by the system by accessing the BIOS setup or using system information tools like CPU-Z or Task Manager. These tools will display the installed RAM capacity and other relevant information.
Installing RAM can be a straightforward process, but it does require some technical knowledge. It’s important to understand compatibility issues, how to handle RAM modules properly, and how to access the computer’s internals. If you are unsure, it is recommended to seek assistance from a professional.
These frequently asked questions should provide you with a better understanding of RAM installation. If you have further inquiries or encounter specific issues, consult the documentation provided with your motherboard or seek support from the manufacturer or a knowledgeable professional.