Introduction
Welcome to our guide on how to configure RAM in BIOS. If you’re looking to optimize the performance of your computer’s RAM (Random Access Memory), tweaking the settings in the BIOS (Basic Input/Output System) can help you achieve that. Understanding how to access and configure these settings will allow you to fine-tune your system and maximize its potential.
Before we delve into the details, let’s briefly explain what BIOS is and why configuring RAM settings in BIOS is important. BIOS is a firmware interface that is responsible for initializing and controlling the hardware components of your computer when you power it on. It acts as the bridge between the operating system and the hardware, allowing them to communicate effectively.
Configuring RAM settings in BIOS is necessary because it allows you to adjust the frequency, timings, and voltages of the RAM modules installed in your system. These settings influence the speed and stability of your computer’s memory, which can significantly impact overall system performance, especially when it comes to demanding tasks like gaming, video editing, or running resource-intensive applications.
In this guide, we will provide step-by-step instructions on how to access the BIOS and locate the RAM settings. We will then explain the process of configuring the RAM frequency, adjusting the timings, and enabling XMP (eXtreme Memory Profile) or AMP (AMD Memory Profile) profiles. By the end of this article, you will have the knowledge and tools to optimize your computer’s RAM to suit your specific needs.
What is BIOS?
The BIOS, short for Basic Input/Output System, is firmware that is embedded in the motherboard of a computer. It is the first software that runs when you power on your computer and is responsible for initializing and configuring various hardware components before the operating system takes over. Think of the BIOS as the intermediary between your computer’s hardware and software.
The primary function of the BIOS is to perform a Power-On Self-Test (POST) to check if all essential hardware components, such as the processor, memory, and storage devices, are functioning correctly. Once the POST is complete, the BIOS continues to initialize the hardware, including the graphics card, sound card, and peripherals like keyboard and mouse, to ensure proper operation.
In addition to hardware initialization, the BIOS also provides a user interface, typically accessed by pressing a specific key (such as F2, Del, or Esc) during the startup process. This interface allows users to access and modify various system settings, including those related to the RAM.
The BIOS has evolved over the years, with modern systems using a newer version called UEFI (Unified Extensible Firmware Interface), which has several advantages over the traditional BIOS. UEFI offers a more intuitive graphical interface, supports larger storage devices, and provides enhanced security features, among other benefits.
Overall, the BIOS plays a vital role in ensuring the proper functioning of a computer by initializing hardware and providing users with access to configuration options. With regards to configuring RAM, the BIOS allows you to adjust settings such as frequency, timings, and voltage, enabling you to optimize the performance of your memory modules and enhance overall system functionality.
Why do you need to configure RAM in BIOS?
Configuring RAM settings in the BIOS is crucial for several reasons. By customizing the settings, you can optimize the performance and stability of your computer’s memory, resulting in improved overall system performance. Here are a few reasons why you might need to configure RAM in the BIOS:
1. Maximize System Performance: The default RAM settings in the BIOS are often set to conservative values to ensure compatibility with a wide range of hardware configurations. By manually configuring the RAM settings, you can potentially increase the frequency, adjust timings, and control voltages to unleash the full potential of your memory modules. This can lead to a noticeable improvement in system responsiveness, especially when performing memory-intensive tasks.
2. Overclocking: Overclocking is the process of increasing the operating frequency of a component beyond its stock specifications. When it comes to RAM, overclocking allows you to push the memory modules beyond their default speed, providing a significant boost in performance. By configuring the RAM settings in the BIOS, you can overclock your RAM safely and effectively, as long as your hardware supports it.
3. Compatibility and Stability: Not all RAM modules are created equal, and some may require specific configurations to function optimally in your system. By adjusting the settings in the BIOS, you can ensure compatibility with your RAM modules and minimize the risk of stability issues like system crashes, blue screens, or memory errors. Fine-tuning the RAM settings can help establish stable communication between the memory modules and the rest of the system.
4. XMP or AMP Profiles: Many RAM modules come with preconfigured profiles, such as eXtreme Memory Profile (XMP) for Intel systems and AMD Memory Profile (AMP) for AMD systems. These profiles provide pre-optimized settings for your RAM, typically with higher frequencies and optimized timings. By enabling XMP or AMP profiles in the BIOS, you can quickly apply these settings, eliminating the need for manual configuration.
5. Troubleshooting RAM Issues: Configuring RAM in the BIOS can also be helpful when troubleshooting memory-related problems. By adjusting settings like timings and voltages, you can identify if instability issues are caused by the RAM itself or other hardware components. It allows you to experiment with different settings to find the optimal configuration for your specific system.
Overall, configuring RAM in the BIOS gives you more control over your computer’s memory and enables you to fine-tune it for optimal performance and stability. Whether you want to maximize system performance, overclock the RAM, or troubleshoot any memory-related issues, accessing and configuring RAM settings in the BIOS is a crucial step in achieving these objectives.
Accessing BIOS
To configure RAM settings in the BIOS, you first need to access the BIOS interface. The process of accessing the BIOS can vary depending on your computer’s manufacturer and model. Here are some common methods to access the BIOS:
1. Restart your computer: Start by completely shutting down your computer and then turn it on again. As soon as you power on your computer, look for a message or a specific key prompt on the screen. It is usually displayed for a few seconds and indicates the key you need to press to access the BIOS. The most common keys are F2, Del, Esc, or F10, but it can vary depending on your computer’s manufacturer.
2. Check your computer’s manual: If you’re unsure about the key to access the BIOS, refer to your computer’s manual or the manufacturer’s website for specific instructions. The manual should provide detailed information on how to enter the BIOS setup utility.
3. Use the Advanced Startup options: On some Windows computers, you can access the BIOS through the Advanced Startup options. To do this, click on the Start menu, then click on the Power button while holding the Shift key. Choose the Restart option, and your computer will restart and present you with various startup options. Select Troubleshoot, then Advanced Options, and finally UEFI Firmware Settings or BIOS Setup to access the BIOS.
4. Use the BIOS Setup Utility: Some manufacturers offer an option to access the BIOS directly from within the operating system. Look for manufacturer-specific software on your computer, such as Dell’s “Dell BIOS Access” or HP’s “HP System Setup” tool, which allows you to enter the BIOS without restarting your computer.
Once you’ve entered the BIOS setup utility, you can navigate using the arrow keys on your keyboard. Use the instructions provided on the screen or refer to your computer’s manual to understand the navigation and options available in your specific BIOS interface.
It’s worth noting that accessing the BIOS can sometimes be a time-sensitive process, so make sure to press the appropriate key prompted on the screen within the specified timeframe. If you miss the window to enter the BIOS, simply perform a restart and try again.
Now that you know how to access the BIOS, let’s move on to the next section where we will look into locating the RAM settings within the BIOS interface.
Locating RAM settings in BIOS
Once you have successfully accessed the BIOS setup utility, the next step is to locate the RAM settings. The exact location and labeling of these settings may vary depending on your computer’s manufacturer and BIOS version. Here are some general steps to help you find the RAM settings:
1. Navigate to the Advanced or Overclocking section: In most BIOS interfaces, the RAM settings can be found under either the Advanced or Overclocking section. Use the arrow keys on your keyboard to navigate through the different sections until you find the one that contains RAM-related settings.
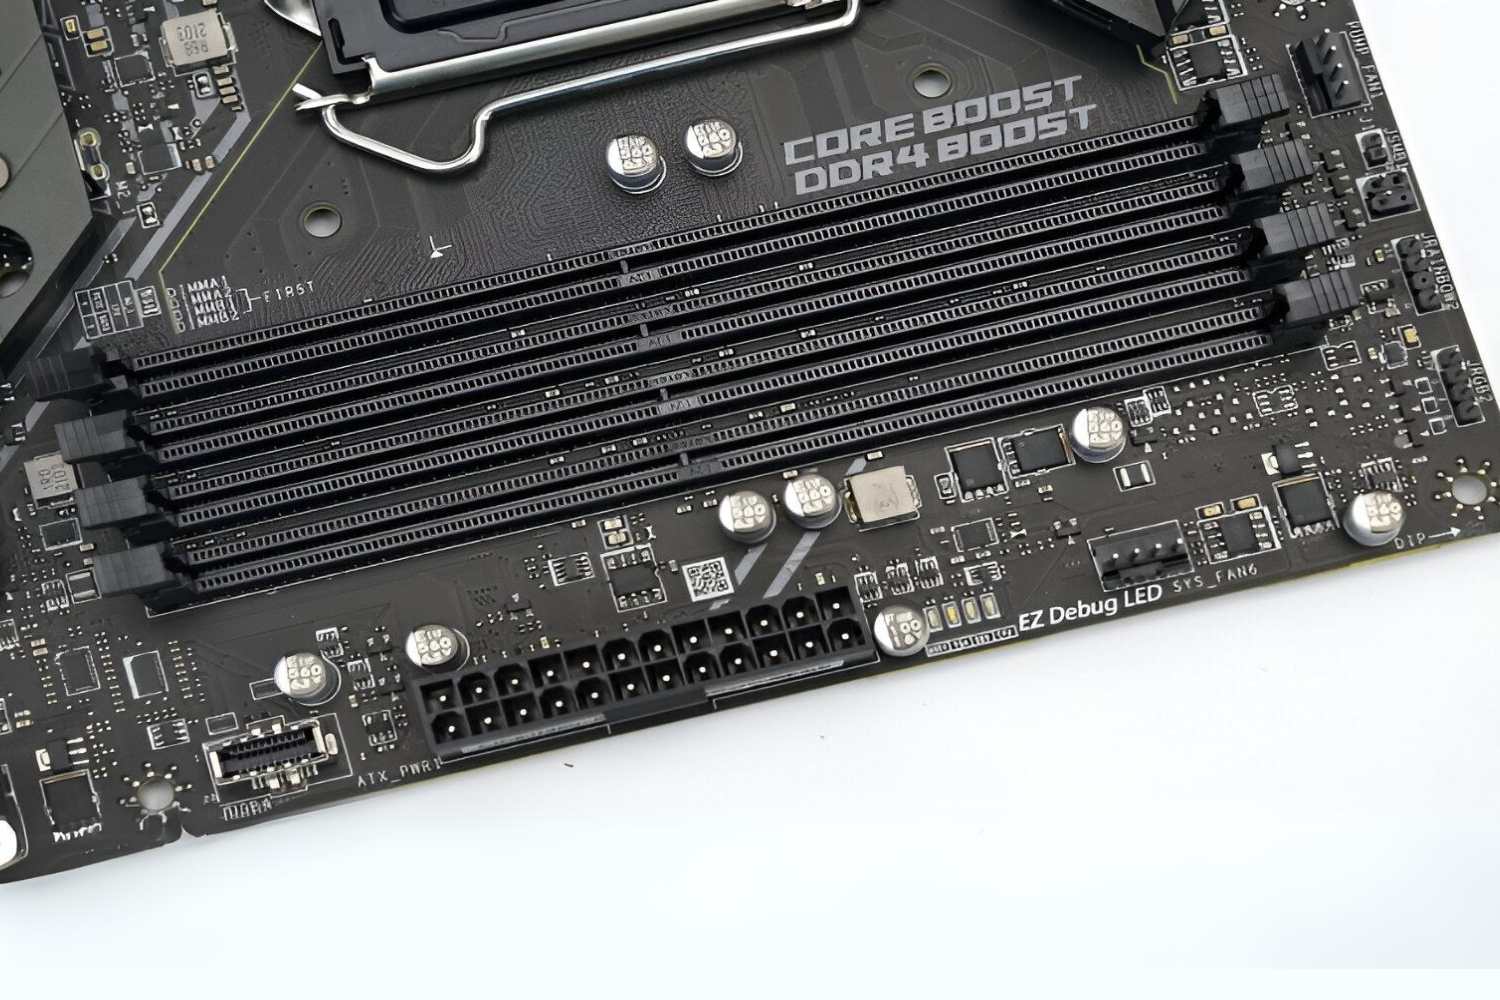
2. Look for Memory or DRAM settings: Once you have entered the appropriate section, you should be able to find settings related to memory or DRAM. These settings control various aspects of the RAM, such as frequency, timings, and voltages.
3. Explore submenus or tabs: Within the Memory or DRAM settings, there may be additional submenus or tabs that provide further options and adjustments. These submenus or tabs might include options to configure the RAM frequency, timings, voltage, and XMP or AMP profiles.
4. Pay attention to labels and descriptions: As you navigate through the RAM settings, read the labels and descriptions carefully. They can provide valuable information about the purpose and impact of each setting. This will help you make informed decisions when configuring the RAM to suit your needs.
Remember, not all BIOS interfaces are the same, so the exact location and labeling of the RAM settings may vary. If you’re having trouble finding the RAM settings, refer to your computer’s manual or the manufacturer’s website for specific instructions related to your BIOS version.
Once you have located the RAM settings, you can proceed to configure them according to your requirements. In the next sections, we will discuss how to adjust the RAM frequency, timings, and voltages, as well as how to enable XMP or AMP profiles for automatic optimization.
Now that you know where to find the RAM settings in the BIOS, let’s explore the process of configuring the different parameters to optimize your computer’s RAM performance.
Configuring RAM Frequency
Configuring the RAM frequency in the BIOS allows you to adjust the speed at which the memory modules operate. When it comes to RAM frequency, there are two primary aspects to consider: the base clock frequency (often referred to as the front-side bus or FSB frequency) and the RAM multiplier.
1. Locate the RAM frequency settings: Go to the section in the BIOS where memory or DRAM settings are located. Look for options related to frequency, sometimes called “DRAM Frequency,” “Memory Clock,” or “Memory Ratio.”
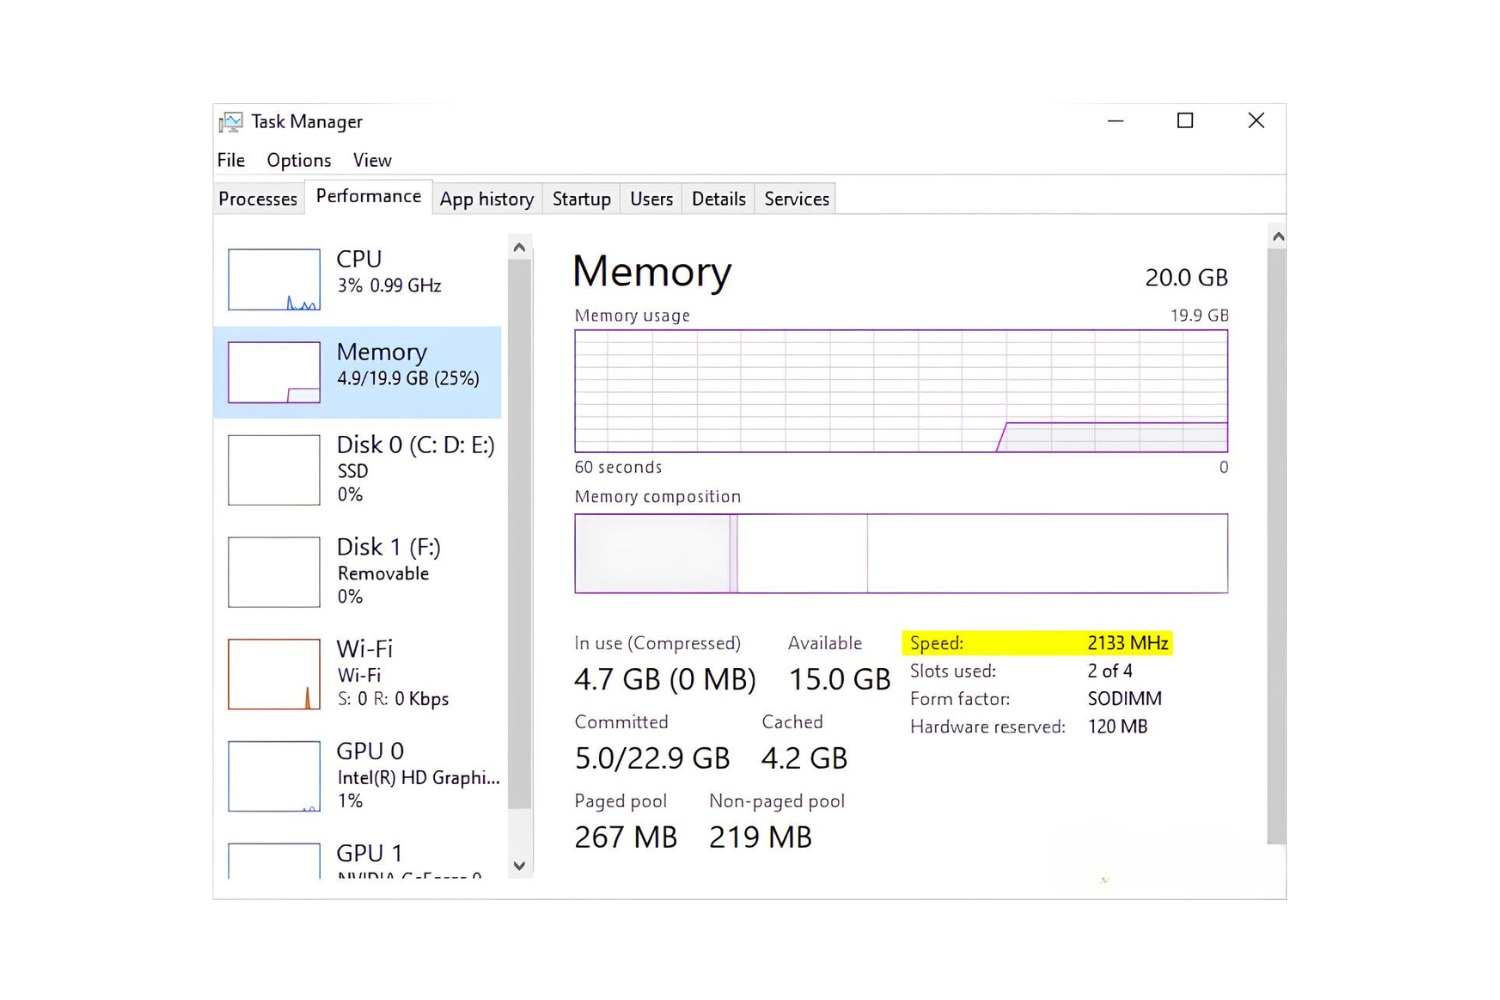
2. Set the desired frequency: Depending on your motherboard and RAM capabilities, you may have a range of frequencies to choose from. Popular options include 2133MHz, 2400MHz, 2666MHz, or even higher. Select the frequency that matches the specifications of your RAM modules and meets your performance requirements. Keep in mind that choosing a higher frequency may require additional adjustments to other settings for stability.
3. Save and exit: Once you have set the desired RAM frequency, save the changes and exit the BIOS. Your computer will reboot, and the new RAM frequency will take effect.
It’s important to note that not all RAM modules are capable of running at higher frequencies than their specified default speed. If you set the RAM frequency too high for your modules, your computer may fail to boot or experience stability issues. Refer to your RAM manufacturer’s specifications or documentation to ensure that your RAM modules are compatible with the desired frequency settings.
Configuring the RAM frequency in the BIOS can have a noticeable impact on system performance, especially in memory-intensive tasks. However, it is crucial to strike a balance between higher frequencies and stability. Test your system thoroughly after making changes to ensure that it remains stable under varying workloads.
In the next section, we will explore how to adjust the RAM timings, which also play a significant role in memory performance and stability.
Adjusting RAM Timings
RAM timings refer to the specific delay timings that dictate how quickly or slowly data can be accessed and transferred within the memory modules. These timings include parameters such as CAS latency (CL), RAS-to-CAS delay (tRCD), RAS precharge (tRP), and RAS active time (tRAS). By adjusting these timings in the BIOS, you can fine-tune the performance and stability of your RAM. Here’s how to adjust RAM timings:
1. Locate the RAM timing settings: Within the BIOS setup utility, navigate to the memory or DRAM settings section. Look for options labeled “Timings,” “CAS Latency”, or “Memory Timings.”
2. Adjust the timings: Once you have located the timing settings, you will usually see a series of values representing different timings. These values can be adjusted manually or selected from a list of predefined options. The exact labels and options may vary depending on your BIOS interface. It’s recommended to refer to your RAM manufacturer’s specifications for the optimal timings that your modules are designed to run at.
3. Set the desired timings: To adjust the timings manually, enter the desired values for each timing parameter. Ensure that you enter the timings correctly, as incorrect settings may cause instability or boot failures. If your BIOS allows, you can also experiment with different presets or XMP/AMP profiles to automatically configure the optimal timings for your RAM.
4. Save and exit: Once you have adjusted the RAM timings, save the changes and exit the BIOS. Your system will reboot, and the new timings will take effect.
Keep in mind that tightening the RAM timings too much can also result in instability. It’s important to find a balance between performance and stability by testing your system under different workloads. If your system experiences issues or fails to boot after adjusting the timings, reset the BIOS settings to their defaults and try more conservative settings.
Adjusting the RAM timings can yield noticeable improvements in memory-intensive tasks by reducing latency and improving data transfer rates. However, the gains may vary depending on your specific hardware and workload.
In the next section, we will discuss how to enable XMP or AMP profiles for automated RAM optimization.
Enabling XMP or AMP Profiles
XMP (eXtreme Memory Profile) and AMP (AMD Memory Profile) are technologies developed by Intel and AMD, respectively, to simplify the process of optimizing RAM performance. These profiles provide preconfigured settings for frequencies, timings, and voltages that are tested and optimized by the RAM manufacturer. Enabling XMP or AMP profiles in the BIOS allows you to automatically apply these settings with a simple selection. Here’s how to enable XMP or AMP profiles:
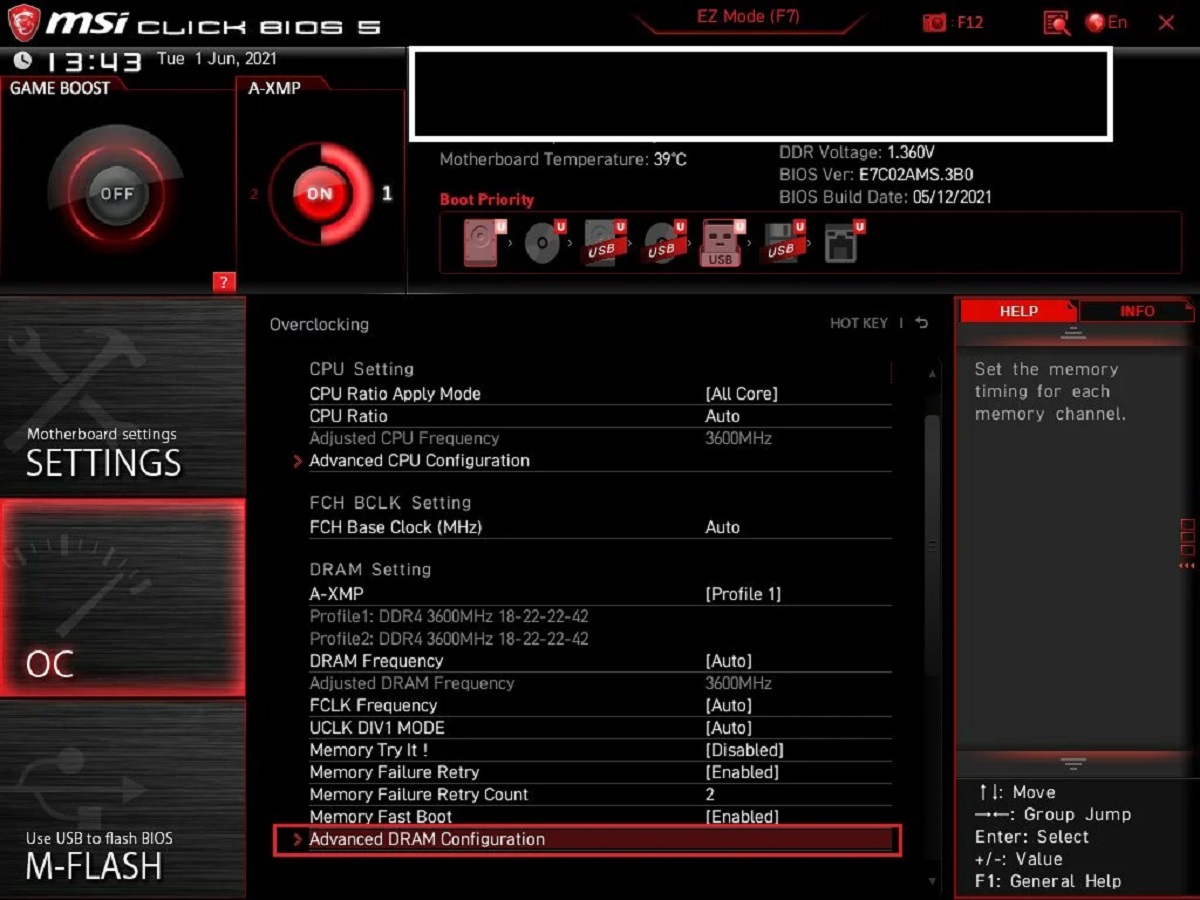
1. Locate the XMP or AMP settings: Navigate to the memory or DRAM settings section in the BIOS. Look for an option labeled “XMP” or “AMP,” which indicates support for these profiles.
2. Enable the XMP or AMP profile: Once you have located the option, select the desired XMP or AMP profile from the available options. The profiles may be listed with different performance levels or frequency settings. Choose the profile that suits your RAM modules and performance requirements.
3. Save and exit: After enabling the XMP or AMP profile, save the changes and exit the BIOS. Your computer will restart, and the settings from the selected profile will be applied.
Enabling XMP or AMP profiles can be an effortless way to optimize RAM performance, as it applies verified settings tailored to your RAM modules. These profiles take into account the capabilities and specifications of the RAM, ensuring a stable configuration with optimized performance.
It’s worth noting that not all RAM modules or motherboards support XMP or AMP profiles. Make sure to check the compatibility of your RAM and motherboard before attempting to enable these profiles. Additionally, be aware that enabling XMP or AMP profiles may result in increased power consumption and temperature, so ensure that your cooling system is adequate.
By utilizing XMP or AMP profiles, you can take advantage of preconfigured settings that are optimized for your RAM’s performance. This saves you the hassle of manually adjusting frequencies, timings, and voltages, especially if you’re not familiar with the intricacies of RAM overclocking.
In the next section, we will discuss the process of saving and exiting the BIOS, ensuring that your changes are applied correctly.
Saving and Exiting BIOS
After making changes to the RAM settings or any other configurations in the BIOS, it is essential to properly save your changes and exit the BIOS setup utility. Here’s how you can do it:
1. Confirm your changes: Before saving and exiting the BIOS, double-check that you have made all the desired changes to the RAM settings or any other configuration parameters. Ensure that you have adjusted the settings according to your requirements and have taken note of any necessary changes or precautions mentioned in your RAM manufacturer’s specifications.
2. Save the changes: In most BIOS interfaces, you can save the changes by selecting an option like “Save Changes and Exit,” “Exit and Save,” or similar. To proceed with saving the changes, press the corresponding key or use the on-screen prompts to confirm.
3. Exit the BIOS: After saving the changes, choose the option to exit the BIOS, usually labeled as “Exit,” “Exit Setup,” or “Exit BIOS.” Again, confirm your selection by pressing the appropriate key or following the displayed instructions.
4. Restart your computer: Once you have exited the BIOS, your computer will restart, and the changes you made to the RAM settings or other configurations will take effect. Allow your computer to boot up normally and observe any changes in system behavior or performance resulting from the modified settings.
It’s important to note that if you encounter any issues or instability after applying the changes, you may need to revisit the BIOS and reset the configurations to their default values. This can typically be done by selecting an option like “Load Defaults” or “Load Optimized Defaults” within the BIOS setup utility.
Additionally, remember that any changes you make in the BIOS can have a significant impact on system stability and functionality. Exercise caution when adjusting settings and ensure that you have a good understanding of the implications of each change.
With the changes saved and the BIOS exited, you have successfully configured the RAM settings to optimize your computer’s memory performance. Enjoy the improved performance and stability that comes with fine-tuning your RAM settings!
Conclusion
Configuring RAM settings in the BIOS is a valuable technique to optimize the performance and stability of your computer’s memory. By adjusting parameters such as frequency, timings, and voltages, you can unleash the full potential of your RAM modules.
In this guide, we have covered the essential steps for configuring RAM in the BIOS. We started by explaining what BIOS is and why it is important to configure RAM settings in the BIOS. We then provided instructions on how to access the BIOS setup utility and locate the RAM settings within it.
Next, we discussed how to adjust the RAM frequency to match the specifications of your RAM modules and meet your performance requirements. We also explored the process of adjusting the RAM timings to minimize latency and optimize data transfer rates.
Furthermore, we explored the option of enabling XMP or AMP profiles, allowing you to automatically apply optimized settings for your RAM modules. These profiles, designed by RAM manufacturers, take the guesswork out of configuring the RAM for optimal performance.
Finally, we discussed the importance of saving your changes and properly exiting the BIOS to ensure that the new settings take effect. We also emphasized the need to exercise caution when making adjustments and to refer to your RAM manufacturer’s specifications for optimal configurations.
By following the steps outlined in this guide, you can effectively configure your RAM settings in the BIOS. This will lead to improved system responsiveness, smoother multitasking, and enhanced performance in memory-intensive tasks.
Remember, the exact steps and options in your BIOS may vary depending on your computer’s manufacturer and model. It’s always a good idea to refer to your computer’s manual or the manufacturer’s website for specific instructions and guidelines related to your BIOS version.
Thank you for reading our guide on how to configure RAM in the BIOS. We hope this information has been valuable in helping you optimize your computer’s memory performance. Enjoy the benefits of a finely-tuned RAM configuration!