Introduction
Welcome to the world of gaming! Whether you’re a casual gamer or a hardcore enthusiast, one thing you may have noticed is that as games become more advanced, they require more resources to run smoothly. One crucial component that plays a significant role in gaming performance is RAM, or Random Access Memory. RAM acts as the bridge between your computer’s processor and storage drive, allowing for faster data access and retrieval.
In this article, we will explore how to put more RAM into a game. By increasing the amount of RAM in your computer, you can improve the overall gaming experience, with faster load times, reduced lag, and smoother gameplay. So, if you find your games struggling to run smoothly or experiencing lag, it may be time to consider upgrading your RAM.
Before diving into the steps of upgrading your RAM, it’s essential to understand the importance of RAM in gaming. RAM serves as the temporary storage where your computer stores the data it needs for quick access. When you launch a game, the game’s assets, including textures, maps, character models, and sound effects, are loaded into RAM. The more RAM you have, the more data can be stored, resulting in faster load times and smoother gameplay.
However, just installing more RAM won’t automatically improve your gaming performance. It’s crucial to check your system requirements to determine if your computer can handle additional RAM. Each game has recommended and minimum system requirements listed, indicating the amount of RAM needed for optimal performance. You can usually find this information on the game’s official website or on the game packaging.
Once you’ve identified the RAM requirements for your games, you can move on to determining the type of RAM your system supports. There are several types of RAM available, such as DDR3, DDR4, and DDR5, with each having different speeds and compatibility with different motherboards. It’s important to choose the right type of RAM that is compatible with your motherboard to ensure successful installation.
Understanding RAM and its importance in gaming
Before delving into the process of adding more RAM to your game, it’s crucial to grasp the fundamental role of RAM in gaming and its significance in enhancing overall performance. RAM, short for Random Access Memory, is a type of computer memory that provides temporary storage for data that is actively used by the CPU. When it comes to gaming, RAM plays a vital role in facilitating fast and efficient data access, enabling smooth gameplay and reducing load times.
Think of RAM as a workspace for your computer. When you launch a game, various assets, such as textures, sounds, and character models, are loaded into RAM to ensure quick and seamless access during gameplay. With more RAM, your computer can store a larger portion of the game data, which translates to faster loading times and less lag during gameplay.
Furthermore, RAM also supports multitasking capabilities. In addition to running the game itself, your computer also needs to handle background processes such as system operations, virus scans, and other applications running concurrently. Insufficient RAM can lead to a strain on your system, causing it to slow down or crash, especially when you have multiple demanding applications or browser tabs open alongside your game.
When your system runs out of available RAM, it compensates by utilizing virtual memory, which involves using a part of your storage drive as temporary RAM. However, this swap between physical RAM and virtual memory can significantly impact game performance, resulting in stutters, freezes, and decreased frame rates.
By adding more RAM to your computer, you provide your system with the necessary resources to handle the demands of modern games. With additional RAM, your computer can store more game data in its fast-access memory, reducing the need for frequent data retrieval from the slower storage drive. This results in smoother gameplay, faster loading times, and improved overall performance.
It’s important to note that while adding more RAM can enhance your gaming experience, it is not the sole factor determining performance. Other components such as the CPU, GPU, and storage drive also play significant roles. However, RAM acts as a crucial bridge between these components, allowing for faster data transfer and a more seamless gaming experience.
Now that you understand the importance of RAM in gaming, it’s time to move on to the next step – checking your system requirements – to ensure that your computer is ready for a RAM upgrade.
Checking your system requirements
Before diving into the process of adding more RAM to your gaming setup, it’s crucial to assess your system requirements to determine if a RAM upgrade is necessary. Checking your system requirements ensures that your computer can handle the additional RAM and that it will provide a noticeable improvement in gaming performance.
The first step in checking your system requirements is to consult the recommended and minimum system requirements for the games you intend to play. Game developers provide these requirements as guidelines for optimal performance. You can usually find them on the game’s official website or on the packaging. The system requirements typically include information about the processor, graphics card, storage space, and RAM needed to run the game smoothly.
Focusing specifically on RAM, the recommended system requirements highlight the amount of RAM that is advised for the best gaming experience. This recommended RAM requirement typically takes into account the game’s graphics, complexity, and memory requirements for smooth gameplay. However, keep in mind that meeting the recommended requirements does not necessarily mean you cannot run the game with less RAM, but it usually indicates that your experience may be compromised with lower settings or reduced performance.
In addition to the recommended RAM, also consider the minimum system requirements of the game. The minimum RAM requirement indicates the bare minimum needed to run the game, although it may result in less-than-optimal performance or limited gameplay features. If your current RAM falls below the minimum requirement, it’s a definite sign that upgrading your RAM will likely improve your gaming experience.
While focusing on game requirements is essential, it’s also worth considering the overall performance of your computer. If you find that your system is struggling with multitasking, experiences frequent slowdowns, or takes an abnormally long time to load applications, these could be signs of insufficient RAM. Upgrading your RAM will not only benefit your gaming experience but also improve your system’s overall performance.
Once you’ve assessed both the game requirements and the performance of your system, you can determine if adding more RAM is necessary. If your current RAM meets the game’s recommended requirements and you’re satisfied with your system’s overall performance, it may not be crucial to upgrade your RAM at this time. However, if you’re falling short of the recommended RAM or experiencing performance issues, it’s a strong indication that adding more RAM is a wise choice.
Now that you know the importance of checking your system requirements, the next step is to determine the type of RAM you need for your computer system. This is crucial for ensuring a successful RAM upgrade. We’ll explore this topic in the next section.
Determining the type of RAM you need
Once you have decided to upgrade your RAM, the next step is to determine the type of RAM that is compatible with your computer system. Choosing the right type of RAM is crucial to ensure a successful installation and optimal performance.
There are several types of RAM available on the market, such as DDR3, DDR4, and DDR5. The type of RAM you need depends on the motherboard in your computer. RAM modules have specific pin configurations that correspond to the memory slots on the motherboard. It’s important to match the RAM type with the supported RAM slots on your motherboard.
To determine the type of RAM supported by your motherboard, you can refer to your computer’s user manual, check the manufacturer’s website, or use system information tools. The user manual or manufacturer’s website usually provides detailed information about the supported RAM types and maximum capacity of RAM your motherboard can handle.
If you don’t have access to the user manual or are unable to find the information online, you can use system information tools like CPU-Z or Speccy to gather information about your computer’s hardware specifications. These tools provide detailed information about your motherboard model, which you can use to search for the motherboard’s specifications online.
Once you have identified the RAM type supported by your motherboard, you also need to consider the speed of the RAM modules. RAM speed is measured in megahertz (MHz), and it determines how quickly data is transferred between the RAM and other system components. It’s recommended to choose RAM modules with a speed that matches or is compatible with the maximum supported speed of your motherboard. Using faster RAM than what your motherboard supports may result in compatibility issues or potential underutilization of the RAM’s performance capabilities.
Additionally, consider the capacity of the RAM modules you plan to purchase. The capacity refers to the amount of memory each module can hold. Common capacities range from 4GB to 16GB, but higher capacities are available for more demanding needs. Consider your budget and the recommended RAM requirements of the games you want to play when determining the capacity of the RAM you need. Keep in mind that adding more RAM will provide better performance, especially for modern games that tend to have higher memory requirements.
By determining the type of RAM that is compatible with your motherboard, considering the speed, and selecting the appropriate capacity, you can ensure that your RAM upgrade is successful and maximizes your gaming experience.
With the necessary knowledge about the type of RAM you need, it’s time to move on to the next step: purchasing the right amount of RAM to meet your requirements. We’ll cover this topic in the following section.
Purchasing the right amount of RAM
When upgrading your RAM, it’s essential to ensure that you purchase the right amount to meet your requirements and provide optimal performance. The amount of RAM you need depends on various factors, such as your system requirements, the games you play, and your budget.
To determine the right amount of RAM to purchase, start by considering the recommended system requirements of the games you intend to play. These requirements often specify the ideal amount of RAM needed for a smooth gaming experience. While meeting the minimum requirements may allow you to run the games, having more RAM can improve overall performance, decrease loading times, and prevent bottlenecks.
Consider your usage patterns and the types of games you typically play. If you play graphic-intensive and modern games, they may require more RAM to handle the high-resolution textures and complex game assets. Additionally, if you engage in multitasking, running multiple applications or processes simultaneously, you may benefit from having more RAM to handle the increased workload.
While it’s tempting to purchase as much RAM as possible, it’s important to strike a balance between your needs and your budget. RAM is an investment, and its cost increases with higher capacities. Evaluate your budget and prioritize the amount of RAM that will provide a noticeable performance boost for your gaming experience.
Typically, a minimum of 8GB of RAM is recommended for gaming. This amount allows for comfortable gameplay, even with demanding games and moderate multitasking. However, if you have the budget and want to future-proof your system, consider upgrading to 16GB or more. Having larger amounts of RAM can benefit you in the long run, as game requirements are likely to increase over time.
It’s important to note that the amount of RAM you can install depends on your motherboard’s capacity. Check the maximum supported RAM capacity of your motherboard to ensure that the amount of RAM you wish to purchase is compatible. If your motherboard supports more significant capacities, you can plan for future upgrades without worrying about compatibility issues.
When purchasing RAM, it’s also crucial to buy modules that match in terms of capacity and speed. Matching RAM modules ensure the best compatibility and performance, especially when using dual-channel or quad-channel configurations. If you plan to add RAM to your existing modules, aim for the same capacity and speed to avoid potential compatibility issues and ensure optimal performance.
Consider trusted brands when purchasing RAM to ensure quality and compatibility. Read product reviews and check for warranties to make an informed decision.
By considering your system requirements, gaming needs, budget limitations, and motherboard compatibility, you can purchase the right amount of RAM to enhance your gaming experience and optimize your system’s performance.
Once you have purchased the appropriate amount of RAM, you’re ready to move on to the actual installation process. In the next section, we will guide you through the steps of preparing your computer for RAM installation.
Preparing your computer for RAM installation
Before you can start installing your new RAM modules, it’s important to properly prepare your computer to ensure a smooth and successful installation process. By following a few essential steps, you can minimize the risk of damaging components and ensure that the RAM is installed correctly.
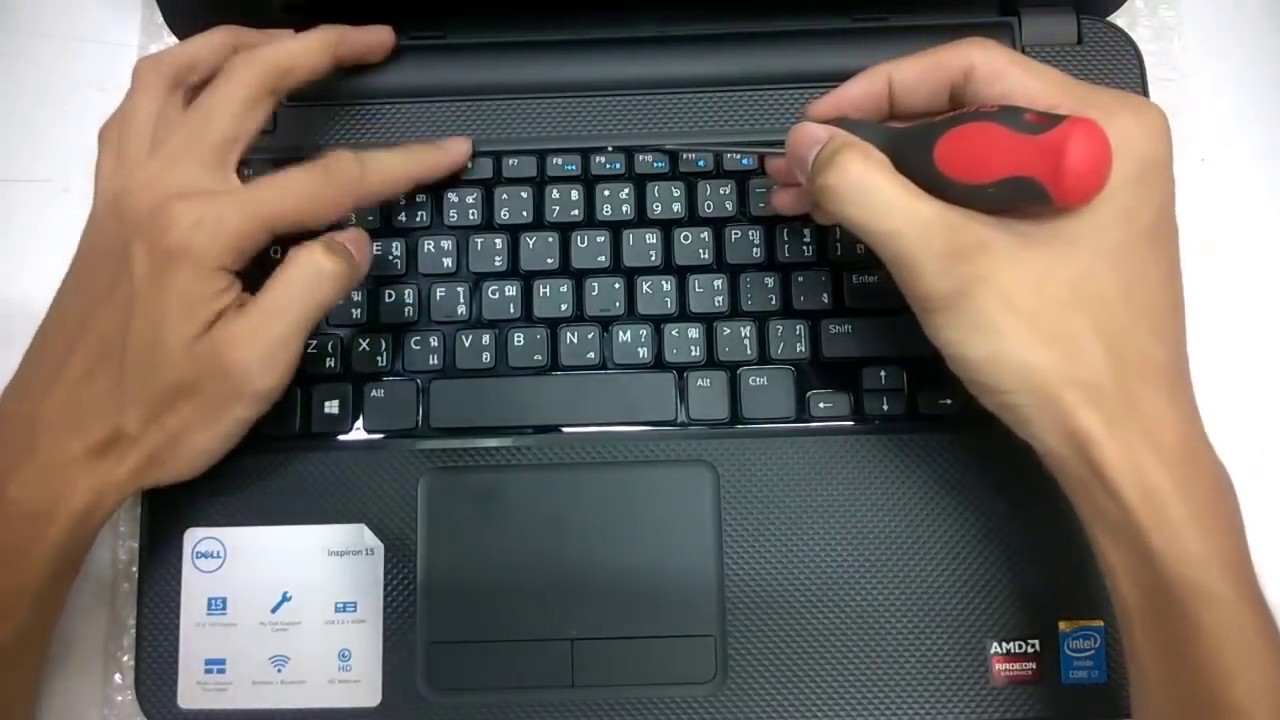
The first step is to turn off your computer and unplug it from the power source. This is crucial to prevent any electrical discharge and avoid potential damage to sensitive components during the installation process. Unplugging your computer also ensures your safety while working inside the system.
Next, locate and remove the computer’s side panel. Most desktop computers have easily removable side panels that provide access to the internal components. Depending on the model, you may need to remove screws or use a latch to open the panel. Refer to your computer’s user manual or manufacturer’s instructions if you are unsure how to remove the side panel.
Once the side panel is removed, it’s a good idea to ground yourself to prevent any static electricity from damaging the components. You can do this by touching a grounded metal surface, such as a metal part of the computer case, or by using an anti-static wristband.
Before touching any components inside the computer, it’s important to discharge any residual electricity by pressing and holding the power button for a few seconds. This helps ensure that any stored energy is released, reducing the risk of static discharge during the installation process.
Now that you’re properly grounded and have discharged any residual electricity, locate the RAM slots on your motherboard. These slots are usually long, rectangular slots typically found near the CPU. They may be color-coded or numbered for easy identification.
Take a moment to familiarize yourself with the existing RAM modules, if any, already installed on your motherboard. Note the position and how they are secured in the slots. This will help you determine the correct way to install the new RAM modules later.
Inspect the RAM slots for any dust or debris. Gently blow or use compressed air to clean the slots if necessary. This step ensures a proper connection between the RAM modules and the motherboard, promoting optimal performance.
Lastly, ensure that the retention clips on the RAM slots are open. These clips hold the RAM modules securely in place. They should be in a position that allows the RAM to slide in easily during installation.
By following these preparation steps, you are now ready to proceed with the actual installation of the RAM modules. The next section will guide you through the process of opening your computer and locating the RAM slots.
Opening your computer and locating the RAM slots
Now that you have prepared your computer for RAM installation, it’s time to open your computer and locate the RAM slots on your motherboard. By following these steps, you will be able to access the RAM slots easily for installation.
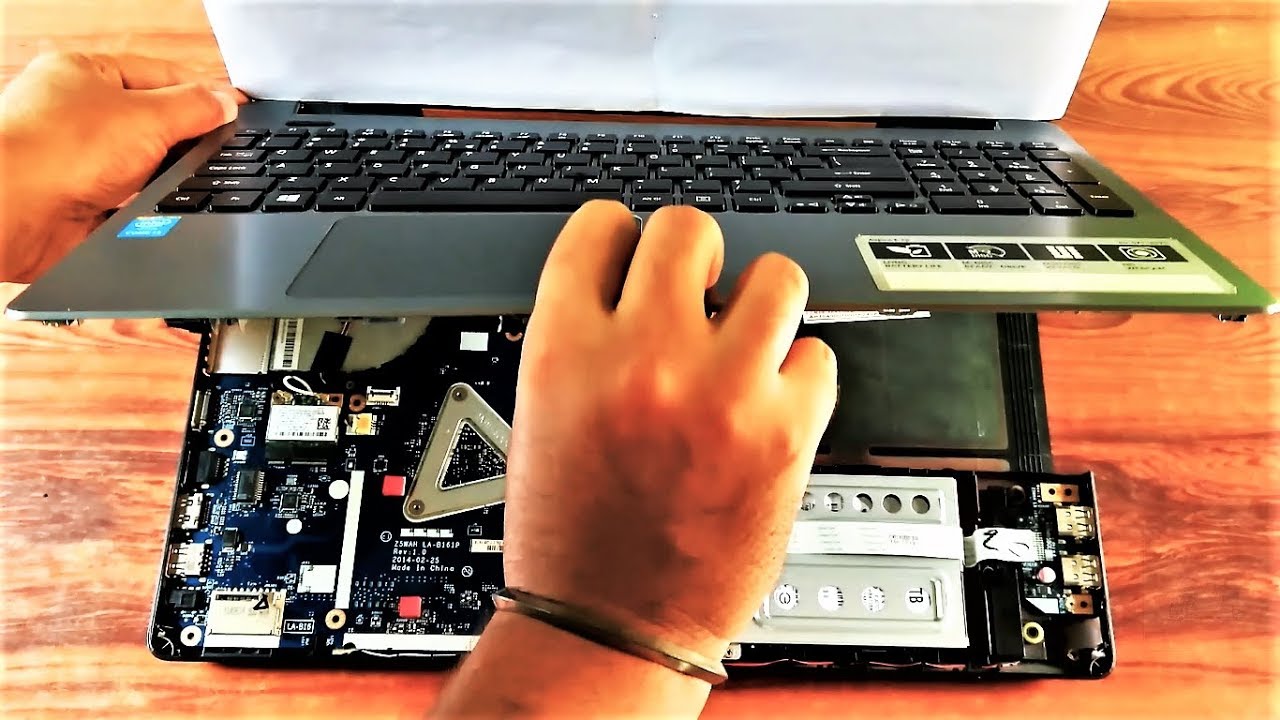
Start by gently removing the side panel of your computer case, ensuring that you have grounded yourself and discharged any static electricity as mentioned in the previous section. Depending on your computer case, you may need to unscrew specific screws or release latches to remove the side panel. If you are unsure about the process, consult your computer’s user manual or manufacturer’s instructions.
With the side panel removed, take a moment to assess the internal components of your computer. Locate the motherboard, which is the large circuit board that houses various components, including the CPU and RAM slots. Look for rectangular slots near the CPU socket, typically arranged in a row or pairs, depending on your motherboard’s configuration.
Identify the RAM slots by their size and shape. They are longer and narrower compared to other expansion slots on the motherboard. The number of RAM slots can vary depending on the motherboard model, with most modern motherboards having at least two or four slots.
Take note of any existing RAM modules installed in the slots, if applicable. Observing their position and orientation can help you determine the proper way to install the new RAM modules. Pay attention to the retention clips on the sides of the slots, which hold the RAM modules securely in place.
Inspect the RAM slots and ensure that they are clean and free from any debris. If you notice any dust or particles inside the slots, use compressed air or gently blow on them to remove any obstructions. A clean and clear connection between the RAM modules and the motherboard is essential for optimal performance.
Take a moment to review your motherboard’s documentation or consult the manufacturer’s website for any specific instructions or recommendations regarding the RAM installation process. Different motherboards may have slight variations in terms of recommended slot configurations or pairing requirements.
With the RAM slots located and prepared, you are now ready to proceed with the actual installation of the new RAM modules. The next section will guide you through the steps of removing the existing RAM (if applicable) and inserting the new RAM modules into the slots.
Removing the existing RAM (if applicable)
If your computer already has RAM modules installed in the slots, you may need to remove them before installing the new RAM. This step is necessary to ensure compatibility and replace the existing modules with the upgraded ones. Follow these steps to safely remove the existing RAM:
Before proceeding, ensure that you have properly grounded yourself and discharged any static electricity by touching a grounded metal surface or using an anti-static wristband.
Locate the retention clips on the sides of the RAM slots. These clips hold the existing RAM modules in place. Gently push these clips outward to release the modules.
Once the clips are released, the existing RAM modules will pop up slightly. Carefully grab the modules by the edges and lift them straight out of the slots. Avoid touching the gold connectors on the bottom of the modules to prevent damage from static electricity or oil on your fingers.
If there are multiple RAM modules installed, remove them one at a time by repeating the process for each module. Place the removed modules in a safe and clean location to avoid any damage or static electricity transfer.
Inspect the RAM slots after removing the modules. Ensure that there is no dust or debris present. If needed, use compressed air or gently blow on the slots to remove any obstructions.
If you are replacing all the existing RAM modules, set them aside for proper disposal or keep them as backups. Remember that they are no longer needed once you install the new RAM.
If you plan to keep some of the existing RAM modules, note their size, speed, and other specifications. This information can be useful when pairing them with the new modules or upgrading them in the future.
With the existing RAM modules removed, you are now ready to proceed with inserting the new RAM modules into the slots. The next section will guide you through this process to ensure a proper and secure installation.
Inserting the new RAM into the slots
With the existing RAM modules removed, it’s time to insert the new RAM modules into the slots. Follow these steps to ensure a proper and secure installation:
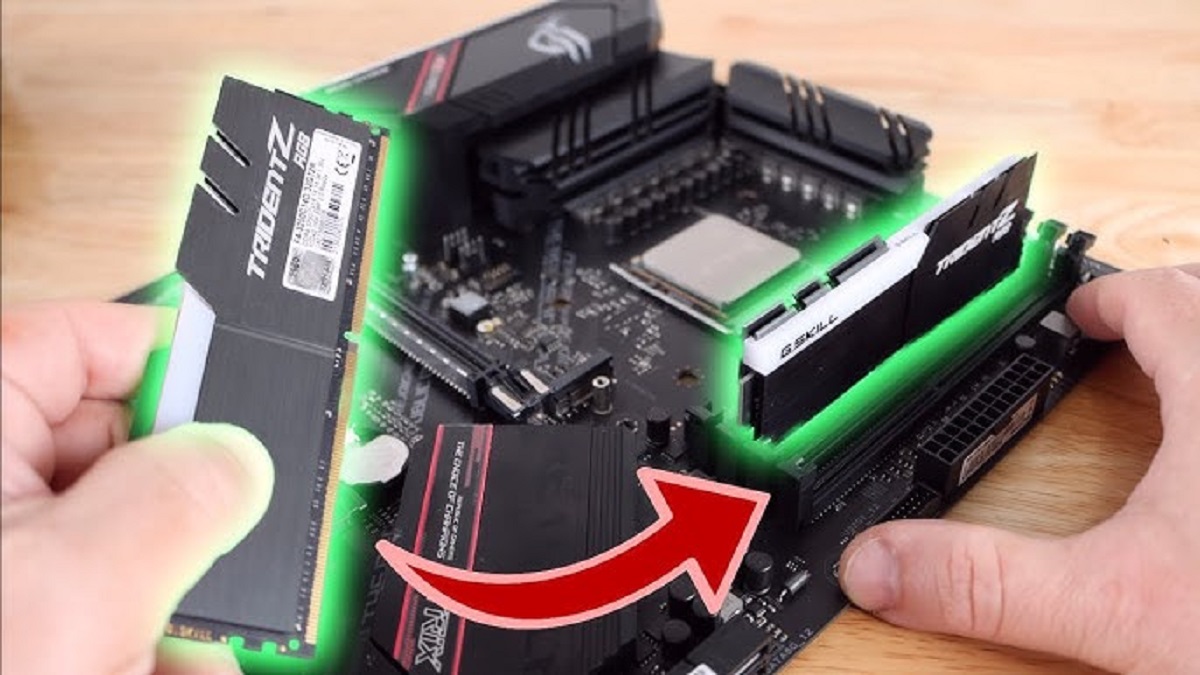
Start by positioning the new RAM module(s) above the RAM slots, aligning the notch on the connector edge of the module with the key in the slot. This ensures that the module can only be inserted in the correct orientation.
Gently lower the RAM module into the slot, making sure that it is perfectly aligned. Apply even pressure on both ends of the module, using your thumbs, until you feel and hear a click. This indicates that the module is properly inserted and the retention clips have securely closed.
Repeat the process for each new RAM module you are installing, if you have multiple modules. For optimal performance, try to install RAM modules in pairs or follow the recommendations provided by your motherboard manufacturer.
Take a moment to visually check that the modules are inserted evenly and securely. Ensure that the retention clips on the sides of the slots are completely closed and holding the modules in place.
Verify that the new RAM modules are fully seated in the slots by giving them a gentle wiggle. They should not move or come out easily if properly installed.
If you are installing RAM modules of different capacities or speeds, make sure to consult your motherboard’s documentation or manufacturer’s recommendations for the optimal placement and configuration of the modules.
Now that the new RAM modules are securely inserted into the slots, you can proceed to the next step of securing the RAM in place to ensure stability during usage. The following section will guide you through this process.
Securing the RAM in place
After inserting the new RAM modules into the slots, it’s important to properly secure them to ensure stability and prevent any accidental dislodging during use. Follow these steps to secure the RAM in place:
Locate the retention clips on the sides of the RAM slots. These clips should have closed automatically when you inserted the RAM modules. However, it’s a good practice to double-check and make sure they are firmly closed.
If the retention clips are not fully closed, use your fingers to push them inward until you hear a click. This ensures that the clips have engaged with the RAM modules and are holding them securely in place.
If you have installed multiple RAM modules, ensure that all the clips are closed and that each module is properly secured. This step is crucial for maintaining stability and preventing any movement or dislodging of the RAM modules while in use.
Gently press down on the top of each RAM module to confirm that it is secure. The modules should not move or wiggle if properly installed and secured by the retention clips.
If any of the RAM modules are not securely locked in place, remove them carefully by opening the retention clips and reinsert them correctly. Be cautious not to apply too much force or bend the modules.
Double-check the orientation and alignment of each RAM module to ensure proper installation. The notch on the connector edge should align with the key in the slot.
Now that the RAM modules are securely in place, you can proceed to the next step – closing your computer and preparing to turn it on. By following these steps to secure the RAM, you can be confident that your new modules are properly installed and ready to enhance your gaming experience.
Closing your computer and turning it on
With the RAM properly installed and secured, it’s time to close your computer and prepare to turn it on. Follow these steps to ensure a safe and successful completion of the RAM installation:
Begin by carefully placing the side panel back onto your computer case. Align the panel with the edges of the case and slide it into place. If necessary, screw in any screws or secure any latches to hold the panel firmly in position.
Take a moment to double-check that all internal components, including the RAM modules, are securely seated and not obstructed by any cables or obstructions. Make sure that the panel is aligned properly and there are no gaps or misalignments.
Tighten any screws, if applicable, to secure the side panel properly. However, be careful not to overtighten them as it may cause damage to the case or components.
Once the side panel is securely in place, connect your computer to the power source. Plug in the power cable and ensure it is properly inserted into the power socket. Avoid using excessive force when connecting the cable to prevent any damage.
Before turning on your computer, take a moment to verify that all external connections, such as peripherals and cables, are properly connected, including the monitor, keyboard, mouse, and any other devices you use.
Now, with your computer fully connected and the RAM installation complete, press the power button to turn on your computer. Observe the startup process to ensure that the computer boots up normally.
If the computer turns on without any issues and you are greeted with the typical startup screen or desktop, it indicates that the RAM installation was successful. You can proceed to check if your computer recognizes the new RAM modules. To do this, you can use various system information tools or access the BIOS/UEFI settings specifically designed to display the amount of installed RAM.
If the computer does not turn on or you encounter any error messages or unusual behavior, double-check the installation of the RAM modules. Ensure they are properly seated and secured in the slots. If necessary, consult the user manual or seek professional assistance for troubleshooting.
Now that your computer is up and running with the new RAM modules installed, you can enjoy the benefits of increased memory capacity and improved gaming performance. Get ready to experience faster load times, reduced lag, and an overall smoother gaming experience with the upgraded RAM.
Remember to keep the installation documentation and details of the new RAM modules for future reference or upgrades. Regularly check for firmware updates or driver updates related to your motherboard and RAM modules to ensure optimal performance.
With your computer successfully turned on, it’s time to enjoy your favorite games with the upgraded RAM. So get ready to level up and immerse yourself in the enhanced gaming experience!
Verifying the RAM installation
After installing the new RAM modules, it’s crucial to verify that the installation was successful and that your computer recognizes the additional memory. Follow these steps to ensure that the RAM installation is properly recognized:
Start by accessing your computer’s system information or diagnostic tools to check the amount of installed RAM. You can use built-in tools like Task Manager (Windows) or Activity Monitor (Mac) to view your system’s memory usage and verify the installed RAM capacity.
If you are using a Windows operating system, press Ctrl + Shift + Esc to open Task Manager. In the “Performance” tab, you will find information about the total physical memory (RAM) installed.
For Mac users, open the “Applications” folder, go to “Utilities,” and launch “Activity Monitor.” In the “Memory” tab, you can view the “Physical Memory” section to see the installed RAM capacity.
Verify that the total physical memory matches the expected capacity of the new RAM modules. For example, if you installed two 8GB RAM modules, the total physical memory should reflect a capacity of 16GB.
If the installed RAM is not showing the expected capacity or if you encounter any discrepancies, it may indicate a potential issue with the installation. Double-check the connections of the RAM modules, making sure they are securely inserted in the slots and properly seated. Also, ensure that the RAM modules are compatible with your motherboard and that they meet the required specifications.
In some cases, the computer might not recognize the new RAM immediately, particularly if it’s your first boot after installation. Restarting the computer can often resolve this issue, as it allows the system to recognize and configure the newly installed RAM properly.
Alternatively, accessing the BIOS or UEFI settings can provide more detailed information about the installed RAM. To access the BIOS/UEFI settings, restart your computer and look for the key to press during startup. Common keys include Del, F2, F10, or Esc, depending on your motherboard manufacturer. Once inside the BIOS/UEFI settings, navigate to the memory or system information section to view the installed RAM capacity.
If both the system information tools and the BIOS/UEFI settings indicate the correct amount of installed RAM, it confirms that the installation was successful, and your computer is recognizing the new RAM modules.
Congratulations! With the verified RAM installation, you can now enjoy the improved gaming performance and smoother overall system operation that the upgraded RAM provides.
Should you encounter any issues or discrepancies during the verification process, double-check the installation steps, consult the documentation provided with your RAM modules or motherboard, or seek professional assistance if needed.
Now that you have confirmed the successful RAM installation, you can fully embrace the increased memory capacity and enjoy a more efficient and responsive gaming experience on your computer.
Troubleshooting common issues
While installing RAM is usually a straightforward process, occasionally, you may encounter issues that require troubleshooting. By understanding and addressing common problems, you can ensure a successful RAM installation. Here are some common issues and troubleshooting steps:
1. Computer not turning on: If your computer fails to turn on after installing the new RAM, double-check the connections and ensure that the RAM modules are securely seated in the slots. Verify that the power supply is properly connected and functioning. If the problem persists, consult a professional for further assistance.
2. System instability or crashes: If you experience frequent system crashes, freezes, or instability after installing the new RAM, it could indicate compatibility issues. Ensure that the RAM modules you installed are compatible with your motherboard. Consider updating your motherboard’s BIOS/UEFI firmware to the latest version. If the problem persists, try reinstalling the previous RAM modules to determine if the issues are related to the new RAM.
3. Incorrectly recognized RAM: If your computer is not recognizing the full capacity of the newly installed RAM, verify that the modules are properly seated in the slots and compatible with your motherboard. Ensure that the BIOS/UEFI settings are up to date and configured correctly to support the new RAM capacity. If necessary, consult your motherboard’s documentation or manufacturer for specific guidance.
4. RAM modules not working in dual-channel mode: If you installed RAM modules in pairs to take advantage of dual-channel mode and they are not operating in this mode, ensure that the modules are inserted into the correct slots specified by your motherboard’s manual. Verify that the modules are identical in terms of capacity, speed, and specifications. If the issue persists, consult your motherboard’s documentation or seek professional assistance.
5. RAM incompatibility with other components: Some RAM modules may have compatibility issues with certain motherboards, CPUs, or other hardware components. Before purchasing RAM, ensure compatibility by consulting your motherboard’s compatibility list or testing with a known working RAM module. If compatibility issues arise, consider returning or replacing the RAM with modules that are compatible with your system.
6. Overheating: The addition of new RAM modules may affect the system’s temperature, especially if the modules generate more heat than the previous ones. Ensure proper airflow within the computer case by checking the placement of fans and removing any dust or obstructions. Consider installing additional cooling solutions, such as fans or a CPU cooler, if needed.
Should any issues persist or if you experience more complex problems during or after the RAM installation, it’s advisable to consult the user manual or contact the technical support of your computer or motherboard manufacturer. They can provide specific guidance and troubleshooting steps based on your system’s configuration.
By addressing common issues and following proper troubleshooting steps, you can successfully resolve any problems that may arise during or after the RAM installation process. This will ensure smooth operation and optimal performance for your computer system.
Conclusion
Congratulations on successfully upgrading your computer’s RAM! By adding more RAM, you have unlocked the potential for improved gaming performance, faster load times, reduced lag, and enhanced multitasking capabilities.
In this article, we explored the importance of RAM in gaming and the steps to put more RAM into a game. We began by discussing the role of RAM in facilitating faster data access and retrieval, as well as its significance in supporting multitasking capabilities.
We then delved into the process of checking your system requirements to determine if a RAM upgrade is necessary. By considering the recommended and minimum system requirements of the games you intend to play, you can ensure that your computer can handle additional RAM and that it will bring noticeable improvements to your gaming experience.
We then proceeded to determine the type of RAM needed by examining the compatibility of RAM types with your particular motherboard. This step ensures a successful installation and optimal performance.
Purchasing the right amount of RAM involved considering your system requirements, gaming needs, and budget limitations. We discussed the recommended capacities and emphasized the importance of finding a balance between your needs and financial constraints.
Preparing your computer for RAM installation required grounding yourself, discharging any static electricity, and accessing the internal components by removing the side panel of your computer case.
Locating the RAM slots and removing the existing RAM modules (if applicable) were important steps in the installation process. By following the proper procedures, you ensured a successful transition to the upgraded RAM.
Inserting the new RAM modules and securing them in place provided stability and a secure connection. By aligning the modules correctly and closing the retention clips, you guaranteed their proper functioning.
Closing your computer, turning it on, and verifying the RAM installation were essential steps to finalize the process. By properly closing the computer case, connecting the power supply, and ensuring the RAM was recognized by your system, you confirmed the success of the installation.
If any issues arose during or after the RAM installation, we provided troubleshooting guidance to help you address common problems. By following the troubleshooting steps or seeking professional assistance, you can overcome any challenges and enjoy the benefits of your upgraded RAM.
In conclusion, by following the steps outlined in this article, you have successfully added more RAM to your computer and set the stage for an enhanced gaming experience. The increased memory capacity will allow your system to run demanding games more smoothly and handle resource-intensive tasks with ease.
Enjoy the improved performance, faster load times, reduced lag, and enhanced multitasking capabilities that the upgraded RAM brings. Now, it’s time to dive into your favorite games and experience the new level of gaming enjoyment that your upgraded RAM provides!