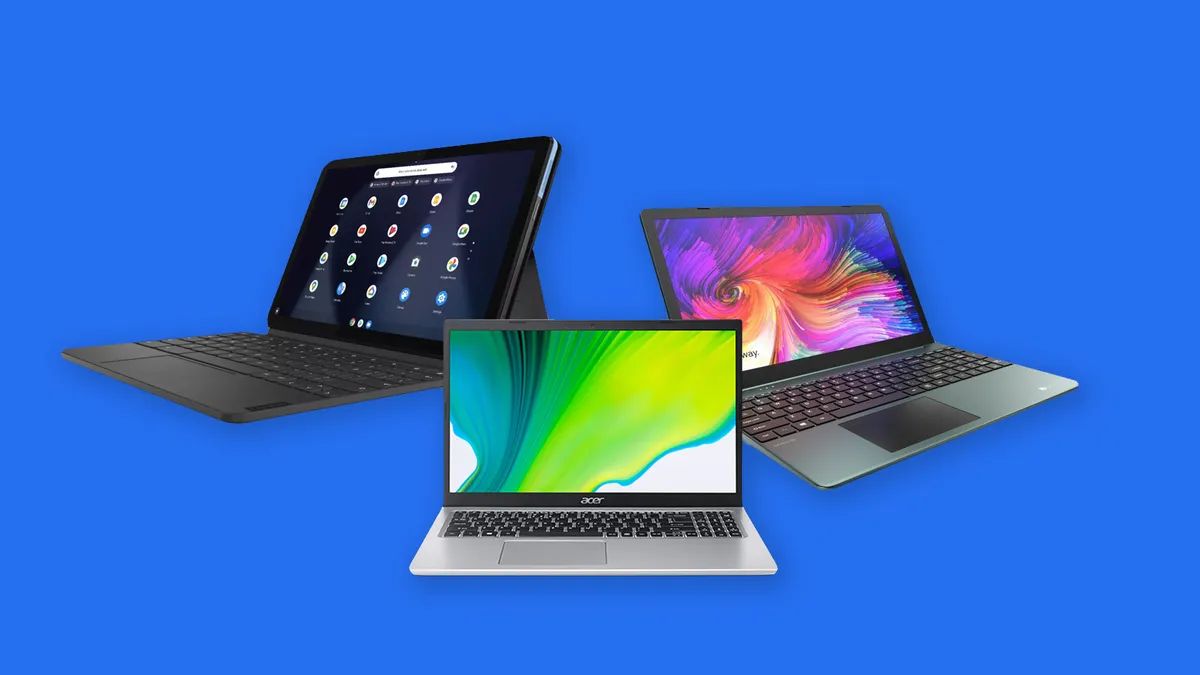
Requirements
To turn your normal laptop into a gaming laptop, you need to meet certain requirements. While it is true that gaming laptops are designed with powerful hardware specifically for gaming purposes, you can still enhance the performance of your regular laptop to enjoy a decent gaming experience. Here are the essential requirements you need to consider:
- Processor: A fast and capable processor is crucial for gaming. Look for laptops with a quad-core or higher processor, preferably from Intel or AMD.
- RAM: More RAM means better multitasking and smoother gaming performance. Aim for at least 8GB, but 16GB or more is recommended for optimal gaming.
- Graphics Card: The graphics card determines how well your laptop can handle graphical demands. Look for a dedicated graphics card with its own VRAM for better gaming performance.
- Storage: While not essential for gaming performance, having ample storage is important for installing games and storing game files. Consider getting a laptop with a larger hard drive or an SSD for faster load times.
- Display: A high-quality display with good resolution and refresh rate will greatly enhance your gaming experience. Look for laptops with at least a Full HD (1920×1080) resolution and a refresh rate of 60Hz or higher.
- Battery Life: Gaming can be power-intensive, so it’s important to have a laptop with decent battery life or the ability to remain plugged in during intense gaming sessions.
- Portability: If you plan on gaming on the go, consider a laptop that is lightweight and portable for easy transportation.
Keep in mind that modifying your existing laptop to meet these requirements may not be possible or cost-effective in some cases. It’s often more practical to invest in a purpose-built gaming laptop if you’re serious about gaming. However, if you’re on a budget or want to get the most out of your current laptop, the following sections will guide you through the necessary steps to upgrade its components for gaming performance.
Choosing the Right Components
When it comes to upgrading your laptop for gaming, choosing the right components is crucial for achieving the desired performance. While you may not have as many options as with a desktop PC, there are still key components that you can upgrade to enhance gaming capability. Here are some considerations for choosing the right components:
- Processor: Look for a CPU (Central Processing Unit) with a higher clock speed and multiple cores. Intel Core i5 or i7 processors are popular choices for gaming laptops.
- RAM: Consider upgrading to higher capacity RAM modules, such as 16GB or even 32GB, depending on your budget and requirements.
- Graphics Card: If your laptop has a dedicated graphics card, check if it can be upgraded. Look for a higher-end model with better performance to handle demanding games.
- Storage: Consider replacing your traditional hard drive with a solid-state drive (SSD) for faster boot times and improved game loading speeds.
- Display: While not a component that can be easily upgraded, ensure your laptop has a high-quality display with good resolution and a high refresh rate for an immersive gaming experience.
- Cooling System: Enhance the cooling capabilities of your laptop by investing in a laptop cooling pad or external cooling fans. This will help prevent overheating during intense gaming sessions.
It’s important to check compatibility and consult with experts or laptop manufacturers to ensure that the components you choose are compatible with your specific laptop model. Some laptops may have limited upgrade options or require specific components, so thorough research is necessary.
While upgrading your laptop’s components can significantly improve gaming performance, it’s important to consider the overall cost of the upgrades. In some cases, it may be more cost-effective to invest in a new gaming laptop instead of upgrading individual components. However, if you’re on a budget or prefer the challenge of upgrading your current laptop, the following sections will guide you through the process of upgrading various components to transform your laptop into a capable gaming machine.
Upgrading Your Processor
The processor, also known as the central processing unit (CPU), is the brain of your laptop. Upgrading your processor can significantly improve gaming performance by providing faster and more efficient processing power. However, it’s important to note that not all laptops have upgradable processors. Before proceeding with any upgrades, check if your laptop’s processor is soldered onto the motherboard or if it can be easily replaced.
If your laptop does have an upgradable processor, here are the steps to follow:
- Research compatibility: Find out which processors are compatible with your laptop model. Check the specifications of your laptop or visit the manufacturer’s website to see the supported processors.
- Choose a suitable processor: Look for a processor with higher clock speed, more cores, and a newer generation for improved gaming performance. A faster processor will handle game calculations and tasks more efficiently.
- Obtain the new processor: Once you’ve identified the compatible processor, purchase it from a reputable source. Make sure the processor is new and comes with a warranty.
- Prepare for installation: Shut down your laptop and disconnect all power sources. You’ll need to remove the bottom panel and potentially other components to access the processor socket.
- Remove the old processor: Gently lift the retention lever on the socket and carefully remove the old processor. Avoid touching the pins or the underside of the new processor, as this can damage them.
- Install the new processor: Align the golden triangle on the corner of the new processor with the triangle on the socket. Carefully place the processor into the socket, ensuring it sits flat and snug. Press down gently and lower the retention lever to secure it in place.
- Reassemble and test: Put back any removed components, close the laptop, and reconnect the power sources. Power on your laptop and check if the new processor is working properly. You may need to update your laptop’s BIOS or drivers to ensure compatibility with the new processor.
It’s worth noting that upgrading your laptop’s processor may require advanced technical skills and can void your warranty. If you’re uncertain or uncomfortable with the process, consider consulting a professional technician for assistance.
Upgrading your laptop’s processor can significantly enhance gaming performance, allowing for smoother gameplay and improved response times. Combined with other upgrades like RAM and a dedicated graphics card, a new processor can transform your normal laptop into a capable gaming machine.
Adding More RAM
One of the most effective ways to boost your laptop’s gaming performance is by adding more RAM (Random Access Memory). RAM is responsible for storing and accessing data that the processor needs to perform tasks. Upgrading your laptop’s RAM can result in smoother multitasking, faster loading times, and improved overall system responsiveness.
Here’s a step-by-step guide on how to add more RAM to your laptop:
- Check the RAM capacity and type: Determine the maximum amount of RAM your laptop supports and the type of RAM it uses (e.g., DDR3, DDR4). Refer to your laptop’s manual or search online for the specifications.
- Purchase the compatible RAM: Once you know the RAM capacity and type, buy the appropriate RAM module from a reputable manufacturer. Make sure to match the speed and type of your existing RAM if you’re not replacing it entirely.
- Prepare for installation: Shut down your laptop, unplug all cables, and remove the battery (if removable). Use proper grounding techniques to avoid static electricity discharge that can damage components. You may also need to remove the bottom panel or access hatch to reach the RAM slots.
- Locate the RAM slots: Identify the RAM slots on the motherboard. The number and position of the slots can vary depending on the laptop model. Typically, laptops have 1-2 slots, but some high-end models may have more.
- Install the new RAM module: If you have an empty RAM slot, simply insert the new RAM module into the open slot at a 45-degree angle and gently press it down until it clicks into place. If you’re replacing existing RAM, carefully remove the old module by pulling the side clips away from the module and lifting it out.
- Test and verify: Close the laptop, reconnect the power sources, and power it on. Check the system information or use diagnostic software to ensure that the additional RAM is detected and functioning at the expected capacity.
Adding more RAM can significantly improve gaming performance by allowing your laptop to store and retrieve more data quickly. This allows for smoother gameplay, faster loading times, and better multitasking capabilities. However, keep in mind that upgrading RAM alone may not have as substantial an impact on gaming performance as upgrading other components like the processor or graphics card. It is best to combine RAM upgrades with other hardware enhancements for the best gaming experience.
Upgrading Your Graphics Card
One of the key components for gaming performance is the graphics card, also known as the GPU (Graphics Processing Unit). Upgrading your laptop’s graphics card can have a significant impact on gaming visuals, frame rates, and overall gaming experience. However, it’s important to note that not all laptops have upgradable graphics cards. Many laptops have integrated graphics that are built into the motherboard and cannot be replaced. Before attempting to upgrade your graphics card, ensure that your laptop has a dedicated graphics card that can be upgraded.
If your laptop does have an upgradable graphics card, follow these steps to upgrade it:
- Research compatibility: Determine the compatibility of your laptop with different graphics cards. Check the manufacturer’s website for a list of supported graphics card models or consult with professionals to find out what options are available for your laptop.
- Choose the right graphics card: Look for a graphics card that offers better performance and fits within your budget. Consider factors such as VRAM (Video Random Access Memory), core clock speed, and CUDA cores, depending on your gaming requirements.
- Purchase the graphics card: Once you’ve chosen the graphics card, purchase it from a reputable source. Ensure it comes with the necessary accessories and that it is compatible with your laptop model.
- Prepare for installation: Shut down your laptop and disconnect all power sources. Remove the bottom panel or access hatch to expose the motherboard and the graphics card slot.
- Remove the old graphics card: Carefully remove the old graphics card by unscrewing any screws or releasing any clips that hold it in place. Gently rock the card back and forth to disconnect it from the PCIe slot. Lift it out once it is fully detached.
- Install the new graphics card: Align the new graphics card with the PCIe slot and gently insert it. Apply even pressure until it is fully seated and the retention mechanism clicks into place. Secure it with screws or clips if necessary.
- Reassemble and test: Put back any removed components, close the laptop, and reconnect the power sources. Power on your laptop and install the appropriate drivers for the new graphics card. Test it by running some demanding games or benchmarking software to ensure it is functioning as expected.
Upgrading your laptop’s graphics card can provide a remarkable boost in gaming performance, allowing for higher resolutions, smoother frame rates, and overall better visual quality. However, it’s important to note that graphics card upgrades may not be feasible for all laptops, especially those with integrated graphics. If your laptop does not support graphics card upgrades, you may need to consider other options, such as using an external graphics card enclosure or investing in a new gaming laptop.
Installing a Solid State Drive (SSD)
Upgrading your laptop’s storage by installing a Solid State Drive (SSD) is an excellent way to enhance gaming performance. Unlike traditional hard drives, SSDs have no moving parts, resulting in faster data access times, quicker boot-up speeds, and improved overall system responsiveness. Here’s a step-by-step guide on how to install an SSD in your laptop:
- Choose the right SSD: Determine the capacity and form factor of the SSD that suits your needs. Consider factors such as storage requirements, budget, and the physical dimensions supported by your laptop.
- Back up your data: Before proceeding with the installation, it’s crucial to back up all your important data from your current storage drive. You can use an external hard drive or cloud storage services to create a backup.
- Prepare for installation: Shut down your laptop, unplug all cables, and remove the battery (if removable). Use proper grounding techniques to avoid static electricity discharge that can damage components. Locate the access panel or bottom cover to access the storage drive bay.
- Remove the old storage drive: Unscrew any screws or release any clips that secure the existing storage drive in place. Gently disconnect the cables or connectors from the drive. Carefully remove the drive from its slot.
- Install the new SSD: Align the new SSD in the drive bay slot properly. Insert the drive at a slight angle and push it into the slot until it is firmly connected. Attach any required screws or secure it with clips to ensure it stays in place.
- Connect the cables: Attach the necessary cables or connectors from the laptop to the new SSD. Follow the markings or instructions provided to ensure proper connection.
- Secure and close the laptop: Put back any removed components, close the laptop, and reconnect the power sources. Make sure everything is securely in place and that there are no loose connections.
- Install the operating system: Boot up your laptop and install the operating system onto the new SSD. Follow the prompts and instructions provided by the operating system installation process.
- Restore your data: Once the operating system is installed, you can restore your previously backed up data onto the new SSD. This will help ensure your files, applications, and settings are transferred to the new drive.
Installing an SSD in your laptop can significantly improve gaming performance by reducing loading times and providing faster data access. The increased speed and responsiveness will enhance the overall gaming experience, allowing for smoother gameplay and quicker launches of games and applications.
Before purchasing an SSD, it’s important to research and ensure compatibility with your laptop model. Some older laptops may have limited support for larger capacity SSDs or specific form factors. Additionally, consider the required storage capacity based on your gaming needs, as SSDs are available in various sizes ranging from a few hundred gigabytes to multiple terabytes.
Cooling Solutions
Keeping your laptop cool is essential for optimal performance, especially during intense gaming sessions that can generate a significant amount of heat. Overheating can cause thermal throttling, which reduces the performance of your laptop’s components and can lead to system instability. Implementing effective cooling solutions can help maintain lower temperatures and ensure your laptop performs at its best. Here are some cooling solutions to consider:
- Laptop Cooling Pads: These are external pads that you place underneath your laptop to provide additional cooling. Cooling pads typically have built-in fans that help dissipate heat and improve airflow around the laptop.
- External Cooling Fans: Similar to laptop cooling pads, external cooling fans can be placed next to or directed towards your laptop to provide additional airflow. These fans come in various sizes and designs, offering targeted cooling for specific areas of the laptop.
- Clean the Ventilation System: Over time, dust and debris can accumulate in your laptop’s ventilation system, obstructing airflow and reducing cooling efficiency. Regularly clean the vents and fans to ensure maximum airflow and prevent heat buildup.
- Elevate Your Laptop: Using a laptop stand or propping up your laptop on a solid surface, such as a book or stand, can improve airflow by allowing air to circulate more freely around the device. Elevating the laptop also helps dissipate heat more effectively.
- Undervolting: Undervolting is the process of reducing the voltage supplied to the laptop’s CPU, which can help lower power consumption and subsequently reduce heat generation. This process typically requires adjusting the settings in your laptop’s BIOS or using specialized software.
- Optimal Room Temperature: Ensure that you are gaming in a cool and well-ventilated environment. Avoid gaming in excessively hot or humid rooms, as this can contribute to higher laptop temperatures.
- Manage Background Processes: Close any unnecessary applications or processes running in the background, as they can consume CPU and RAM resources, leading to increased heat generation. This will help lighten the workload on your laptop’s components and reduce heat output.
Implementing cooling solutions can significantly improve the overall performance and lifespan of your gaming laptop. By maintaining lower temperatures, you’ll experience smoother gameplay, reduced system crashes, and a more comfortable gaming experience. It’s important to note that while cooling solutions can help manage heat, they may not completely eliminate thermal issues if significant hardware limitations exist or if your laptop’s cooling system is inadequate. In such cases, it may be beneficial to consult a professional technician or consider upgrading your laptop’s cooling components.
Updating Drivers and Software
To ensure optimal performance and compatibility, it’s essential to regularly update the drivers and software on your gaming laptop. Drivers act as a bridge between your hardware and operating system, while software updates often include bug fixes, performance enhancements, and new features. Here’s why keeping your drivers and software up to date is crucial for gaming:
Performance Optimization: Driver updates from manufacturers, such as graphics card and audio drivers, can provide performance optimizations specifically designed for gaming. These updates often include bug fixes and improvements that enhance the compatibility and stability of your gaming experience.
Better Compatibility: Software updates, particularly for gaming platforms like Steam, Origin, or Epic Games, are crucial for maintaining compatibility with the latest games and features. Game developers often release updates or patches to fix issues and provide smoother gameplay on various hardware configurations.
Security Enhancements: Keeping your drivers and software up to date helps protect your laptop from potential security vulnerabilities. These updates often address and patch known security flaws, preventing hackers or malware from exploiting them.
Feature Enhancements: Many driver and software updates introduce new features and functionalities that can enhance your gaming experience. These updates can include improved graphics settings, advanced audio options, and additional customization possibilities.
To update your drivers and software, follow these steps:
- Graphics Card Drivers: Visit the official website of your graphics card manufacturer (NVIDIA, AMD, Intel) and look for the driver download section. Locate your graphics card model and download the latest driver for your operating system. Follow the installation instructions provided.
- Audio Drivers: Check the support page of your laptop manufacturer’s website for the latest audio driver updates. Download and install the appropriate audio drivers for your specific laptop model.
- Gaming Platform Updates: Launch your gaming platforms, such as Steam or Origin, and navigate to the settings or options menu. Look for the update or check for updates option. Follow the prompts to update the platform to the latest version.
- System Updates: Regularly check for operating system updates, such as Windows updates for Windows users or macOS updates for Mac users. These updates often include driver updates for various hardware components and can provide overall system stability and security enhancements.
- Game Updates: Launch your installed games and check for available updates within the game menus or through the gaming platform. Download and install any updates or patches released by the game developers.
By keeping your drivers and software up to date, you can ensure that your gaming laptop is running at peak performance, with improved compatibility, enhanced security, and access to the latest features and optimizations. Remember to check for updates regularly and enable automatic updates whenever possible to streamline the process and stay up to date effortlessly.
Optimizing Your Laptop’s Performance
To get the best gaming experience on your laptop, it’s essential to optimize its performance. By fine-tuning settings and making some adjustments, you can enhance the overall performance and ensure smoother gameplay. Here are some tips to help you optimize your laptop for gaming:
- Close unnecessary applications: Before launching a game, close any unnecessary background applications and processes to free up system resources. This can help reduce CPU and RAM usage, allowing your laptop to allocate more power to the game.
- Disable resource-hungry software: Disable or exit any resource-intensive software such as antivirus scans, system backups, or other software that may consume significant system resources while gaming.
- Adjust power settings: Navigate to your laptop’s power settings and select a mode that prioritizes performance over energy saving. This can ensure that your laptop is running at maximum capacity during gaming sessions.
- Optimize in-game settings: Adjust the graphical settings within each game to find the right balance between visual quality and performance. Lowering settings such as resolution, shadows, or anti-aliasing can help improve frame rates and reduce strain on the graphics card.
- Update the BIOS: Check for BIOS updates on your laptop manufacturer’s website. Updating the BIOS can bring improvements, bug fixes, and optimizations that can enhance overall system performance.
- Manage storage space: Ensure you have sufficient free space on your laptop’s storage drive. Delete unnecessary files, uninstall unused programs, and move files to an external storage device to maintain adequate storage space for optimal performance.
- Defragment, optimize, or trim your storage drive: Depending on the type of storage drive you have (HDD or SSD), perform the appropriate maintenance procedures to optimize and improve read/write speeds.
- Keep drivers up to date: Regularly update your graphics card drivers, audio drivers, and other essential drivers to ensure compatibility, stability, and access to performance optimizations provided by manufacturers.
- Keep your laptop clean: Dust and debris can accumulate in your laptop’s cooling system, hindering proper heat dissipation and potentially causing performance issues. Regularly clean the vents, fans, and cooling components to prevent overheating.
- Optimize network settings: If you play online games, optimize your network settings for better performance. Ensure you have a stable and fast internet connection, close bandwidth-consuming applications, and consider using an Ethernet connection for lower latency.
By implementing these optimization techniques, you can maximize your laptop’s potential for gaming. It’s important to remember that every laptop is different, and not all optimization tips may be applicable or provide significant improvements to your specific laptop model. Experiment with the settings, monitor performance, and find the right balance that suits your needs and preferences.
Overclocking Your Laptop’s Components
Overclocking is a method of increasing the performance of your laptop’s components, such as the CPU and GPU, by running them at higher speeds than the default settings. This can result in improved gaming performance and faster processing times. However, it’s essential to approach overclocking with caution, as it can potentially void warranties and cause instability or overheating if not done correctly. Here’s a brief guide on how to overclock your laptop’s components:
1. Research and understand your laptop’s limitations: Before attempting any overclocking, research your laptop’s limitations to determine if it supports overclocking and to what extent. Some laptops have locked BIOS settings or limited cooling capabilities, which may hinder your ability to overclock effectively.
2. Use overclocking software: Find and install reliable overclocking software specifically designed for your laptop’s components. These software utilities enable you to adjust clock speeds, voltages, and fan speeds in a controlled and monitored manner.
3. Monitor temperatures: Keep a close eye on your laptop’s temperatures during the overclocking process. Higher clock speeds can generate more heat, potentially leading to overheating. Use software tools to monitor temperatures and ensure they stay within safe limits.
4. Start with small and gradual adjustments: Begin by making small adjustments to the clock speeds and voltages. Increase the clock speeds incrementally and test stability after each adjustment. Run stress tests, such as Prime95 or FurMark, to ensure that your laptop remains stable under heavy loads.
5. Watch for stability issues: If your laptop experiences crashes, freezes, or instability after overclocking, it’s an indication that the settings need adjustment. Reduce the clock speeds or increase the voltage slightly until stability is achieved.
6. Test and benchmark: After achieving a stable overclock, test your laptop’s performance in real-world scenarios and benchmark it using reputable benchmarking software. Monitor frame rates, loading times, and overall system responsiveness to evaluate the effectiveness of your overclocking efforts.
7. Maintain proper cooling: Overclocking generates additional heat, so ensuring proper cooling is crucial. Use laptop cooling pads, invest in laptop cooling systems, or adjust fan speeds to keep temperatures in check and prevent overheating.
It’s important to note that overclocking puts additional stress on your laptop’s components, which can reduce their lifespan. Moreover, it can void warranties, so proceed at your own risk and only if you’re comfortable with the process. If you’re uncertain or inexperienced, it’s advisable to seek guidance from professionals or overclocking enthusiasts.
Remember that every laptop is different, and the overclocking potential can vary. Some laptops may have more locked-down BIOS settings or limitations due to their thin and light design. Always exercise caution, monitor temperatures, and be prepared to revert to default settings if issues arise.
Summary
Transforming your normal laptop into a gaming laptop is possible with the right upgrades and optimizations. By considering the requirements, choosing the right components, upgrading the processor and RAM, installing a solid-state drive, upgrading the graphics card, and implementing cooling solutions, you can significantly enhance your laptop’s gaming performance. Additionally, updating drivers and software, optimizing performance settings, and possibly overclocking your laptop’s components can further boost its capabilities.
It is important to conduct thorough research and ensure compatibility before making any upgrades or modifications to your laptop. Not all laptops have the same upgrade options, and some modifications may void warranties or require professional assistance. Additionally, while upgrading your laptop can improve its gaming performance, it may not match the performance of dedicated gaming laptops.
Keep in mind that regular maintenance, such as cleaning the cooling system, managing storage space, and monitoring temperatures, is essential for long-term performance and stability. Additionally, optimizing in-game settings, adjusting power settings, and keeping drivers and software up to date are key for maximizing gaming performance on your laptop.
Ultimately, the goal is to strike a balance between upgrading your laptop and making optimizations while prioritizing your budget and specific gaming needs. Upgrading your laptop can extend its lifespan and improve gaming capabilities, but it is worth considering investing in a purpose-built gaming laptop if gaming is a top priority for you.
Remember to proceed with caution, follow manufacturer guidelines, and seek professional help if needed to ensure successful upgrades and modifications to your laptop. With the right choices and careful implementation, you can enjoy a fulfilling gaming experience on your transformed gaming laptop.