Introduction
Welcome to the world of Overwatch 2, the highly anticipated sequel to the popular team-based first-person shooter game developed by Blizzard Entertainment. Whether you’re a seasoned player or new to the franchise, this guide will walk you through the process of downloading and installing Overwatch 2 on your PC. With its engaging gameplay, stunning graphics, and diverse roster of heroes, Overwatch 2 offers an immersive gaming experience that will keep you hooked for hours on end.
Embark on thrilling missions, engage in intense team battles, and work together with your friends to overcome challenges in this action-packed sequel. Before diving into the world of Overwatch 2, let’s first ensure that your PC meets the minimum system requirements to guarantee a smooth and seamless gaming experience.
Please note that Overwatch 2 is currently available for PC only, so make sure you have a compatible PC before proceeding with the download and installation process. Now, let’s take a look at the system requirements for Overwatch 2!
System Requirements for Overwatch 2
Before you begin the download and installation process for Overwatch 2, it’s important to ensure that your PC meets the minimum system requirements. These requirements are necessary for the game to run smoothly and provide an optimal gaming experience. Below are the minimum and recommended system specifications for Overwatch 2:
- Minimum Requirements:
- OS: Windows 10 64-bit
- Processor: Intel Core i3 or AMD Phenom X3 8650
- Memory: 4GB RAM
- Graphics: Nvidia GeForce GTX 460 or ATI Radeon HD 4850
- Storage: 30GB available space
- Internet: Broadband internet connection
- Recommended Requirements:
- OS: Windows 10 64-bit
- Processor: Intel Core i5 or AMD Phenom II X3 or better
- Memory: 6GB RAM
- Graphics: Nvidia GeForce GTX 660 or ATI Radeon HD 7950 or better
- Storage: 30GB available space
- Internet: Broadband internet connection
Please note that these are just the minimum and recommended requirements, and for the best gaming experience, it is always recommended to aim for higher specifications. If your PC meets or exceeds these requirements, you’re all set to proceed with the Overwatch 2 download and installation process. Let’s continue with the next steps!
Step 1: Preparing Your PC for Download
Before you can start downloading Overwatch 2, it’s important to prepare your PC to ensure a smooth and hassle-free installation process. Follow these steps to get your PC ready:
- Check your internet connection: Ensure that you have a stable and reliable internet connection. A high-speed broadband connection is ideal to avoid any interruptions during the download process.
- Free up storage space: Overwatch 2 requires a significant amount of disk space. Make sure you have at least 30GB of free space on your hard drive to accommodate the game installation.
- Update your operating system: Ensure that your PC’s operating system is up to date. This will help improve compatibility and optimize performance during the download and installation process.
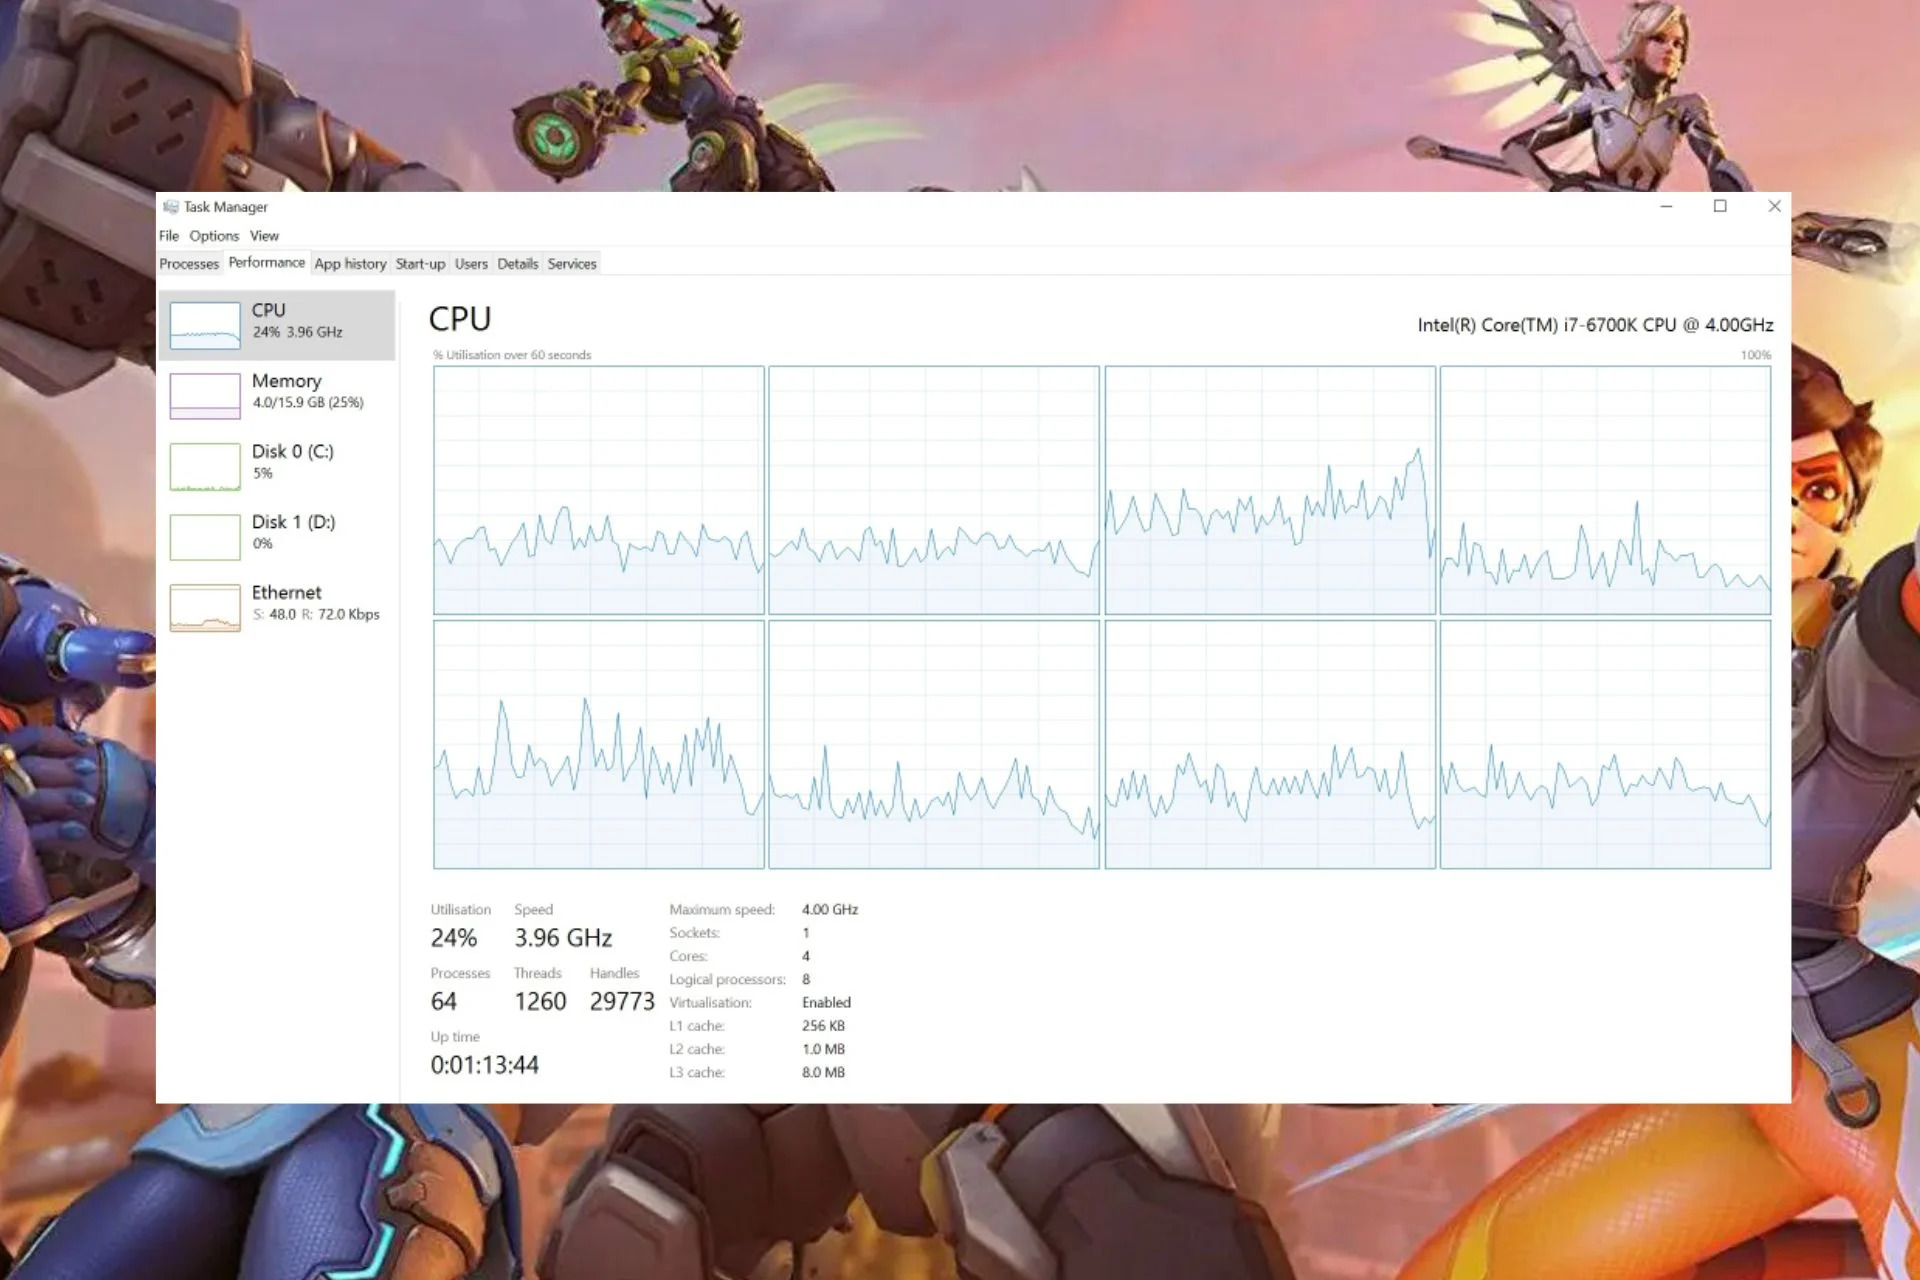
- Disable unnecessary background processes: Close any unnecessary programs or processes running in the background. This will free up system resources and ensure that Overwatch 2 receives maximum processing power for a smooth installation.
- Update your graphics drivers: It’s crucial to have the latest graphics drivers installed on your PC. Visit the website of your graphics card manufacturer and download the latest drivers suitable for your system.
- Scan your PC for malware and viruses: It’s always a good idea to run a full scan of your PC using reputable antivirus software. This will ensure that your system is free from any malicious programs that could interfere with the Overwatch 2 download process.
By following these steps, you can ensure that your PC is optimized for the Overwatch 2 download and installation. Once you have completed these preparations, you’re ready to move on to the next step, accessing the official Overwatch 2 website.
Step 2: Accessing the Official Overwatch 2 Website
To start the process of downloading Overwatch 2, you need to access the official Overwatch 2 website. Follow these steps to reach the website:
- Open your preferred web browser: Launch the web browser of your choice on your PC. Popular options include Google Chrome, Mozilla Firefox, and Microsoft Edge.
- Go to the official Overwatch 2 website: In the address bar of your web browser, type in the URL for the official Overwatch 2 website. You can easily find this by searching for “Overwatch 2 official website” in a search engine.
- Navigate to the Overwatch 2 section: Once you reach the official website, look for the section specific to Overwatch 2. This might be featured on the homepage or have its own dedicated page or tab.
- Explore the features and information: Take some time to explore the website and familiarize yourself with the features, gameplay, and any updates or news related to Overwatch 2. This will give you a better understanding of the game before proceeding with the download.
Once you have successfully accessed the official Overwatch 2 website and gathered the necessary information, you’re ready to move on to the next step: creating an Overwatch account. This account is essential for purchasing and downloading Overwatch 2, so let’s proceed to the next step!
Step 3: Creating an Overwatch Account
In order to purchase and download Overwatch 2, you will need to create an Overwatch account. Follow these steps to create your account:
- Click on the “Create Account” option: On the official Overwatch 2 website, look for the option to create a new account. This is usually located in the top right corner of the page.
- Provide your personal information: Fill out the required fields in the account creation form, including your email address, password, and any additional information requested. Ensure that you provide accurate and valid details.
- Verify your email: After submitting the account creation form, you will receive an email with a verification link. Click on the link to verify your email address and activate your Overwatch account.
- Choose a unique username: Once your email is verified, you will be prompted to choose a unique username for your Overwatch account. Select a username that reflects your personality and is not already in use by another player.
- Set up account security: As an extra layer of protection, it’s recommended to set up additional security measures for your account, such as adding a mobile authenticator or enabling two-factor authentication.
- Agree to the terms and conditions: Review the terms and conditions of the Overwatch 2 account and agree to them by checking the appropriate box. It’s important to familiarize yourself with the terms to ensure you comply with the rules and regulations of the game.
- Complete the account creation process: Once you have provided all the necessary information, click on the “Create Account” or similar button to finalize the account creation process.
Once your Overwatch account is created, you’re ready to move on to the next step: purchasing Overwatch 2. With your account in place, you’ll be able to access and download the game to start your thrilling adventures! Let’s proceed to the next step for more details.
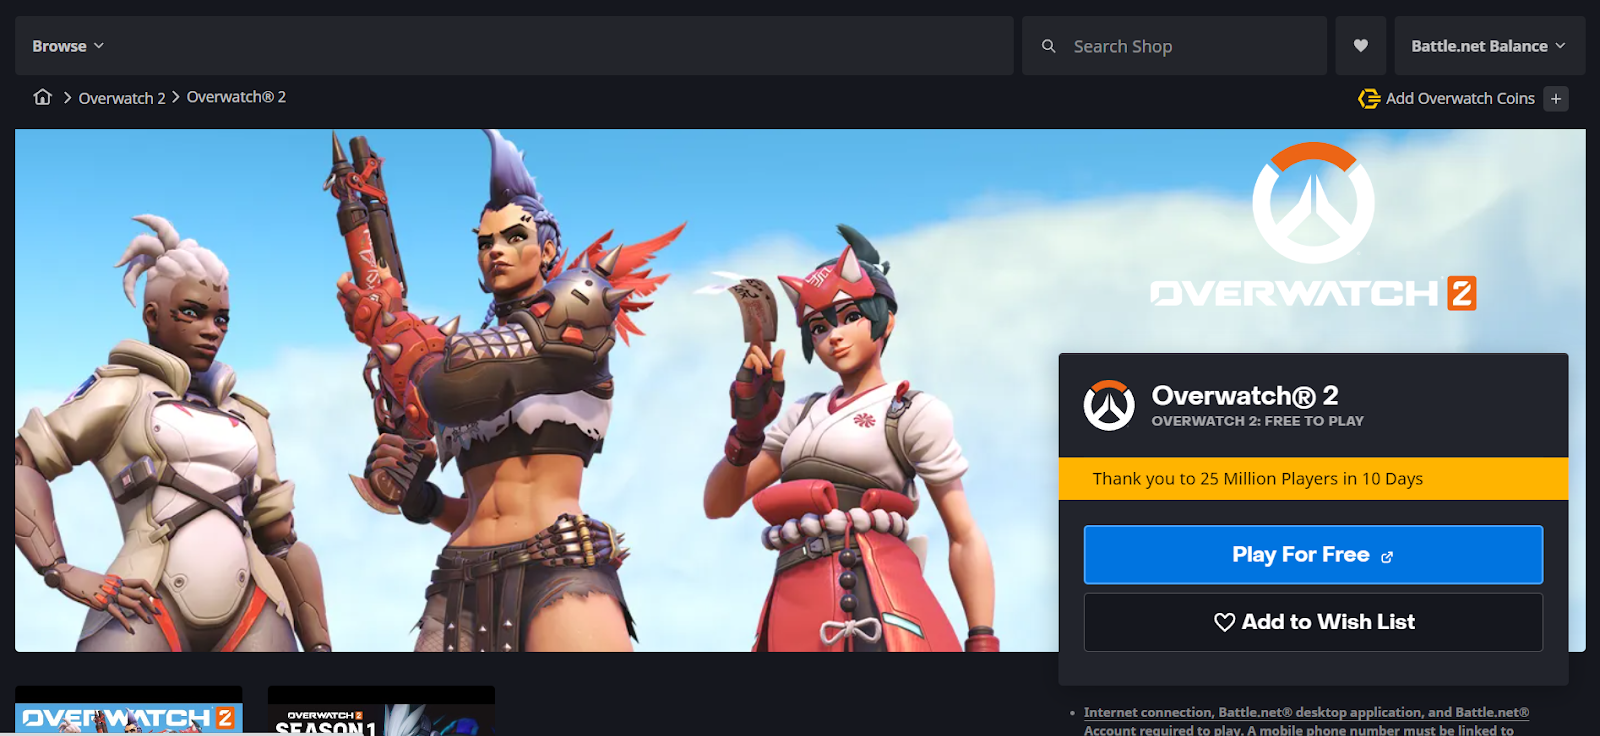
Step 4: Purchasing Overwatch 2
Now that you have created your Overwatch account, it’s time to purchase Overwatch 2. Follow these steps to complete your purchase:
- Visit the official Overwatch 2 website: Go back to the official Overwatch 2 website using your web browser.
- Log in to your Overwatch account: Click on the “Log In” or similar option and enter your account credentials to access your Overwatch account.
- Navigate to the purchase page: Look for the section or tab on the website that allows you to purchase Overwatch 2. This might be labeled as “Buy Now” or “Purchase Overwatch 2”.
- Select your edition: Choose the edition of Overwatch 2 that best suits your preferences and budget. There may be different editions available, each offering unique content and bonuses.
- Review the details: Take a moment to review the details of your selected edition, including the price, included content, and any additional bonuses or perks that may come with your purchase.
- Proceed to the checkout: Click on the “Proceed to Checkout” or similar button to proceed to the payment process.
- Enter your payment details: Enter your payment information, such as credit card details or PayPal account information, in the secure payment form. Ensure that you provide accurate and valid information.
- Complete the purchase: Once you have entered your payment details, review the information provided and click on the “Purchase” or similar button to complete your Overwatch 2 purchase.
After completing your purchase, you will receive a confirmation email with details about your Overwatch 2 edition and instructions on how to download the game. Keep an eye on your email inbox for this important information. Now that you have successfully purchased Overwatch 2, let’s move on to the next step: downloading the Overwatch 2 launcher.
Step 5: Downloading Overwatch 2 Launcher
After purchasing Overwatch 2, the next step is to download the Overwatch 2 launcher. The launcher is a dedicated application that allows you to manage and launch Overwatch 2 on your PC. Follow these steps to download the Overwatch 2 launcher:
- Check your email: After completing your purchase, check your email inbox for a message from Blizzard Entertainment. This email should contain instructions on how to download the Overwatch 2 launcher.
- Follow the download link: Click on the provided download link in the email to start downloading the Overwatch 2 launcher. The link will typically direct you to the official Blizzard website or a designated download page.
- Choose the appropriate operating system: On the download page, select the appropriate operating system for your PC. Overwatch 2 is currently available for Windows, so choose the Windows option.
- Start the download: Click on the “Download” or similar button to initiate the download of the Overwatch 2 launcher. The launcher may be a large file, so it may take some time depending on your internet connection speed.
- Save the installer file: Once the download is complete, choose a location on your PC where you want to save the installer file. It’s recommended to save it in an easily accessible location, such as the desktop or a dedicated downloads folder.
- Open the installer file: Locate the saved Overwatch 2 launcher installer file and double-click on it to run the installer.
- Follow the installation prompts: The installer will guide you through the installation process. Follow the on-screen prompts to install the Overwatch 2 launcher on your PC.
- Launch the Overwatch 2 launcher: Once the installation is complete, locate the Overwatch 2 launcher icon on your desktop or in your Start menu and double-click on it to launch the launcher.
Congratulations! You have successfully downloaded and installed the Overwatch 2 launcher. Now, it’s time to move on to the next step: installing Overwatch 2 on your PC. Let’s continue with the installation process in the next step.
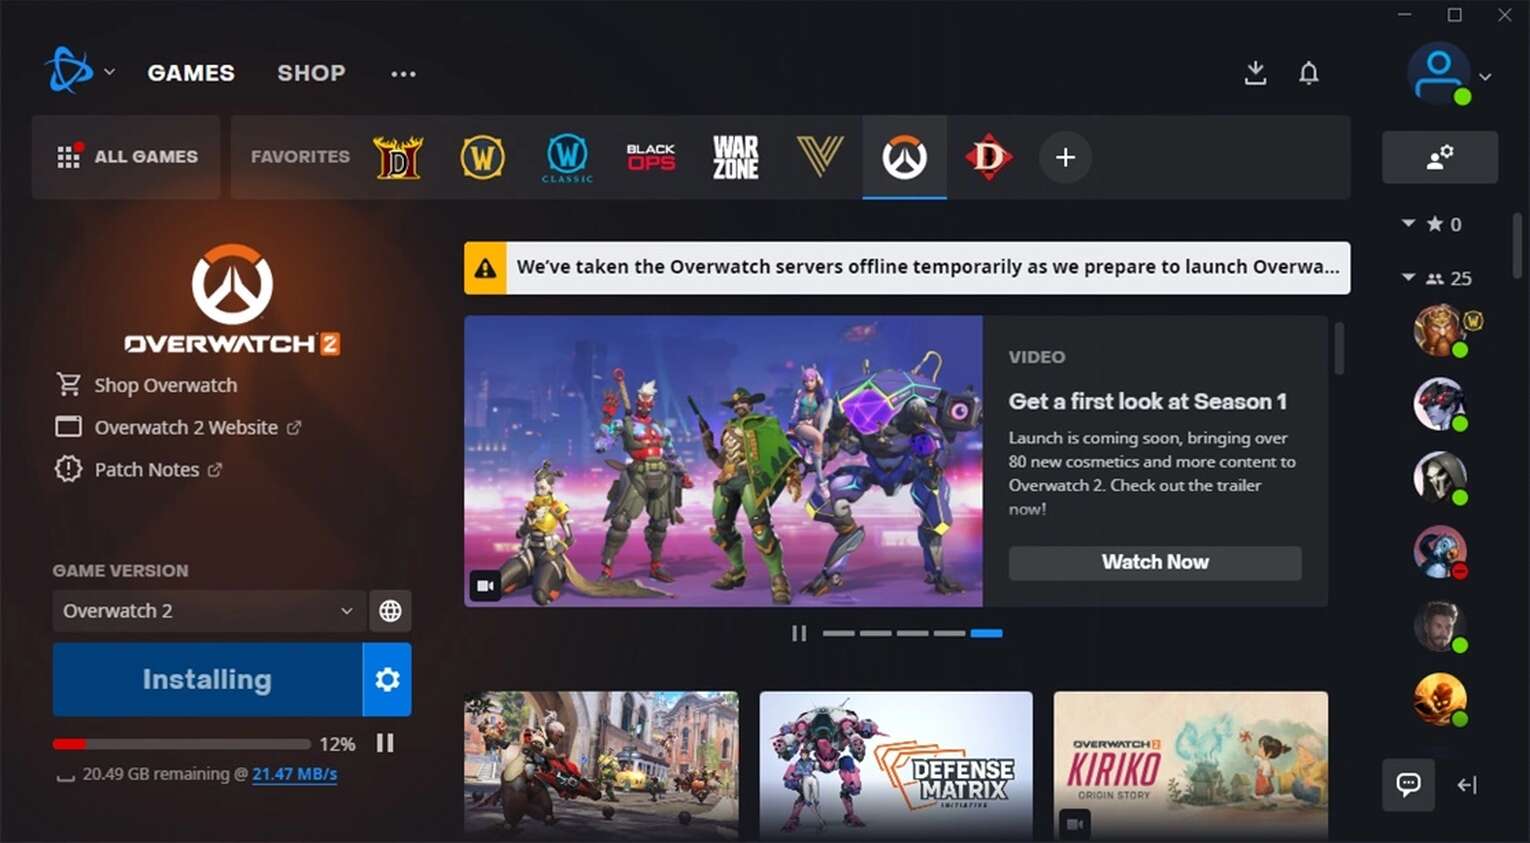
Step 6: Installing Overwatch 2
Now that you have the Overwatch 2 launcher installed on your PC, it’s time to proceed with the installation of Overwatch 2 itself. Follow these steps to install Overwatch 2:
- Launch the Overwatch 2 launcher: Open the Overwatch 2 launcher by double-clicking on its icon on your desktop or in your Start menu.
- Log in to your Overwatch account: Enter your Overwatch account credentials in the login screen of the launcher to access your account.
- Navigate to Overwatch 2: Once you are logged in, navigate to the Overwatch 2 section within the launcher. This is usually clearly labeled or accessible through a prominent tab or button.
- Click on the “Install” button: Find the “Install” or similar button for Overwatch 2 and click on it to initiate the installation process.
- Select the installation location: Choose a location on your PC where you want the Overwatch 2 files to be installed. It’s recommended to have sufficient disk space and choose a location with ample storage.
- Start the installation: Click on the “Start Install” or similar button to begin the installation process. The launcher will start downloading and installing the necessary files for Overwatch 2.
- Wait for the installation to complete: The installation process may take some time, depending on the speed of your internet connection and PC specifications. Be patient and allow the installer to complete the installation process.
- Check for updates: Once the installation is complete, the launcher may check for any available updates for Overwatch 2. If any updates are found, allow the updates to download and install to ensure you have the latest version of the game.
- Launch Overwatch 2: After the installation and any necessary updates are complete, click on the “Play” or similar button in the launcher to launch Overwatch 2 and start playing.
Congratulations! You have successfully installed Overwatch 2 on your PC. Now it’s time to jump into the game and experience the thrilling battles and exciting gameplay. Let’s move on to the next step, launching Overwatch 2, to start your gaming journey!
Step 7: Launching Overwatch 2
After successfully installing Overwatch 2 on your PC, it’s time to launch the game and dive into the exciting world of heroes and battles. Follow these steps to launch Overwatch 2:
- Open the Overwatch 2 launcher: Locate the Overwatch 2 launcher icon on your desktop or in your Start menu and double-click on it to open the launcher.
- Log in to your Overwatch account: Enter your Overwatch account credentials in the login screen of the launcher to access your account.
- Select your region and click “Play”: Once you are logged in, the launcher will prompt you to select your region. Choose your desired region and then click on the “Play” or similar button to launch the game.
- Wait for the game to load: The Overwatch 2 game client will launch and start loading. Depending on your PC’s performance and internet connection speed, this process may take a few moments.
- Select your hero: Once the game is loaded, you will be taken to the main menu where you can select your hero. Choose your favorite hero or experiment with different heroes to find your playstyle.
- Explore game modes and maps: Overwatch 2 offers various game modes and maps to keep you entertained. Take the time to explore the different options and try out different game modes such as Quick Play, Competitive Play, and Arcade.
- Join a match or create a group: Once you have selected your hero and familiarized yourself with the game modes, you can join a match to play with other players or create a group with your friends to embark on cooperative adventures.
- Enjoy the gameplay: Immerse yourself in the dynamic gameplay, strategic team-based battles, and incredible abilities of the Overwatch heroes. Communicate with your team, coordinate strategies, and aim for victory!
Congratulations! You have successfully launched Overwatch 2 and are ready to experience the thrilling and action-packed gameplay. Have fun exploring the world of Overwatch 2 and remember to keep practicing and honing your skills as you progress through your gaming journey.
Troubleshooting Common Download Issues
While downloading Overwatch 2, you may encounter some common issues that can impede your progress. Here are a few troubleshooting tips to help you overcome these obstacles:
- Slow download speed: If you notice that your download speed is slower than expected, try pausing and resuming the download in the Overwatch 2 launcher. Additionally, ensure that you’re not running any bandwidth-heavy applications or downloads in the background that may be limiting your download speed.
- Internet connection interruptions: If your internet connection gets interrupted during the download, try restarting your router or connecting to a more stable network. You can also try using a wired connection instead of Wi-Fi for a more consistent internet connection.
- Insufficient disk space: If you receive an error message indicating insufficient disk space, make sure to free up some space on your hard drive by deleting unnecessary files or programs. Consider temporarily moving files to an external storage device to create more space for the Overwatch 2 installation.
- Failed login or account issues: If you’re experiencing trouble logging in to your Overwatch account or encounter account-related issues, double-check your username and password for accuracy. If needed, try resetting your password through the account recovery process or contact Blizzard’s support for further assistance.
- Game files are corrupt: If the installation process stops due to corrupt game files, try using the repair function in the Overwatch 2 launcher. This will scan and repair any corrupted files that may be causing the issue.
- Error messages during installation: If you encounter specific error messages during the installation process, it’s recommended to search for the exact error message online or consult the Overwatch 2 support resources provided by Blizzard. They often provide detailed troubleshooting steps specific to each error message.
- Antivirus or firewall blocking the download: Sometimes, your antivirus software or firewall can interfere with the download and installation process. Temporarily disable your antivirus or whitelist the Overwatch 2 launcher in your firewall settings to prevent any potential conflicts.
If you continue to experience difficulties during the download and installation process, reaching out to Blizzard’s support team will provide expert assistance to resolve your specific issue. They can offer personalized solutions to help you overcome any obstacles and get you back on track to enjoying Overwatch 2.
Conclusion
Congratulations on successfully downloading and installing Overwatch 2 on your PC! By following the steps outlined in this guide, you have gained the necessary knowledge to embark on thrilling missions, engage in intense team battles, and experience the excitement of Overwatch 2.
Throughout this guide, you learned how to prepare your PC, access the official Overwatch 2 website, create an Overwatch account, purchase the game, download the Overwatch 2 launcher, and install the game on your PC. We also provided troubleshooting tips to overcome common download issues that you may encounter during the process.
Now that you have launched Overwatch 2, it’s time to explore the diverse roster of heroes, utilize their unique abilities, and work together with your team to secure victory. Engage in heart-pounding battles, adapt your strategies, and aim for the top ranks in competitive play.
Remember to stay vigilant for future game updates and patches, as these can bring exciting new features, balance changes, and additional content to enhance your gaming experience. Stay connected with the Overwatch 2 community, participate in events, and embrace the camaraderie fostered within the player base.
Thank you for choosing Overwatch 2 as your game of choice. We hope this guide has provided you with valuable information and made the download and installation process a breeze. Now, it’s time to jump into the action-packed world of Overwatch 2. See you on the battlefield, hero!