Introduction
Welcome to the exciting world of Overwatch! If you’re eagerly anticipating the Overwatch Open Beta and can’t wait to jump into the action, you’ve come to the right place. In this guide, we will walk you through the step-by-step process of downloading and installing Overwatch Open Beta.
Overwatch is a team-based first-person shooter developed by Blizzard Entertainment. It has quickly become one of the most popular and highly regarded games in the industry since its release. With its diverse roster of heroes and fast-paced gameplay, Overwatch offers a unique and thrilling experience for gamers of all skill levels.
The Open Beta phase is the perfect opportunity for players to get a taste of the Overwatch universe before its official release. During the Open Beta, you’ll have access to a variety of game modes, including quick play, competitive play, and custom games. Additionally, you’ll be able to explore different maps and experience the unique abilities and playstyles of each hero.
Whether you’re a seasoned Overwatch player or brand new to the game, participating in the Open Beta is a great way to join the Overwatch community, test your skills, and provide valuable feedback to the developers.
Before we get started with the download and installation process, let’s make sure your system meets the minimum requirements to run Overwatch smoothly. By ensuring your system meets these requirements, you can enjoy the game with optimal performance and minimal issues.
System Requirements
Prior to downloading and installing Overwatch Open Beta, it’s important to verify that your computer meets the minimum system requirements. By meeting these requirements, you can guarantee a smooth and enjoyable gaming experience. Here are the minimum system requirements for Overwatch:
- Operating System: Windows 7/8/10 (64-bit), macOS 10.13 or later
- Processor: Intel Core i3 or AMD Phenom X3 8650
- Memory: 4GB RAM
- Graphics: NVIDIA GeForce GTX 460, ATI Radeon HD 4850, or Intel HD Graphics 4400
- DirectX: Version 11
- Storage: 30GB available space
Please note that these are only the minimum requirements. For optimal performance, it is recommended to have a higher-end system. If you’re unsure about your computer’s specifications, you can check the details by following these steps:
- On Windows: Click the Start menu, select “Settings,” then choose “System.” Under the “About” tab, you’ll find your device specifications.
- On macOS: Click the Apple menu in the top-left corner, select “About This Mac,” then navigate to the “Overview” tab for your system details.
Once you’ve verified that your system meets the minimum requirements, you’re ready to proceed with the download and installation process. In the following steps, we’ll guide you on how to get started with Overwatch Open Beta.
Step 1: Create a Battle.net Account
In order to download and play Overwatch Open Beta, you’ll need to create a Battle.net account. Battle.net is Blizzard Entertainment’s online gaming platform, which allows players to access and manage their Blizzard games, including Overwatch. Here’s how to create a Battle.net account:
- Open your web browser and visit the official Battle.net website.
- Click on the “Create Account” button located at the top right corner of the page.
- Fill in the required information, including your preferred email address and a strong, unique password. Be sure to read and agree to the Terms of Use and Privacy Policy.
- Complete the reCAPTCHA verification to confirm that you’re not a robot.
- Click on the “Create Account” button to finalize the account creation process.
- Check your email inbox for a verification email from Battle.net. Open the email and click on the verification link to activate your account.
- Once your account is activated, you can proceed to the next step to download the Battle.net Desktop App.
Creating a Battle.net account is free and only takes a few minutes. Make sure to choose a strong password and keep your account information secure to protect your gaming progress and personal information.
Now that you have your Battle.net account ready, let’s move on to the next step: downloading the Battle.net Desktop App, which will serve as the central hub for accessing and managing your Blizzard games.
Step 2: Download the Battle.net Desktop App
Before you can download Overwatch Open Beta, you’ll need to install the Battle.net Desktop App. This application serves as a launcher and platform for accessing and managing Blizzard games, including Overwatch. Follow these steps to download the Battle.net Desktop App:
- Visit the official Battle.net website in your web browser.
- Click on the “Download for Windows” or “Download for Mac” button, depending on your operating system.
- Once the download is complete, locate the file on your computer and run the installer.
- Follow the on-screen instructions to proceed with the installation process.
- Once the installation is complete, the Battle.net Desktop App will launch automatically.
The Battle.net Desktop App provides a convenient way to access and manage your Blizzard games, as well as access the Blizzard Shop, stay updated with news and announcements, and connect with friends who are also using the platform.
Now that you have successfully downloaded and installed the Battle.net Desktop App, you’re ready to log in and proceed with the next step: installing Overwatch Open Beta.
Step 3: Install the Battle.net Desktop App
Now that you have downloaded the Battle.net Desktop App, it’s time to install it on your computer. Follow these simple steps to complete the installation process:
- Locate the installer file that you downloaded in the previous step.
- Double-click on the file to run the installer.
- You may be prompted to grant permission to make changes to your device. Click “Yes” to proceed.
- Follow the on-screen instructions to proceed through the installation process.
- Choose your preferred language and installation location, then click “Install” to begin the installation.
- Wait for the installation process to complete. This may take a few minutes.
- Once the installation is finished, the Battle.net Desktop App will automatically launch.
Congratulations! You have successfully installed the Battle.net Desktop App on your computer. This app will serve as your gateway to access and manage your Blizzard games, including Overwatch Open Beta.
Now that the Battle.net Desktop App is installed, it’s time to log in to your Battle.net account and proceed with the next steps to download and install Overwatch Open Beta. If you don’t have a Battle.net account yet, refer to Step 1 for instructions on creating one.
In the next step, we will guide you on how to log in to the Battle.net Desktop App using your account details. Let’s continue with the next step of the installation process.
Step 4: Log in to the Battle.net Desktop App
Now that you have installed the Battle.net Desktop App, it’s time to log in to your Battle.net account and prepare for the installation of Overwatch Open Beta. Follow these steps to log in:
- Launch the Battle.net Desktop App on your computer.
- You will be greeted with the login screen. Enter your Battle.net email address and password in the respective fields.
- If you have enabled two-factor authentication (2FA) for your Battle.net account, you will be prompted to enter the authentication code from your authenticator app or device.
- Click on the “Log In” button to proceed.
Once you have successfully logged in, the Battle.net Desktop App will verify your account and display the Blizzard games associated with your account. Now you’re ready to download and install Overwatch Open Beta.
If you encounter any login issues, double-check that you have entered your email address and password correctly. Also, verify that you have a stable internet connection. If you continue to experience difficulties, you can visit the Battle.net support website for further troubleshooting assistance.
With the Battle.net Desktop App successfully logged in, you’re one step closer to experiencing the excitement of Overwatch Open Beta. Next, we will guide you on how to find the Overwatch Open Beta in the app and initiate the download.
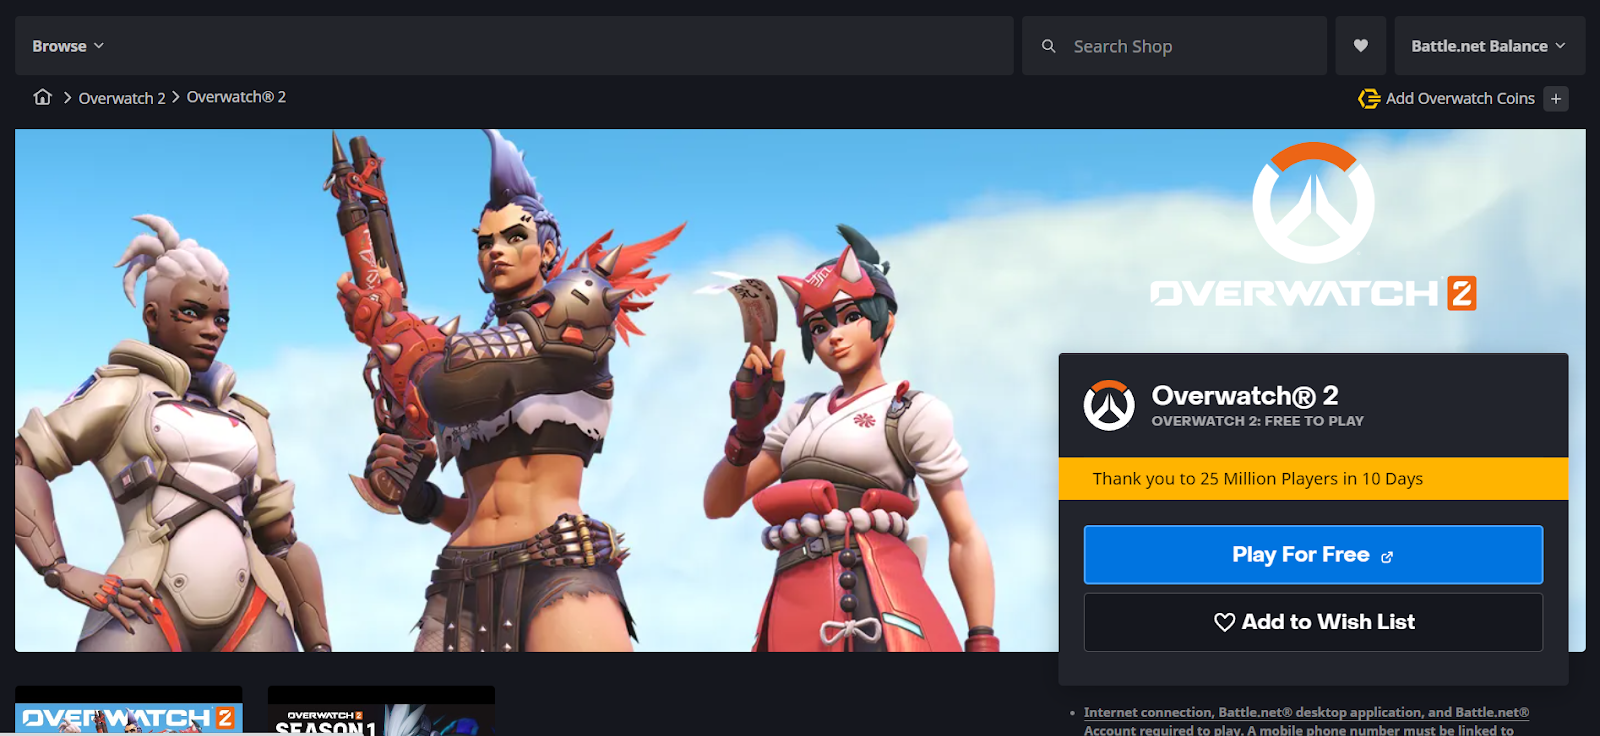
Step 5: Find Overwatch Open Beta
Having logged in to the Battle.net Desktop App, it’s time to locate Overwatch Open Beta and get ready for the download. Follow these steps to find Overwatch Open Beta:
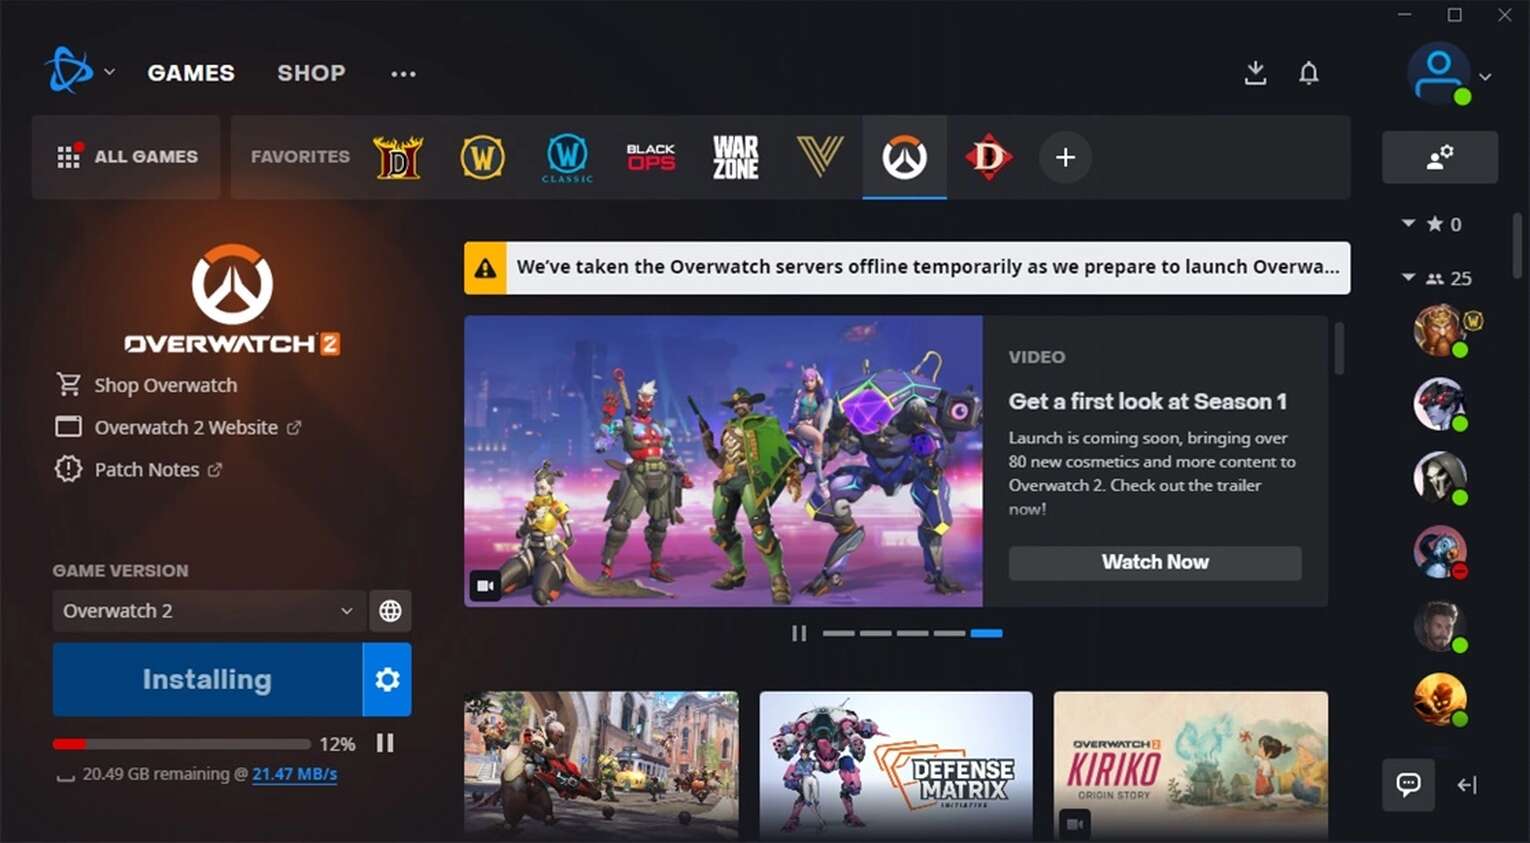
- In the Battle.net Desktop App, you will see the game library on the left side of the window. Click on the “Games” tab to view your available games.
- Scroll through the list of games until you find “Overwatch.”
- If Overwatch Open Beta is currently available, you will see a small icon indicating this next to the game title.
- If you don’t see the Overwatch Open Beta icon, it may not be available at the moment. In that case, keep an eye out for announcements or check back later to see if it becomes available.
- Click on the “Overwatch” game icon to access the Overwatch game page.
- On the Overwatch game page, you will find information about the game, including the latest news and updates.
- If Overwatch Open Beta is available, you will see a “Download” button or a similar prompt to initiate the download.
- Click on the “Download” button to start the download process.
Once you have located Overwatch Open Beta and initiated the download process, the Battle.net Desktop App will begin downloading the necessary files. The time it takes to download the game will depend on the speed of your internet connection.
Now that you have found Overwatch Open Beta and started the download, let’s move on to the next step: installing Overwatch Open Beta on your computer.
Step 6: Download Overwatch Open Beta
With Overwatch Open Beta successfully located in the Battle.net Desktop App, it’s time to download the game and prepare for the installation. Follow these steps to download Overwatch Open Beta:
- Once you have clicked on the “Download” button in the Overwatch game page, the Battle.net Desktop App will begin downloading the necessary files for Overwatch Open Beta.
- The download progress will be displayed in the Battle.net Desktop App, indicating the remaining time and download speed.
- Ensure that you have a stable internet connection during the download process to prevent any interruptions.
- The size of the download may vary depending on updates and patches, as well as your region.
- Be patient as the download completes. The time it takes to download Overwatch Open Beta will depend on the speed of your internet connection.
While the download is in progress, you can take this time to explore more about Overwatch, including its heroes, maps, and gameplay mechanics. Familiarize yourself with the game’s features and get ready for an incredible gaming experience.
Once the download is complete, you’re ready to move on to the next step: installing Overwatch Open Beta on your computer. In the following section, we will guide you through the installation process.
Step 7: Install Overwatch Open Beta
Now that you have successfully downloaded Overwatch Open Beta, it’s time to install the game on your computer. Follow these steps to complete the installation process:
- In the Battle.net Desktop App, navigate to the Overwatch game page if you’re not already there. You can do this by clicking on the “Games” tab and selecting “Overwatch.”
- If the download is complete, you will see an “Install” button or a similar prompt to initiate the installation process.
- Click on the “Install” button to start the installation process.
- The Battle.net Desktop App will guide you through the installation steps, including choosing the installation location and agreeing to any additional terms and conditions.
- Wait for the installation process to complete. This may take some time, depending on the speed of your computer and the size of the game files.
During the installation, make sure that you have sufficient storage space on your computer and a stable internet connection. It is also important to keep the Battle.net Desktop App open until the installation is finished.
Once the installation is complete, you’re just one step away from jumping into the exciting world of Overwatch Open Beta. In the next section, we will guide you on how to launch Overwatch Open Beta and start playing.
Step 8: Launch Overwatch Open Beta
Congratulations, you’re almost ready to start playing Overwatch Open Beta! Now that you have successfully installed the game on your computer, follow these steps to launch Overwatch Open Beta:
- In the Battle.net Desktop App, navigate to the Overwatch game page by clicking on the “Games” tab and selecting “Overwatch.”
- Once on the Overwatch game page, you will see a “Play” button or a similar prompt to launch the game.
- Click on the “Play” button to start Overwatch Open Beta.
- The Overwatch Open Beta launcher will open, and you may be prompted to log in again using your Battle.net account credentials.
- Once logged in, the game will start, and you’ll be taken to the main menu of Overwatch Open Beta.
- From the main menu, you can choose from a variety of game modes, including quick play, competitive play, and custom games.
- Explore the heroes, maps, and gameplay features of Overwatch Open Beta and start your gaming adventure.
Make sure to take some time to familiarize yourself with the controls and learn about the unique abilities of each hero. Overwatch Open Beta offers an exciting and immersive experience that will keep you engaged for hours.
Now that you have successfully launched Overwatch Open Beta, it’s time to show off your skills, team up with friends, and dive into the intense and action-packed world of Overwatch. Enjoy your gaming experience!
Conclusion
Congratulations! You have successfully navigated through the steps of downloading and installing Overwatch Open Beta. By following this guide, you now have access to the exciting world of Overwatch and can join thousands of players in the intense team-based battles.
We started by ensuring that your system meets the minimum requirements for running Overwatch smoothly. Then, we guided you through the process of creating a Battle.net account and downloading the Battle.net Desktop App. With the app installed, you logged in to your Battle.net account and found Overwatch Open Beta in the game library. After downloading and installing the game, you launched Overwatch Open Beta and are now ready to experience the thrill of the game firsthand.
Overwatch Open Beta offers a diverse selection of heroes, each with their own unique abilities and playstyles. Engage in fast-paced battles, work as a team, and compete against players from around the world. Explore different maps, experiment with different strategies, and unlock rewards as you progress.
Remember to keep your Battle.net account secure and stay updated with news and announcements from the Overwatch community. Participate in events, share your experiences, and provide feedback to contribute to the ongoing development and improvement of the game.
Thank you for choosing Overwatch Open Beta and joining the vibrant community of players. Enjoy your time exploring this dynamic and ever-evolving game, and may your adventures in Overwatch be filled with excitement and triumph!