Introduction
Overwatch 2 is an eagerly anticipated sequel to Blizzard Entertainment’s popular team-based first-person shooter game. Packed with new maps, heroes, and game modes, Overwatch 2 promises to deliver an immersive and exciting gaming experience. If you’re a PC gamer looking to download and dive into the action of Overwatch 2, you’re in the right place.
Whether you’re a seasoned player or about to embark on your first Overwatch adventure, this guide will walk you through the step-by-step process of downloading Overwatch 2 on PC. From creating a Blizzard account to installing the game, we’ll cover everything you need to know to get started.
Before we get into the nitty-gritty details, let’s take a quick glance at the minimum system requirements to ensure that your PC is ready to handle Overwatch 2. Having a computer that meets or exceeds these requirements will ensure smooth gameplay and an optimal experience:
- Operating System: Windows® 10 64-bit
- Processor: Intel® Core™ i3 or AMD Phenom™ X3 8650
- Memory: 4 GB RAM
- Graphics: NVIDIA® GeForce® GTX 460, ATI Radeon™ HD 4850, or Intel® HD Graphics 4400
- DirectX: Version 11
- Storage: 30 GB available space
- Internet: Broadband internet connection
If your PC meets or exceeds these system requirements, then you’re good to go! Let’s dive into the step-by-step process of downloading Overwatch 2 on your PC.
System Requirements
Before downloading Overwatch 2 on your PC, it’s essential to ensure that your system meets the minimum requirements. This will help guarantee a smooth and enjoyable gaming experience. Here are the minimum system requirements for Overwatch 2:
- Operating System: Windows® 10 64-bit
- Processor: Intel® Core™ i3 or AMD Phenom™ X3 8650
- Memory: 4 GB RAM
- Graphics: NVIDIA® GeForce® GTX 460, ATI Radeon™ HD 4850, or Intel® HD Graphics 4400
- DirectX: Version 11
- Storage: 30 GB available space
- Internet: Broadband internet connection
These requirements may seem intimidating, but they are essential for ensuring smooth gameplay and optimal performance. If your PC meets or exceeds these specifications, you’re ready to embark on your Overwatch 2 adventure.
It’s worth noting that alongside the minimum requirements, Blizzard also provides recommended system requirements that provide a more enhanced gaming experience. Here are the recommended specifications for Overwatch 2:
- Operating System: Windows® 10 64-bit
- Processor: Intel® Core™ i5 or AMD Phenom™ II X3 or better
- Memory: 8 GB RAM
- Graphics: NVIDIA® GeForce® GTX 660 or AMD Radeon™ HD 7950 or better
- DirectX: Version 11
- Storage: 30 GB available space
- Internet: Broadband internet connection
Meeting the recommended system requirements will ensure a higher level of graphical fidelity, smoother performance, and an overall better experience in Overwatch 2. However, keep in mind that the game can still be enjoyed even if your PC only meets the minimum requirements.
Now that you know the system requirements for Overwatch 2, it’s time to move on to the next step: downloading the game.
Step 1: Open a Web Browser
The first step to download Overwatch 2 on your PC is to open a web browser. You can use popular browsers like Google Chrome, Mozilla Firefox, Microsoft Edge, or Safari.
To open a web browser, locate the browser icon on your desktop or search for the browser’s name in the Windows Start menu. Once you find it, double-click on the icon to launch the browser.
If you prefer using keyboard shortcuts, you can press the Windows key on your keyboard and start typing the name of the browser. The search results will display the browser’s icon, which you can then press Enter to open.
Once the web browser is open, you’re ready to move on to the next step: visiting the Blizzard website.
Remember, if you don’t have a web browser installed, you can download one by searching for the browser’s name on any search engine. Make sure to download the latest version to ensure compatibility and security.
Now that you have your web browser open and ready, let’s proceed to the next step to continue the Overwatch 2 download process.
Step 2: Go to the Blizzard Website
After opening your web browser, the next step is to navigate to the official Blizzard website. This is the platform where you can find Overwatch 2 and access the download page.
To go to the Blizzard website, simply type “Blizzard” in the search bar of your web browser and press Enter. The search results will display the official Blizzard website at the top. Click on the link to open the website.
Alternatively, you can directly enter the website’s URL, which is www.blizzard.com. Copy and paste this URL into the address bar of your web browser and press Enter to visit the Blizzard website.
Once you’re on the Blizzard website, you’ll have access to a plethora of information about Blizzard games, including Overwatch 2. Take a moment to explore the website if you’re interested in learning more about their other titles or updates.
However, our main objective is to download Overwatch 2, so our focus will be on finding the appropriate section of the website that allows us to move forward with the download process.
Now that you’re on the Blizzard website, let’s proceed to the next step to either create or sign in to your Blizzard account.
Step 3: Create or Sign In to Your Blizzard Account
In order to download Overwatch 2, you will need to have a Blizzard account. If you already have a Blizzard account, you can proceed to sign in. If not, you will need to create a new account.
To create a new Blizzard account, look for the “Sign Up” or “Create Account” button on the Blizzard website. Clicking on this button will take you to the account creation page.
On the account creation page, you will be asked to provide some personal information such as your name, email address, and date of birth. Follow the prompts and fill in the necessary details to complete the account creation process.
Make sure to choose a secure password that includes a combination of letters, numbers, and special characters to protect your account.
If you already have a Blizzard account, look for the “Sign In” button on the website and click on it. This will take you to the login page where you can enter your account credentials to sign in.
Ensure that the credentials you provide are accurate and match the information associated with your Blizzard account to avoid any login issues.
Once you’ve successfully signed in or created a new Blizzard account, you’re one step closer to downloading Overwatch 2 on your PC. The next step is to purchase the game or redeem a code if you already have one.
Step 4: Purchase or Redeem Overwatch 2
Now that you have a Blizzard account and you’re signed in, it’s time to either purchase Overwatch 2 or redeem a code if you already have one.
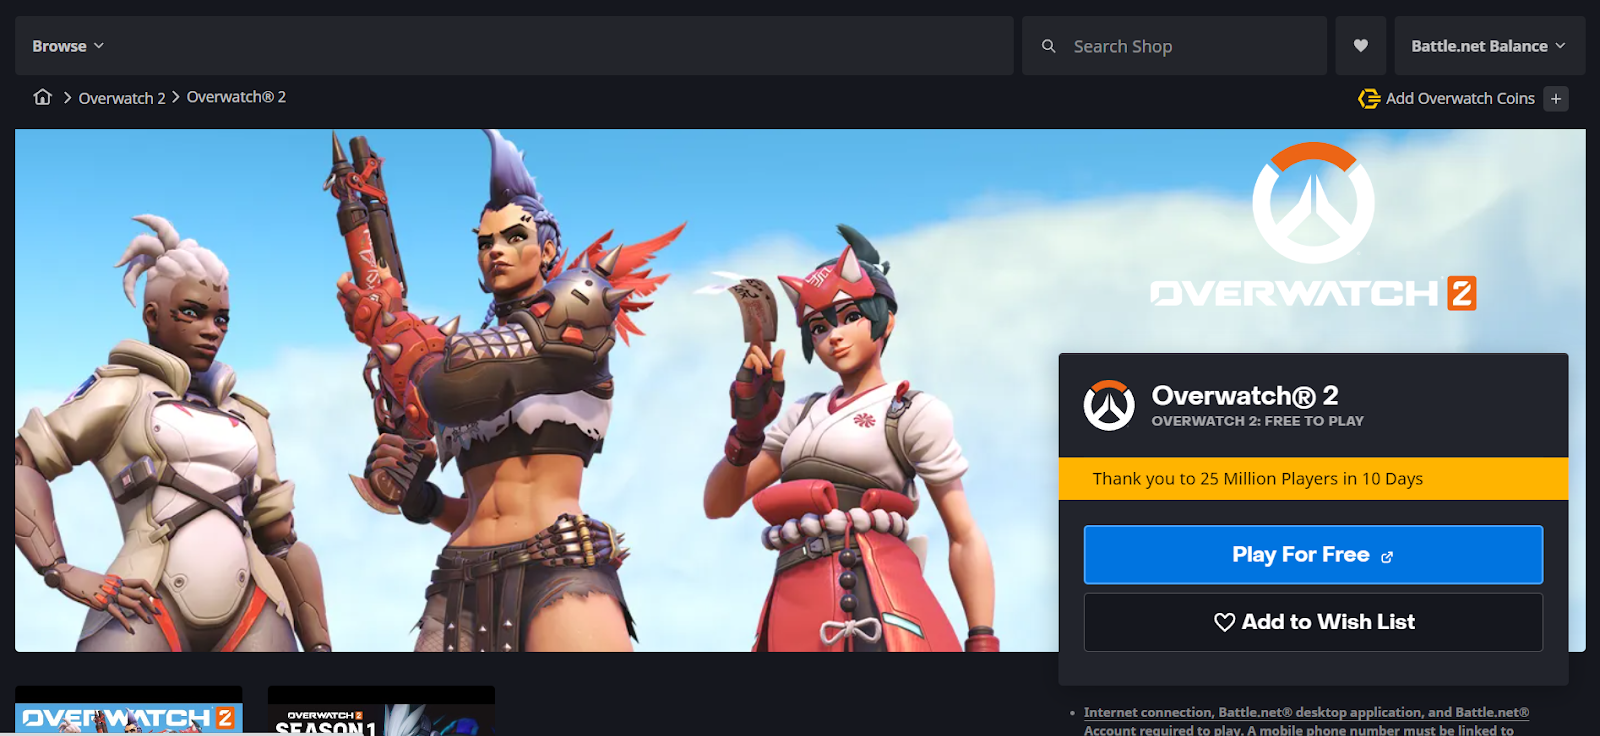
If you haven’t purchased Overwatch 2 yet, you can do so directly from the Blizzard website. Look for the “Games” section or specifically search for Overwatch 2. Once you’ve found the game, click on it to access the purchase page.
On the purchase page, you’ll have the option to choose your edition of Overwatch 2. Blizzard usually offers different editions with varying bonus content, so select the one that suits your preferences.
After selecting your desired edition, you will be guided through the checkout process. This usually involves providing your payment details and confirming the purchase. Follow the prompts and ensure that the information you provide is accurate.
If you already have a code to redeem, you can do so by going to your Blizzard account settings or the redemption page. Look for the “Redeem a Code” section and enter your code in the designated field. Once you’ve entered the code correctly, click on the “Redeem” button.
After successfully purchasing or redeeming Overwatch 2, the next step is to download the Blizzard Battle.net Desktop App, which will allow you to download and install the game.
Now that you’ve purchased or redeemed Overwatch 2, let’s move on to the next step: downloading the Blizzard Battle.net Desktop App.
Step 5: Download the Blizzard Battle.net Desktop App
In order to download and install Overwatch 2, you will need to have the Blizzard Battle.net Desktop App on your PC. This app serves as a central hub for accessing and managing Blizzard games.
To download the Blizzard Battle.net Desktop App, visit the Blizzard website and navigate to the “Downloads” or “Download App” section. Look for the option specific to the Battle.net Desktop App and click on it.
On the download page, you will typically see buttons or links to download the app for Windows or Mac. Click on the appropriate button for your operating system to start the download.
Depending on your web browser settings, the Blizzard Battle.net Desktop App installer file may start downloading automatically, or you may be prompted to choose a location to save the file.
Once the download is complete, locate the installer file in your downloads folder or the location where it was saved. Double-click on the file to launch the installer.
Follow the on-screen prompts and instructions to install the Blizzard Battle.net Desktop App on your PC. The installer will guide you through the necessary steps, such as accepting the terms of service and choosing the installation location.
Depending on your internet connection speed, the installation process may take a few minutes. Be patient and avoid interrupting the installation process.
Once the installation is complete, you should see the Blizzard Battle.net icon on your desktop or in your Windows Start menu. Double-click on the icon to launch the app.
Congratulations! You now have the Blizzard Battle.net Desktop App installed on your PC. The next step is to log in to your Blizzard account through the app to access Overwatch 2.
With the Blizzard Battle.net Desktop App ready, let’s move on to the next step: logging in to the app.
Step 6: Install the Blizzard Battle.net Desktop App
Installing the Blizzard Battle.net Desktop App is a crucial step in being able to download and play Overwatch 2 on your PC. The Battle.net Desktop App is a centralized platform that allows you to access and manage your Blizzard games.
To install the Blizzard Battle.net Desktop App, you will first need to have the installer file. You can obtain this file by visiting the official Blizzard website and navigating to the “Downloads” or “Download App” section. Look for the option specifically for the Battle.net Desktop App and click on it.
On the download page, you’ll usually find buttons or links to download the app for Windows or Mac. Click on the appropriate button for your operating system to start the download.
Once the download is complete, locate the installer file in your downloads folder or the location where it was saved. Double-click on the file to launch the installer.
Follow the on-screen prompts and instructions to proceed with the installation. The installer will guide you through the necessary steps, such as accepting the terms of service and choosing the installation location.
Keep in mind that the installation process may take a few minutes, depending on your internet connection speed. It’s important to be patient and avoid interrupting the installation process.
Once the installation is complete, you should see the Blizzard Battle.net icon on your desktop or in your Windows Start menu. Double-click on the icon to launch the app.
Now that you have successfully installed the Blizzard Battle.net Desktop App, you’re one step closer to the excitement of playing Overwatch 2 on your PC. The next step is to log in to your Blizzard account using the app.
With the Blizzard Battle.net Desktop App installed, let’s move on to the next step: logging in and accessing your Blizzard account.
Step 7: Log In to the Blizzard Battle.net Desktop App
Now that you have the Blizzard Battle.net Desktop App installed, the next step is to log in to your Blizzard account. Logging in is necessary to access Overwatch 2 and other Blizzard games through the app.
To log in to the Blizzard Battle.net Desktop App, locate the app icon on your desktop or in your Windows Start menu. Double-click on the icon to launch the app.
Upon launching the app, you will be presented with a login screen. Enter your Blizzard account email address and password in the provided fields. Make sure to enter the information accurately to avoid any login errors.
If you have multiple Blizzard accounts, ensure that you’re entering the correct email address and password associated with the account that has Overwatch 2.
After entering your credentials, click on the “Log In” button to proceed. The app will then authenticate your account information and establish a connection.
If the login information is correct, you’ll be successfully logged in to the Blizzard Battle.net Desktop App. You should now have access to your Blizzard account and be able to view your game library.
With the app logged in and your Blizzard account connected, you’re just a few steps away from downloading and playing Overwatch 2. The next step is to locate Overwatch 2 within the app.
With the Blizzard Battle.net Desktop App successfully logged in, let’s move on to the next step: locating Overwatch 2 within the app and initiating the download.
Step 8: Locate Overwatch 2 in the App
Now that you’re logged in to the Blizzard Battle.net Desktop App, it’s time to locate Overwatch 2 within the app. This will allow you to initiate the download process and prepare for your Overwatch 2 gaming experience.
Once you’re logged in, you will be presented with the app’s main interface. Look for the “Games” tab or a similar section that provides access to your game library.
Click on the “Games” tab to view a list of all the games associated with your Blizzard account. Scroll through the list or use the search bar to find Overwatch 2.
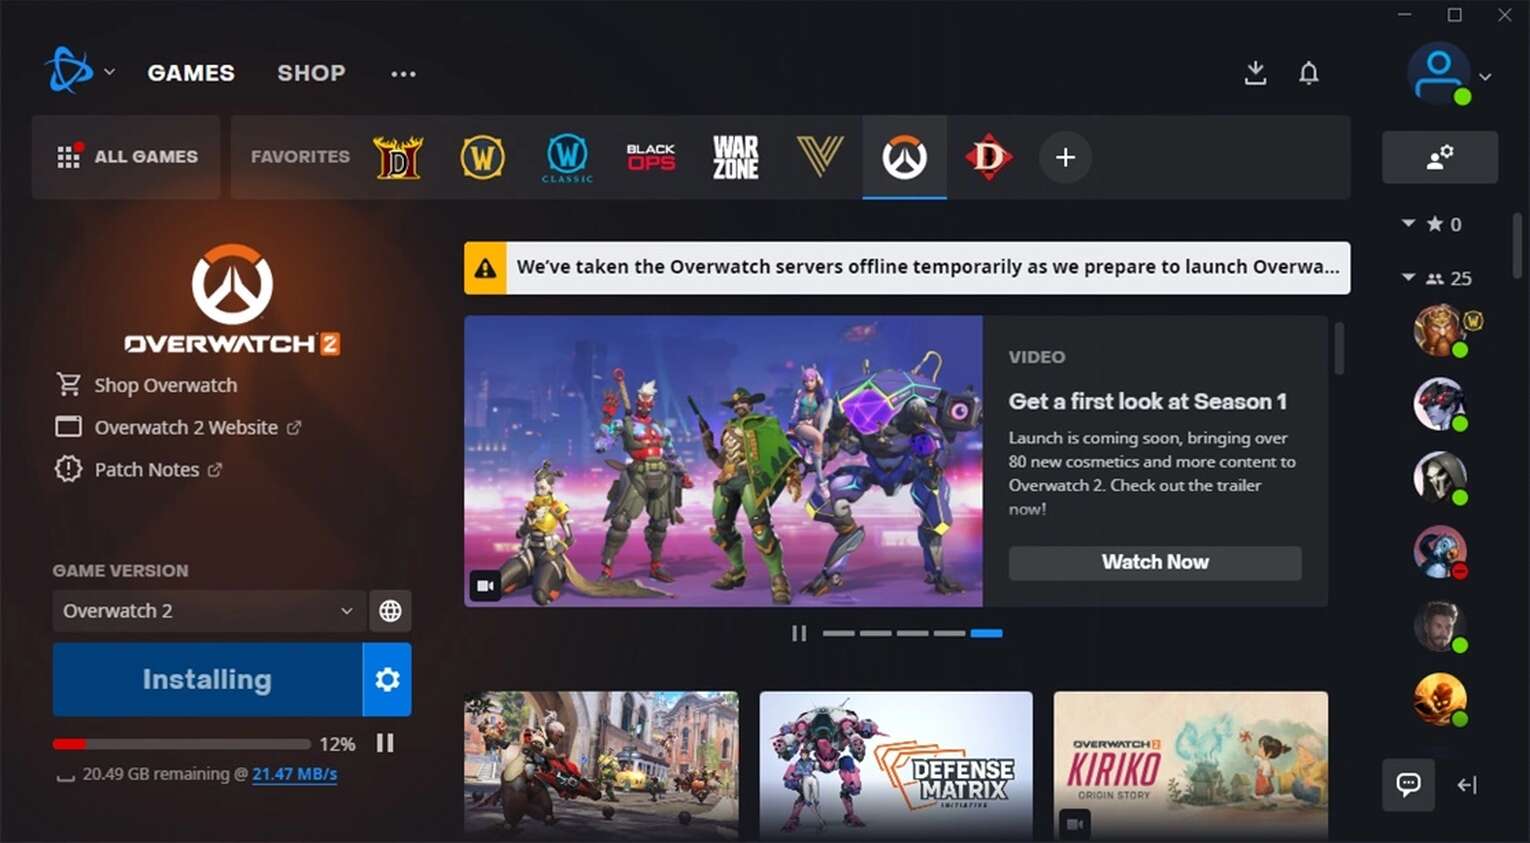
Once you’ve located Overwatch 2 in your game library, you’ll generally see an “Install” button or a similar option next to the game’s name.
Click on the “Install” button to initiate the download and installation process for Overwatch 2. The app will start downloading the necessary files to your designated installation location on your PC.
During the download, you can monitor the progress of the download and the estimated time remaining. The speed of the download will depend on the size of the game and the speed of your internet connection.
It’s important to ensure that you have sufficient storage space on your PC to accommodate the download and installation of Overwatch 2.
Now that you’ve located Overwatch 2 in the app and initiated the download process, you’re one step closer to joining the action. The next step is to wait for the download to complete.
With Overwatch 2 located in the Blizzard Battle.net Desktop App, let’s move on to the next step: patiently waiting for the download to finish.
Step 9: Begin the Download
After locating Overwatch 2 in the Blizzard Battle.net Desktop App, the next step is to begin the download process. This will allow the necessary game files to be transferred to your computer, preparing you to embark on your Overwatch 2 adventure.
Once you’ve clicked on the “Install” button for Overwatch 2, the download will start automatically. The Blizzard Battle.net Desktop App will begin retrieving the game files from the Blizzard servers and transferring them to your designated installation location on your PC.
During the download, you can monitor the progress by checking the download bar or percentage displayed in the Blizzard Battle.net Desktop App. The time it takes to download Overwatch 2 will depend on the size of the game and the speed of your internet connection.
It’s important to have a stable and reliable internet connection during the download process. If the connection is interrupted or your internet speed fluctuates, it may affect the overall speed and progress of the download.
While the download is taking place, you can utilize the app’s features or explore other games and content available in the Blizzard Battle.net Desktop App. However, it’s recommended to refrain from performing bandwidth-intensive tasks that may interrupt or slow down the download process.
Ensure that you have sufficient storage space on your PC to accommodate the download. Overwatch 2 requires a certain amount of storage, and it’s important to check that you meet the specified requirements.
Now that you’ve initiated the download, it’s time to be patient and allow the Blizzard Battle.net Desktop App to complete the process. Once the download is finished, you’ll be one step closer to launching Overwatch 2 and stepping into the game.
With the download in progress, let’s move on to the next step: waiting for the download to complete.
Step 10: Wait for the Download to Complete
After initiating the download of Overwatch 2 in the Blizzard Battle.net Desktop App, it’s time to be patient and wait for the download to complete. The download time will vary depending on the size of the game and the speed of your internet connection.
While the download is in progress, it’s important to ensure that your internet connection remains stable. Any interruptions or fluctuations in your internet speed may impact the overall speed and progress of the download.
You can monitor the progress of the download by checking the download bar or percentage displayed in the Blizzard Battle.net Desktop App. This will give you an idea of how much of the game files have been downloaded and how much is remaining.
During the waiting period, you can take this time to familiarize yourself with the game’s features, watch tutorials or gameplay videos, or engage with the Overwatch community to get excited for the adventures that await.
In the meantime, it’s important to ensure that your PC meets or exceeds the recommended system requirements for Overwatch 2. This will ensure smooth gameplay once the download is complete and the game is ready to play.
Additionally, make sure you have sufficient storage space on your PC to accommodate the downloaded files. Overwatch 2 requires a certain amount of space, and it’s essential to ensure that you have enough available.
As the download progresses, avoid performing bandwidth-intensive tasks that may hinder or interrupt the download. This will help ensure a smooth and uninterrupted process until the download is complete.
Once the download is finished, you’ll be one step closer to experiencing the thrilling world of Overwatch 2 on your PC. Now, let’s move on to the final step: launching Overwatch 2 and starting your journey as a hero.
Step 11: Launch Overwatch 2 and Start Playing
Congratulations! The wait is finally over, and the download of Overwatch 2 is complete. Now, it’s time to launch the game and dive into the exhilarating world of heroes and team-based battles.
To launch Overwatch 2, return to the Blizzard Battle.net Desktop App. Locate the game in your game library, where you previously initiated the download.
Once you’ve found Overwatch 2 in your game library, click on the “Play” or “Launch” button next to the game’s name. This will start the game and allow you to enter the Overwatch 2 universe.
As the game launches, you may be prompted to log in to your Blizzard account again. Enter your account credentials to proceed and access your Overwatch 2 account.
Within Overwatch 2, you can choose from a variety of gameplay modes, including Quick Play, Competitive Play, and the immersive Story Mode. Select your preferred mode and get ready to team up with friends or take on opponents from around the world.
Explore the diverse cast of heroes and their unique abilities, strategic team compositions, and fast-paced action. Whether you prefer playing as a damage-dealing DPS, a support-focused healer, or a tanky frontline, Overwatch 2 offers a hero for every playstyle.
Engage in intense battles, coordinate with your team to capture objectives, and unleash powerful ultimates to turn the tide of the match. Experience the thrill of teamwork and mastery as you work together with your allies to secure victory.
Don’t forget to explore the ever-expanding world of Overwatch 2, with new maps, heroes, and exciting updates rolling out regularly. Stay connected to the Overwatch community for news, updates, and events that will enhance your gaming experience.
Now that you’ve successfully launched Overwatch 2, it’s time to embark on your epic gaming journey. Enjoy the thrilling matches, unlock rewards, and strive to become a legendary hero in the world of Overwatch.
Have fun and may your victories be glorious!
Conclusion
Congratulations on successfully downloading and launching Overwatch 2 on your PC! You’ve now gained access to the thrilling world of team-based battles, diverse heroes, and exciting gameplay modes.
We started by ensuring that your PC met the minimum system requirements for Overwatch 2, guaranteeing a smooth gaming experience. Then, we walked through the step-by-step process, from opening a web browser to creating or signing in to your Blizzard account.
We discussed how to purchase or redeem Overwatch 2 on the official Blizzard website and how to download and install the Blizzard Battle.net Desktop App. Once the app was installed, we covered how to log in to your Blizzard account and locate Overwatch 2 in the app’s game library.
After initiating the download, we emphasized the importance of patience as you waited for the download to complete. Finally, we reached the climax of the process – launching Overwatch 2 and embarking on your journey as a hero.
Now that you’re well-equipped with the knowledge of how to download Overwatch 2 on your PC, it’s time to hone your skills, strategize with your team, and enjoy the thrilling world of Overwatch 2.
Remember to stay connected to the Overwatch community, participate in events, and embrace the ever-evolving world of heroes and adventures. Enjoy countless hours of exhilarating gameplay, epic victories, and memorable moments in Overwatch 2.
Thank you for following this guide. We hope you have a fantastic time exploring all that Overwatch 2 has to offer. Good luck, have fun, and may your gaming experiences be truly legendary.