Introduction
Welcome to the exciting world of modding! If you’ve ever wanted to enhance your gaming experience, Nexus Mod Manager is the perfect tool for you. With thousands of mods created by a passionate community, Nexus offers a vast array of new content and features for your favorite games.
In this guide, we will walk you through the process of downloading mods on Nexus Mod Manager, a powerful and user-friendly mod management tool. Whether you’re a beginner or an experienced modder, this step-by-step tutorial will help you make the most of your gaming experience by accessing and installing a wide range of incredible mods.
Before we dive into the nitty-gritty details, let’s take a moment to understand what mods are and why they are so popular among gamers. Mods, short for modifications, are user-created content that alter or add new elements to a game. These can range from simple cosmetic changes to extensive gameplay overhauls, opening up a world of possibilities for customization and personalization.
Now, you might be wondering, why should I use Nexus Mod Manager? Well, apart from being one of the most popular modding platforms, Nexus Mod Manager comes with several advantages. It provides a centralized hub for managing your mods, making it easy to browse, download, install, and update them seamlessly. Additionally, Nexus Mod Manager offers a variety of features such as mod load order management, mod conflict resolution, and an intuitive user interface, making it suitable for modders of all levels of experience.
Throughout this guide, we will cover everything you need to know to start downloading mods on Nexus Mod Manager. We will walk you through the process of registering on the Nexus website, installing the mod manager, finding and downloading mods, activating them within the manager, and managing updates. By the end of this tutorial, you will have the knowledge and tools to enhance your gaming experience with the amazing world of mods.
So, without further ado, let’s jump right into it and discover the wonders of modding on Nexus Mod Manager!
Step 1: Register and Install Nexus Mod Manager
Before you can start downloading and installing mods with Nexus Mod Manager, you’ll need to create an account on the Nexus website and install the mod manager on your computer. In this step, we’ll guide you through the registration process and show you how to set up the mod manager.
1. Register on the Nexus website: Open your preferred web browser and visit the official Nexus website at www.nexusmods.com. Click on the “Register” button at the top right corner of the page. Fill in the required details, including your preferred username, password, and a valid email address. Verify your email address by clicking on the link sent to your inbox. Once you’ve successfully registered, you’re ready to move on to the next step.
2. Download and Install Nexus Mod Manager: On the Nexus website, click on the “Files” tab at the top of the page. In the search bar, type “Nexus Mod Manager” and press Enter. Locate the Nexus Mod Manager software in the search results and click on the “Download” button. Save the installation file to your computer.
Once the download is complete, locate the installation file and double-click on it to start the installation process. Follow the on-screen instructions to complete the installation, selecting the appropriate options as needed. Once the installation is finished, launch Nexus Mod Manager.
3. Configure Nexus Mod Manager: Upon launching Nexus Mod Manager, you’ll be prompted to set up your mod directories. These directories will define where your downloaded mods will be stored on your computer. Choose a destination folder for your mods or use the default location. Click “OK” to confirm the selection.
Next, you’ll need to specify the games you want to use Nexus Mod Manager with. Click on the “Games” tab at the top of the Nexus Mod Manager window. From the list of supported games, select the games you intend to mod and click “OK.”
Congratulations! You have successfully registered on the Nexus website and installed Nexus Mod Manager. You’re now one step closer to experiencing the world of mods. In the next step, we’ll guide you through the process of finding and downloading mods from the Nexus website.
Step 2: Find and Download Mods on the Nexus Website
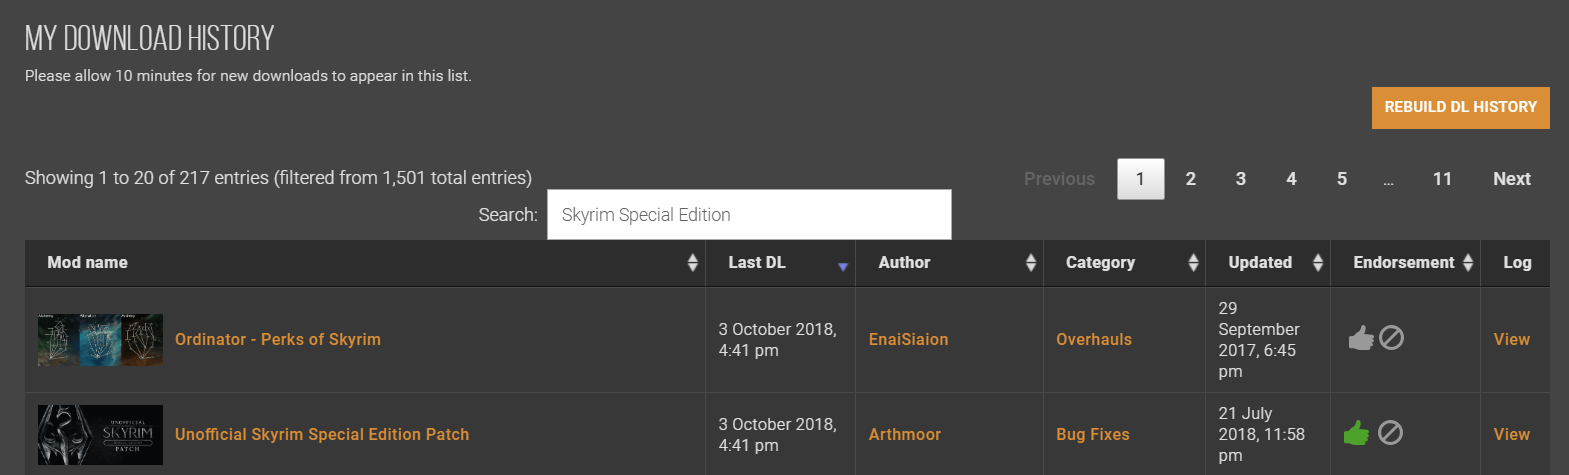
Now that you have Nexus Mod Manager up and running, it’s time to find and download the mods you want to install. The Nexus website offers a vast collection of mods for various games, from essential bug fixes to exciting gameplay enhancements. In this step, we’ll guide you through the process of finding and downloading mods on the Nexus website.
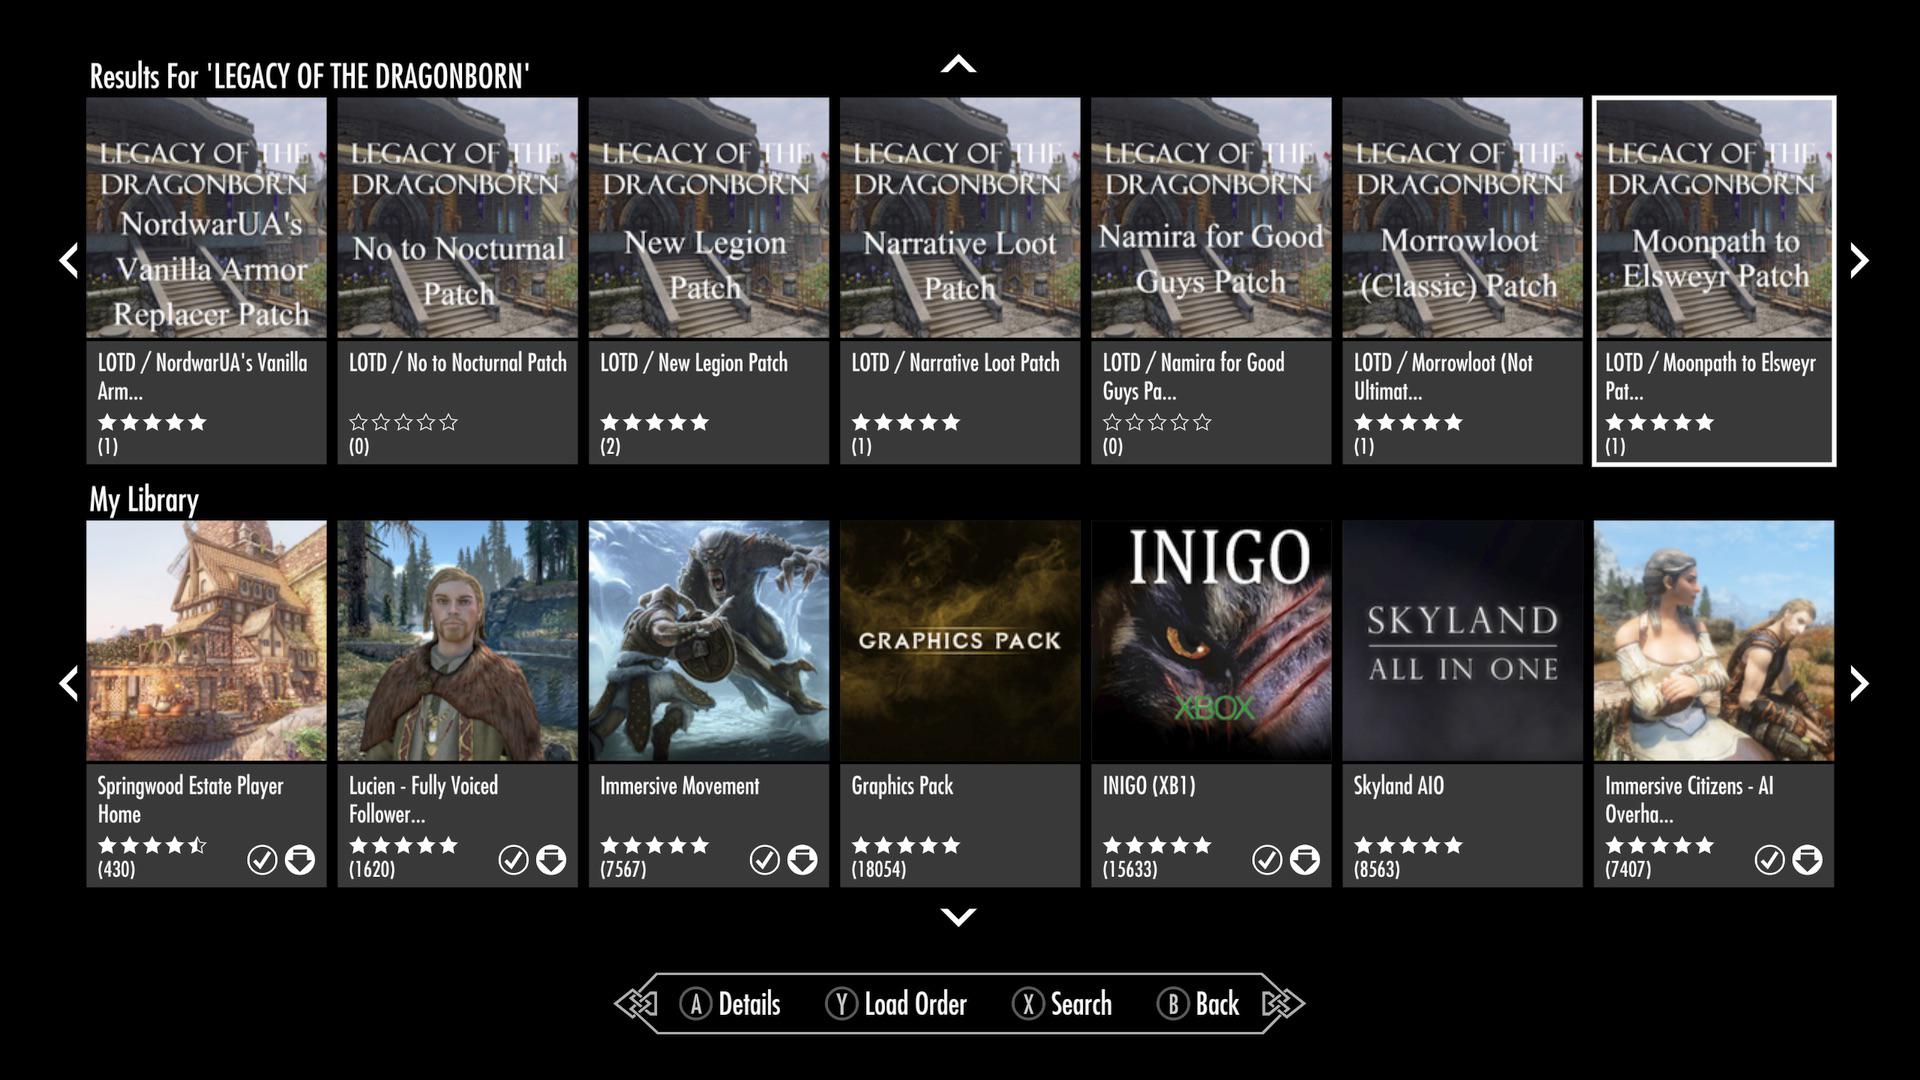
1. Browse the Nexus website: Open your web browser and visit the Nexus website at www.nexusmods.com. Use the search bar at the top of the page to enter the name of the game you want to mod. Once the game’s page appears, click on it to access the mods available for that specific game.
2. Filter and sort the mods: On the game’s page, you will find a variety of filters and sorting options on the left side of the screen. Use these filters to narrow down your search based on categories such as gameplay tweaks, graphical enhancements, or specific mod types. You can also sort the mods by popularity, endorsements, or release date.
3. Select and download a mod: Once you’ve found a mod that interests you, click on its name to access its page. Here, you can read the mod’s description, view screenshots, and check user reviews. If the mod fits your requirements, click on the “Files” tab to see the available download options. Choose the newest version of the mod and click the “Download” button.
4. Configure Nexus Mod Manager for automatic integration: After the mod file finishes downloading, Nexus Mod Manager will automatically detect it. A pop-up window will appear, displaying the mod’s details. Select the mod and click “OK” to activate it within Nexus Mod Manager.
5. Repeat for additional mods: To download more mods, repeat the above steps. Explore the different categories and popular mod lists to discover new and exciting mods that align with your preferences. Remember to carefully read the mod’s description, compatibility notes, and user reviews before downloading.
Now that you know how to find and download mods on the Nexus website, you’re ready to move on to the next step: activating the downloaded mods in Nexus Mod Manager. Stay tuned!
Step 3: Activate the Downloaded Mods in Nexus Mod Manager
Once you have downloaded mods from the Nexus website, it’s time to activate them in Nexus Mod Manager. Activating mods will integrate them into your game, allowing you to enjoy their new content and features. In this step, we will guide you through the process of activating your downloaded mods in Nexus Mod Manager.
1. Launch Nexus Mod Manager: Open Nexus Mod Manager on your computer. If you haven’t done so already, login to your Nexus account within the manager. You will be prompted to enter your Nexus credentials if you haven’t logged in previously.
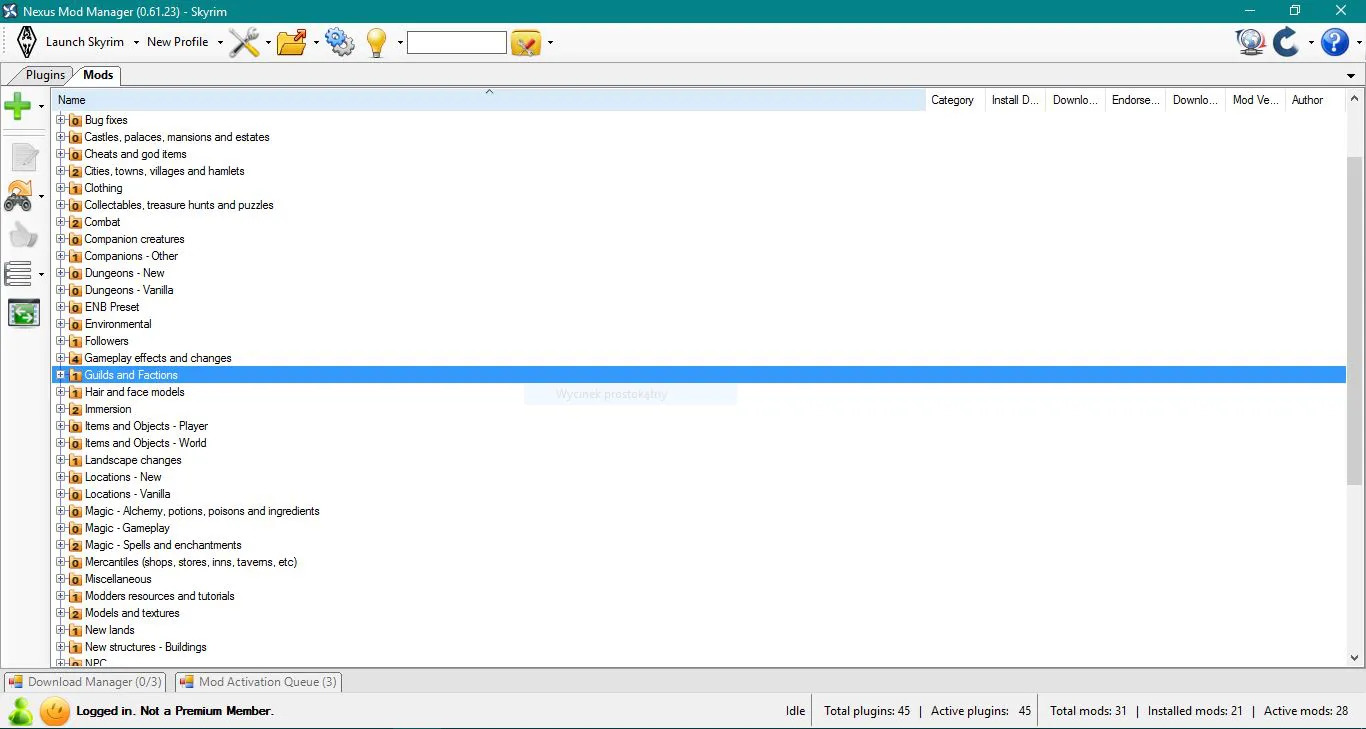
2. Locate your downloaded mods: In the Nexus Mod Manager interface, click on the “Mods” tab at the top of the window. Here, you will see a list of all the mods you have downloaded. You can also use the search function to find a specific mod by name.
3. Activate the downloaded mods: To activate a mod, simply check the box next to its name in the mod list. You can select multiple mods at once by holding down the Ctrl key (or Command key on Mac) while clicking on the mods. Activating a mod will enable it for use in your game.
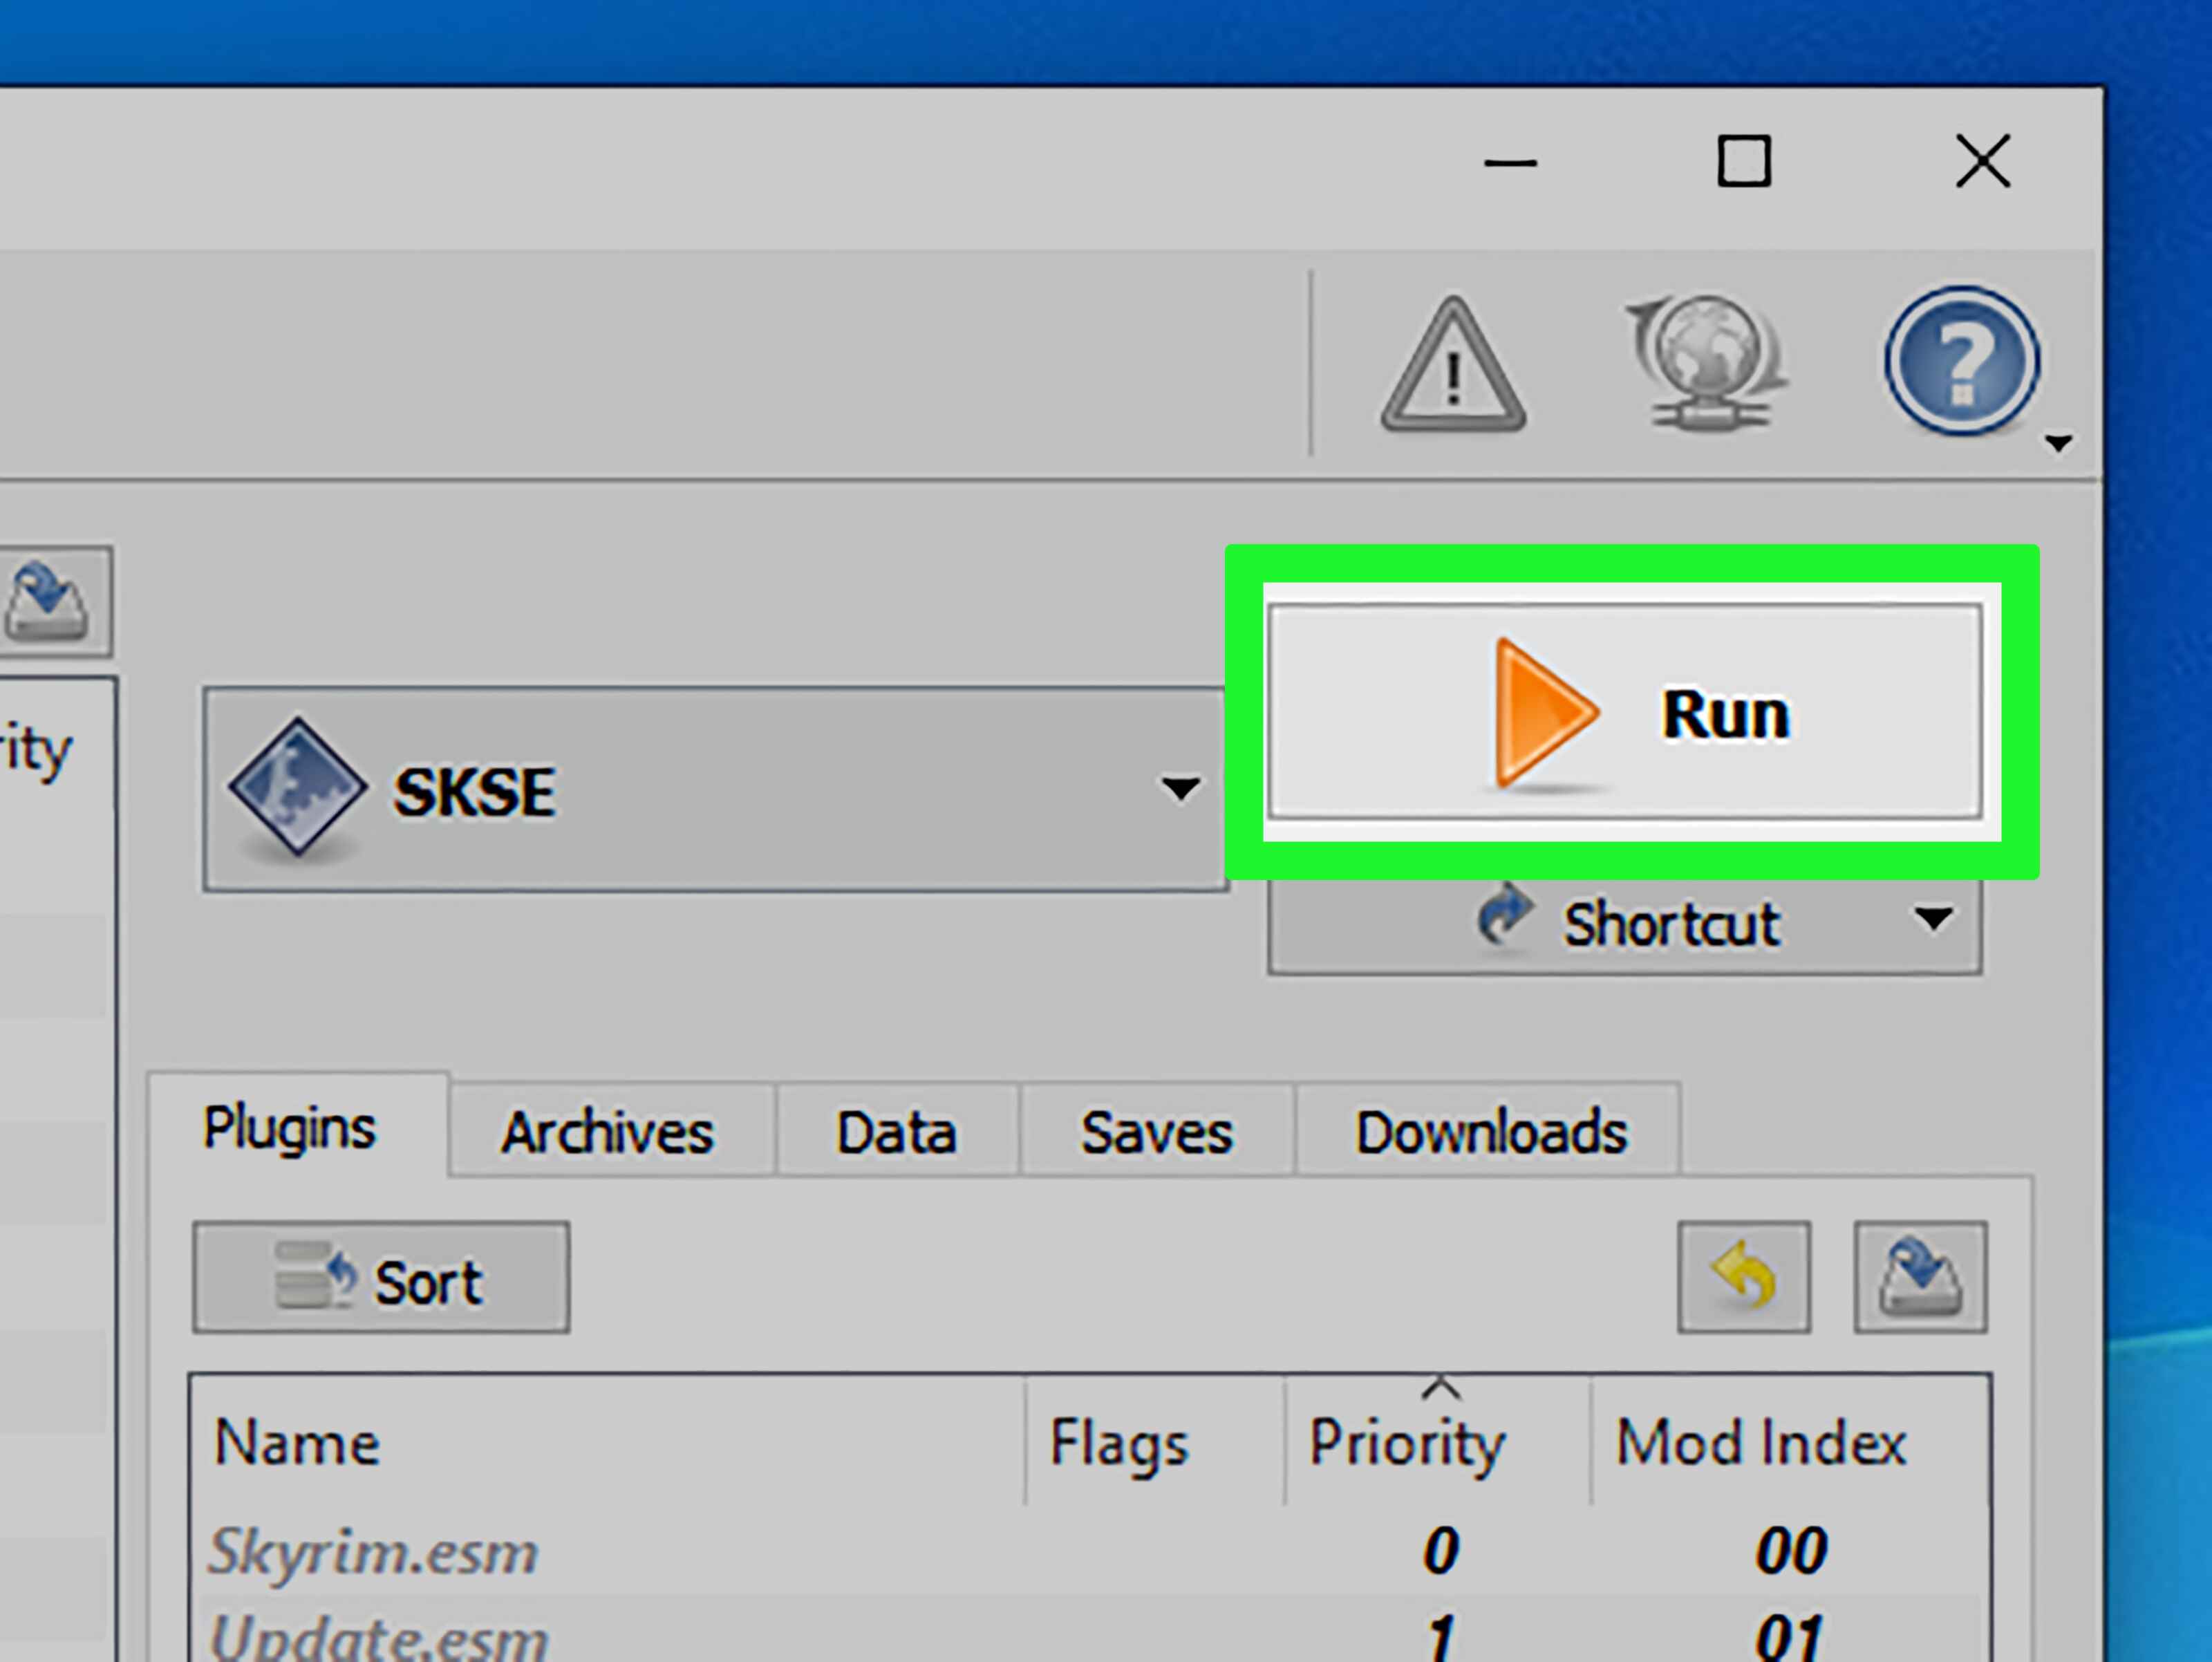
4. Configure mod load order: The order in which mods are loaded can impact their functionality. To ensure that your mods work properly together, it’s important to configure the load order. In Nexus Mod Manager, click on the “Plugins” tab. Here, you will see a list of all the active mods and their load order. You can rearrange the mod order by dragging and dropping them in the desired sequence. The mod at the top of the list will be loaded first, followed by the others in descending order.
5. Check for mod conflicts: Some mods may conflict with each other, causing issues in your game. Nexus Mod Manager provides a built-in conflict detection feature to help you identify these conflicts. In the “Plugins” tab, any conflicting mods will be marked with a caution sign. It’s advisable to read the mod descriptions and user comments to identify potential conflicts and take the necessary steps to resolve them.
6. Update mods: From time to time, mod authors release updates to improve the functionality or address any issues in their mods. To update your mods, simply click on the “Check for Updates” button in the Nexus Mod Manager interface. The manager will automatically detect and download any available updates for your activated mods.
Congratulations! You have successfully activated your downloaded mods in Nexus Mod Manager. In the next step, we will cover how to manage the load order of your mods to ensure a smooth and immersive gaming experience. Stay tuned!
Step 4: Configure Mod Load Order
Managing the load order of your mods is essential to ensure that they work harmoniously and provide the desired gameplay experience. In this step, we will guide you through the process of configuring the mod load order in Nexus Mod Manager.
1. Understand mod load order: Mod load order refers to the sequence in which mods are loaded by the game. Mods that affect similar aspects of the game can conflict if they are loaded in the wrong order. For example, a mod that modifies NPCs should load before a mod that changes their appearance.
2. Access the load order manager: Launch Nexus Mod Manager on your computer. Click on the “Plugins” tab at the top of the interface. Here, you will see a list of all your active mods and their load order.
3. Manage load order manually: To manually configure the load order, you can click and drag the mods in the list to rearrange them. The mod at the top of the list will be loaded first, followed by the others in descending order. Consider the mod dependencies – some mods may require specific mods to be loaded before or after them.
4. Sort with the “Sort” button: Nexus Mod Manager provides a handy “Sort” button to automatically adjust the load order based on recommended guidelines. Clicking this button will organize your mods according to predefined rules and help prevent conflicts. However, be sure to review the load order after using the sorting option, as it may not always perfectly align with your preferences.
5. Resolve mod conflicts: Conflicts can arise when two or more mods try to make changes to the same aspects of the game. Nexus Mod Manager offers a convenient way to identify mod conflicts. In the “Plugins” tab, any conflicting mods will be marked with a caution sign. If conflicts are detected, you may need to adjust the load order manually or consider using specialized tools to resolve conflicts, such as LOOT (Load Order Optimization Tool).
6. Test and troubleshoot: After configuring the load order, it’s essential to test your game to ensure that the mods are working as intended. Launch the game through Nexus Mod Manager and play for a while. Keep an eye out for any unusual behavior or conflicts. If you encounter issues, double-check the load order and mod compatibility to identify potential causes.
By effectively managing the mod load order, you can create a stable and enjoyable gaming experience with your installed mods. In the next step, we will discuss how to install and manage updates for your mods. Stay tuned!
Step 5: Install and Manage Mod Updates
Mod updates are crucial for keeping your mods up to date with the latest features, improvements, and bug fixes. In this step, we will guide you through the process of installing and managing mod updates in Nexus Mod Manager.
1. Check for mod updates: Launch Nexus Mod Manager and click on the “Mods” tab at the top of the interface. Here, you will see a list of all your downloaded mods. Look for the “Update” column to identify mods with available updates. If a mod has an update, the number of available updates will be displayed in this column.
2. Download and install mod updates: To download and install updates, simply click on the mod that requires an update. Nexus Mod Manager will display the mod’s details, including the available updates. Click the “Update” button to initiate the download and installation process. Once the update is installed, the mod will be up to date.
3. Enable automatic updates: Nexus Mod Manager offers the option to enable automatic mod updates. To do this, click on the “Settings” button in the Nexus Mod Manager interface. In the “General” tab, check the box next to “Automatically check for mod updates.” This will prompt Nexus Mod Manager to automatically check for and download updates whenever available.
4. Uninstall outdated mods: It’s essential to keep your mod list streamlined and up to date. If you have mods that are no longer being updated or that you no longer use, it’s advisable to uninstall them from Nexus Mod Manager. To uninstall a mod, simply uncheck the box next to its name in the mod list. This will remove the mod from your game and free up space for new mods or updates.
5. Handle incompatible updates: Mod updates can sometimes introduce incompatibilities with other mods or the game itself. If an updated mod conflicts with other mods you have installed, you may need to make adjustments to the load order or look for compatibility patches. Read mod descriptions, user comments, or consult modding communities for guidance on resolving compatibility issues.
6. Regularly check for updates: Mod authors release updates at different frequencies, so it’s important to regularly check for updates to ensure you stay up to date with the latest versions. Make it a habit to launch Nexus Mod Manager and check for updates, or enable the automatic update feature to simplify the process.
By staying vigilant and keeping your mods updated, you can ensure that you’re benefiting from the latest improvements and enhancements in the modding community. Now that you have learned how to install and manage mod updates, you’re ready to unleash the full potential of your game with the latest mod features. In the next section, we will conclude this guide. Let’s wrap it up!
Conclusion
Congratulations! You have successfully learned how to download, activate, and manage mods on Nexus Mod Manager. With the knowledge and tools gained from this guide, you are now able to enhance your gaming experience by accessing a wide range of incredible mods created by the passionate modding community.
Throughout this guide, we covered the essential steps to get started with Nexus Mod Manager. We began by registering on the Nexus website, installing the mod manager, and understanding the benefits it offers. Then, we delved into the process of finding and downloading mods from the Nexus website, ensuring you have the mods you desire to spice up your gameplay.
Next, we explored the process of activating downloaded mods within Nexus Mod Manager, configuring the load order to prevent conflicts, and managing updates for your mods. By effectively managing the load order and staying up to date with mod updates, you can ensure a stable and enjoyable gaming experience with your favorite mods.
Remember to always read mod descriptions, check for compatibility, and engage with the modding community for any questions or troubleshooting. Modding is a dynamic and ever-evolving process, and keeping up with the latest developments and user feedback will help you make the most of your modding journey.
Now, armed with the knowledge and skills gained from this guide, it’s time to explore the vast world of mods for your favorite games. Make unique and personalized gaming experiences a reality by experimenting with different mods, tweaking your load order, and immersing yourself in the creative possibilities that modding offers.
Thank you for joining us on this modding adventure. We hope that this guide has provided you with the necessary information and guidance to dive into the exciting world of modding on Nexus Mod Manager. Now, go forth, embrace your creativity, and enjoy countless hours of enhanced gameplay with your favorite mods!