Introduction
Are you an avid fan of Skyrim looking to enhance your gaming experience? Mods are the perfect way to add new features, improve graphics, and customize your gameplay. With thousands of mods available, the possibilities are endless. However, figuring out how to download mods for Skyrim can be a daunting task, especially for beginners.
In this article, we will guide you through the process of downloading and installing mods for Skyrim. Whether you are an experienced modder or a newbie to the world of mods, this step-by-step guide will help you get started and explore the limitless potential of Skyrim mods.
Before diving into the nitty-gritty of modding, it’s important to understand what mods are and how they can enhance your gaming experience. Mods, short for modifications, are user-created content that can alter various aspects of the game. From new quests and characters to improved visuals and gameplay mechanics, mods give you the freedom to personalize your Skyrim adventure.
Now that you have a basic understanding of mods, let’s explore the different tools and platforms you’ll need to download and install them.
Understanding Mods
Before delving into the world of Skyrim mods, it’s essential to have a clear understanding of what they are and how they can enhance your gaming experience. Mods, short for modifications, are user-created content that can modify various aspects of the game. They can range from simple cosmetic changes to complex gameplay overhauls.
One of the major advantages of mods is that they allow players to customize Skyrim according to their preferences. Are you looking for better graphics? Want to add new weapons, armor sets, or spells? How about adding new quests or expanding the world of Skyrim? Mods can provide all of this and more.
Mods are created by the passionate Skyrim community and can be found on various platforms, with Nexus Mods being one of the most popular. These mods are typically created by fellow players who have honed their skills in modding and are dedicated to enhancing the Skyrim experience for everyone.
When it comes to choosing mods, it’s important to select those that align with your personal preferences and desired gameplay experience. Some players prefer mods that focus on enhancing the visual aesthetics of the game, while others prefer mods that introduce new gameplay mechanics or add immersive quests.
Before downloading and installing mods, it’s crucial to ensure that they are compatible with the version of Skyrim you’re playing. Different mods may require specific versions of the game or additional dependencies, such as the Skyrim Script Extender (SKSE). It’s recommended to carefully read the mod description and any installation instructions provided by the mod author.
While mods can greatly enhance your Skyrim experience, it’s important to be cautious when selecting and installing them. Always download mods from trusted sources to ensure that they are safe and free from malicious code. Additionally, keep in mind that some mods may conflict with others, leading to compatibility issues or crashes. Properly managing your mods and load order will help avoid such problems.
Understanding the different types of mods available and being aware of compatibility issues will ensure a smoother modding experience. Now that you have a solid understanding of what mods are and their potential, let’s move on to the next step – choosing a mod manager.
Choosing a Mod Manager
When it comes to managing your Skyrim mods, using a mod manager is highly recommended. A mod manager simplifies the process of installing, organizing, and updating mods, making it easier to keep track of your modifications and avoid conflicts.
There are several mod managers available, each with its own set of features and benefits. Here are three popular options:
- Nexus Mod Manager (NMM): Developed by the creators of Nexus Mods, NMM is a user-friendly mod manager that makes modding a breeze. With its intuitive interface, you can easily browse and download mods from the Nexus Mods website, install them with a single click, and manage your load order. NMM also offers features like the ability to activate or deactivate mods, prioritize their order, and easily update installed mods.
- Vortex: Vortex is another mod manager developed by Nexus Mods. It has a more modern and streamlined interface compared to NMM. Vortex offers robust mod management capabilities, including a mod installation wizard, a built-in conflict resolver, and a comprehensive mod deployment process. It also provides a helpful plugin management system that aids in managing compatibility across mods.
- Mod Organizer 2: Mod Organizer 2 (MO2) is a powerful mod manager with advanced features and flexibility. It boasts a unique “Virtual File System” that keeps your Skyrim installation clean by isolating mod files from the game’s core files. This makes it easier to manage and uninstall mods without leaving any traces in your Skyrim directory. MO2 also offers a comprehensive set of tools for mod management, including profile management, LOOT integration for load order optimization, and a built-in mod conflict detector.
When choosing a mod manager, consider factors such as your level of expertise, desired features, and compatibility with your modding workflow. It’s recommended to explore the different mod managers, read user reviews, and try out their functionalities to determine which one suits your needs best.
Once you have selected a mod manager, you’ll be ready to delve into the world of Skyrim mods. In the next section, we’ll guide you on how to find and download mods from Nexus Mods.
Finding Skyrim Mods
With the vast number of Skyrim mods available, finding the ones that suit your preferences can be an exciting journey. There are several platforms where you can discover and download mods, but one of the most popular and reliable sources is Nexus Mods.
Nexus Mods is a community-driven website that hosts a vast collection of mods for various games, including Skyrim. The website offers a user-friendly interface and powerful search functionality, making it easy to find mods that pique your interest.
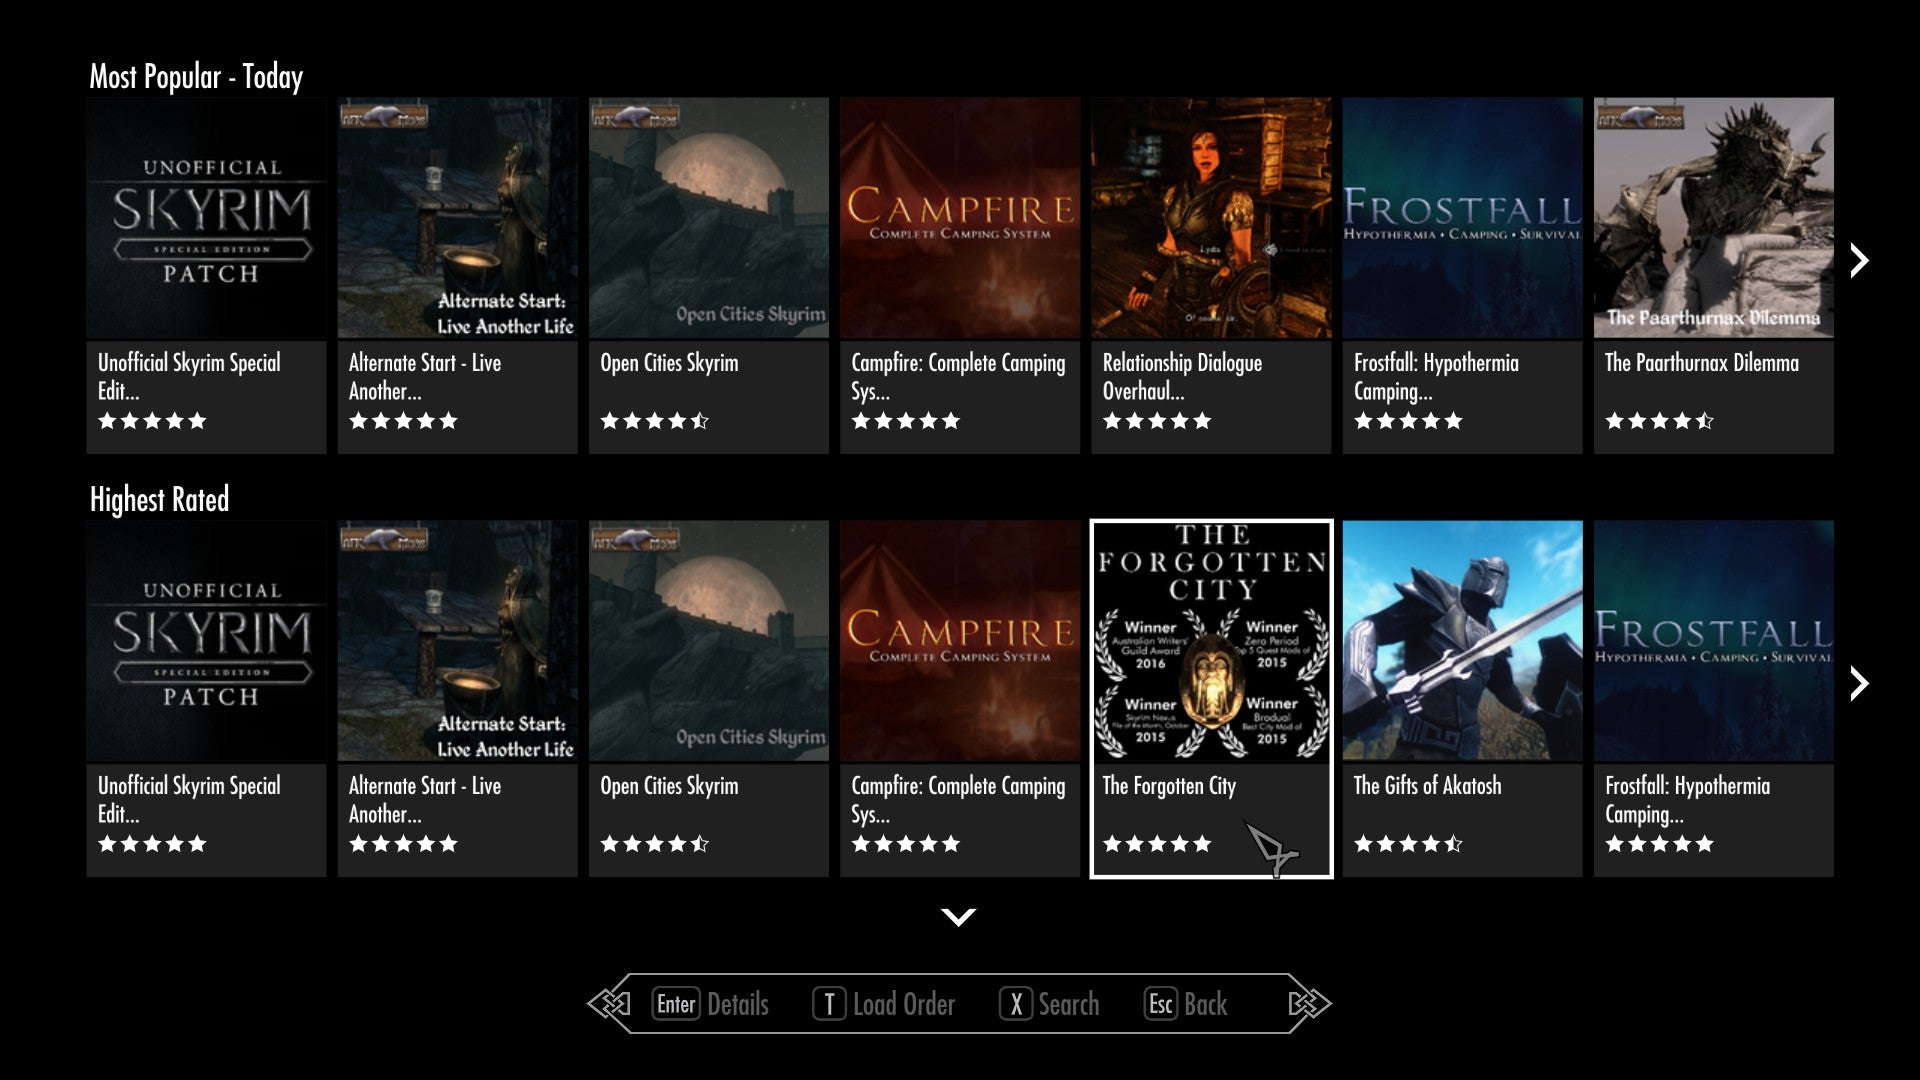
To start your search, visit the Nexus Mods website and navigate to the Skyrim section. Here, you’ll find a wide range of categories, such as gameplay, graphics, quests, and more. Browse through these categories to explore different types of mods available.
Another helpful feature on Nexus Mods is the endorsement system. Mod authors can receive endorsements from users who have enjoyed their mods. These endorsements act as a seal of approval and can help you identify popular and well-received mods.
Additionally, you can utilize the sorting and filtering options to narrow down your search. Sort mods by endorsements, downloads, or latest updates to discover the most popular and actively maintained ones. Use filters to specify your preferences, such as mod type, compatibility with expansions or DLCs, or even the language of the mod.
Reading mod descriptions and user reviews is also crucial in your search for the perfect mods. Mod descriptions provide valuable information about the mod’s features, compatibility, installation process, and any required dependencies. User reviews give you insights into whether the mod is stable, bug-free, and enhances the gameplay as intended.
Once you find a mod or a few that catch your eye, it’s time to download them and prepare for the installation. In the next section, we’ll guide you through the process of downloading mods from Nexus Mods.
Downloading Mods from Nexus Mods
Nexus Mods provides a straightforward and user-friendly platform for downloading mods for Skyrim. Once you have found a mod that you want to install, follow these steps to download it:
- Ensure that you have created a Nexus Mods account and are logged in.
- Click on the mod’s page to access its details and description.
- Review the information provided, including compatibility, requirements, and any installation instructions.
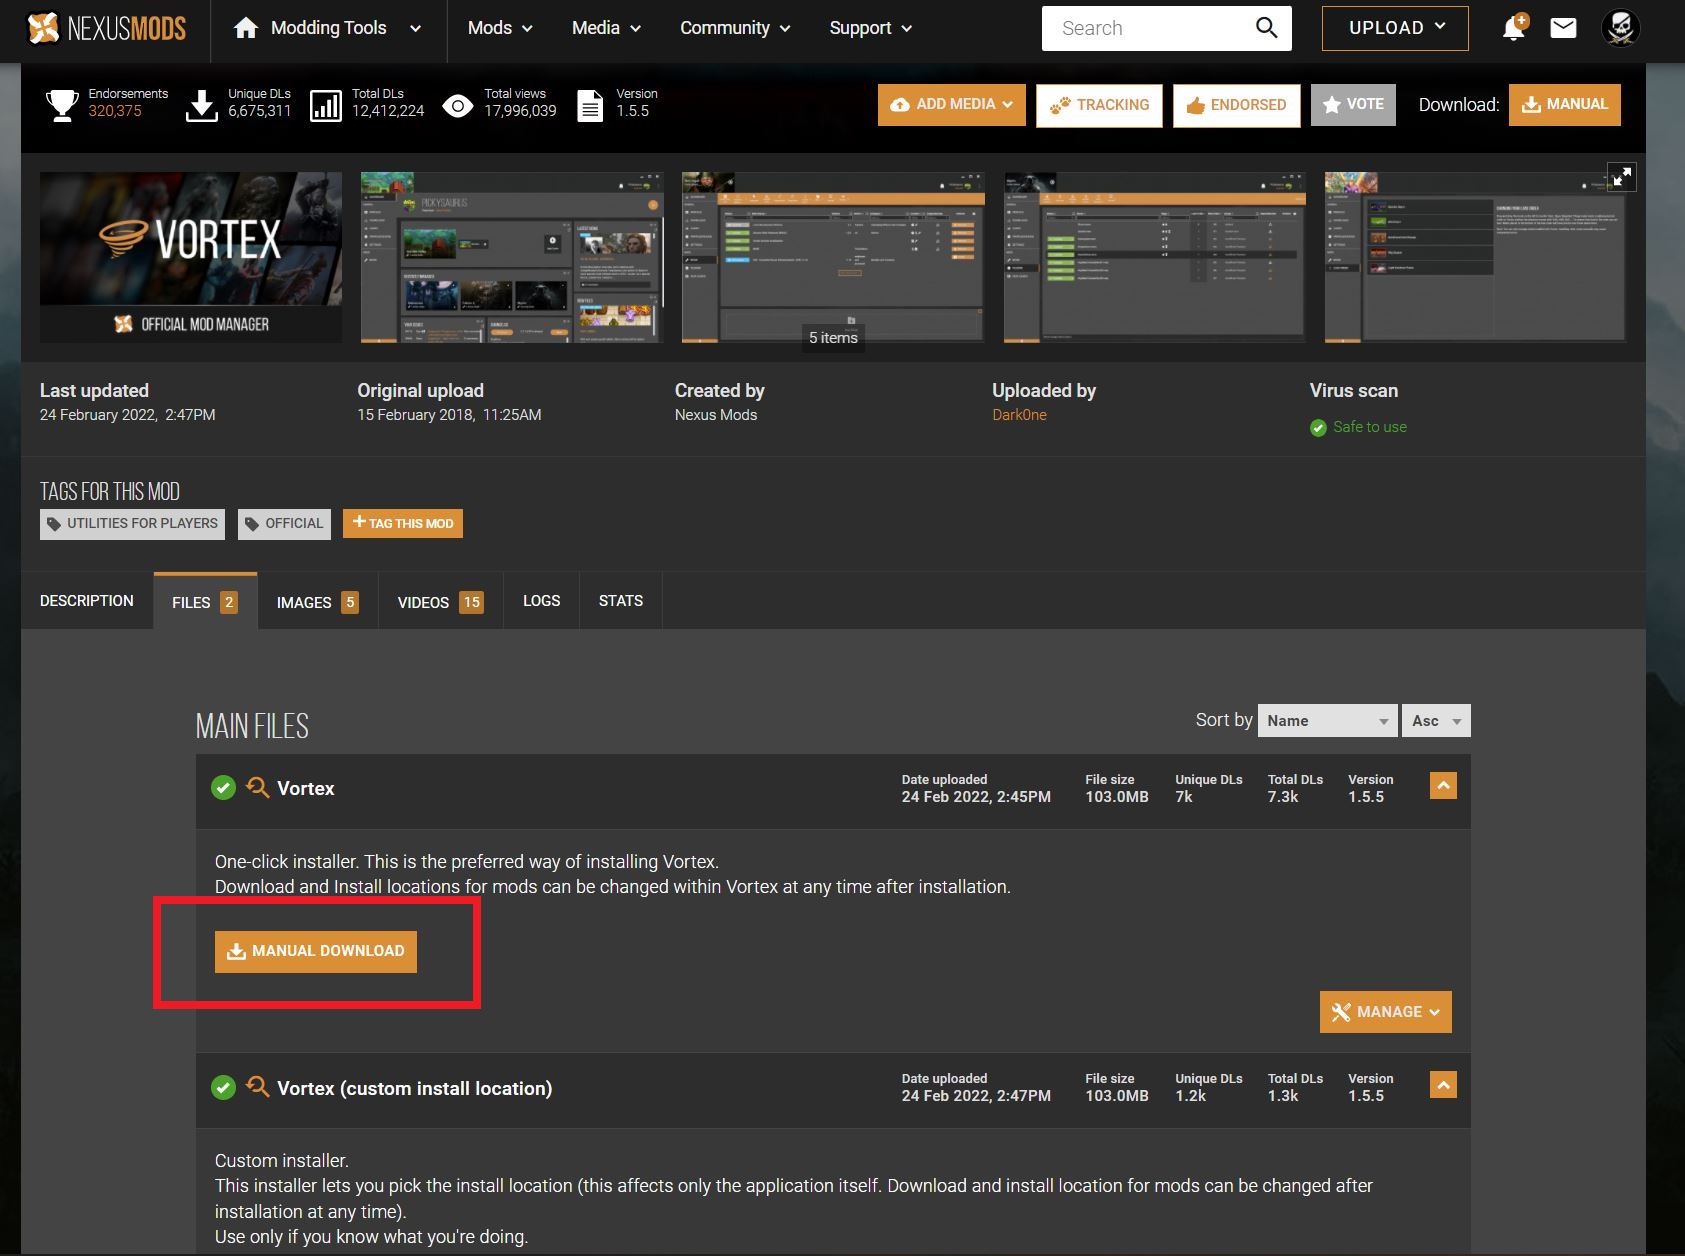
- Scroll down to the “Files” section of the mod page.
- Here, you will find multiple files associated with the mod. Look for the main file, usually labeled as the “Main File,” “Download,” or something similar.
- Click on the “Download” button next to the main file.
- A pop-up window will appear, asking you to confirm the download.
- Choose the location on your computer where you want to save the mod file.
- Click “OK” to begin the download.
- Depending on the size of the mod and your internet connection, the download may take a few moments to complete.
- Once the download is finished, navigate to the location on your computer where the mod file was saved.
Congratulations! You have successfully downloaded the mod file from Nexus Mods. Now, you are ready to proceed with the installation of the mod using a mod manager, as discussed in the next section.
It’s worth mentioning that some mods may have additional optional files or patches available for download. These files can provide compatibility with other mods or offer additional features. Feel free to explore these options, but be mindful of their compatibility and potential conflicts with other mods in your setup.
Now that you have the necessary mod files, let’s move on to the installation process using a mod manager, making mod installation quick and hassle-free.
Installing Mods with a Mod Manager
Using a mod manager is the recommended method for installing mods in Skyrim. It simplifies the process and ensures that mods are installed correctly while managing the load order and resolving conflicts. Here’s a step-by-step guide on how to install mods using a mod manager:
- Open your chosen mod manager (e.g., Nexus Mod Manager, Vortex, Mod Organizer 2).
- Ensure that your mod manager is correctly configured and connected to your Skyrim installation.
- Navigate to the mod manager’s interface and look for a button or tab that says “Mods” or “Mod Library.”
- Click on the “Mods” or “Mod Library” button to access your mod list.
- Locate the “Install” button or a similar option within the mod manager’s interface.
- Click on the “Install” button to initiate the mod installation process.
- A dialog box or file browser will appear, allowing you to select the mod file you downloaded from Nexus Mods.
- Navigate to the location where you saved the mod file and select it.
- Click “OK” or “Install” to proceed with the installation.
- The mod manager will handle the installation process, extracting and deploying the necessary files to the correct locations in your Skyrim installation.
- Once the installation is complete, the mod will appear in your mod manager’s mod list, indicating that it is now installed and ready to use.
Depending on the mod manager you are using, you may have additional options available for managing the mod, such as activating or deactivating mods, changing load order, or accessing mod-specific settings.
It’s worth noting that some larger mods or mods with additional dependencies may require additional installation steps or configuration. Always refer to the mod’s documentation or installation instructions for specific details on any additional steps that need to be taken.
Now that you have successfully installed the mod using your chosen mod manager, you’re one step closer to experiencing the new content, features, or visual improvements it brings to your Skyrim game. In the next section, we’ll cover the alternative method of manual installation for mods that are not compatible with mod managers.
Installing Mods Manually
While using a mod manager is the recommended method for installing mods, there may be instances where certain mods are not compatible with mod managers or require manual installation. In such cases, you can follow these steps to manually install the mods:
- Download the mod files from the source website, such as Nexus Mods.
- Once the mod files are downloaded, navigate to your Skyrim installation directory.
- Locate the “Data” folder within the Skyrim installation directory.
- Inside the “Data” folder, you will find several subfolders containing game files.
- Check if the mod you downloaded has any specific installation instructions mentioned in the mod description or readme file.
- If there are specific instructions, follow them accordingly.
- If the mod files are in an archive format (e.g., .zip, .rar), extract the contents of the archive using a file extraction tool such as WinRAR or 7-Zip.
- After extracting the mod files, you may find folders and loose files.
- Copy the mod files into the corresponding folders in the “Data” directory.
- If the mod contains loose files (e.g., .esp, .bsa), you can place them directly into the “Data” folder.
- Make sure to respect folder structures mentioned in the mod description or readme file.
- Once all the mod files are placed in the appropriate folders, you can launch Skyrim.
- Ensure that the mod is enabled in the game’s mod list, which can be accessed from the main menu.
Remember that manually installed mods may require additional steps like tweaking game settings or merging plugins to avoid conflicts. Always refer to the mod documentation for any specific instructions or troubleshooting steps.
While manual installation gives you more control, it also requires careful monitoring and management of mod files. It’s important to keep track of installed mods, their compatibility, and possible conflicts manually. Therefore, using a mod manager is highly recommended whenever possible.
Now you are equipped with the knowledge to manually install mods in Skyrim. In the next section, we’ll cover managing mods and ensuring the correct load order for a stable and optimized gameplay experience.
Managing Mods and Load Order
Properly managing your mods and load order is crucial for a stable and enjoyable Skyrim experience. Load order refers to the sequence in which mods are loaded into the game, and it can greatly impact the functioning of your mods. Here are some important tips for managing mods and load order:
- Use a Mod Manager: As mentioned earlier, using a mod manager such as Nexus Mod Manager, Vortex, or Mod Organizer 2 makes managing mods and load order much easier. These tools provide intuitive interfaces and features that allow you to organize, activate, and deactivate mods with a few clicks.
- Read Mod Descriptions: Before installing a mod, thoroughly read its description to ensure compatibility and understand any specific installation instructions or recommendations provided by the mod author. Mod descriptions may also include information on load order requirements or compatibility patches.
- Sort with LOOT: LOOT (Load Order Optimization Tool) is a third-party program that automatically sorts your mods into the optimal load order. It analyzes the conflicts and dependencies between mods and provides a recommended load order. Running LOOT periodically ensures that your mods are arranged to avoid conflicts and improve stability.
- Resolve Conflicts: Some mods may alter the same aspects of the game, leading to conflicts. Conflicting mods can result in crashes, missing items, or unexpected behavior. If you encounter issues, check for compatibility patches available on the mod page or consider disabling conflicting mods to troubleshoot the problem.
- Create Mod Profiles: Mod organizer tools like Mod Organizer 2 allow you to create separate profiles for different gameplay experiences. This enables you to have multiple setups with different combinations of mods and load orders. Profiles can help you switch between different playthroughs or experiment with mods without affecting your main setup.
- Regularly Update Mods: Mod authors often release updates to address bugs, improve performance, or introduce new features. It’s important to keep your mods up to date. Check for updates on the Nexus Mods website or use the update functionality provided by your mod manager.
- Backup Your Game: Before making any major changes to your mods or load order, it’s always a good idea to back up your game. Backups ensure that you can revert to a previous working state if you encounter issues or conflicts with new mod installations or load order changes.
By effectively managing your mods and load order, you can create a stable and optimized Skyrim experience that incorporates all the enhancements and features you desire. Now that you know how to manage mods and load order, let’s move on to section 8, which covers updating and removing mods.
Updating and Removing Mods
Regularly updating and removing mods is an essential part of maintaining a stable and enjoyable Skyrim modding experience. Updates can bring bug fixes, performance improvements, and new features, while removing outdated or conflicting mods ensures a smoother gameplay experience. Here’s a guide on how to update and remove mods:
Updating Mods:
- Keep track of mod updates: Stay informed about mod updates by regularly visiting the Nexus Mods website, checking for notifications from your mod manager, or subscribing to mod author newsletters if available.
- Check mod compatibility: Before updating a mod, ensure that the new version is compatible with your current Skyrim setup. Read the mod description, changelog, or any additional notes provided by the mod author regarding compatibility with other mods or the need for special installation steps.
- Update through mod manager: If you’re using a mod manager, updating mods is typically a straightforward process. The mod manager will notify you when updates are available, and you can initiate the update process with a few clicks.
- Manual update: For mods installed manually, download the updated files from the source website, extract them if necessary, and replace the old files in the appropriate mod folders.
Removing Mods:
- Consider compatibility: Before removing a mod, ensure that it is not a crucial dependency for any other mods in your setup. Removing a mod that other mods rely on can cause instability or missing content.
- Disable through mod manager: For mods installed through a mod manager, you can simply disable them within the mod manager’s interface. This keeps the mod files intact but prevents them from being loaded in your game.
- Remove manually: If you installed mods manually, navigate to your Skyrim installation directory, locate the mod files, and delete them. Be careful not to delete any files that might be shared or required by other mods.
- Clean your save file: After removing a mod, it’s recommended to clean your save file using tools like FallrimTools or Skyrim Save Cleaner. These tools can help remove any lingering references or scripts associated with the mod you removed.
Remember, when updating or removing mods, it’s crucial to keep track of mod dependencies, compatibility, and instructions provided by the mod authors. Paying attention to these details will help you maintain a stable and enjoyable modded Skyrim experience.
In the next section, we’ll discuss common troubleshooting tips to help you resolve issues that may arise during your modding journey.
Troubleshooting Common Issues
While modding Skyrim can significantly enhance your gaming experience, occasional issues may arise that need troubleshooting. Here are some common issues that modders may encounter and tips for resolving them:
- Game Crashes or Freezes: If Skyrim crashes or freezes after installing mods, it may be due to conflicting mods or an issue with the load order. Use a mod manager to review and adjust your load order or disable mods to identify the culprit. LOOT (Load Order Optimization Tool) can also help resolve conflicts and stabilize your game.
- Missing or Clipping Objects: If you see missing objects or experience clipping issues, it may indicate a problem with either a mod installation or mod conflict. Verify that the mod is installed correctly, and check for any mod conflicts by disabling mods one at a time to pinpoint the issue.
- Performance Issues: Mods can sometimes impact performance, resulting in lower frame rates or increased loading times. Adjust your graphics settings, use performance-enhancing mods or patches, or lower the number of active mods to improve performance.
- NPC or AI Issues: If you encounter issues with NPCs not behaving as intended or experiencing graphical glitches, ensure that you have compatible AI mods and any required patches installed. Also, verify the load order and mod compatibility to identify any conflicts affecting NPCs.
- Mod Compatibility: Conflicting mods can cause various issues in Skyrim. Before installing multiple mods, carefully read the mod descriptions, check for compatibility patches, and use a mod manager to manage load order. Test your mods one-by-one to identify any problematic combinations.
- Outdated Mods: Outdated mods may not work correctly with the latest version of Skyrim or other mods. Check for updates on Nexus Mods or the mod author’s website, and ensure that you’re using the most recent versions to avoid compatibility issues.
- Save File Corruption: Mod removal or updates can occasionally lead to save file corruption or instability. Always make backups of your save files before making significant changes to your mod setup. If you encounter save file issues, refer to the mod author’s documentation or try using save file cleaners to resolve any lingering mod references.
Remember to consult the mod descriptions, installation instructions, and user forums on Nexus Mods or other relevant websites for specific troubleshooting advice related to individual mods. Modding communities are also excellent resources for addressing mod-related issues or seeking assistance.
By troubleshooting common issues, you can maintain a stable and enjoyable Skyrim modding experience. Now that you have the tools to troubleshoot common problems, let’s conclude our guide on downloading mods for Skyrim.
Conclusion
Modding Skyrim can be a rewarding and transformative experience, allowing you to customize and enhance your gameplay in countless ways. Throughout this guide, we’ve walked you through the process of downloading, installing, managing, and troubleshooting mods for Skyrim.
Understanding mods and their potential is the first step in embarking on your modding journey. Whether you’re looking to improve graphics, add new quests, or change gameplay mechanics, mods offer a wide variety of options to personalize your Skyrim adventure.
Choosing a mod manager, such as Nexus Mod Manager, Vortex, or Mod Organizer 2, simplifies the process of installing and managing mods. These tools streamline the installation process, handle load order management, and aid in resolving conflicts, providing a smoother and more user-friendly modding experience.
Finding mods on platforms like Nexus Mods opens up a whole world of possibilities. With the extensive collection of mods available, you can browse through different categories, read user endorsements and reviews, and select mods that align with your preferences and desired gameplay experience.
Whether you’re using a mod manager or installing mods manually, being mindful of compatibility, following installation instructions, and managing your load order is essential for a stable and optimized mod setup.
Updating and removing mods ensures that you stay up to date with bug fixes, improved performance, and new features. Regularly assessing your mod selection, resolving conflicts, and organizing your load order will contribute to a smoother and more enjoyable Skyrim modding experience.
Lastly, should you encounter any issues along the way, troubleshooting common problems will help you identify and resolve conflicts, crashes, missing objects, or performance issues.
Now armed with the knowledge and understanding of modding Skyrim, you have the power to shape your gaming experience and explore a world of endless possibilities. So go ahead, dive into the realm of mods, and create your ultimate Skyrim adventure!