Introduction
Welcome to the world of Skyrim, the epic fantasy role-playing game that has captured the hearts of millions of players around the globe. If you’re a proud owner of a PlayStation 4 and you’ve been itching to enhance your Skyrim experience, you’re in luck! In this article, we will guide you through the process of downloading mods for Skyrim on your PS4.
Mods, short for modifications, are user-created content that can be added to the base game to introduce new features, improve gameplay mechanics, and enhance the overall visual and audio experience. With mods, you have the power to personalize your Skyrim adventure to suit your preferences and make it truly unique.
Before diving into the exciting world of mods, there are a few essential steps you need to take to ensure a smooth and successful modding experience. In the following sections, we’ll walk you through each step, from setting up your PS4 to browsing and installing mods. So grab your controller and let’s get started!
Step 1: Setting up your PS4
The first step in downloading mods for Skyrim on your PS4 is to ensure that your console is set up and ready to go. Here’s what you need to do:
- Connect your PS4 to the internet: Make sure your PS4 is connected to the internet, either via Wi-Fi or an ethernet cable. This is crucial, as you’ll need a stable internet connection to download and install mods.
- Update your PS4 software: It’s important to have the latest software version on your PS4 to ensure compatibility with mods. Go to the Settings menu on your PS4, select “System Software Update,” and then follow the on-screen instructions to update your console.
- Make space for mods: Mods can take up a significant amount of storage space on your PS4. Check that you have enough free space on your console’s hard drive to accommodate the additional content. If needed, delete any unnecessary games or files to create space.
- Enable automatic downloads: To make the mod installation process smoother, it’s recommended to enable automatic downloads on your PS4. In the Settings menu, navigate to “Power Save Settings” and then “Set Features Available in Rest Mode.” Tick the box for “Stay Connected to the Internet” and enable “Enable Turning On PS4 from Network” for a hassle-free experience.
With these steps completed, your PS4 is now ready for the exciting world of Skyrim mods. In the next section, we’ll guide you through creating a Bethesda.net account, which is necessary to access and download mods for Skyrim Special Edition.
Step 2: Creating a Bethesda.net Account
In order to access and download mods for Skyrim on your PS4, you will need to create a Bethesda.net account. Here’s how:
- Visit the Bethesda.net website: Using a web browser on your computer or mobile device, go to the official Bethesda.net website.
- Click on “Create Account”: Look for the “Create Account” button, typically located at the top right corner of the webpage. Click on it to begin the registration process.
- Fill in the required information: Provide the necessary details, such as your email address, a unique username, and a strong password. Make sure to choose a password that is secure and not easily guessable.
- Confirm your email: After completing the registration form, you will receive an email from Bethesda.net. Check your inbox and click on the verification link provided in the email to confirm your account.
- Log in to your Bethesda.net account: Once your account is confirmed, return to the Bethesda.net website and log in using your newly created username and password.
- Link your Bethesda.net account to your PSN ID: To enable mod support for Skyrim on your PS4, you need to link your Bethesda.net account to your PlayStation Network (PSN) ID. From the Bethesda.net homepage, go to “Profile” and select “Linked Accounts.” Follow the instructions to link your PSN ID to your Bethesda.net account.
Congratulations! You have successfully created a Bethesda.net account and linked it to your PSN ID. Now, you’re one step closer to downloading and enjoying mods for Skyrim on your PS4. Next, let’s move on to the installation of the Skyrim Special Edition.
Step 3: Installing the Skyrim Special Edition
In order to download and play mods for Skyrim on your PS4, you must have the Skyrim Special Edition installed on your console. Here’s how you can install it:
- Access the PlayStation Store: Turn on your PS4 and navigate to the PlayStation Store from the main menu.
- Search for Skyrim Special Edition: Use the search function within the PlayStation Store to find the Skyrim Special Edition. Alternatively, you can browse the “Games” section and look for Skyrim Special Edition under the “Featured” or “New” categories.
- Select and download the game: Once you’ve found Skyrim Special Edition, click on it to open the game’s page. From there, you can choose to either purchase the game or download it if you already own it.
- Wait for the download and installation: After initiating the download, the game will begin to download and install on your PS4. The installation time will vary depending on your internet connection speed and the size of the game.
- Check the status of the installation: You can monitor the progress of the installation by going to the “Notifications” section on your PS4’s main menu. Once the installation is complete, you’ll be ready to embark on your modding adventure in Skyrim Special Edition!
With Skyrim Special Edition installed on your PS4, you’re now ready to enter the world of mods and unlock endless possibilities for enhancing your Skyrim experience. In the next section, we’ll guide you through accessing the mods menu in-game and preparing to download your first mods.
Step 4: Launching Skyrim Special Edition and Accessing the Mods Menu
Now that you have Skyrim Special Edition installed on your PS4, it’s time to launch the game and access the mods menu. Follow these steps:
- Turn on your PS4: Make sure your console is powered on and connected to your TV.
- Select Skyrim Special Edition: From the main menu of your PS4, navigate to the game library and locate Skyrim Special Edition.
- Launch the game: Once you’ve found Skyrim Special Edition, select it and click on the “Play” button to launch the game.
- Wait for the game to load: Skyrim Special Edition may take a few moments to load. Be patient while it initializes.
- Access the mods menu: Once the game has loaded, navigate to the main menu. Look for the “Mods” option and select it to access the mods menu.
- Agree to the terms: Before browsing and installing mods, you may be prompted to agree to certain terms and conditions. Read through them carefully and accept to proceed.
By accessing the mods menu within Skyrim Special Edition, you have unlocked the ability to explore an extensive library of user-created content. In the upcoming section, we’ll delve into the exciting process of browsing and selecting mods that align with your preferences and playstyle. Get ready to take your Skyrim adventure to new heights!
Step 5: Browsing and Selecting Mods
With Skyrim Special Edition launched and the mods menu in front of you, it’s time to dive into the exciting world of modding. Follow these steps to browse and select mods for your gameplay:
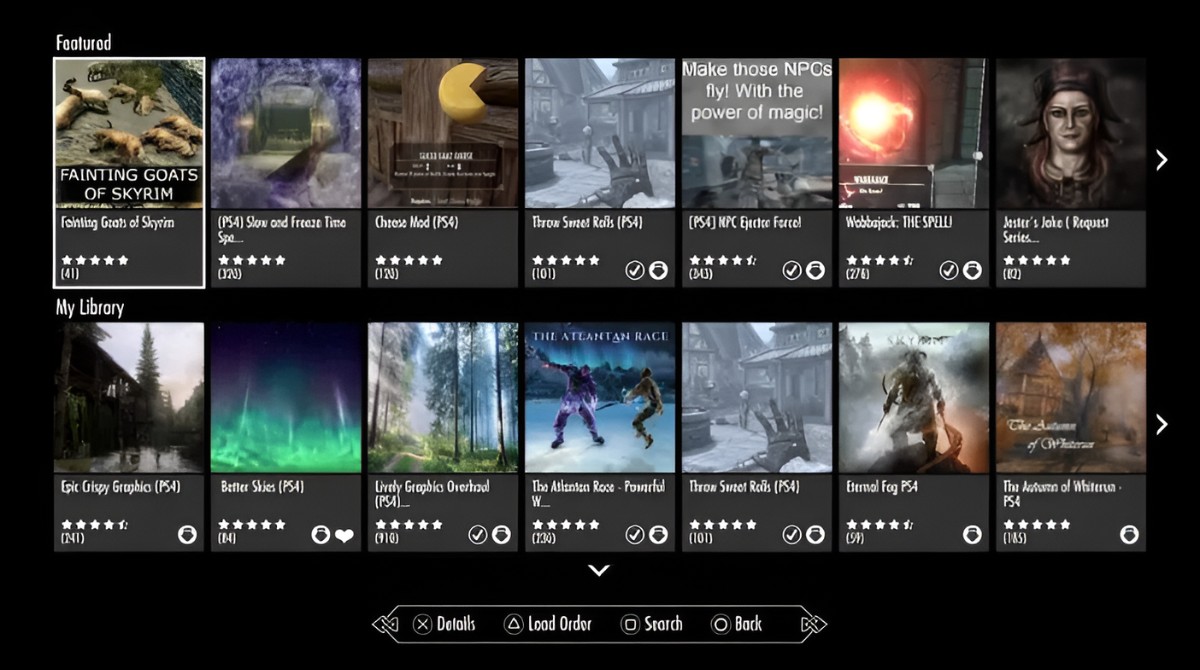
- Browse the mod categories: The mods menu will typically have various categories to help you narrow down your search. Common categories include gameplay enhancements, graphics improvements, new quests, and character customizations. Explore each category to find mods that catch your interest.
- Read mod descriptions: Clicking on a mod will display its description, giving you an overview of its features and changes. Pay attention to the details and make sure the mod aligns with what you’re looking for in your Skyrim experience.
- Check ratings and user feedback: Many mods have user ratings and comments. Take the time to read through them to get a sense of the mod’s quality and potential compatibility issues. This feedback can help you make an informed decision when selecting mods.
- Select and download mods: When you’ve found a mod that you want to install, select it and choose the “Download” option. The mod will begin downloading onto your console.
- Review and manage your mod list: As you download mods, they will appear in your mod list. From here, you can review and manage the mods you’ve installed. You can enable or disable mods, rearrange their load order, and remove any that you no longer want.
Take your time while browsing and selecting mods. Experiment with different combinations to create a Skyrim experience that suits your preferences. In the following section, we’ll guide you through the process of downloading and installing the mods you’ve chosen.
Step 6: Downloading and Installing Mods
Now that you’ve selected your desired mods, it’s time to download and install them into your Skyrim Special Edition game. Follow these steps to bring your chosen mods to life:
- Select the mod to install: From your mod list, choose the mod you want to install. Make sure it’s the one you’ve carefully selected.
- Initiate the download: Once you’ve selected the mod, click the “Download” button. The mod will start downloading onto your PS4.
- Wait for the download to complete: The download time may vary depending on the size of the mod and your internet connection speed. Be patient and let the download finish.
- Install the mod: After the download is complete, the mod will be ready to install. Follow the on-screen prompts to install the mod into your Skyrim Special Edition game.
- Enable the mod: Once the mod is installed, go back to your mod list and enable the mod by selecting it and choosing the “Enable” option. This will ensure that the mod is active and operational.
Repeat these steps for each mod you’ve chosen to download and install. Keep in mind that some mods may have specific installation instructions or additional requirements, so be sure to read the mod description carefully.
Congratulations! You’ve successfully downloaded and installed mods into your Skyrim Special Edition game. In the next section, we’ll discuss how to manage and organize your mods to keep your gameplay experience smooth and enjoyable.
Step 7: Managing and Organizing Your Mods
With multiple mods installed in your Skyrim Special Edition game, it’s important to have good management and organization to ensure a smooth and enjoyable gameplay experience. Follow these steps to effectively manage and organize your mods:
- Load order: The load order of your mods is crucial, as it determines the order in which they will be loaded by the game. Some mods may conflict with each other if their load order is not properly arranged. To manage your load order, access the “Mods” menu and use the provided tools to adjust the order. Typically, mods that modify similar aspects of the game should have a specific order to avoid conflicts.
- Enable/disable mods: If you ever encounter compatibility issues or simply want to deactivate a particular mod, you can do so by going to your mod list and selecting the mod you want to disable. Use the “Disable” option to turn off the mod. If you wish to re-enable it later, you can simply choose the “Enable” option again.
- Update your mods: Mod creators often release updates to fix bugs or add new features. It’s essential to keep your mods up to date to ensure compatibility with the latest version of Skyrim Special Edition. Visit the mod section regularly to check for updates and install them accordingly.
- Remove unwanted mods: If you no longer want a particular mod in your game, you can remove it by selecting it from your mod list and choosing the “Delete” option. Make sure to disable the mod before deleting it to ensure a smooth uninstallation process.
- Browse for new mods: Modding is an ever-evolving experience, with new and exciting mods being created continuously. Take some time to browse for new mods and see if any catch your interest. Experimentation and discovering new additions can breathe new life into your Skyrim adventure.
By effectively managing and organizing your mods, you can maintain a stable and enjoyable gameplay experience while incorporating the enhancements and modifications that you desire. In the final section, we’ll address some common troubleshooting tips to help you overcome any mod-related issues you may encounter along the way.
Step 8: Troubleshooting Common Mod Issues
While modding can greatly enhance and enrich your Skyrim experience, it’s not uncommon to encounter some issues along the way. Here are some common modding problems and their potential solutions:
- Mod conflicts: Conflicts may arise when two or more mods alter the same aspects of the game. If you notice unexpected behavior or glitches, try disabling mods one by one until you identify the conflicting mod. Alternatively, consult the mod creator’s documentation or modding community forums for compatibility patches or recommended load orders.
- Game crashes: If your game crashes or freezes after installing a mod, it may be due to compatibility issues or insufficient system resources. Validate that your mods are compatible with the current version of Skyrim Special Edition and ensure you have sufficient memory and processing power. Additionally, check for any mod updates or patches that address stability issues.
- Missing textures or meshes: If you encounter missing textures or meshes in your game after installing a mod, it could be due to improper installation or missing mod dependencies. Double-check that you followed the installation instructions correctly and ensure that any required mods or assets are installed and active.
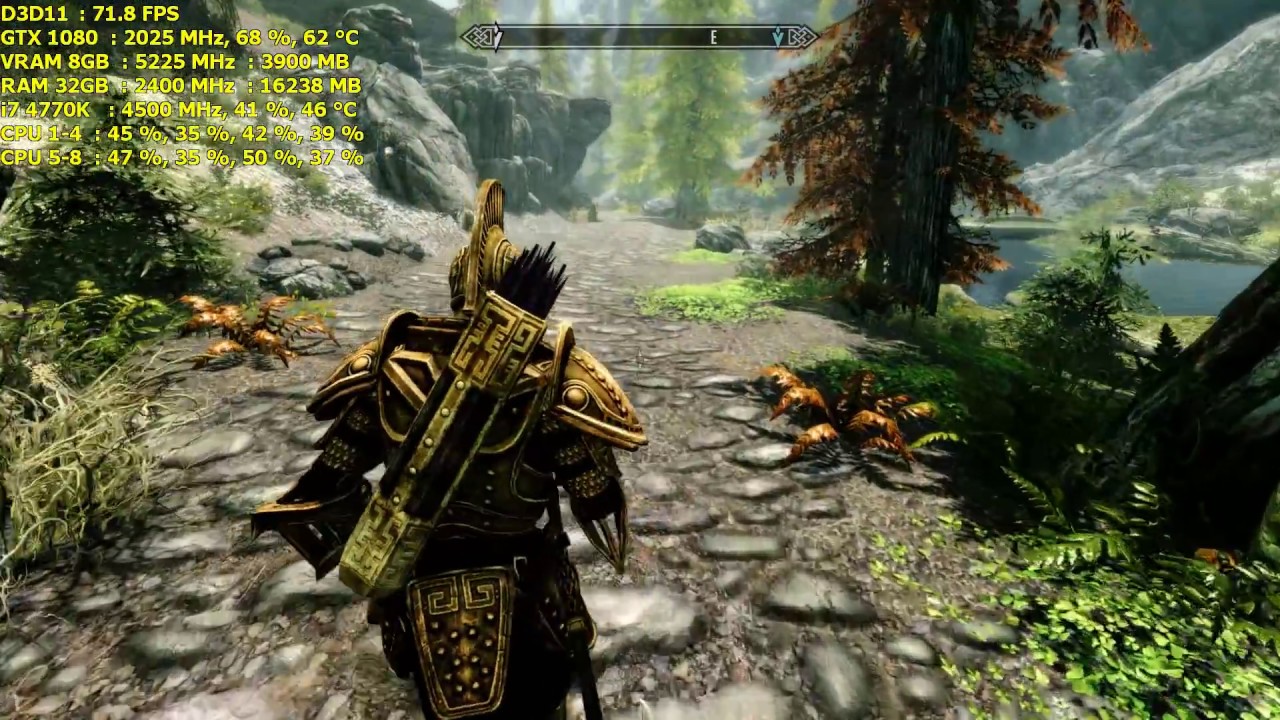
- Performance issues: Some mods, especially graphics-intensive ones, can impact your game’s performance. If you experience significant frame rate drops or sluggishness, consider tweaking the graphical settings within Skyrim Special Edition or disable mods that have higher performance requirements.
- Mod updates and patches: It’s important to stay up to date with mod updates and patches released by the mod creators. These updates often address issues, provide bug fixes, and enhance compatibility. Regularly check for updates within the modding community or through the Bethesda.net platform.
Remember, modding can occasionally be a trial-and-error process. If you encounter issues or have questions, don’t hesitate to seek support from the modding community or relevant forums. It’s also advisable to make backups of your game saves in case you need to revert to a previous state to troubleshoot problematic mods.
By troubleshooting and addressing mod-related issues as they arise, you can ensure a stable and enjoyable modding experience in Skyrim Special Edition. With that, you’re now equipped with the knowledge and tools to explore the vast world of mods and make your Skyrim adventure truly unique.
Conclusion
Congratulations on completing the guide to downloading mods for Skyrim on your PS4! By following the steps outlined in this article, you have gained the necessary knowledge to enhance your Skyrim experience and customize the game to your liking.
From setting up your PS4 and creating a Bethesda.net account to installing Skyrim Special Edition and accessing the mods menu, each step has been carefully explained to ensure a smooth modding process.
With mods, you have the power to transform the world of Skyrim, adding new quests, improving graphics, enhancing gameplay mechanics, and much more. The ability to tailor your gameplay experience to your preferences is one of the most exciting aspects of modding.
Remember to browse, select, download, and install mods that align with your desired enhancements and carefully manage your mod list to maintain stability and performance. Address common modding issues by troubleshooting and seeking assistance from the modding community, and regularly update your mods to ensure compatibility.
Now that you’re equipped with the know-how, it’s time to dive into the world of mods and unleash your creativity. So grab your controller, launch Skyrim Special Edition, and embark on an immersive modded adventure.
May your Skyrim journey be filled with awe-inspiring vistas, thrilling quests, and endless possibilities!


