**
Introduction
**
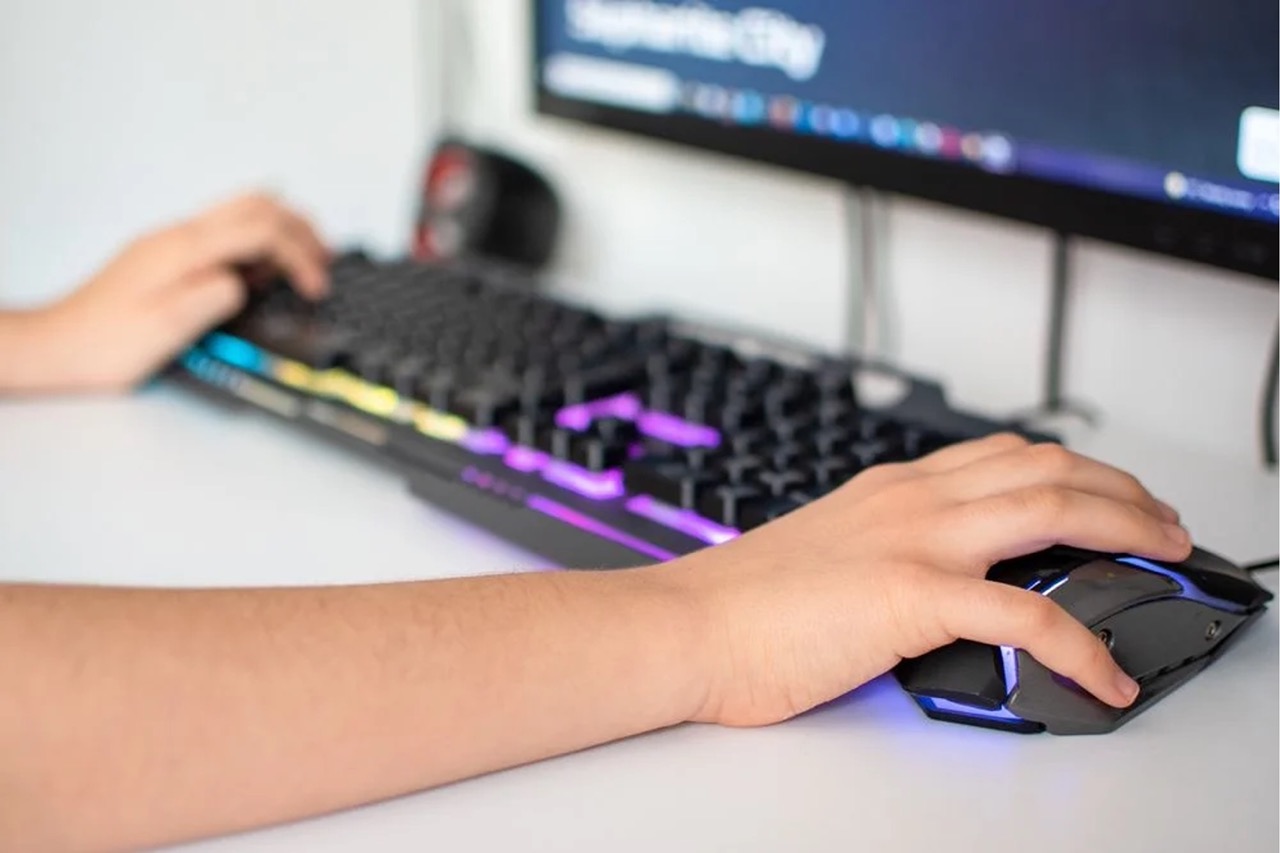
Are you an avid gamer who relies on lightning-quick reflexes to conquer virtual worlds? If so, you understand the critical role of the spacebar on your gaming keyboard. When this essential key starts to malfunction, it can significantly hamper your gaming experience. The frustration of dealing with a sticky or unresponsive spacebar can be enough to throw off your game and hinder your performance.
In this guide, we'll walk you through the process of fixing the spacebar on your gaming keyboard. Whether it's sticking, producing double spaces, or not registering at all, we'll help you troubleshoot and resolve the issue. You don't have to endure the inconvenience of a faulty spacebar any longer. By following the steps outlined in this guide, you'll be back to gaming with precision and ease in no time.
A malfunctioning spacebar can stem from various factors, such as accumulated debris, misaligned components, or worn-out stabilizers. Understanding the root cause of the problem is the first step toward finding a solution. With the right tools and a methodical approach, you can restore your spacebar to its optimal functionality and bid farewell to the frustration of missed jumps, mistimed actions, and disrupted gameplay.
So, grab your toolkit and get ready to dive into the world of keyboard maintenance. With a little patience and the guidance provided here, you'll soon be enjoying seamless and responsive keystrokes, reclaiming your competitive edge in the gaming arena. Let's embark on this journey to revive your spacebar and elevate your gaming experience.
Understanding the Issue with the Spacebar
Before delving into the process of fixing your spacebar, it’s essential to grasp the potential issues that may be causing its malfunction. A sticky or unresponsive spacebar can disrupt your gaming sessions and impede your typing efficiency. Understanding the common culprits behind this problem will enable you to address it effectively.
One prevalent issue is the accumulation of debris and dust beneath the spacebar. Over time, particles can infiltrate the keyboard, leading to sticky or inconsistent key presses. Additionally, the stabilizers that support the spacebar keycap may become misaligned or worn, resulting in irregular keystroke behavior. Furthermore, if the keyboard’s switches are nearing the end of their lifespan, they may exhibit erratic performance, including double-spacing or failing to register key presses.
Another factor to consider is the presence of liquid residue from accidental spills. If any liquid has seeped into the spacebar mechanism, it can cause corrosion and hinder the key’s responsiveness. Identifying the specific issue affecting your spacebar is crucial for implementing the appropriate solution. By diagnosing the root cause, you can tailor your approach to effectively rectify the problem and restore your keyboard’s functionality.
Whether you’re a dedicated gamer or a productivity enthusiast, a malfunctioning spacebar can be a major inconvenience. It’s essential to address this issue promptly to prevent it from escalating and impacting your user experience. With a clear understanding of the potential issues, you’ll be better equipped to tackle the problem and breathe new life into your keyboard.
Tools Needed for Fixing the Spacebar
Before embarking on the task of repairing your spacebar, it’s crucial to gather the necessary tools to ensure a smooth and efficient process. Equipping yourself with the right instruments will enable you to address the issue effectively and restore your keyboard’s functionality. Here are the essential tools you’ll need for fixing the spacebar:
- Screwdriver: A precision screwdriver set is indispensable for accessing the internal components of your keyboard. Depending on the keyboard model, you may require Phillips or Torx screwdrivers to remove the casing and access the spacebar mechanism.
- Keycap Puller: This specialized tool is designed to safely remove keycaps without damaging the switches or surrounding keys. It facilitates the disassembly of the spacebar for thorough cleaning or maintenance.
- Cotton Swabs: Utilize these to gently clean the area beneath the spacebar and remove any accumulated debris or residue. They are effective for reaching tight spaces and ensuring thorough cleaning.
- Compressed Air: A can of compressed air is ideal for dislodging stubborn debris and dust particles from the keyboard’s interior. It provides a non-invasive method of cleaning intricate components without causing damage.
- Lubricant (Optional): In some cases, applying a small amount of keyboard-specific lubricant can help restore smooth and consistent key presses. However, it’s important to exercise caution and apply the lubricant sparingly to avoid over-saturation.
- Clean Cloth: Use a soft, lint-free cloth to wipe down the keyboard’s surface and remove any smudges or marks. Keeping the keyboard clean and free of contaminants is essential for optimal performance.
By assembling these tools, you’ll be well-prepared to address the issues affecting your spacebar and rejuvenate your keyboard’s responsiveness. With the right equipment at your disposal, you can proceed with confidence, knowing that you have everything you need to tackle the task effectively.
Step-by-Step Guide to Fixing the Spacebar
Now that you’ve gathered the necessary tools, it’s time to embark on the process of fixing your spacebar. Follow these step-by-step instructions to address the issues affecting your keyboard and restore the optimal functionality of the spacebar:
- Prepare Your Workspace: Find a well-lit and spacious area to work on your keyboard. Ensure that you have all the required tools within reach and that the workspace is free from clutter.
- Power Off and Disconnect: Turn off your computer and disconnect the keyboard from the USB port to prevent any electrical mishaps during the repair process.
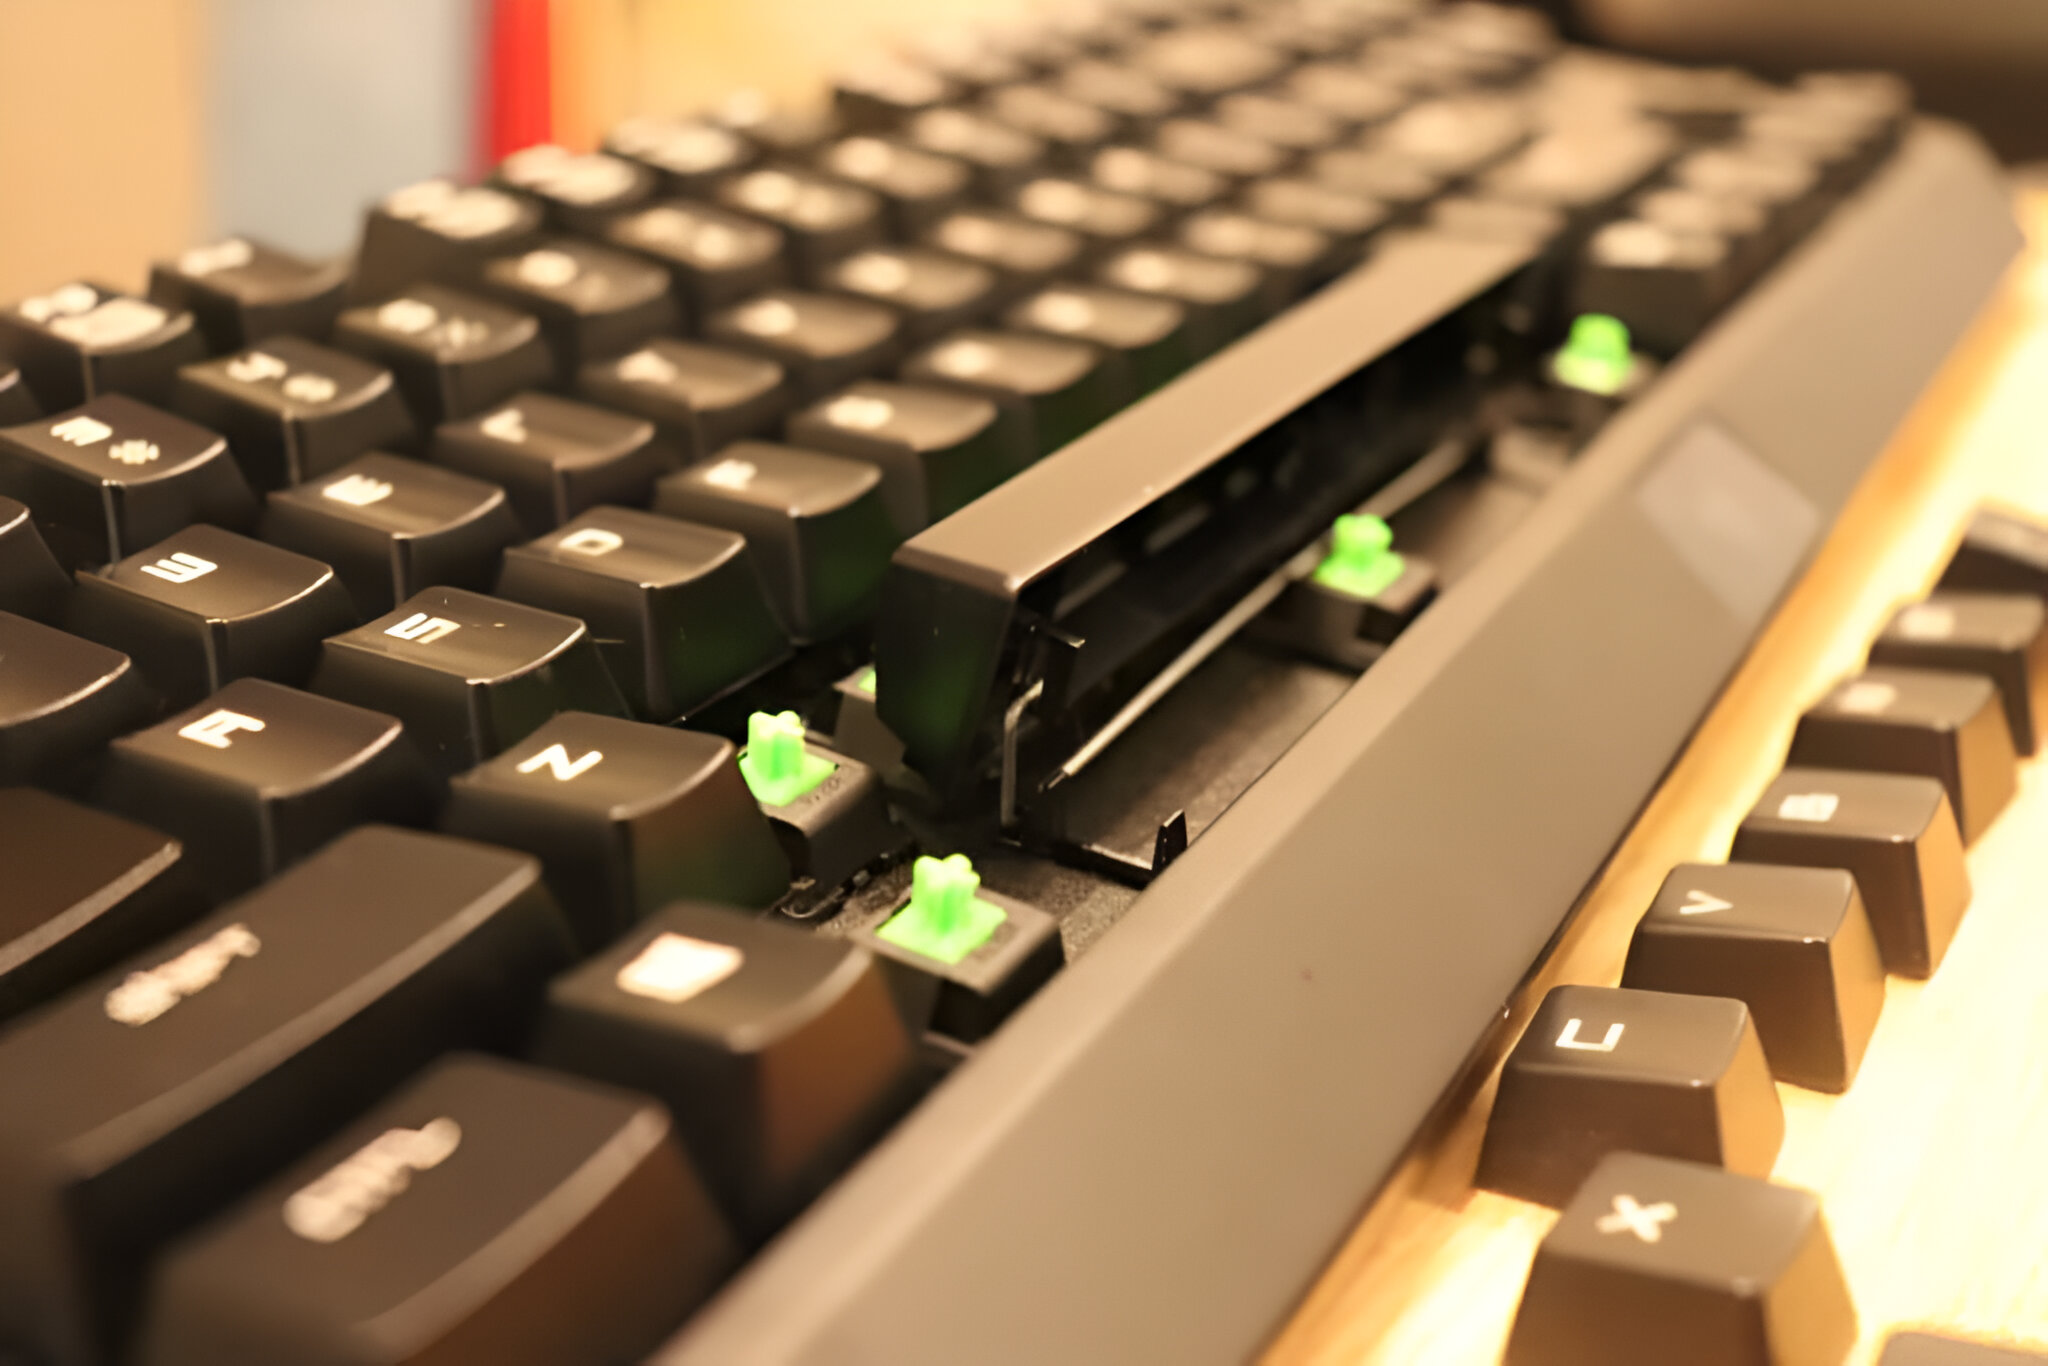
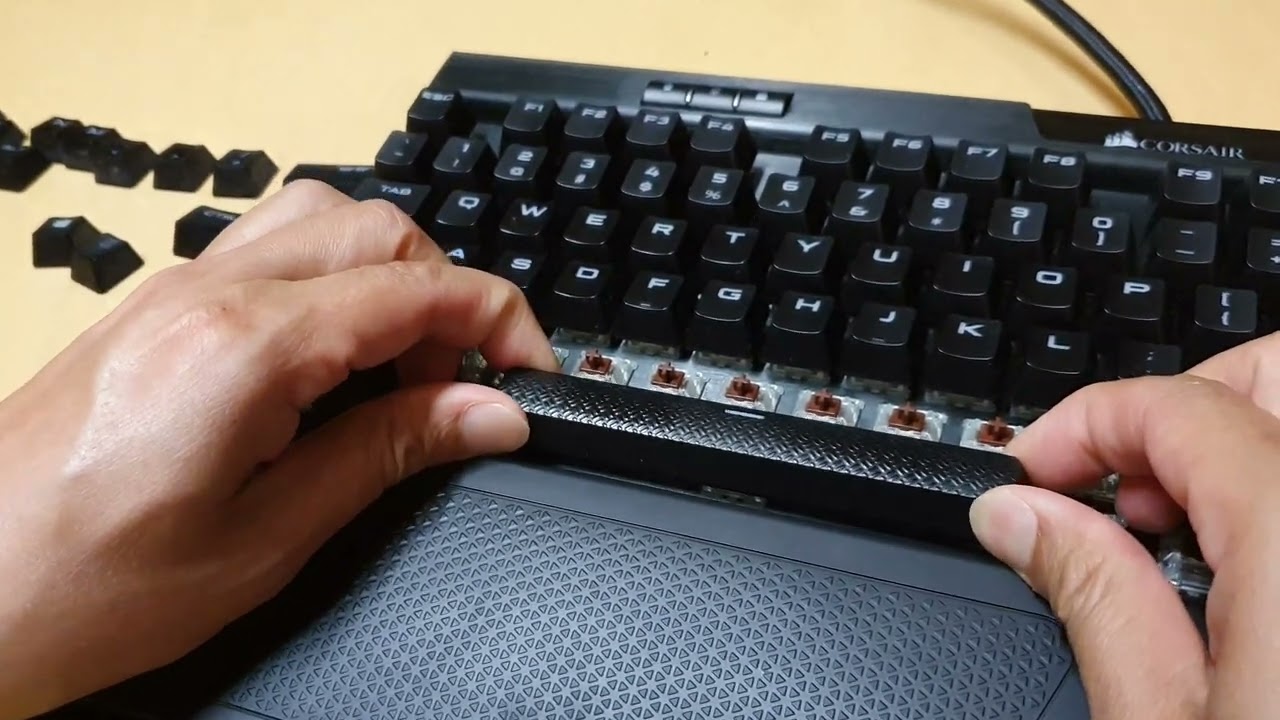
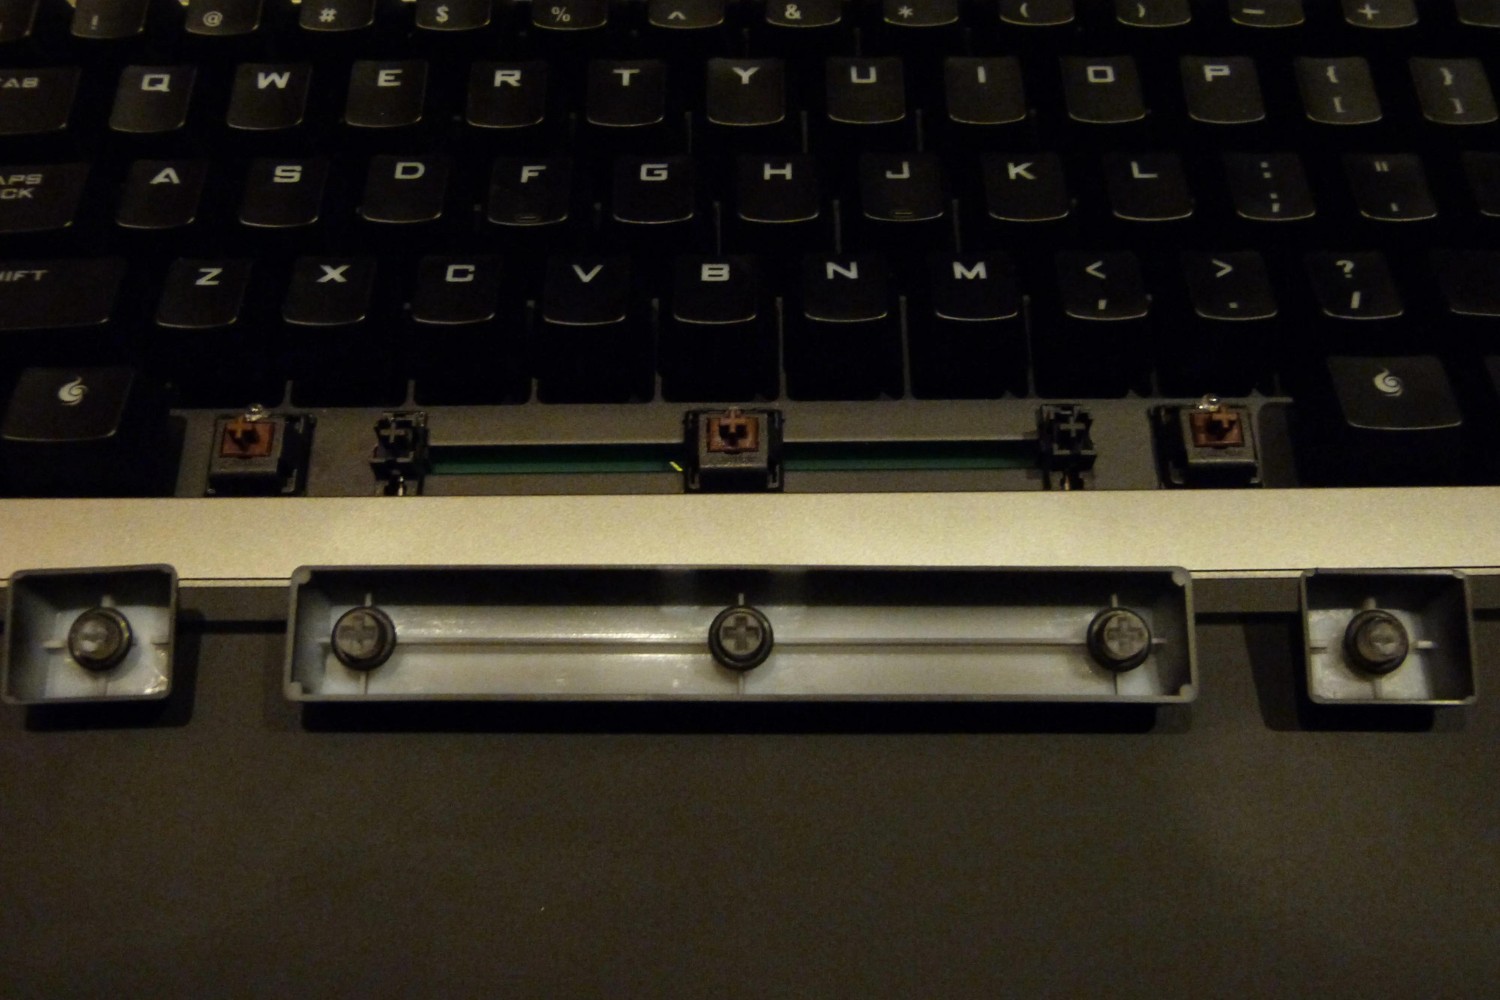
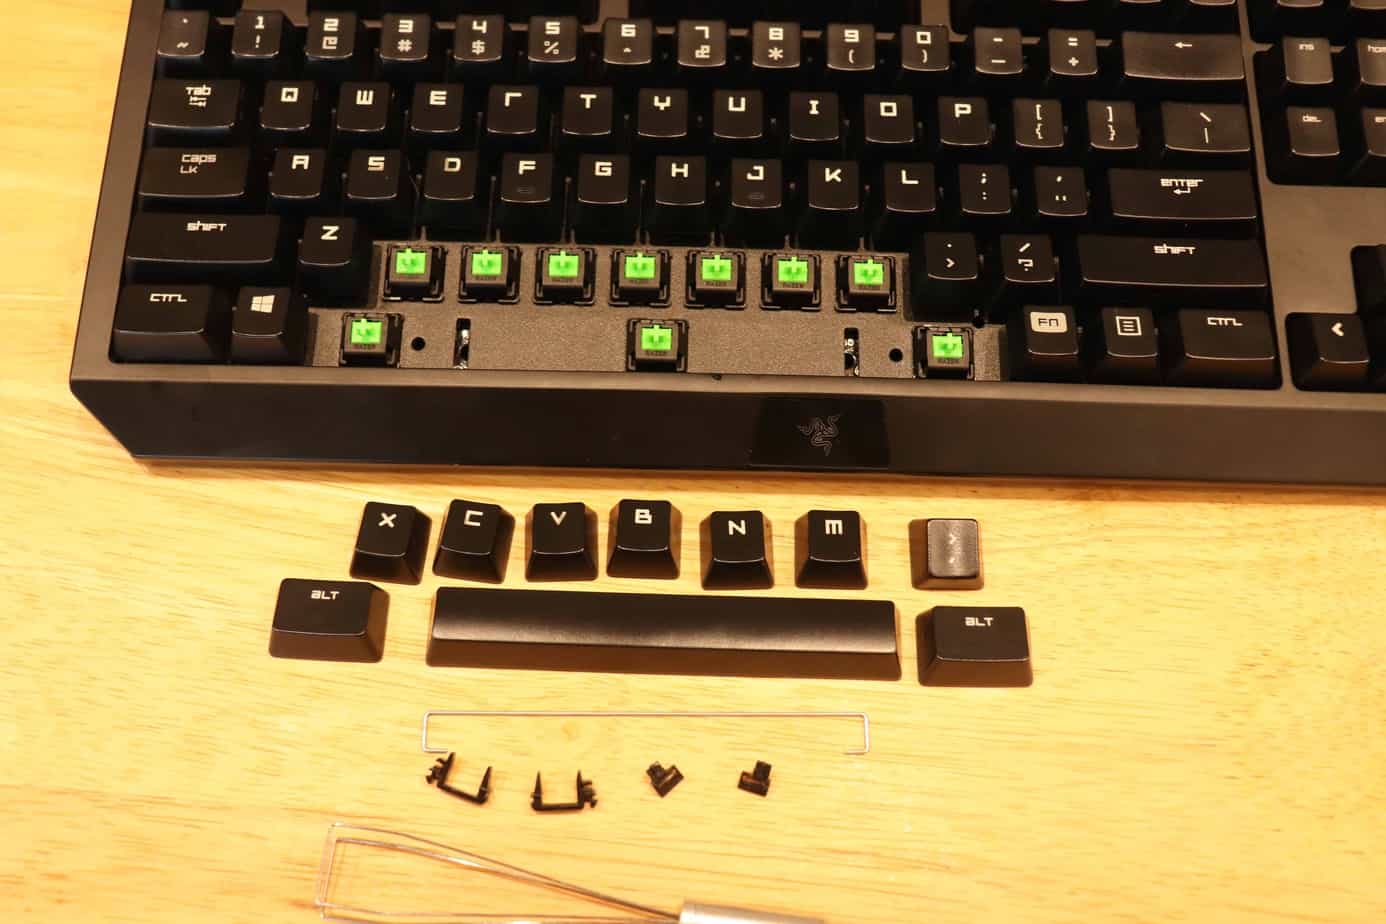
- Remove the Keycap: Use a keycap puller to gently remove the spacebar keycap, taking care not to damage the surrounding keys or switches. Place the keycap aside in a safe location.
- Clean the Spacebar Area: Use compressed air and cotton swabs to meticulously clean the area beneath the spacebar, removing any debris, dust, or residue that may be affecting its performance.
- Inspect the Stabilizers: Examine the stabilizers that support the spacebar for any misalignment or signs of wear. Ensure that they are functioning smoothly and are free from obstructions.
- Lubricate (If Necessary): If the stabilizers exhibit friction or stiffness, apply a small amount of keyboard-specific lubricant to restore smooth movement. Exercise caution to avoid over-lubrication.
- Reassemble the Keycap: Carefully place the spacebar keycap back onto the keyboard, ensuring that it is aligned properly and securely seated on the switches.
- Secure the Casing: If you had to disassemble the keyboard casing, reattach it using the appropriate screws and ensure that it is firmly secured.
- Reconnect and Test: Plug the keyboard back into the computer and power it on. Test the spacebar to ensure that it registers key presses accurately and exhibits smooth, consistent behavior.
By following these systematic steps, you can address the issues affecting your spacebar and revitalize your keyboard’s performance. With careful attention to detail and a methodical approach, you’ll soon be enjoying seamless keystrokes and enhanced gaming experiences.
Testing the Spacebar After Fixing
After completing the repair process, it’s crucial to thoroughly test the spacebar to ensure that the issues have been effectively addressed. Proper testing will validate the success of your efforts and provide confidence in the restored functionality of your keyboard. Here’s a comprehensive approach to testing the spacebar after fixing:
- Keystroke Accuracy: Begin by typing various combinations of characters and words that involve the spacebar. Pay close attention to the responsiveness and accuracy of the key presses, ensuring that each press results in a single space without sticking or irregular behavior.
- Consistency Check: Test the spacebar across different areas of the keycap to verify consistent performance. Press the key at its center, edges, and various points in between to confirm uniform responsiveness.
- Rapid Keystrokes: Assess the spacebar’s performance during rapid and successive keystrokes. Ensure that it registers each press reliably without producing double spaces or skipping inputs.
- Gaming Simulation: If you’re an avid gamer, engage in a gaming session that heavily relies on the spacebar for actions such as jumping or evasion. Evaluate the key’s responsiveness and accuracy in the context of gameplay to confirm its reliability.
- Long-Term Testing: Use the keyboard for an extended period, incorporating typical usage scenarios such as typing documents, browsing the web, and engaging in various applications. Monitor the spacebar’s performance over time to validate its sustained functionality.
By conducting these comprehensive tests, you can ascertain the effectiveness of the spacebar repair and identify any lingering issues that may require further attention. It’s essential to ensure that the spacebar operates seamlessly across diverse usage scenarios, providing consistent and reliable performance.
If, after testing, you encounter any persisting issues with the spacebar, consider revisiting the repair process to address the specific concerns. Thorough testing and validation are integral to achieving a fully restored and reliable spacebar, enhancing your overall typing and gaming experiences.
Conclusion
Repairing a malfunctioning spacebar on your gaming keyboard is a rewarding endeavor that can significantly enhance your overall user experience. By understanding the underlying issues, gathering the necessary tools, and following a systematic repair process, you can restore the optimal functionality of this critical key.
Throughout this guide, we’ve explored the common issues that can affect the spacebar, such as debris accumulation, misaligned stabilizers, and worn-out switches. Armed with this knowledge, you’ve gained insight into the factors that may be contributing to the malfunction of your spacebar.
Equipped with essential tools such as screwdrivers, keycap pullers, and cleaning materials, you’ve been empowered to embark on the repair journey with confidence. The step-by-step guide provided has offered a clear and methodical approach to addressing the issues affecting your spacebar, allowing you to navigate the repair process effectively.
After completing the repair, thorough testing of the spacebar is paramount to ensure its accuracy, consistency, and reliability across various usage scenarios. By conducting comprehensive tests, you can validate the success of your repair efforts and enjoy the renewed performance of your keyboard.
With a fully functional spacebar, you can immerse yourself in gaming adventures, embark on typing tasks with precision, and engage in seamless interactions with your computer. The restoration of this pivotal key elevates your overall user experience, empowering you to navigate virtual realms and accomplish tasks with enhanced efficiency.
Embracing the process of fixing your spacebar not only resolves a specific issue but also fosters a deeper connection with your keyboard. By taking proactive steps to maintain and repair your gaming keyboard, you demonstrate a commitment to optimizing your gaming and typing experiences.
As you apply the knowledge and skills gained from this guide, you embark on a journey of keyboard maintenance and repair, ensuring that your gaming keyboard remains a reliable and responsive tool for your digital endeavors. With a revitalized spacebar, you’re poised to conquer virtual challenges and unleash your full potential in the digital realm.