Introduction
Splitwise is a popular mobile app that simplifies personal finance management and expense sharing among friends, roommates, and groups. With its user-friendly interface and robust features, Splitwise makes it easy to track expenses, settle debts, and maintain transparency in shared finances.
Whether you’re planning a trip with friends, splitting utility bills with roommates, or managing expenses for a project, Splitwise provides a seamless platform for managing expenses and simplifying the process of splitting costs.
In this article, we will guide you through the process of using the Splitwise mobile app efficiently. We will cover everything from downloading the app and setting up an account to exploring its different features and optimizing its functionality. By the end of this guide, you will be equipped with the knowledge to navigate Splitwise with ease.
So, let’s dive in and explore the world of Splitwise, where managing expenses has never been easier!
Downloading and Installing the Splitwise Mobile App
To get started with Splitwise, the first step is to download and install the mobile app on your smartphone. The Splitwise app is available for both iOS and Android devices, and you can find it on the respective app stores.
Here’s a step-by-step guide on how to download and install the Splitwise app:
- Open the App Store (iOS) or Google Play Store (Android) on your smartphone.
- Search for “Splitwise” in the search bar.
- Once you find the Splitwise app, tap on it to open the app details page.
- Click on the “Install” or “Get” button to start the download and installation process.
- Wait for the app to download and install on your device. This may take a few moments depending on your network speed.
- Once the installation is complete, you can open the app by tapping on the Splitwise icon on your home screen.
It’s important to note that the Splitwise app is free to download and use. However, there are additional features available through a subscription called Splitwise Pro. The Pro version offers advanced features such as receipt scanning and CSV export for a monthly or yearly fee.
After installing the app, you’re ready to create an account and start managing your expenses with Splitwise. In the next section, we will guide you through the account setup process to ensure you get the most out of the app.
Creating an Account on Splitwise
Once you have downloaded and installed the Splitwise app, the next step is to create an account. Creating an account will allow you to access and manage your expenses across multiple devices and invite friends to Splitwise.
Here’s a step-by-step guide on how to create an account on Splitwise:
- Open the Splitwise app on your smartphone.
- On the welcome screen, tap on the “Get Started” or “Create Account” button.
- You will have the option to sign up with your email address, Google account, or Facebook account. Choose the method that is most convenient for you.
- If you choose to sign up with your email address, enter your email and create a strong, unique password. Make sure to remember these credentials as they will be required for future logins.
- If you opt to sign up with your Google or Facebook account, follow the prompts to allow Splitwise access to your account details.
- After successfully signing up, you will be prompted to enter your name and select a profile picture (optional).
- Review and accept the terms of service, privacy policy, and any other necessary agreements.
Once your account is created, you will be directed to the main dashboard of the Splitwise app. From here, you can start adding friends, creating expenses, and exploring the different features of Splitwise.
It is worth mentioning that Splitwise allows you to sync your account across devices, so you can access your expenses and keep track of your payments whether you’re using a smartphone, tablet, or computer. Simply login to your account on any device that has the Splitwise app installed, and you will have instant access to your financial data.
Now that your account setup is complete, let’s move on to the next section where we will discuss how to add friends to Splitwise.
Adding Friends to Splitwise
One of the key features of Splitwise is the ability to add and manage friends within the app. Adding friends to Splitwise allows you to easily split expenses and keep track of who owes what. Here’s a step-by-step guide on how to add friends to Splitwise:
- Open the Splitwise app and login to your account.
- In the main dashboard, tap on the “Friends” tab at the bottom of the screen.
- Click on the “+” or “Add friends” button to start adding friends.
- You will have the option to add friends manually by entering their email address or username, or you can invite them via your phone contacts or Facebook.
- If you choose to add friends manually, simply enter their email address or username and tap on the “Add” button. They will receive an invitation to join Splitwise.
- If you opt to invite friends via phone contacts or Facebook, Splitwise will show you a list of friends who are already using Splitwise. You can select the friends you want to add and tap on the “Add” button to send them an invitation. If your friend is not using Splitwise, they will receive an invitation to download the app.
- Once your friends accept the invitation and join Splitwise, they will be added to your friend list in the app.
Adding friends to Splitwise allows you to easily share expenses and keep track of who owes money to whom. You can create group expenses for a specific trip or event, or you can split expenses individually with each friend.
It’s important to note that when adding friends to Splitwise, you have the option to set different privacy levels for each friend. You can choose to share all expenses with a friend, hide specific expenses from a friend, or even create a separate group for shared expenses.
With friends added to your Splitwise account, you’re ready to start creating expenses and splitting costs. In the next section, we will explore the different features of Splitwise that make expense management a breeze.
Understanding the Different Features of Splitwise
Splitwise offers a range of powerful features to simplify expense management and maintain transparency among friends. Understanding these features will help you make the most out of the app and streamline your financial interactions. Here’s an overview of the key features of Splitwise:
1. Expense Tracking: Splitwise allows you to create expenses easily and categorize them based on specific categories like groceries, rent, or utilities. You can add details such as the total amount, date, and a description for each expense.
2. Splitting Expenses: Splitwise simplifies the process of splitting bills by allowing you to add friends and allocate shares for each expense. You can split equally, by percentages, or by specific amounts, depending on the arrangement with your friends.
3. Payment Requests and Settling Debts: Splitwise allows you to send payment requests to friends who owe you money. You can also settle debts by recording payments made off the app, and Splitwise will automatically update the balances accordingly.
4. IOUs: With the IOU feature, you can keep track of informal debts or small payments not associated with a specific expense. This feature is handy for tracking small loans or shared expenses that are not split evenly.
5. Group Expenses: Splitwise allows you to create group expenses for trips, events, or any shared activity. You can easily split the costs among all members of the group, simplifying the process of managing shared expenses.
6. Itemized Bills: Splitwise also offers the option to add itemized bills for expenses, allowing you to track individual items and their respective costs.
7. Receipts and Expense Notes: You can upload receipts or add expense notes for each transaction, ensuring you have a record of all relevant details associated with each expense.
These are just a few of the many features that Splitwise offers to streamline expense management and ensure transparency among friends. By utilizing these features, you can effectively track and manage your shared finances with ease.
In the next section, we will guide you through the process of creating new expenses and adding necessary details to ensure accurate tracking and splitting of costs.
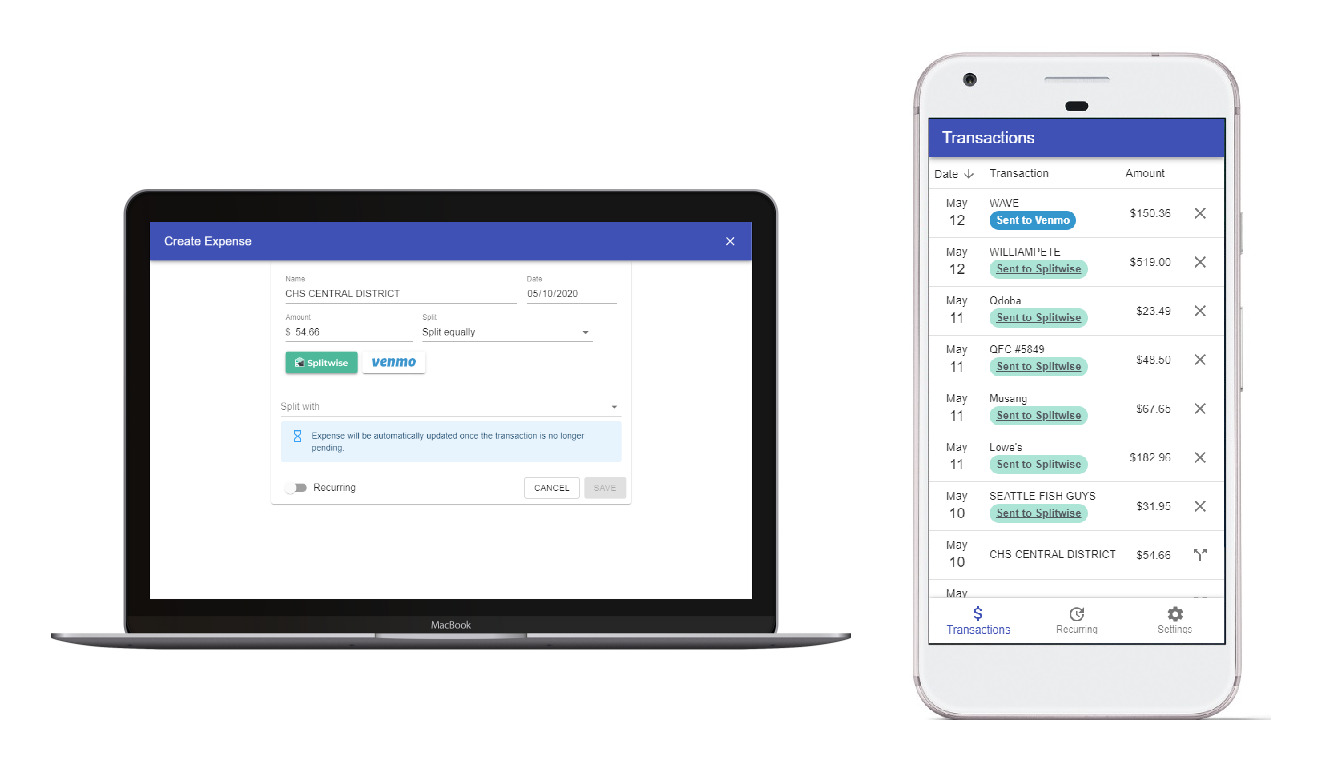
Creating New Expenses and Adding Details
Creating new expenses in Splitwise is a straightforward process that allows you to accurately track and split costs. By adding relevant details, you ensure transparency and clarity in your shared expenses. Here’s how you can create new expenses and add necessary details in Splitwise:
- Open the Splitwise app and navigate to the main dashboard.
- Tap on the “+” or “Add Expense” button to create a new expense.
- Enter the details of the expense, including the total amount, date, and description.
- You can choose to categorize the expense by selecting a specific category from the available options or by creating a custom category.
- To add friends who were involved in the expense, tap on the “Split with” field and select the friends from your friend list. You can choose to split the expense equally, by percentages, or by specific amounts.
- If the expense is shared among a group, select the appropriate group from the “For Group” field.
- By tapping on the “Add Receipt” button, you can attach a photo of the receipt to the expense for reference.
- Once you have entered all the necessary details, tap on the “Save” or “Done” button to create the expense.
It’s important to be thorough when adding expense details, as it helps in accurately tracking and splitting costs among friends. By including relevant descriptions, dates, and receipts, you ensure transparency and eliminate any confusion or disputes regarding shared expenses.
Splitwise also allows you to make adjustments to expenses even after they have been created. For example, you can edit the total amount, change the split details, or add additional information to an existing expense. This flexibility ensures that you can keep your expense records up to date.
With expenses properly added and detailed, you can now move on to splitting the expenses among friends. In the next section, we will guide you through the process of splitting expenses with friends using Splitwise.
Splitting Expenses with Friends
Splitting expenses with friends in Splitwise is a seamless process that ensures fairness and accuracy in shared financial transactions. Whether you’re dividing the cost of a dinner, a trip, or monthly bills, Splitwise simplifies the process of splitting expenses among friends. Here’s how you can split expenses with friends using Splitwise:
- Open the Splitwise app and navigate to the main dashboard.
- Tap on the expense you want to split with your friends.
- In the expense details page, you will see a list of friends involved in the expense.
- Tap on the friend’s name and choose how you want to split the expense. You have the option to split equally, by percentages, or by specific amounts.
- Repeat this process for each friend involved in the expense, ensuring that the total allocations add up to the total expense amount.
Splitwise will automatically calculate the individual share for each person based on the split method you selected. This makes it easy to track who owes what and simplifies the process of settling debts among friends.
If you have an expense with multiple friends, Splitwise also allows you to split the expense unequally. For example, if two friends paid for a group dinner and a third friend did not attend, you can split the expense only between the two friends who were present. Splitwise offers flexibility in accommodating different scenarios and arrangements.
Additionally, if you want to split expenses differently with different friends, you can create multiple expenses for the same transaction. This enables you to accurately allocate the expenses based on individual preferences or agreements.
Remember, Splitwise acts as a virtual ledger, keeping track of who owes money to whom. As friends make payments towards shared expenses, the balances will automatically update, reflecting the changes in the financial relationship.
With expenses properly split among friends, Splitwise provides a clear picture of your shared finances and facilitates straightforward debt settling. In the next section, we will discuss how to send and receive payment requests using Splitwise.
Sending and Receiving Payment Requests
In Splitwise, sending and receiving payment requests is a convenient way to settle debts with friends and ensure timely payments. Splitwise provides an easy-to-use feature that allows you to request money from friends who owe you for shared expenses. Here’s how you can send and receive payment requests using Splitwise:
- Open the Splitwise app and go to the main dashboard.
- Tap on the expense for which you want to request payment.
- In the expense details page, you will see a list of friends involved in the expense and their respective balances.
- Tap on the friend’s name who owes you money.
- On their individual page, you will find a “Request” button or icon.
- Tap on the “Request” button and enter the amount you want to request from that friend.
- You can optionally add a note to specify the reason for the payment request.
- Tap on the “Send” or “Request” button to send the payment request.
When you send a payment request, your friend will receive a notification on their Splitwise app or via email, informing them about the request and the amount owed. They can then choose to accept the request and make a payment using the integrated payment options available in the app.
On the receiving end, when you receive a payment request from a friend in Splitwise, you will be able to see the details of the request, including the amount, the expense it is associated with, and any additional notes provided. You can then choose to accept the request and make the payment, either through Splitwise or through other means like cash or other payment platforms.
Splitwise provides various built-in payment methods, including Venmo, PayPal, and direct bank transfers, making it convenient for friends to settle their debts. However, it’s important to note that Splitwise itself does not process the actual payments; it acts as a platform to facilitate communication and record debt settlement between friends.
By using the payment requests feature in Splitwise, you can easily manage your shared finances and ensure that everyone settles their debts in a fair and timely manner.
In the next section, we will explore how to manage expenses and track payments effectively in Splitwise.
Managing Expenses and Tracking Payments
Splitwise offers robust tools to help you effectively manage your expenses and track payments, ensuring that you stay on top of your shared finances. With its intuitive interface and comprehensive features, Splitwise simplifies expense management for individuals and groups. Here’s how you can effectively manage expenses and track payments in Splitwise:
Expense History: Splitwise provides a clear and organized expense history, allowing you to view all past and current expenses. You can easily access details such as the description, date, and amount for each expense.
Payment Tracking: Splitwise keeps a record of all payments made, whether on the app or outside of it. You can mark expenses as paid, record partial payments, or update payment details to ensure accurate tracking of who owes what.
Balance Sheet: Splitwise generates a balance sheet that shows the overall debt status with each friend. This sheet provides a summary of who owes money to whom, making it easy to understand and settle debts.
Payment Reminders: Splitwise sends payment reminders to friends who have outstanding balances, helping to facilitate prompt payments and maintain transparency in shared expenses.
Commenting and Communication: Splitwise allows you to communicate and leave comments on specific expenses. This feature is helpful for discussing the details of an expense, clarifying payment arrangements, or simply sharing information among friends.
Export and Reports: Splitwise offers the option to export expense data and generate reports in CSV format. This feature allows for easy integration with other financial management tools and enhances the ability to analyze and track expenses over time.
With these features, Splitwise empowers you to manage your expenses efficiently and ensure that all payments are accurately tracked and settled. It provides a comprehensive overview of shared finances, enabling you to easily monitor your financial obligations and maintain transparency with friends.
In the next section, we will discuss how to leverage Splitwise’s IOU feature for tracking informal debts and miscellaneous expenses.
Using the IOU Feature
Splitwise’s IOU feature is a handy tool for tracking informal debts and miscellaneous expenses that may not be directly associated with a specific shared expense. With the IOU feature, you can easily keep track of small loans, personal expenses, or any other financial transactions among friends. Here’s how you can use the IOU feature in Splitwise:
1. Adding an IOU: To add an IOU, go to the Splitwise app and navigate to the main dashboard. Tap on the “+” or “Add Expense” button and select the option for an IOU. Enter the details of the transaction, such as the amount, date, and a brief description. Choose the person involved in the IOU, and Splitwise will instantly update the balances.
2. Settling an IOU: When it’s time to settle an IOU, go to the expense details page. Tap on the person’s name and select the “Settle up” option. Enter the amount you’ve paid or received, and Splitwise will update the balances accordingly. This ensures accurate tracking of one-on-one transactions outside of shared expenses.
3. Tracking IOU History: Splitwise keeps a record of all IOUs, providing a clear and comprehensive history of personal transactions among friends. This makes it easy to refer back to previous IOUs and ensure that all debts are settled appropriately.
The IOU feature is particularly useful for situations where you lend or borrow small amounts from friends, or when you have personal expenses that are not meant to be shared equally. It allows you to maintain financial transparency and ensure that all transactions are accurately recorded.
It’s important to note that while the IOU feature adds flexibility to track informal debts, it does not replace the need to split shared expenses among friends. For group expenses or bills that should be evenly divided, it’s recommended to use the regular expense-splitting feature in Splitwise.
In the next section, we will discuss how to customize settings and notifications according to your preferences in Splitwise.
Customizing Settings and Notifications
Splitwise provides a range of customizable settings and notifications to enhance your experience and ensure that you stay updated on your shared expenses. By customizing these options, you can tailor Splitwise to your preferences and receive relevant notifications. Here’s how you can customize settings and notifications in Splitwise:
1. Notification Preferences: Splitwise allows you to choose which notifications you want to receive and how you want to receive them. You can customize notifications for payment reminders, new expenses, friend invitations, and more. Go to the settings menu within the app and navigate to the Notifications section to modify your preferences.
2. Currency Settings: Splitwise supports various currencies, and you can set your preferred currency in the app settings. This ensures that all expenses and balances are displayed in the currency you are most familiar with.
3. Language Selection: Splitwise offers multiple language options, allowing you to choose the language that you are most comfortable with. This feature enhances usability and ensures a seamless experience for users across different language preferences.
4. Privacy Settings: Splitwise provides various privacy options to control how your expenses are shared with friends. You can choose to share all expenses, hide certain expenses, or keep expenses private among specific groups. This allows you to maintain privacy and control over your financial information.
5. Default Split Settings: In the settings menu, you can set default split preferences for new expenses. You can choose the default split method, such as equal splits or percentages, to save time when creating new expenses.
6. Touch ID / Face ID: For added security, Splitwise supports authorization using Touch ID or Face ID on compatible devices. You can enable this feature in the app settings to ensure that only you can access your Splitwise account.
7. Group Settings: If you’re part of a group or multiple groups in Splitwise, you can customize group settings such as group names, member permissions, and expense visibility. This allows for a more personalized and tailored experience within each group setting.
By customizing the settings and notifications in Splitwise, you can optimize your experience and ensure that you receive relevant information and prompts according to your preferences. Take some time to explore the app settings and adjust them to suit your needs.
In the next section, we will share some tips and tricks for using Splitwise efficiently.
Tips and Tricks for Using Splitwise Efficiently
To make the most out of Splitwise and streamline your expense management process, consider these tips and tricks:
1. Regularly Update and Review Expenses: Make it a habit to update Splitwise with new expenses and review existing ones. This ensures that the balances and shared expenses are always up to date.
2. Settle Debts Promptly: Encourage your friends to settle their debts promptly. Sending gentle reminders through Splitwise or discussing outstanding balances in person can help maintain financial transparency and avoid unnecessary confusion or disputes.
3. Communicate Openly: Use the commenting feature in Splitwise to communicate openly with your friends regarding expenses. This helps clarify any questions or concerns related to specific expenses and fosters a healthy financial relationship.
4. Utilize Payment Options: Take advantage of the integrated payment options in Splitwise, such as Venmo, PayPal, or direct bank transfers, to settle debts conveniently. These options facilitate easy and secure transactions among friends.
5. Customize Categories: Personalize your expense categories in Splitwise to align with your spending habits. Creating custom categories allows for better expense tracking and a more detailed financial overview.
6. Keep Receipts and Documentation: Take photos of receipts or upload them directly to Splitwise. This helps in maintaining a record of expenses and can be useful for future reference or reimbursements.
7. Utilize Reports: Generate reports in Splitwise to analyze your spending patterns and gain insights into your shared finances. This can be particularly helpful for budgeting or identifying areas where you can save money.
8. Regularly Backup Data: Consider periodically exporting your Splitwise data and keeping backup copies in a secure location. This ensures that your financial records are safe and accessible even if there are changes in your devices or data loss.
9. Explore Splitwise Pro Features: Consider upgrading to Splitwise Pro to access additional features like receipt scanning, recurring expenses, and CSV export. Evaluate whether the Pro version aligns with your needs and budget.
10. Stay Organized with Groups: If you frequently share expenses with specific groups of friends or family, consider creating dedicated groups within Splitwise. This helps keep expenses organized and allows for easy tracking and splitting of group expenses.
By implementing these tips and tricks, you can effectively manage your shared expenses, promote financial transparency, and enhance your overall experience with Splitwise.
In the next section, we will explore troubleshooting common issues that may arise while using Splitwise.
Troubleshooting Common Issues
While Splitwise generally provides a seamless experience for managing shared expenses, you may occasionally encounter some common issues. Here are a few troubleshooting tips to help you resolve these issues:
1. Syncing Data: If you are using Splitwise on multiple devices and notice that your data is not syncing properly, try logging out of your account and logging back in on all devices. This can often resolve syncing issues and ensure that your data is consistent across devices.
2. Payments Not Updating: If you have made a payment or received a payment, but the balances or payment history are not updating, double-check that you have marked the expense as paid in Splitwise. If the issue persists, try refreshing the app or logging out and logging back in.
3. Incorrect Notifications: If you are receiving incorrect or unwanted notifications in Splitwise, review your notification settings in the app’s settings menu. Ensure that you have selected the appropriate notification preferences for your needs.
4. Discrepancies in Balance: If you notice discrepancies in the balances displayed for you and your friends, verify the expenses and payments recorded for each person. Make sure that all transactions are accurately entered and accounted for to avoid any discrepancies in balance calculations.
5. Payment Gateway Issues: If you encounter issues with the payment gateway, such as errors or failures, ensure that you have a stable internet connection. If the problem persists, reach out to the Splitwise support team or the payment gateway provider for assistance.
6. Forgot Password: If you forget your Splitwise account password, use the “Forgot Password” option on the login screen. Follow the prompts to reset your password and gain access to your account.
7. App Update Issues: If you experience issues after updating the Splitwise app, try uninstalling and reinstalling the app on your device. This can help resolve any compatibility issues or bugs that may have occurred during the update process.
8. Reach Out to Support: If you encounter persistent issues or other technical problems with Splitwise, don’t hesitate to reach out to the Splitwise support team. They are available to assist you and provide guidance in resolving any issues you may encounter.
Remember, it’s always beneficial to keep your Splitwise app up to date with the latest version, as updates often include bug fixes and improvements to enhance the overall user experience.
By following these troubleshooting tips and seeking support when needed, you can quickly address any issues that arise while using Splitwise and continue managing your shared expenses smoothly.
In a nutshell, Splitwise offers a user-friendly platform to manage shared expenses and maintain transparency among friends. By utilizing its features effectively, customizing settings, and promptly addressing any issues, Splitwise can become a practical tool for hassle-free expense management.
Conclusion
Managing shared expenses and maintaining transparency among friends can be a challenging task, but with the Splitwise mobile app, it becomes a seamless and efficient process. Throughout this guide, we have explored various aspects of using Splitwise, including downloading and installing the app, creating an account, adding friends, understanding its features, creating new expenses, splitting costs, and sending and receiving payment requests. We also discussed the importance of managing expenses, utilizing the IOU feature, customizing settings and notifications, and troubleshooting common issues.
Splitwise provides a comprehensive platform for expense management, allowing you to easily track and split expenses with friends, roommates, or groups. By utilizing its features and customizing settings to your preferences, you can efficiently manage your shared finances, maintain transparency, and ensure timely settlement of debts.
Remember to regularly update your expenses, communicate openly with friends, and settle debts promptly to avoid any misunderstandings or disputes. By following the tips and tricks provided, you can make the most out of Splitwise and streamline your expense management process.
Whether you’re planning a trip, splitting utility bills, or managing project expenses, Splitwise offers a user-friendly interface and powerful features to simplify the process of sharing and tracking costs. With Splitwise, you can focus on enjoying your experiences with friends while keeping your financial interactions organized and transparent.
If you encounter any issues or have questions while using Splitwise, don’t hesitate to reach out to the Splitwise support team for assistance. They are there to help you resolve any technical problems and provide guidance whenever necessary.
So, go ahead and download the Splitwise app, create your account, and start managing your expenses with ease. With Splitwise by your side, financial transparency among friends has never been simpler.