Introduction
Welcome to our guide on how to remove a person from a Splitwise group. Splitwise is a popular expense sharing app that helps you manage and split expenses with friends, roommates, and colleagues. However, there may come a time when you need to remove someone from a group due to various reasons such as a change in living arrangements, a falling out, or simply to streamline your expense tracking.
In this article, we will walk you through the step-by-step process of removing a person from a Splitwise group. We’ll cover everything you need to know, from logging into Splitwise and accessing the group to confirming the removal and settling any outstanding balances.
Removing a person from a Splitwise group is a straightforward process, but it’s important to approach it with care and consideration. Before proceeding with the removal, make sure to communicate your intentions with the individual involved and discuss any pending expenses or outstanding balances. Transparency and open communication can help minimize any potential conflicts or misunderstandings.
Now, let’s dive into the steps to remove a person from a Splitwise group. Whether you’re looking to streamline your expense management or address a specific situation, this guide will provide you with the knowledge and instructions to successfully remove a person from your Splitwise group.
Step 1: Login to Splitwise
The first step to remove a person from a Splitwise group is to log in to your Splitwise account. Open your preferred web browser and visit the Splitwise website or open the Splitwise mobile app on your smartphone.
If you already have an account, enter your login credentials (email address and password) and click on the “Log In” button. If you don’t have an account, you can easily create one by clicking on the “Sign Up” option and following the registration process.
Once you are logged in to your Splitwise account, you will be directed to the Splitwise homepage or your dashboard, depending on the platform you are using.
If you are using the web version, you will see a list of your groups on the left-hand side of the screen. Locate the group from which you want to remove a person and click on it to access the group details.
If you are using the mobile app, tap on the menu icon (usually represented by three horizontal lines) in the top-left corner of the screen to open the navigation menu. From there, select the desired group to proceed to the next step.
By logging in to your Splitwise account, you have successfully completed the first step towards removing a person from a Splitwise group. Now, let’s move on to the next step to proceed with the removal process.
Step 2: Open the group
After logging in to your Splitwise account, the next step is to open the group from which you want to remove a person. This will allow you to access the group details and make the necessary changes.
In the web version of Splitwise, you will see a list of your groups displayed on the left-hand side of the screen. Locate the group you wish to remove a person from and click on its name to open it.
If you are using the mobile app, you can find your groups by tapping on the menu icon (usually represented by three horizontal lines) in the top-left corner of the screen, and then selecting “Groups” from the menu. Locate the relevant group and tap on it to open it.
Once you have opened the group, you will be able to view all the members and expenses associated with that particular group. Take a moment to familiarize yourself with the group’s current state and make sure you have a clear understanding of the person you want to remove.
This step is crucial as it allows you to verify that you are working with the correct group and ensures that you are fully aware of the current dynamics before proceeding further.
Now that you have successfully opened the group, it’s time to move on to the next step and locate the person you wish to remove from the Splitwise group.
Step 3: Locate the person
Once you have opened the Splitwise group, the next step is to locate the person you want to remove from the group. This will allow you to access their profile and make the necessary changes.
In the group interface, you will see a list of all the members who are part of the group. Scroll through the list and find the name of the person you wish to remove.
You can easily locate the person by their name, which is displayed alongside their profile picture or icon. Take your time to ensure you have identified the correct individual before proceeding.
If the group has many members and scrolling through the list becomes cumbersome, you can use the search or filter option provided by Splitwise to quickly locate the person. Look for a search bar or filter icon within the group interface and enter the person’s name to find them instantly.
Locating the person you want to remove is an essential step in the process, as it ensures that you are making the necessary changes to the correct individual. It also allows you to double-check their involvement in the group and any related expenses.
Once you have successfully located the person within the Splitwise group, you are ready to proceed to the next step and begin the removal process.
Step 4: Click on the person’s name
Now that you have located the person you wish to remove from the Splitwise group, the next step is to click on their name to access their profile and make the necessary changes.
In the group interface, find the name of the person you want to remove. It will be displayed alongside their profile picture or icon. Once you have identified the correct individual, click on their name.
By clicking on the person’s name, you will be directed to their profile within the group. Here, you will find information about their contributions, expenses, and balances related to the group. Take a moment to review their profile before proceeding further.
Within the person’s profile, you may also find additional options or features that can provide further insights into their involvement in the group. This can include detailed breakdowns of their expenses, any pending balances, or notifications related to the group.
Clicking on the person’s name is an important step as it grants you access to their individual profile within the Splitwise group. This access allows you to make informed decisions and take appropriate actions regarding their participation in the group.
Once you have clicked on the person’s name and familiarized yourself with their profile, you are ready to move on to the next step in the removal process.
Step 5: Select “Remove from Group”
After accessing the profile of the person you wish to remove from the Splitwise group, the next step is to select the “Remove from Group” option. This action will initiate the process of removing the person from the group.
Within the person’s profile, look for a button or option that is labeled “Remove from Group” or similar. This option is typically located on the profile page, usually near the bottom or in a prominent position.
Once you have located the “Remove from Group” option, click on it to proceed with the removal process. Splitwise may prompt you with a confirmation message or ask you to confirm your decision to remove the person from the group.
It’s essential to ensure that you have selected the correct option and that you are removing the intended person from the group. Double-check their name and any other identifying details to avoid any accidental removals.
By selecting the “Remove from Group” option, you are indicating your intention to remove the person from the group permanently. This action will revoke their access to the group, and they will no longer be able to view or participate in group-related activities.
Now that you have successfully selected the “Remove from Group” option, let’s move on to the next step to confirm the removal and address any outstanding balances.
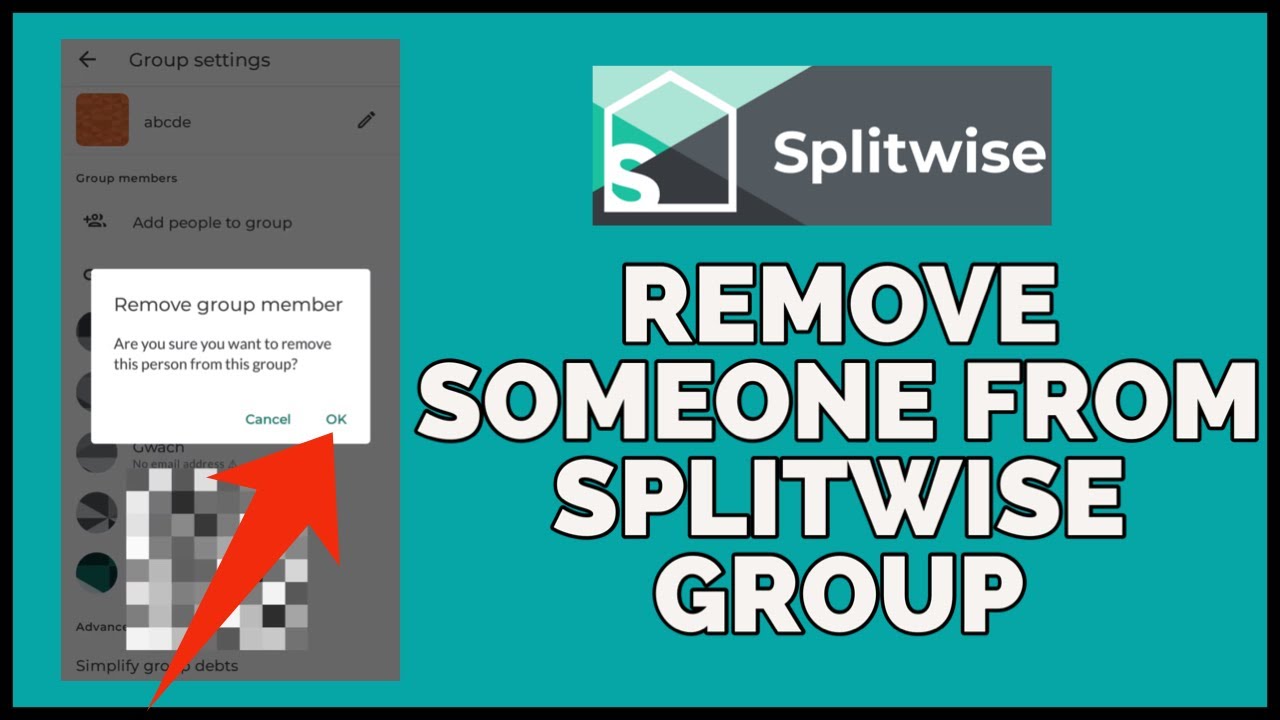
Step 6: Confirm the removal
After selecting the “Remove from Group” option to remove a person from the Splitwise group, the next step is to confirm the removal. This step ensures that you are intentionally removing the person from the group and prompts you to make any necessary adjustments.
When you choose to remove someone from the group, Splitwise may prompt you with a confirmation message or a notification to confirm your decision. This confirmation step helps prevent accidental removals and allows you to review the consequences of removing the person from the group.
Read the confirmation message carefully to ensure that you understand the implications of the removal. It may provide additional information about the person’s outstanding balances, any settlements, or any notifications that will be sent to the person upon removal.
If you are certain that you want to proceed with the removal, click on the confirmation button or follow the steps provided in the confirmation message to confirm the removal. Splitwise may request you to re-enter your login credentials or provide additional verification for security purposes.
Confirming the removal is an important step as it ensures that you are deliberate in your decision and fully aware of the consequences. Take your time to review any pending balances or settlements to ensure they are appropriate and fair.
Once you have confirmed the removal, the person will be officially removed from the Splitwise group. They will no longer have access to the group or any related activities.
With the confirmation of the removal complete, we can now move on to the next step and address any balances that may need to be settled as a result of the person’s removal from the group.
Step 7: Check if any balances need to be settled
After removing a person from the Splitwise group, the next step is to check if there are any outstanding balances that need to be settled. This ensures that the financial obligations within the group are properly addressed and resolved.
Open the group interface or navigate to the group’s page to review the balances and transactions associated with the group. Look for any remaining balances or debts that involve the person who was removed.
If there are any pending balances, you have a few options to consider. First, you can manually adjust the balances by taking into account any payments made or expenses incurred by the removed person. Alternatively, you can redistribute the remaining balances among the remaining group members to account for the person’s absence.
Splitwise provides various tools and features that can assist you in settling the balances. You can use the app’s calculations and splitting functions to evenly distribute the remaining amounts or make adjustments based on specific agreements within the group.
Communication is key at this stage. Reach out to the remaining group members to discuss how to address any outstanding balances. It’s important to ensure that everyone is on the same page and agrees on how to handle the financial aspects of the group moving forward.
Depending on the complexity of the balances and agreements within the group, it may be beneficial to have a group conversation or call to discuss and finalize the necessary adjustments.
By checking and settling any remaining balances, you ensure that the financial matters within the group are dealt with in a fair and transparent manner. This step helps maintain the integrity of the group’s financial records and fosters positive relationships among group members.
With the balances settled, you have successfully completed the process of removing a person from the Splitwise group. Congratulations!
Removing a person from a Splitwise group can be a sensitive process, but by following these steps and communicating openly, you can ensure a smooth transition and maintain a harmonious group dynamic.
Conclusion
Removing a person from a Splitwise group may become necessary for various reasons, such as changes in living arrangements or the need to streamline expense tracking. By following the steps outlined in this guide, you can successfully remove someone from a Splitwise group while maintaining transparency and fairness within the group.
We began by logging into Splitwise and accessing the group from which we wanted to remove a person. We then located the individual in question, clicked on their name to access their profile, and selected the “Remove from Group” option.
After confirming the removal, it was crucial to review any outstanding balances or debts related to the person being removed. By addressing these balances, we ensured that financial obligations within the group were properly settled.
Throughout this process, it’s essential to maintain open communication with all group members. Discuss any changes or adjustments with the remaining members to ensure everyone is aware of and agrees to the decisions made regarding the removal and any pending balances.
By successfully removing a person from the Splitwise group and settling any outstanding balances, you can maintain accurate financial records and promote a harmonious group dynamic.
Remember, removing someone from a group should be done with care and consideration. Openly communicate your intentions and discuss any pending expenses or outstanding balances to minimize conflicts.
Thank you for following this guide on how to remove a person from a Splitwise group. We hope you found the information helpful, and we wish you continued success in managing your expenses with Splitwise!