Introduction
Welcome to Splitwise, the ultimate expense tracking app that helps you keep track of your shared expenses with friends, family, and roommates. With Splitwise, you no longer have to worry about managing spreadsheets or keeping receipts for every transaction.
However, there are times when you might need to delete an expense from your Splitwise account. Whether it’s because a mistake was made or the expense is no longer relevant, this article will guide you through the process of deleting expenses in Splitwise.
Deleting an expense is a straightforward process that can be done with just a few simple steps. In the following sections, we will walk you through each step, ensuring that you can confidently delete any unwanted expenses in Splitwise without any hassle.
So, whether you accidentally added an expense twice, entered the wrong amount, or simply want to declutter your expense list, follow the steps below to delete expenses with ease.
Step 1: Launch the Splitwise App
The first step in deleting an expense in Splitwise is to ensure that you have the app installed on your device. Splitwise is available for both iOS and Android, so you can easily find and download it from the App Store or Google Play Store.
Once you have the app installed, locate the Splitwise icon on your home screen or app drawer and tap on it to launch the app. If you haven’t logged in to your Splitwise account yet, you will be prompted to do so. Enter your credentials or sign up for a new account if you don’t have one already.
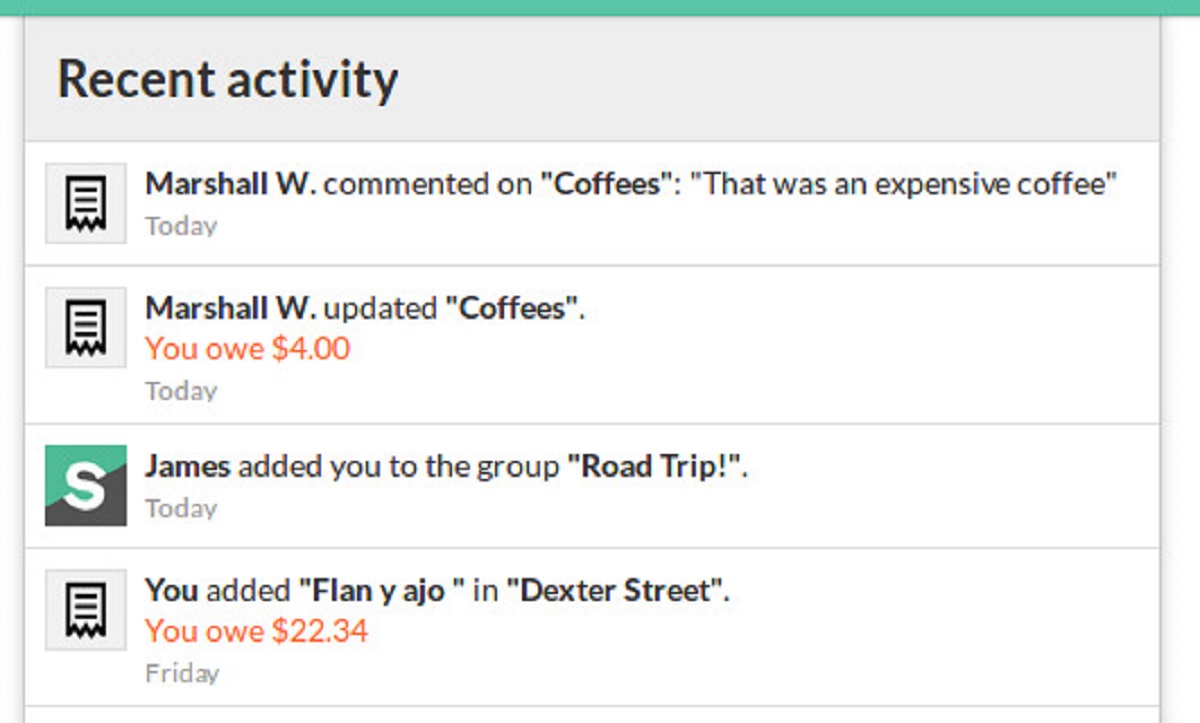
After logging in, you will be greeted with the Splitwise home screen, which displays your recent activity and a summary of your expenses. Take a moment to familiarize yourself with the app’s interface, as it will make navigating and deleting expenses easier.
Now that you are logged in and on the home screen of the Splitwise app, you can proceed to the next step and access the expenses section.
Step 2: Access the Expenses Section
Once you have launched the Splitwise app and logged in, the next step is to navigate to the Expenses section. This is where you can view and manage all your expenses, including the ones you want to delete.
To access the Expenses section, look for the menu bar at the bottom of the screen. Depending on your device, it may be located at the bottom of the app or accessible through an icon with three horizontal lines.
Tap on the Expenses icon in the menu bar to open the Expenses section. This will bring up a list of all your expenses, organized by date or other relevant filters. You can scroll through the list to find the expense you want to delete, or you can use the search bar at the top to quickly locate it.
If you have a long list of expenses and finding the specific one is proving difficult, Splitwise offers various filter options to help you narrow down the search. You can filter by date range, category, or even search for specific keywords related to the expense.
Once you have located the expense you want to delete, proceed to the next step to open the expense details and prepare for deletion.
Step 3: Find the Expense to Delete
Now that you have accessed the Expenses section in the Splitwise app, the next step is to find the specific expense that you want to delete. This can be done by scrolling through the list or by utilizing the search and filter options available.
If you have a smaller number of expenses, you can simply scroll through the list to visually locate the expense you want to delete. Expenses are typically displayed in chronological order, with the most recent ones appearing at the top of the list.
However, if you have a long list of expenses or want to quickly find a specific expense, you can make use of the search bar at the top of the Expenses section. Simply enter relevant keywords related to the expense, such as the name of the person you shared the expense with or a description of the expense itself.
In addition to the search bar, Splitwise provides filter options that allow you to narrow down the list of expenses based on certain criteria. For example, you can filter by date range, category, or even the status of the expense (such as pending or settled).
By utilizing the search and filter options, you can quickly find the expense you want to delete without the need to manually scroll through a long list of expenses. Once you have located the expense, proceed to the next step to open its details.
Step 4: Open the Expense Details
After finding the expense you want to delete, the next step is to open its details. This will allow you to review the information associated with the expense and make sure you are deleting the correct one.
To open the expense details, simply tap on the expense in the list. This will bring up a screen that provides a comprehensive overview of the expense, including the date, description, amount, category, and the individuals involved in the transaction.
Take a moment to review the details of the expense to ensure that it is indeed the one you want to delete. Double-check the amount, description, and the individuals involved before proceeding to the deletion process.
If you accidentally tapped on the wrong expense or realized that it is not the one you want to delete, simply go back to the Expenses section and repeat the previous steps to find the correct expense.
Once you have confirmed that you are looking at the correct expense and are ready to proceed with its deletion, move on to the next step to learn how to delete it from your Splitwise account.
Step 5: Delete the Expense
Now that you have opened the expense details and confirmed that it is the one you want to delete, it’s time to proceed with deleting it from your Splitwise account.
To delete the expense, look for the delete button or icon on the expense details screen. The delete button is usually represented by a trash bin or a similar symbol.
Tap on the delete button to initiate the deletion process. Depending on the app version and settings, you may be prompted with a confirmation message to ensure that you indeed want to delete the expense.
Read the confirmation message carefully to avoid accidentally deleting the expense. If you are certain that you want to proceed, select the confirm option to delete the expense from your Splitwise account.
It’s important to note that once you delete an expense, it cannot be undone. Make sure to double-check your decision before confirming the deletion.
Once you have successfully deleted the expense, you will be redirected back to the Expenses section, where the deleted expense will no longer appear in the list.
Congratulations! You have successfully deleted the expense from your Splitwise account. If you have any more expenses to delete, you can repeat the previous steps for each one.
Now that you know how to delete expenses in Splitwise, you can easily manage and keep track of your shared expenses without any unnecessary clutter.
Proceed to the next step to learn how to refresh the expenses list after deleting an expense.
Step 6: Confirm Deletion
After initiating the deletion of an expense in Splitwise, it is important to confirm the deletion to ensure that it is intentional and prevent any accidental removals.
Once you tap on the delete button, a confirmation message will typically appear on the screen, prompting you to confirm your decision. The purpose of this confirmation is to provide an extra layer of protection, as deleting an expense cannot be undone.
Read the confirmation message carefully to ensure that you are deleting the correct expense. It is crucial to double-check the details, such as the expense amount, description, and individuals involved, to avoid any mistakes.
If you are sure that you want to proceed with the deletion, select the confirm option or click on the “yes” button, depending on the interface design. This action will permanently remove the expense from your Splitwise account.
However, if you have second thoughts or realize that you have selected the wrong expense for deletion, you can choose the cancel option or click on the “no” button. This will abort the deletion process and keep the expense intact in your account.
It is essential to exercise caution during this step to prevent any accidental deletion of important expenses. Taking a moment to verify your decision before confirming the deletion can save you from any unnecessary hassle.
Now that you have confirmed the deletion of the expense, you can proceed to the last step to learn how to refresh the expenses list to see the changes reflected.
Step 7: Refresh the Expenses List
After successfully deleting an expense in Splitwise, it’s important to refresh the expenses list to ensure that the changes are properly reflected and the deleted expense is no longer visible.
To refresh the expenses list, you can simply swipe down or use the refresh button/icon typically located at the top of the expenses screen. This action will trigger a refresh of the information displayed, ensuring that any deleted expenses are no longer present.
Once the refresh is complete, you should see the deleted expense removed from the list. This confirms that the deletion process was successful.
If, for any reason, the deleted expense still appears in the expenses list after refreshing, it is possible that the deletion process encountered a glitch. In such cases, try closing and relaunching the Splitwise app to ensure that the changes are properly reflected.
By regularly refreshing the expenses list, you can keep your Splitwise account up to date and ensure that any deleted expenses are promptly removed from view.
Remember, refreshing the expenses list not only applies to deleted expenses but also applies to any updates or changes made to your shared expenses. It allows you to have the most accurate and current view of your expenses within the app.
With the expenses list refreshed and the deleted expense no longer visible, you have successfully completed the process of deleting an expense in Splitwise.
Now you can confidently continue managing your shared expenses, keeping your account organized and clutter-free.
Thank you for following this step-by-step guide on how to delete expenses in Splitwise. If you have any more questions or need further assistance, feel free to explore the Splitwise support resources or reach out to their customer service.
Conclusion
Congratulations! You have now learned how to delete expenses in Splitwise with ease. By following the simple steps outlined in this guide, you can effortlessly remove unwanted expenses from your account, ensuring that your expense lists remain accurate and clutter-free.
The process of deleting an expense in Splitwise involves launching the app, accessing the Expenses section, finding the specific expense you want to delete, opening its details, deleting the expense, confirming the deletion, and refreshing the expenses list to see the changes reflected.
Remember to double-check the details of the expense before confirming its deletion and exercise caution to avoid accidentally deleting important expenses.
With the ability to efficiently delete expenses, you can stay on top of your shared expenses, whether it’s for trips, rent-splitting, or group activities. Splitwise helps you maintain transparency and fairness in your financial interactions with others.
Now that you have mastered the art of deleting expenses in Splitwise, you can confidently navigate the app and manage your financial interactions with ease. Take advantage of the numerous features Splitwise offers, such as expense categorization, bill splitting, and automatic calculations.
Remember to keep your Splitwise account up to date by regularly deleting unnecessary expenses and refreshing the expenses list. This will provide you with an accurate overview of your financial transactions and help you stay organized.
If you encounter any difficulties or have further questions about using Splitwise or any other features, don’t hesitate to refer to Splitwise’s official support resources or reach out to their customer service for assistance.
Happy expense tracking and seamless financial interactions with Splitwise!