Introduction
Welcome to our guide on how to delete Splitwise activity! Splitwise is a fantastic app that helps you keep track of shared expenses and simplifies the process of splitting bills with friends, roommates, or colleagues. However, there may come a time when you need to delete an activity from your Splitwise account. Whether it’s a duplicate entry, a mistake, or simply outdated information, removing unwanted activities is a straightforward process.
In this article, we will walk you through the step-by-step process of deleting Splitwise activity, ensuring that your expense records are accurate and up to date. By following these simple instructions, you’ll be able to maintain a clean and organized Splitwise account, ensuring the financial transparency among all involved parties.
Before we dive in, it’s worth mentioning that deleting an activity will permanently remove it from your account. This means that any associated expenses, comments, and other related details will also be erased. Therefore, it’s crucial to double-check the activity you want to delete and ensure it’s the correct one. Now, let’s get started with the process!
Step 1: Launch the Splitwise app
The first step in deleting Splitwise activity is to open the Splitwise app on your device. Whether you’re using an Android or iOS device, you can find the Splitwise app icon on your home screen or app drawer. Simply tap on the icon to launch the app.
If you haven’t installed the Splitwise app yet, you can download it from the Google Play Store for Android devices or the App Store for iOS devices. Once installed, open the app and sign in to your Splitwise account using your login credentials. If you don’t have an account, you can quickly create one by providing your email address and choosing a password.
Once you’re logged in, ensure that you have a stable internet connection. This will ensure that the app can sync your account data and allow you to access all the necessary features.
If you’re accessing Splitwise through a web browser, simply open the browser of your choice and navigate to the Splitwise website. Sign in to your account using your login credentials, and ensure that you have a stable internet connection.
Now that you’ve successfully launched the Splitwise app and logged in to your account, you’re ready to proceed to the next step.
Step 2: Access your activity log
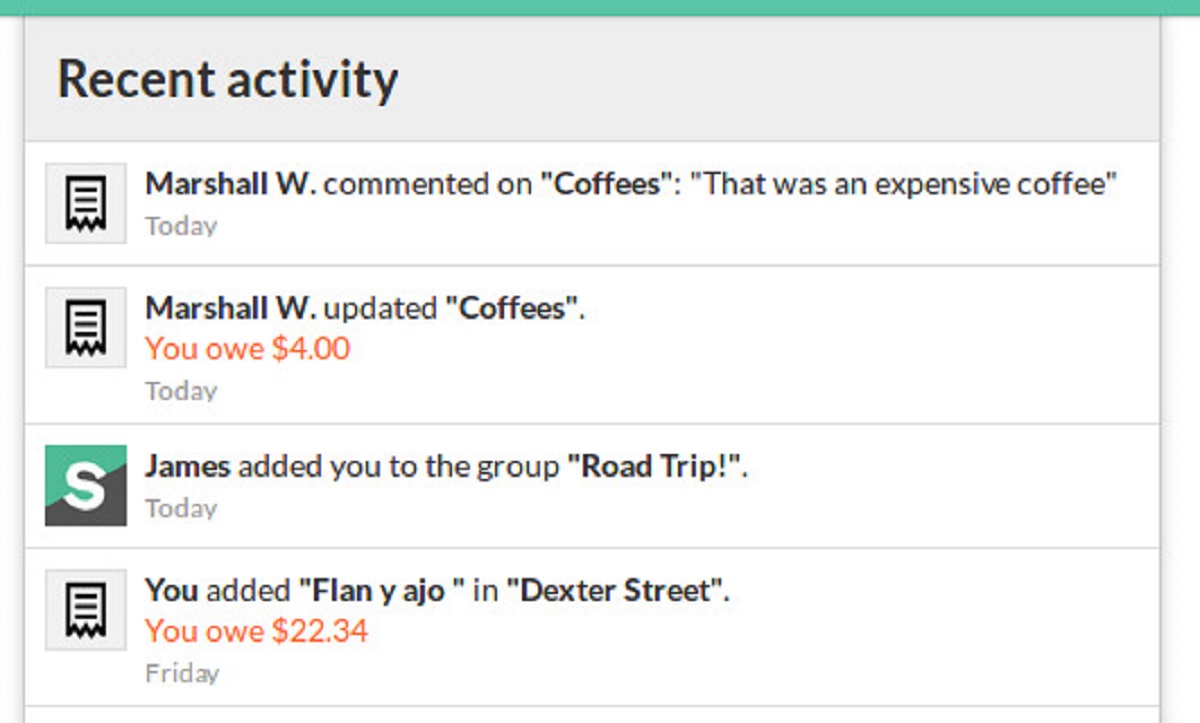
Once you’re logged in to the Splitwise app or website, the next step is to access your activity log. The activity log is where you can view a detailed history of all the activities and transactions in your Splitwise account.
In the Splitwise app, you can access your activity log by tapping on the menu icon usually located in the top-left corner of the screen. This will open the sidebar menu. From the menu options, select “Activity” or “History” to navigate to your activity log.
If you’re using the Splitwise website, you can find the activity log by clicking on the “Activity” or “History” tab in the navigation bar at the top of the screen. This will take you to a page displaying your recent activities and transactions.
Once you’re on the activity log page, you’ll see a list of all the activities and transactions in chronological order, starting with the most recent. Each activity entry provides details such as the date, time, participants, and specific details of the expense or transaction.
Scroll through the list to find the activity that you want to delete. If there are too many activities to scroll through, you can use the search or filter options, if available, to narrow down your search and locate the specific activity more quickly.
Now that you’ve accessed your activity log and identified the activity you want to delete, it’s time to move on to the next step.
Step 3: Select the activity to delete
Once you have accessed your activity log in the Splitwise app or website, the next step is to select the specific activity that you want to delete. Find the entry for the activity you wish to remove from your account.
In the Splitwise app, you can usually long-press or swipe left on the activity to reveal additional options. Look for the option that allows you to delete or remove the activity. Tapping on this option will mark the activity for deletion.
If you’re using the Splitwise website, you can typically find a checkbox or a button next to each activity entry. Locate the checkbox or button corresponding to the activity you want to delete and select it to mark the activity for deletion.
Before proceeding to the next step, double-check that you have selected the correct activity. Ensure that the details and participants match what you intended to delete. It’s crucial to be cautious, as the deletion process is irreversible, and once an activity is deleted, it cannot be recovered.
If you have multiple activities to delete, you can repeat this step for each one. Once all the desired activities are selected, move on to the next step to delete them from your Splitwise account.
Now that you have identified and selected the activity you want to delete, it’s time to move on to the next step and remove it from your account.
Step 4: Delete the selected activity
Now that you have selected the activity you want to delete from your Splitwise account, it’s time to proceed with the deletion process. Deleting the activity will permanently remove it from your account, along with any associated expenses, comments, and other relevant data.
In the Splitwise app, after selecting the activity you wish to delete, look for a trash can icon or a delete button. Tap on it to initiate the deletion process. You may be asked to confirm your action before proceeding.
If you’re using the Splitwise website, locate the delete button or option near the selected activity. Click on it to initiate the deletion process. Similar to the app, you may be prompted to confirm your decision.
After confirming the deletion, the selected activity will be deleted from your Splitwise account. The activity will no longer appear in your activity log, and any expenses or comments associated with the activity will be permanently removed.
It’s important to note that deleting an activity will not affect any calculations or debts recorded in Splitwise. The app will automatically recalculate and adjust the balances between the participants based on the deletion of the activity.
Now that you have successfully deleted the selected activity, let’s move on to the final step to ensure that the deletion has been successfully processed and reflected in your Splitwise account.
Step 5: Confirm the deletion
After deleting the selected activity from your Splitwise account, it’s important to confirm that the deletion has been successfully processed. This step will ensure that the activity is no longer visible in your activity log and that any associated expenses or comments have been permanently removed.
In the Splitwise app, navigate back to your activity log and check if the deleted activity is no longer present. If you can no longer find the activity in the log, this indicates that the deletion was successful.
If you’re using the Splitwise website, refresh the activity log page and verify that the deleted activity is no longer listed. If the activity is no longer visible, this confirms that the deletion was successful.
Additionally, you can also cross-check the balances and calculations within your Splitwise account to ensure that the deletion of the activity has been accurately reflected. Check if the balances have adjusted accordingly and if the debts between participants have been updated.
If, for any reason, you are unable to confirm the deletion or if the activity still appears in your account, you may need to repeat the deletion process or reach out to Splitwise support for further assistance.
By confirming the deletion, you can have peace of mind knowing that the unwanted activity has been successfully removed from your Splitwise account, maintaining accurate and up-to-date expense records.
Congratulations! You have now completed the process of deleting Splitwise activity. You can now enjoy a clean and organized Splitwise account, free from any unwanted or outdated activities.
Conclusion
Deleting Splitwise activity is a simple and straightforward process that allows you to maintain an accurate and organized account of your shared expenses. By following the steps outlined in this guide, you can easily remove unwanted or outdated activities from your Splitwise account.
Remember to exercise caution when deleting activities, as the process is irreversible. Double-check that you have selected the correct activity and confirm your decision before proceeding with the deletion. This will ensure that you are removing the intended activity from your account.
After successfully deleting an activity, confirm that the deletion has been processed by checking your activity log and verifying the absence of the deleted activity. You can also cross-reference the balances and calculations within your account to ensure that the deletion has been accurately reflected.
By regularly managing and deleting unwanted activities, you can maintain a clean and organized Splitwise account, streamlining the tracking and splitting of expenses with your friends, roommates, or colleagues.
We hope this guide has been helpful in assisting you with deleting Splitwise activity. If you have any further questions or need additional assistance, don’t hesitate to reach out to Splitwise support for further guidance.
Happy splitting!