Introduction
Welcome to this guide on how to add Splitwise to Mint! Splitwise and Mint are two popular financial management tools that can help you stay organized and on top of your expenses. By connecting Splitwise to Mint, you can easily track and manage your shared expenses, making it easier to stay on budget and settle up with your friends or roommates.
Splitwise is a free app designed to simplify the process of splitting expenses with others. Whether you’re sharing rent, utilities, or even group travel expenses, Splitwise allows you to track who owes what to whom. It takes the hassle out of splitting bills by calculating each person’s share and sending reminders for payments.
Mint, on the other hand, is a comprehensive financial management tool that helps you track your spending, create budgets, and monitor your overall financial health. With Mint, you can link your bank accounts, credit cards, and other financial accounts to get a complete picture of your income and expenses.
Now, you might be wondering why you should connect Splitwise to Mint. Well, integrating Splitwise with Mint gives you the advantage of having all your financial information in one place. Instead of manually entering your shared expenses into Mint, the integration allows you to automatically sync your Splitwise transactions. This not only saves you time and effort but also gives you a more accurate representation of your overall financial picture.
In the following sections, we’ll guide you through the step-by-step process of adding Splitwise to Mint. By the end of this guide, you’ll be able to seamlessly track your shared expenses and make informed financial decisions. So let’s get started!
What is Splitwise?
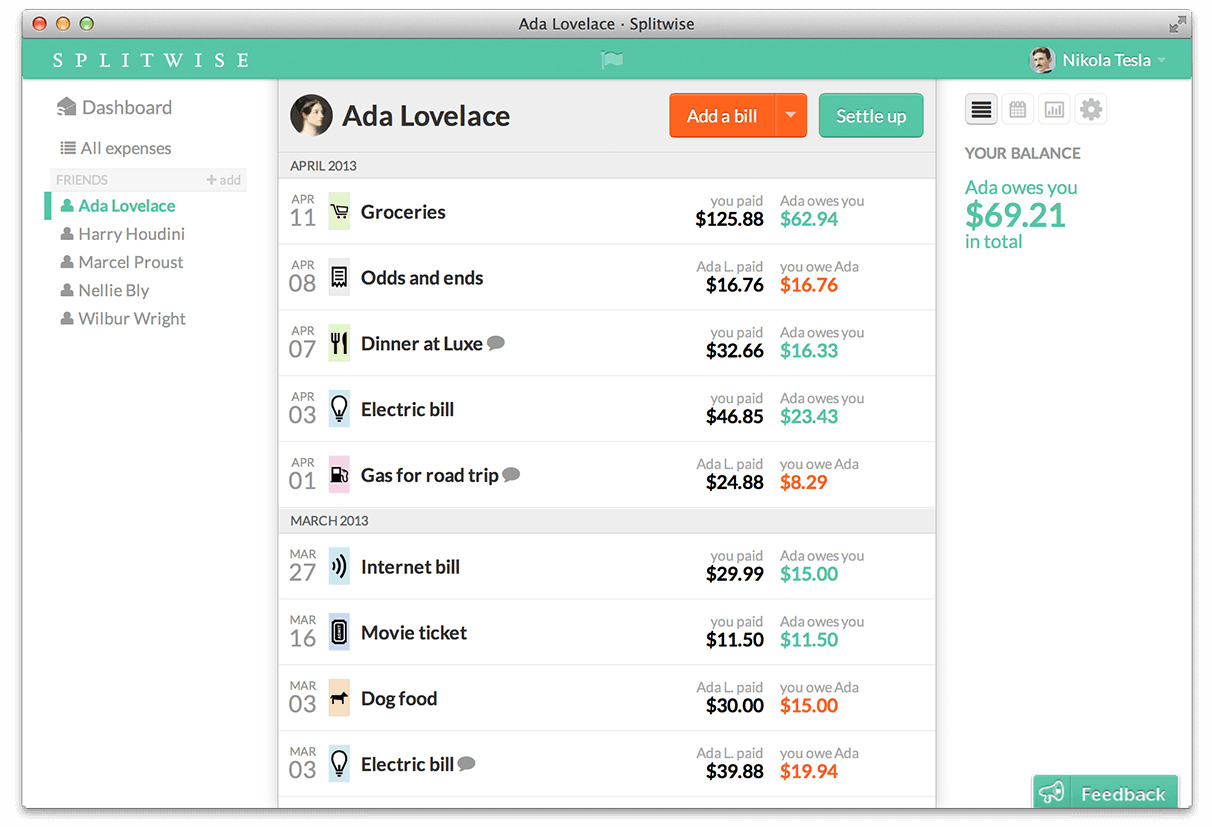
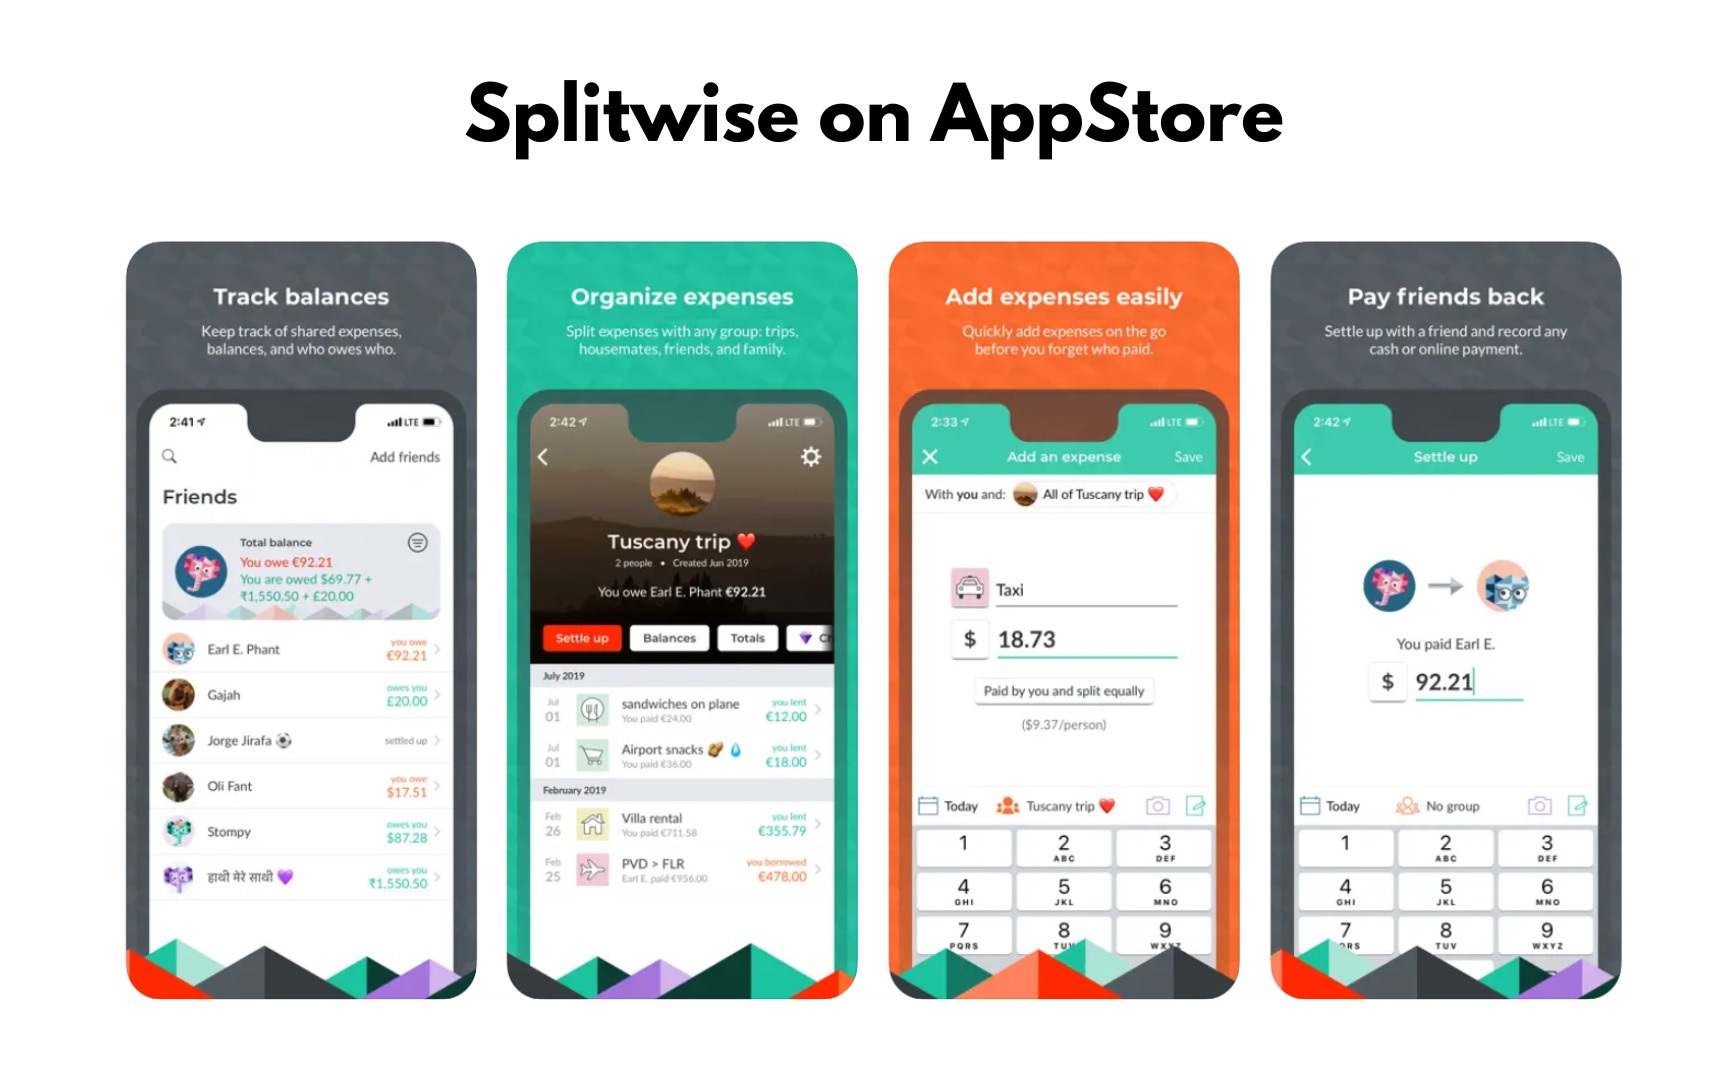
Splitwise is a popular expense-sharing app that simplifies the process of splitting bills with friends, roommates, or family members. Whether you’re going on a group vacation, sharing rent and utilities, or simply splitting the cost of a meal, Splitwise helps you keep track of who owes what.
The app provides a user-friendly platform where you can easily create groups and add expenses within those groups. For example, if you’re on a trip with three friends, you can create a group for that specific trip and add all the expenses incurred during the journey. Splitwise then calculates each person’s share of the expenses based on their consumption and updates the balances accordingly.
Splitwise offers various features to facilitate seamless expense sharing. Here are some key features:
- Expense splitting: With Splitwise, you can easily split bills, rent, groceries, or any other shared expenses. You can specify the exact amount each person owes, or Splitwise can calculate it for you based on the percentage you define.
- Group management: Splitwise allows you to create and manage multiple groups, making it effortless to track expenses with different sets of people. Whether you’re sharing expenses with roommates, friends, or family members, Splitwise keeps all your groups organized and separate.
- Expense categorization: You can categorize expenses to keep them organized and gain insights into your spending habits. Splitwise provides predefined categories such as food, rent, utilities, travel, and more, or you can create custom categories that suit your needs.
- Payment reminders: Splitwise helps keep everyone on track with payment reminders. If someone owes you money, the app will send gentle reminders to settle the outstanding balance, ensuring that everyone is aware of their financial responsibilities.
Splitwise is available as a mobile app for both iOS and Android devices, making it easy to manage your shared expenses on the go. It also offers a web version for convenient access from your computer.
Overall, Splitwise is a valuable tool for maintaining transparency and fairness when sharing expenses. Its user-friendly interface, robust features, and ability to calculate and track balances make Splitwise a go-to app for anyone looking to simplify expense sharing.
What is Mint?
Mint is a popular personal finance management tool that helps you take control of your finances and achieve your financial goals. With Mint, you can easily track your income and expenses, create budgets, set financial goals, and gain valuable insights into your spending habits.
Mint operates by connecting with your financial accounts, such as bank accounts, credit cards, and investment accounts, to provide you with a comprehensive overview of your financial situation. It securely pulls your transaction data and categorizes them automatically, allowing you to see where your money is going and make informed financial decisions.
Here are some key features and functionalities of Mint:
- Expense tracking: Mint automatically categorizes your transactions and provides you with a clear breakdown of your spending habits. You can see how much you’re spending on various categories such as groceries, dining out, transportation, and more. This helps you identify areas where you can cut back and save money.
- Budget creation: Mint allows you to create customized budgets based on your financial goals. You can set spending limits for different categories and track your progress in real-time. Mint sends alerts and notifications when you’re approaching or exceeding your budget, helping you stay accountable and avoid overspending.
- Bill reminders: Never miss a bill payment again! Mint sends you reminders for upcoming bills and due dates, ensuring that you stay on top of your financial obligations.
- Financial goal setting: Whether you’re saving for a vacation, a new car, or paying off debt, Mint helps you set and track your financial goals. You can set specific targets, track your progress, and receive tips and recommendations on how to reach your goals faster.
- Credit monitoring: Mint provides you with a free credit score and credit report summary, allowing you to keep an eye on your credit health and detect any potential errors or fraudulent activities.
Mint’s user-friendly interface and visual dashboards make it easy to understand and analyze your financial data. You can access Mint through their website or by using the Mint mobile app, available for iOS and Android devices.
Overall, Mint is a powerful tool for managing your personal finances. It empowers you to make smarter financial decisions, stay organized, and work towards your financial goals. By connecting Splitwise to Mint, you can enjoy the added convenience of having your shared expenses seamlessly integrated into your overall financial picture.
Why should I connect Splitwise to Mint?
There are several compelling reasons why you should connect Splitwise to Mint. By integrating these two powerful financial tools, you can experience a seamless and efficient way of managing your shared expenses and overall finances. Here are some benefits of connecting Splitwise to Mint:
- Automatic transaction syncing: When you connect Splitwise to Mint, your shared expenses from Splitwise will be automatically synced to Mint. Instead of manually entering each expense into Mint, this integration saves you time and effort by automating the process. It ensures that your financial information is up to date and accurate.
- Complete financial picture: By linking Splitwise to Mint, you can have a comprehensive view of your financial situation. You’ll be able to see your individual expenses, shared expenses, income, and other financial transactions in one place. This holistic view provides you with a clearer understanding of your overall financial health.
- Budget accuracy: Integrating Splitwise with Mint helps you create more accurate budgets. You can include your shared expenses in your Mint budgets, allowing you to track and manage your spending with greater precision. This ensures that your budgets reflect your true financial obligations, leading to more realistic and effective budgeting.
- Real-time expense tracking: With the Splitwise and Mint integration, you can track your shared expenses in real-time. Any updates made in Splitwise, such as new expenses or payments, will instantly reflect in Mint. This enables you to stay on top of your shared expenses and easily track who owes what.
- Financial insights and analysis: Mint offers robust reporting and analysis features that can be enhanced by integrating Splitwise. You can gain deeper insights into your spending patterns, identify trends, and make data-driven financial decisions. Whether it’s analyzing your individual expenses or tracking your spending within specific groups, the integration provides you with valuable information to manage your finances effectively.
Overall, connecting Splitwise to Mint streamlines your financial management process. It eliminates the hassle of manually inputting shared expenses, gives you a complete view of your financial picture, and enhances your budgeting and tracking capabilities. By integrating these two tools, you can effectively manage your personal finances and maintain transparency when sharing expenses with others. So, why not take advantage of this integration and enjoy a more organized and insightful approach to your financial journey?
How to Add Splitwise to Mint
Adding Splitwise to Mint is a straightforward process that involves connecting your Splitwise account to Mint. Here’s a step-by-step guide to help you seamlessly integrate these two financial management tools:
- Step 1: Sign in to your Mint account: Visit the Mint website or open the Mint mobile app and sign in using your credentials.
- Step 2: Go to the “Settings” tab: Once you’re logged in, navigate to the “Settings” tab. In the web version, you’ll find it in the top right corner of your screen. In the mobile app, you can access it from the main menu.
- Step 3: Find the “Accounts” section: Look for the “Accounts” section within the Settings menu. This is where you’ll manage and connect your financial accounts.
- Step 4: Click on the “Add accounts” button: Locate the “Add accounts” button or a similar option within the Accounts section. Click on it to initiate the process of adding a new account.
- Step 5: Search for Splitwise: In the search bar provided, type “Splitwise” and select it from the search results. Splitwise should be listed as one of the available account options.
- Step 6: Connect your Splitwise account to Mint: Follow the prompts to sign in to your Splitwise account and authorize the connection between Splitwise and Mint. You may need to provide your Splitwise login credentials to proceed.
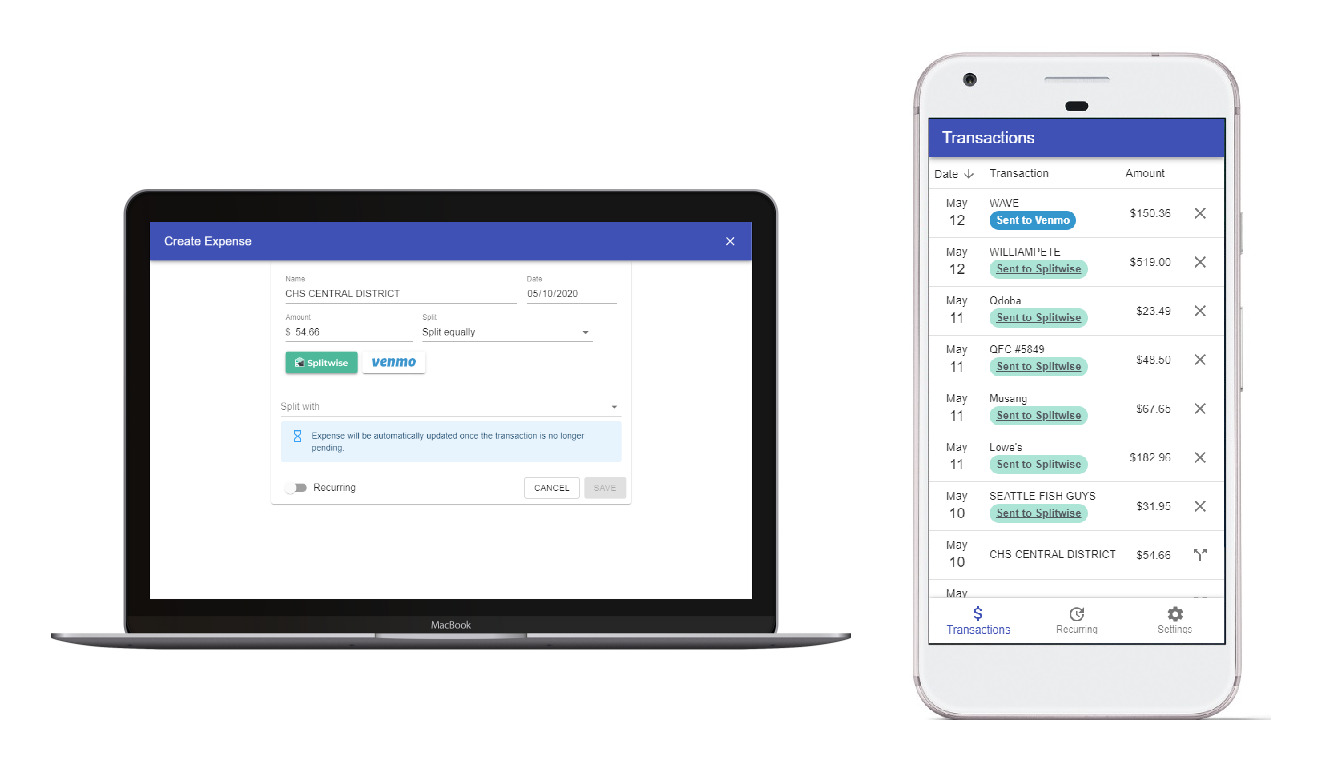
- Step 7: Set up your Splitwise transactions in Mint: Once the connection is established, Mint will start importing your Splitwise transactions. You can review and categorize them within Mint to ensure accurate tracking and organization.
- Step 8: Review and confirm the connection: Before finalizing the connection between Splitwise and Mint, review the imported Splitwise transactions and ensure everything looks correct. Once you’re satisfied, confirm the connection to complete the integration.
That’s it! You’ve successfully added Splitwise to Mint. From this point forward, your Splitwise transactions will be automatically updated and synced with Mint, providing you with a unified view of your financial data.
Note: Occasionally, you may encounter issues or have questions during the integration process. If that happens, you can refer to the FAQ section provided by Mint or reach out to their customer support for assistance.
Now that you’ve successfully connected Splitwise to Mint, you can enjoy the benefits of seamless expense tracking and a complete financial overview. Stay on top of your shared expenses, manage your budgets effectively, and make more informed financial decisions.
Step 1: Sign in to your Mint account
The first step to adding Splitwise to Mint is signing in to your Mint account. Mint is accessible through both the web version and mobile app, making it convenient for users to manage their finances on various devices. Follow these instructions to get started:
- Visit the Mint website or open the Mint mobile app: Launch your preferred web browser and go to the Mint website (www.mint.com). Alternatively, if you prefer to use the mobile app, locate the Mint app on your iOS or Android device and open it.
- Enter your login credentials: On the Mint homepage or app login screen, you’ll need to provide your login credentials. This typically includes your email address and password. If you’re signing in for the first time, you may need to create a Mint account by clicking on the “Sign Up” or “Create Account” option.
- Click on the “Sign In” button: After entering your login information, click on the “Sign In” button to proceed. This will authenticate your credentials and log you in to your Mint account.
- Verify your identity (if applicable): Depending on your account setup or security measures, you may be prompted to verify your identity. This can be done through a verification code sent to your registered email address or mobile phone number.
Once you’ve successfully signed in to your Mint account, you’ll be ready to proceed with the next steps of connecting Splitwise to Mint. It’s essential to ensure that you have a working and active Mint account before moving forward.
Remember to keep your Mint login credentials secure and confidential. If you ever need to update your Mint account information, including your email or password, you can typically do so within the account settings or profile section of the Mint platform.
Now that you’re signed in to Mint, let’s move on to the next step and continue adding Splitwise to your Mint account.
Step 2: Go to the “Settings” tab
After signing in to your Mint account, you’ll need to navigate to the “Settings” tab in order to connect Splitwise. The “Settings” tab is where you can manage various account preferences and configurations within Mint. Follow these steps to find the “Settings” tab:
- Locate the navigation menu: On the Mint website, you’ll typically find the navigation menu at the top right corner of the screen. It is represented by three horizontal lines or a gear icon. If you’re using the Mint mobile app, the navigation menu may be accessible from a menu button located at the top or bottom of the screen.
- Click on the navigation menu: Once you’ve identified the navigation menu, click on it to open a drop-down menu or sidebar. This menu contains various options for managing your Mint account.
- Find and click on the “Settings” option: Within the navigation menu options, scan the list for the “Settings” option. It is usually labeled as “Settings” or depicted by a gear icon. Click on this option to access the Mint account settings.
Once you successfully access the “Settings” tab, you’ll be presented with a range of configurations and preferences that you can customize to your liking. This is where you’ll find the necessary options to connect Splitwise to your Mint account and enable the integration.
By accessing the “Settings” tab, you’re taking the necessary steps towards integrating Splitwise and Mint, which will streamline the management of your shared expenses and overall financial picture. So, let’s move on to the next step and continue the process of adding Splitwise to Mint.
Step 3: Find the “Accounts” section
After accessing the “Settings” tab in your Mint account, the next step is to locate the “Accounts” section. The “Accounts” section is where you can manage and connect your financial accounts, including the integration with Splitwise. Follow these steps to find the “Accounts” section:
- Look for the menu options: In the “Settings” tab, you’ll typically see a vertical menu or a list of options on the left side of your screen. Scan through these menu options to find the one labeled “Accounts.” It may be listed directly as “Accounts” or be represented by an icon related to accounts or transactions.
- Click on the “Accounts” option: Once you’ve identified the “Accounts” option, click on it to access the account management settings. This will open a new page or section dedicated to managing your linked financial accounts.
Once you navigate to the “Accounts” section, you’ll have the ability to add, remove, or modify your connected financial accounts. This is where you’ll integrate Splitwise with Mint to automatically sync your shared expenses into your Mint account.
Keep in mind that the exact location and appearance of the “Accounts” section may vary slightly between the web version and the mobile app. However, Mint generally maintains a consistent structure across devices, making it easy for users to find and manage their accounts efficiently.
With the “Accounts” section located, you’re one step closer to integrating Splitwise with your Mint account. In the next step, we’ll guide you on how to add Splitwise as an account within Mint, enabling the automatic syncing of your shared expenses. So, let’s proceed to the next step and continue the process of connecting Splitwise to Mint.
Step 4: Click on the “Add accounts” button
Now that you have accessed the “Accounts” section in your Mint account, it’s time to click on the “Add accounts” button. This step will allow you to initiate the process of adding Splitwise as an account within Mint. Follow these instructions to proceed:
- Look for the “Add accounts” button: Within the “Accounts” section, you’ll typically find a button or link labeled “Add accounts” or something similar. This button is specifically designed to add new financial accounts to your Mint profile, including Splitwise.
- Click on the “Add accounts” button: Once you locate the “Add accounts” button, click on it to trigger the process of adding Splitwise as an account within your Mint profile.
Clicking on the “Add accounts” button will open a dialogue box or a new page where you can search for and connect Splitwise to your Mint account. This step is crucial for establishing the integration and allowing the automatic syncing of your shared expenses into Mint.
Keep in mind that the “Add accounts” button may be located in different areas of the “Accounts” section, depending on the Mint platform you’re using (web or mobile app). However, Mint maintains a user-friendly interface, making it easy to locate and access the necessary features.
With the “Add accounts” button clicked, you’re one step closer to connecting Splitwise to your Mint account. In the next step, we’ll guide you through the process of searching for Splitwise and initiating the connection within Mint. So, let’s move on to the next step and continue the integration process.
Step 5: Search for Splitwise
After clicking on the “Add accounts” button in your Mint account, the next step is to search for Splitwise. This allows you to find the Splitwise integration option within Mint and initiate the connection process. Follow these steps to search for Splitwise:
- Locate the search bar: Within the “Add accounts” dialogue box or page, you’ll typically find a search bar where you can enter the name of the account you want to connect. Look for this search bar, which is designed to help you locate and connect new accounts.
- Type “Splitwise” into the search bar: Once you’ve identified the search bar, enter “Splitwise” as the search term. As you type, the search functionality within Mint will start suggesting options based on your input.
- Select Splitwise from the search results: Review the search results provided by Mint and select Splitwise from the options presented. Look for the official Splitwise integration, which should be listed among the available account options.
By searching for Splitwise within Mint, you’re identifying the specific integration that allows you to sync your shared expenses seamlessly. Once you select Splitwise from the search results, you’ll be ready to proceed with the next step of connecting your Splitwise account to Mint.
Remember, the search functionality may differ slightly between the web version of Mint and the mobile app. However, Mint generally maintains a consistent user experience across platforms, making it easy for users to locate and connect accounts efficiently.
With Splitwise selected from the search results, you’re now prepared to connect your Splitwise account to Mint. In the next step, we’ll guide you through the process of establishing the connection and enabling the automatic syncing of your shared expenses. Let’s proceed to the next step and continue the integration process.
Step 6: Connect your Splitwise account to Mint
Now that you have selected Splitwise from the search results within Mint, it’s time to connect your Splitwise account. This step allows you to establish the link between Splitwise and Mint, enabling the automatic syncing of your shared expenses. Follow these instructions to connect your Splitwise account to Mint:
- Follow the prompts to sign in to your Splitwise account: Once you select Splitwise from the search results, Mint will guide you through the process of signing in to your Splitwise account. You’ll need to provide your Splitwise login credentials, which typically include your email address or username and password.
- Authorize the connection between Splitwise and Mint: After signing in to your Splitwise account, Mint will request authorization to access your Splitwise data. Review the permissions and information requested, and if you’re comfortable with them, grant the authorization.
- Confirm the connection: Once you authorize the connection, Mint will finalize the integration by establishing the link between your Splitwise and Mint accounts. This step ensures that your shared expenses in Splitwise will automatically appear in your Mint account.
By connecting your Splitwise account to Mint, you’re enabling the automatic syncing of your shared expenses and ensuring that your financial information remains up to date across both platforms. This integration simplifies expense tracking and allows you to manage your shared expenses within the broader context of your financial picture in Mint.
Keep in mind that the specific steps and prompts during the connection process may vary slightly depending on the Mint platform you’re using (web or mobile app). However, Mint provides clear and intuitive instructions to guide you through the process.
With your Splitwise account successfully connected to Mint, you’re now ready to proceed to the next step, where we’ll guide you on how to set up your Splitwise transactions in Mint. Let’s move on and continue the integration process.
Step 7: Set up your Splitwise transactions in Mint
Now that you have connected your Splitwise account to Mint, it’s time to set up your Splitwise transactions within Mint. This step allows you to review and categorize your shared expenses, ensuring accurate tracking and organization. Follow these instructions to set up your Splitwise transactions in Mint:
- Review the imported Splitwise transactions: After connecting Splitwise to Mint, Mint will start importing your Splitwise transactions. Navigate to the transactions section within Mint, which is usually located in the main dashboard or menu. Look for the transactions that have been imported from Splitwise.
- Categorize the Splitwise transactions: Next, review each Splitwise transaction in Mint and assign an appropriate category. Mint provides predefined categories such as “Food,” “Rent,” “Utilities,” and more. Select the category that best matches the nature of the expense. If necessary, you can create custom categories in Mint to suit your specific needs.
- Verify transaction details: Double-check the details of each Splitwise transaction imported into Mint to ensure accuracy. This includes the date, amount, payee, and any additional notes. If you notice any discrepancies or errors, you can edit the transaction details directly within Mint.
Setting up your Splitwise transactions in Mint ensures that your shared expenses are appropriately categorized and included in your overall financial tracking and budgeting. By reviewing and organizing your expenses within Mint, you’ll have a clearer picture of your spending habits and financial commitments.
Mint offers a user-friendly interface with intuitive controls, making it easy to navigate, review, and categorize your transactions. If you encounter any difficulties or have questions during this process, Mint provides helpful resources, including tutorials and customer support, to assist you.
With your Splitwise transactions reviewed and categorized in Mint, you’re now equipped to leverage the integration between these two platforms for a more comprehensive and accurate financial management experience. In the next step, we’ll guide you on reviewing and confirming the connection between Splitwise and Mint. Let’s proceed and complete the integration process.
Step 8: Review and Confirm the Connection
At this stage, you have set up your Splitwise transactions in Mint. The final step is to review and confirm the connection between Splitwise and Mint, ensuring that everything is accurately synced and integrated. Follow these instructions to review and confirm the connection:
- Double-check Splitwise transactions in Mint: Take a final look at your Splitwise transactions within Mint to ensure that all the imported data and categories are correct. Verify that your shared expenses are accurately reflected in Mint and align with the transactions in your Splitwise account.
- Review the overall integration: Take a moment to evaluate the overall integration between Splitwise and Mint. Consider whether the synced transactions provide you with a unified and comprehensive view of your financial information, including both individual and shared expenses.
- Confirm the connection: If you are satisfied with the integration and your Splitwise transactions in Mint, confirm and finalize the connection. Depending on the Mint platform (web or mobile app), you may need to click on a “Confirm” or “Finish” button to complete the process.
By reviewing and confirming the connection, you ensure that any future changes in your Splitwise account, such as new expenses or payments, will be automatically reflected within Mint. This ongoing synchronization allows you to have an up-to-date and accurate representation of your overall financial picture.
If you encounter any issues or have questions during the review and confirmation process, Mint provides resources such as FAQs and customer support to assist you. Remember that maintaining the connection between Splitwise and Mint will be important for the seamless tracking and management of your shared expenses moving forward.
With the connection between Splitwise and Mint reviewed and confirmed, congratulations! You have successfully integrated these two powerful financial tools. You can now enjoy the benefits of having a unified view of your financial data, simplified expense tracking, and effective budgeting within Mint.
Remember to regularly review and manage your Splitwise transactions in Mint to ensure accuracy and maximize the benefits of this integration. Now that you have completed the integration process, you’re ready to navigate your financial journey with enhanced clarity and control.
FAQ: Common Issues and Troubleshooting
While connecting Splitwise to Mint is generally a smooth process, you may encounter some common issues or have questions along the way. This FAQ section addresses some common queries and provides guidance for troubleshooting. Here are a few frequently asked questions:
Q: I can’t find the “Add accounts” button in my Mint account settings. What should I do?
A: Make sure you are accessing the Mint account settings from a desktop or laptop computer rather than a mobile device or tablet. If you’re still unable to find the button, try clearing your browser cache or using a different web browser. If the issue persists, reach out to Mint customer support for further assistance.
Q: I connected Splitwise to Mint, but my transactions are not syncing. What could be the problem?
A: First, ensure that you have authorized Mint to access your Splitwise account during the connection process. Double-check that you are using the correct login credentials for both Splitwise and Mint. If the problem persists, try disconnecting and reconnecting Splitwise in Mint’s settings. If the issue continues, reach out to Mint customer support for further troubleshooting.
Q: Why are some of my Splitwise transactions not categorized correctly in Mint?
A: Mint’s automatic categorization may not always perfectly classify your Splitwise expenses. You can manually edit the transaction categories in Mint to ensure accurate tracking. Additionally, you can create custom categories in Mint to better align with your specific expenses. Regularly reviewing and adjusting the categorization will help improve accuracy over time.
Q: Can I unlink Splitwise from Mint if I no longer want to sync my transactions?
A: Yes, you can unlink Splitwise from Mint at any time. Go to the “Accounts” section in your Mint settings, locate the Splitwise account, and choose the option to disconnect or remove it. Keep in mind that unlinking the accounts will stop the automatic syncing of future transactions, but it will not delete any previously imported Splitwise transactions from your Mint account.
Q: Does connecting Splitwise to Mint have any privacy or security implications?
A: Mint takes data privacy and security seriously. The integration with Splitwise is designed to securely sync your transaction information only between these two services. Your login credentials and financial data remain encrypted and protected by Mint’s security measures. However, it’s always important to use strong, unique passwords for both Splitwise and Mint to ensure maximum protection.
If you encounter any other issues or have additional questions during the integration process, refer to Mint’s documentation, FAQs, or seek support from their customer service. They are better equipped to assist you with specific technicalities and troubleshooting.
Remember that common issues and troubleshooting solutions may change over time, so it’s essential to refer to the latest information provided by Mint or contact their support for the most up-to-date guidance.
With the help of this FAQ section, you can address common concerns and overcome any potential obstacles while integrating Splitwise with Mint. Enjoy the benefits of seamless expense tracking and financial management!
Conclusion
Integrating Splitwise with Mint provides you with a powerful combination for managing your shared expenses and overall financial health. By following the step-by-step process outlined in this guide, you can seamlessly connect Splitwise to Mint and enjoy the convenience of automatic syncing, accurate expense tracking, and comprehensive financial insights.
With Splitwise, you can easily split bills and track shared expenses with friends, roommates, or family members. Mint, on the other hand, allows you to manage your personal finances, track your spending, create budgets, and set financial goals. By connecting these two tools, you can have a complete view of your financial situation, including both individual and shared expenses.
Throughout this guide, we explored the steps to add Splitwise to Mint, including signing in to your Mint account, accessing the “Settings” tab, finding the “Accounts” section, clicking on the “Add accounts” button, searching for Splitwise, connecting your Splitwise account to Mint, setting up your Splitwise transactions in Mint, and reviewing and confirming the connection. We also provided a FAQ section to address common issues and troubleshooting.
As you continue to use Splitwise and Mint, remember to regularly review and categorize your transactions, create budgets, and monitor your spending to make informed financial decisions.
By utilizing the integration between Splitwise and Mint, you can stay organized, gain valuable insights into your finances, and ensure that your shared expenses are accurately tracked and managed. Take advantage of these powerful tools to simplify your financial management and improve your overall financial well-being.
Now that you have completed the integration process, it’s time to enjoy the benefits of seamless expense tracking, effective budgeting, and a clearer understanding of your financial situation. Go ahead and explore the combined power of Splitwise and Mint to take control of your shared expenses and achieve your financial goals.