Introduction
Welcome to Splitwise, the ultimate platform for simplifying shared expenses among friends, roommates, or travel companions. Gone are the days of messy spreadsheets or arguments over who owes who what. With Splitwise, you can easily keep track of expenses, split bills, and settle payments, all in one convenient place.
Whether you’re planning a group trip, living with roommates, or simply going out for dinner with friends, Splitwise has got you covered. This intuitive and user-friendly app takes the hassle out of managing shared expenses, ensuring that everyone involved gets a fair and accurate account of who owes what.
In this article, we will guide you through the process of setting up Splitwise, adding expenses, splitting bills, tracking balances, and handling payments. We’ll also cover how to invite friends and request payments from others, as well as how to mark expenses as settled. By the end, you’ll be a Splitwise pro, confidently managing your shared expenses like a seasoned accountant.
So, let’s dive in and discover how Splitwise can revolutionize the way you and your friends handle shared expenses. Say goodbye to financial headaches and hello to a simpler, more efficient way of managing your group finances. Let’s get started!
Setting up Splitwise
Before you can start managing your shared expenses on Splitwise, you’ll need to set up an account. Follow these simple steps to get started:
- Download the Splitwise app: Splitwise is available for both iOS and Android devices. Head to the App Store or Google Play Store and search for “Splitwise.” Tap the “Install” button to download the app to your device.
- Create an account: Once the app is installed, open it and tap on “Sign Up” to create a new account. You can either sign up using your email address or connect with your Google or Facebook account.
- Add your details: Fill in the required information, including your name and email address. Choose a strong password to ensure the security of your account.
- Verify your email: After completing the registration process, you will receive an email from Splitwise. Click on the verification link in the email to verify your account and activate it.
- Set currency preferences: Upon logging in to your account, you’ll have the option to set your preferred currency. This is important as Splitwise supports multiple currencies, allowing you to accurately track expenses no matter where you are in the world.
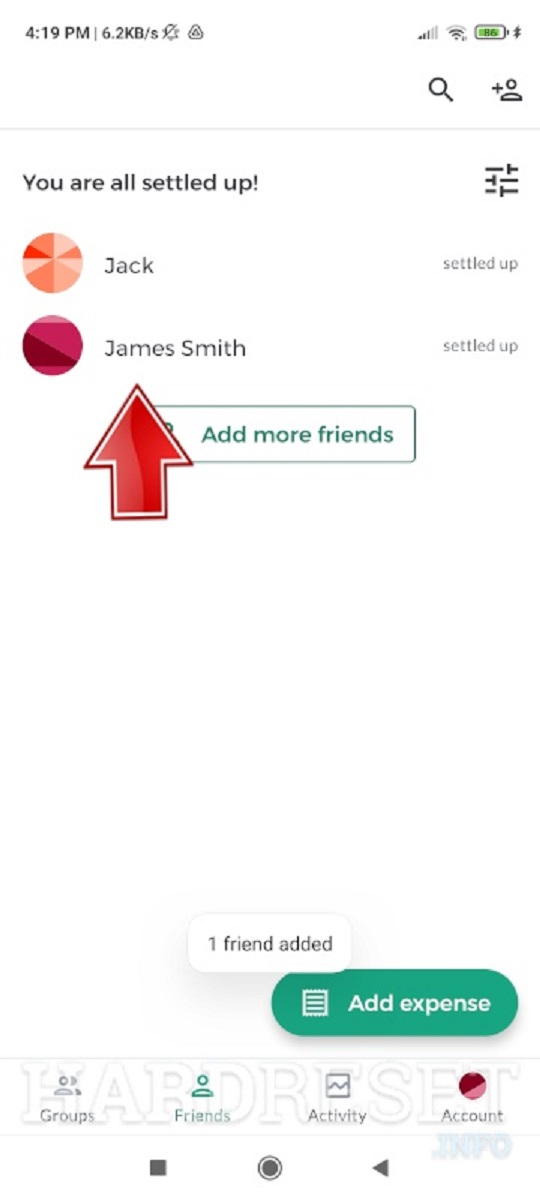
- Connect with friends: To make Splitwise truly effective, you’ll want to connect with your friends or roommates. Tap on the “Friends” tab and click on the “+” button to add friends. You can either search for their usernames or import contacts from your phone.
Once you’ve completed these steps, you’re ready to delve into the world of shared expenses with Splitwise. The app is designed to simplify the process and provide transparency for everyone involved, ensuring that you can focus on enjoying time with your friends and worry less about financial calculations.
Now that you have an account and your friends are connected, let’s move on to the next step: adding expenses.
Adding expenses
Now that you have set up your Splitwise account and connected with your friends, it’s time to start adding expenses. Follow these steps to add expenses accurately:
- Open the Splitwise app: Launch the Splitwise app on your device and sign in to your account.
- Create a new expense: Tap on the “+” sign or the “Add an expense” button to create a new expense.
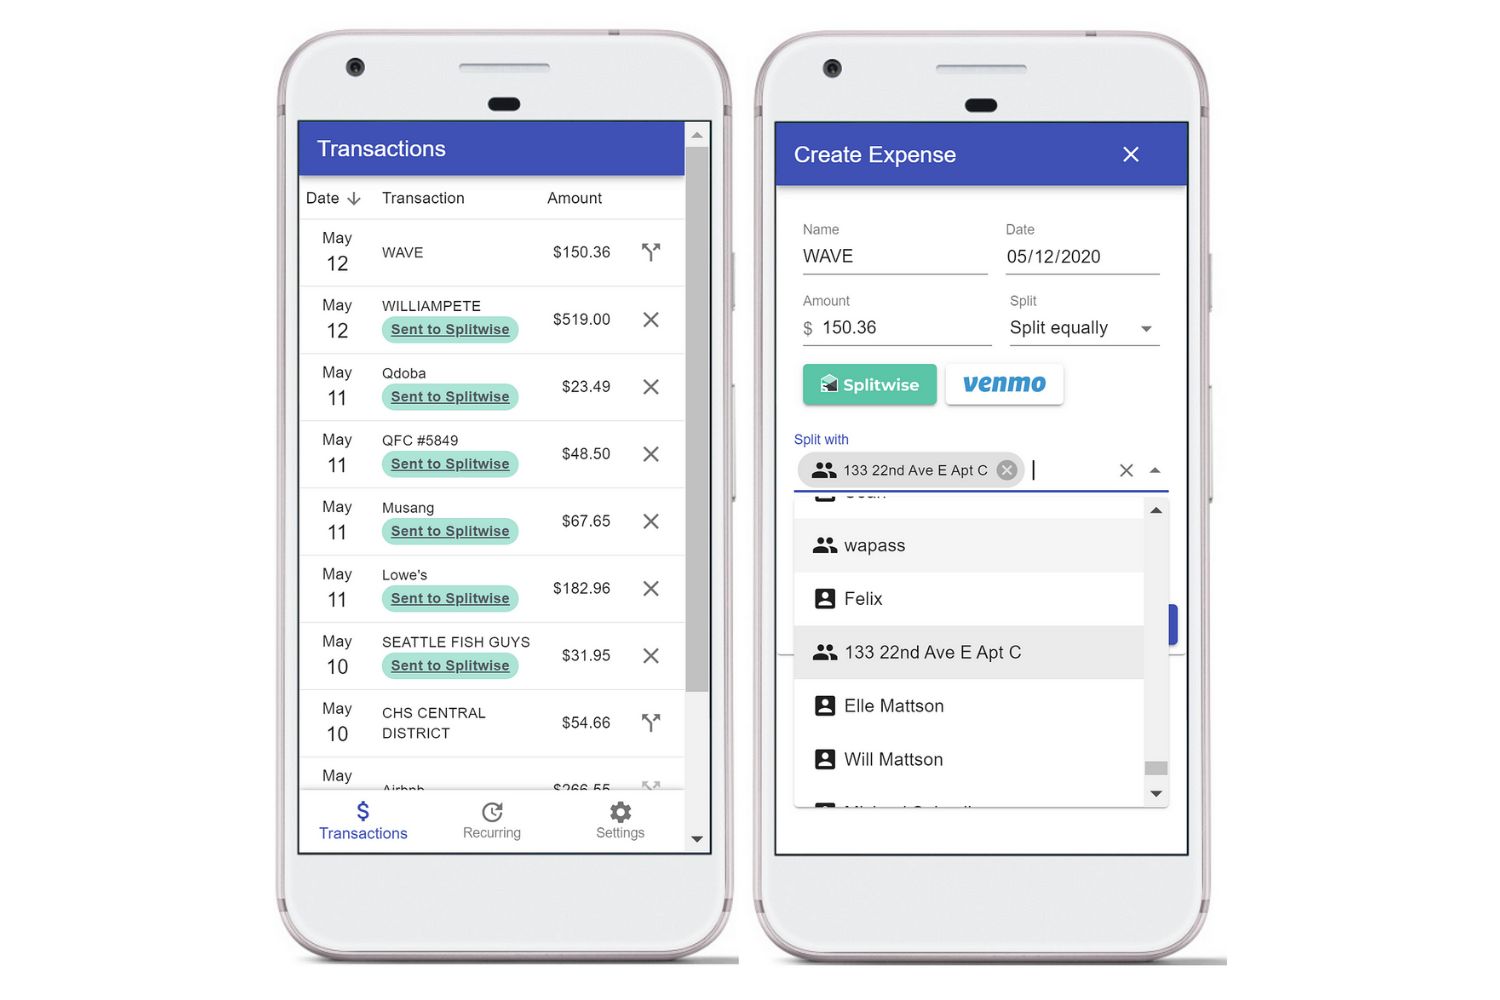
- Enter the details: Fill in the necessary information for the expense, including the description, date, and amount spent. Splitwise provides additional options like adding a photo of the receipt, selecting the category of the expense, and assigning it to a specific group or individual.
- Choose who participated: Indicate who was involved in the expense by selecting the friends or groups that were present. Splitwise allows you to split expenses equally, unequally, or by percentage, depending on your preference.
- Save the expense: Once you’ve entered all the relevant details, tap on the “Save” or “Submit” button to add the expense to your account.
Splitwise makes it easy to keep track of individual expenses and ensures that everyone is aware of their share. The app automatically calculates the amounts owed by each person, eliminating the need for manual calculations or misunderstandings.
If you have a recurring expense (like rent or utilities), you can set it up as a recurring payment in Splitwise. This way, you won’t have to manually add the expense every time it occurs. Just set the recurrence frequency (monthly, weekly, etc.) and Splitwise will handle the rest.
Adding expenses on Splitwise is a straightforward process, providing a clear picture of who owes what. With this step completed, let’s move on to the next: splitting expenses.
Splitting expenses
Splitting expenses is a core feature of Splitwise, allowing you to divide the cost of shared bills and purchases accurately. Follow these steps to split expenses with ease:
- Select the expense: Open the Splitwise app and navigate to the “Expenses” tab. Find the expense you want to split and tap on it to open the details.
- Choose how to split: Splitwise offers various options for splitting expenses. You can split equally, unequally, or by percentage. Select the appropriate option based on your agreement with the participants.
- Adjust individual shares: Depending on your splitting method, you can modify the amount owed by each person. Splitwise automatically calculates the shares based on the selected splitting option, but you can fine-tune it if necessary.
- Include or exclude participants: If certain friends were not involved in the expense, you can exclude them from the split. Simply deselect the individuals who are not responsible for the cost.
- Save the splits: Once you have configured the splitting settings, tap on the “Save” button to update the expense with the revised splits.
Splitwise ensures fairness and transparency when dividing expenses among friends. It simplifies the process by handling the calculations for you, making it easy to keep track of individual shares and outstanding balances.
Whether it’s splitting the bill at a restaurant, sharing the cost of groceries, or dividing travel expenses, Splitwise has you covered. With the ability to customize the splitting options to match your specific needs, you can ensure that everyone pays their fair share.
Now that we have covered how to split expenses on Splitwise, it’s time to move on to the next step: tracking balances.
Tracking balances
One of the key advantages of using Splitwise is the ability to track balances easily. Splitwise keeps a running tab of who owes money and to whom, ensuring that everyone stays on top of their financial obligations. Here’s how to track balances on Splitwise:
- Access the dashboard: Open the Splitwise app and navigate to the home or dashboard screen.
- View the summary: The dashboard provides a clear overview of your outstanding balances. It shows the total amount you owe to others and the total amount others owe to you.
- Check individual balances: Scroll down to see a list of friends or groups with whom you have shared expenses. Splitwise displays individual balances indicating how much you owe or are owed by each person or group.
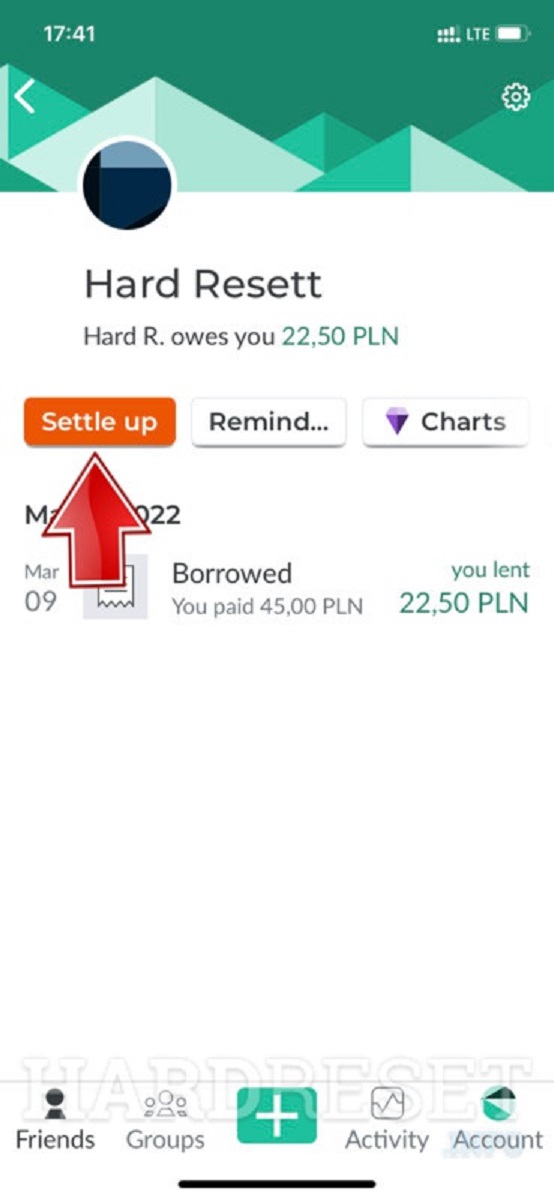
- Dig deeper: If you tap on a friend’s name or a group, you can view a detailed breakdown of the expenses, recent activity, and the current balance. This helps you understand the history of transactions and any recent updates.
- Settle balances: When you are ready to settle a balance, you can make a payment directly through Splitwise or any external payment platform of your choice. We’ll explore the payment options later in this guide.
Tracking balances on Splitwise provides a clear picture of your financial standing within your shared group. It eliminates the need for constant back-and-forth discussions about who owes what, making it easier to keep track of your financial relationships.
With Splitwise, you can have peace of mind knowing that you are always aware of your outstanding balances and can address them as needed. Now that you understand how to track balances, let’s move on to inviting friends to join Splitwise.
Inviting friends to join Splitwise
Splitwise is designed to simplify shared expenses, but it’s even more effective when your friends and roommates join the platform as well. Here’s how you can invite them to join Splitwise:
- Open the Splitwise app: Launch the Splitwise app on your device and sign in to your account.
- Access the Friends tab: Tap on the “Friends” tab located at the bottom of the screen. This will bring you to the section where you can manage your list of friends.
- Invite friends: In the Friends tab, you will see an option to “Invite Friends.” Tap on this to choose your preferred method of inviting friends. You can send an invitation via email, SMS, or share your unique referral code for them to enter during the sign-up process.
- Customize the invitation message: When sending invitations, you can add a personal touch by customizing the invitation message. You can explain the benefits of Splitwise, highlight its features, and express why you think it will be useful for them.
- Track invitations: Splitwise allows you to track the status of your invitations. You can see which friends have accepted your invitation and joined Splitwise, making it easier to keep track of who you can start sharing expenses with.
By inviting friends to join Splitwise, you can streamline the process of sharing expenses and ensure that everyone is on the same page. This eliminates the need for manual calculations, reduces misunderstandings, and promotes transparency within your shared financial arrangements.
Now that you know how to invite friends to join Splitwise, let’s move on to the next topic: how to pay someone on Splitwise.
How to pay someone on Splitwise
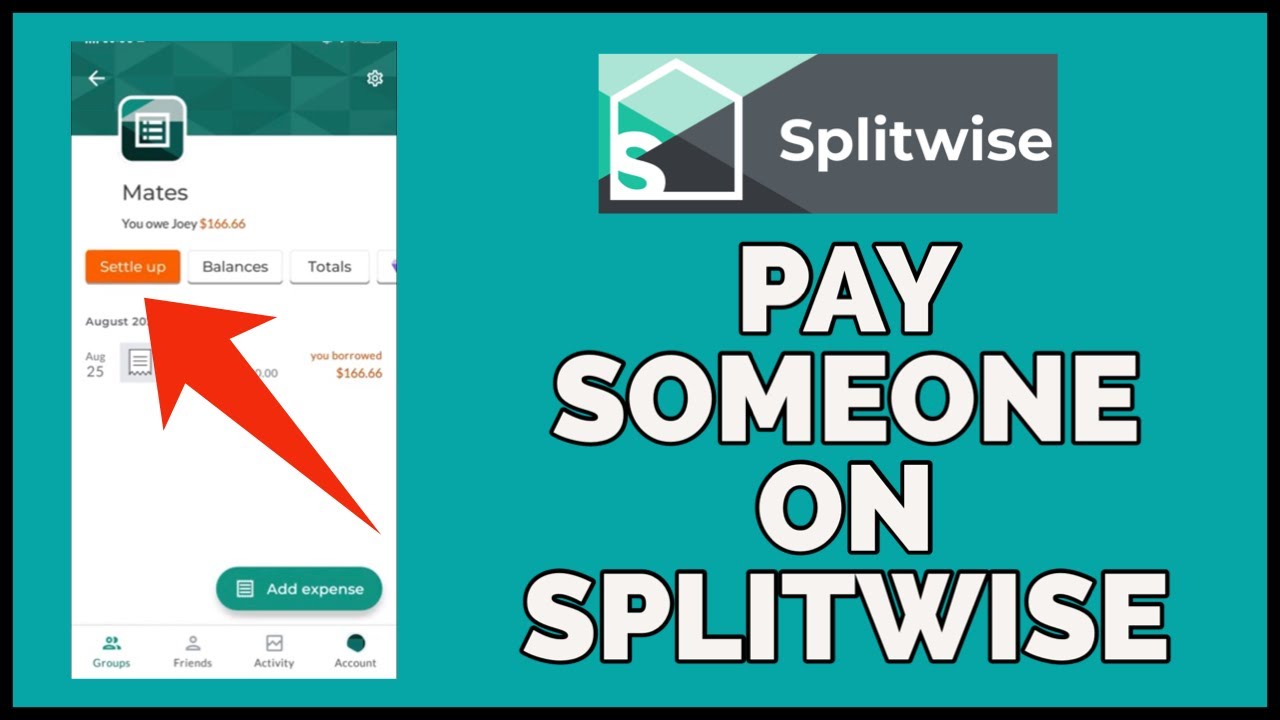
Splitwise not only simplifies the process of tracking shared expenses but also provides convenient options for settling payments. Here’s how you can pay someone on Splitwise:
- Choose the expense: Open the Splitwise app and navigate to the “Expenses” tab. Select the expense for which you want to make a payment.
- Check the balances: Before making a payment, ensure that you have an accurate understanding of the balances. Splitwise displays how much you owe or are owed by each person or group.
- Select the payment method: Splitwise offers various payment methods, depending on your location and preferences. You can make payment directly through the app or opt for an external payment platform such as PayPal, Venmo, or a bank transfer.
- Enter the payment details: Follow the prompts to enter the required payment details. This may include providing your payment credentials or connecting your Splitwise account to the external payment platform.
- Confirm and send the payment: Double-check the payment amount and recipient details, then confirm and send the payment. Splitwise will update the expense as “settled” once the payment is successfully completed.
Splitwise aims to provide flexibility, allowing you to choose the payment method that is most convenient for you and the recipient. It removes the hassle of dealing with cash or writing checks, making the payment process streamlined and efficient.
Remember to communicate with the person you are paying to confirm the payment method they prefer. This ensures a smooth transaction and eliminates any potential confusion.
Now that you know how to make payments on Splitwise, let’s explore the next step: requesting payments from others.
Paying through external payment platforms
Splitwise offers the flexibility to use external payment platforms for settling expenses. This allows you to choose a payment method that is convenient and familiar to you. Here’s how you can pay through external payment platforms on Splitwise:
- Select the expense: Open the Splitwise app and navigate to the “Expenses” tab. Choose the expense for which you want to make a payment.
- Check the balances: Before proceeding with the payment, review the balances to understand how much you owe or are owed by each person or group.
- Choose an external payment platform: Splitwise integrates with popular payment platforms such as PayPal, Venmo, and various banking apps. Select the desired platform from the available options.
- Enter the payment details: Follow the prompts to enter the necessary payment details, such as the recipient’s information and the payment amount. Make sure to review the information thoroughly before proceeding.
- Authorize the payment: After verifying all the details, confirm and authorize the payment on the external payment platform. This will initiate the transfer of funds to settle the expense on Splitwise.
When using external payment platforms, it’s important to keep communication open with the recipient to ensure a smooth transaction. Confirm the payment method they prefer and discuss any necessary details such as usernames, email addresses, or phone numbers associated with their payment accounts.
Splitwise simplifies the payment process by seamlessly integrating with external payment platforms, allowing you to settle expenses with ease. Whether it’s PayPal, Venmo, or your preferred banking app, you can choose the method that works best for you.
Now that you know how to pay through external payment platforms on Splitwise, let’s discuss the next step: requesting payments from others.
Requesting payments from others
Splitwise allows you to request payments from others when you have outstanding balances. It’s a convenient way to remind friends or roommates of their financial obligations. Here’s how to request payments on Splitwise:
- Access the expense: Open the Splitwise app and navigate to the “Expenses” tab. Find the expense for which you want to request payment.
- Check the balances: Review the balances to determine how much others owe you for that specific expense.
- Request payment: Depending on the situation, you can choose to request payment from specific individuals involved in the expense or from the entire group. Splitwise provides options to customize the payment request based on your preferences.
- Send the request: Once you have specified the recipients and the amount to be paid, click on the “Send” or “Request” button to send the payment request.
- Track payment requests: Splitwise allows you to keep track of the payment requests you have made. You can see the status of each request, whether it has been paid or is still pending.
Requesting payments from others through Splitwise ensures that everyone is aware of their outstanding balances and can settle their financial obligations promptly. It eliminates the need for constant reminders or awkward conversations.
It’s important to maintain clear communication and set expectations with your friends or roommates when requesting payments. Provide them with the necessary details, such as preferred payment methods or deadlines, to make the process as smooth as possible.
Now that you know how to request payments from others on Splitwise, let’s discuss the next step: marking an expense as settled.
Marking an expense as settled
Once a payment has been made and you have received the funds for an expense, it’s important to mark it as settled on Splitwise. This helps keep your records accurate and ensures that you and your friends are on the same page regarding the status of the expense. Here’s how to mark an expense as settled:
- Open the Splitwise app: Launch the Splitwise app on your device and sign in to your account.
- Access the expense: Navigate to the “Expenses” tab and locate the expense that has been fully paid.
- Verify the payment: Double-check that you have received the correct payment amount from the individual or group. Ensure that it matches the owed portion of the expense.
- Mark as settled: Tap on the expense to open its details. Look for the “Mark as settled” or “Settle expense” option and click on it to confirm that the payment has been received.
- Update the balances: Splitwise will automatically update the balances based on the expense being marked as settled. This ensures that the settled amount is reflected accurately and eliminates any future confusion.
Marking an expense as settled is an essential step in Splitwise to maintain accurate records and keep track of your financial transactions. It indicates that the payment has been made and received, bringing closure to that particular shared expense.
Remember to communicate with your friends or roommates when marking an expense as settled. This ensures that everyone is aware and acknowledges the payment, fostering transparency and trust within your shared financial arrangements.
Now that you know how to mark an expense as settled on Splitwise, you have a complete understanding of the process. Let’s recap what we’ve covered so far and conclude our guide.
Handling discrepancies and disputes
While Splitwise is designed to streamline shared expenses and promote transparency, occasional discrepancies or disputes may arise. It’s important to address these issues promptly and effectively to maintain healthy financial relationships with your friends or roommates. Here’s how to handle discrepancies and disputes on Splitwise:
- Open communication: When a discrepancy or dispute arises, it’s crucial to communicate openly and honestly with the individuals involved. Discuss the issue, share your perspective, and listen to theirs to gain a clear understanding of the problem.
- Provide evidence: If possible, provide evidence to support your claims or address any misunderstandings. This can include receipts, transaction records, or additional documentation that clarifies the situation.
- Collaborative solution: Work together to find a fair and mutually beneficial solution. Consider possible compromises or alternative methods of resolving the issue that address everyone’s concerns and ensure a balanced outcome.
- Seek mediation if necessary: In cases where a resolution cannot be reached through communication alone, consider involving a neutral third party to mediate the dispute. This can be a trusted friend, a mutual acquaintance, or even a mediator provided by Splitwise if available.
- Update expenses and settlements: Once an agreement or resolution has been reached, make sure to update the expenses and settlements on Splitwise accordingly. This ensures that the app accurately reflects the resolved issue and removes any outstanding balances related to the dispute.
Handling discrepancies and disputes in a constructive and respectful manner is crucial for maintaining healthy financial relationships with your friends or roommates. By addressing issues promptly and seeking resolution together, you can preserve the trust and harmony within your shared financial arrangements.
Remember that misunderstandings can happen, but by approaching them with empathy and open communication, you can work towards a resolution that satisfies everyone involved.
Now that we’ve covered the process of handling discrepancies and disputes on Splitwise, let’s wrap up our guide.
Conclusion
Managing shared expenses can often become a complicated and stressful task, leading to confusion and strained relationships. Fortunately, Splitwise offers a simple and efficient solution to streamline the process and ensure fairness among friends, roommates, or travel companions. By utilizing Splitwise, you can easily track expenses, split bills accurately, and settle payments conveniently.
In this guide, we have walked through the essential steps of setting up Splitwise, adding expenses, splitting bills, tracking balances, inviting friends to join, making payments, and handling discrepancies or disputes. We have explored how Splitwise simplifies the management of shared finances, eliminating the need for manual calculations and reducing the risk of misunderstandings.
Splitwise provides a user-friendly interface, customizable splitting options, and integration with external payment platforms. It empowers users to maintain transparent and balanced financial relationships. Whether you’re planning a trip, sharing household expenses, or splitting the bill at a restaurant, Splitwise ensures that everyone gets a fair share and the burden of managing shared expenses is significantly reduced.
Remember, effective communication, trust, and collaboration are key to successfully managing shared finances. Utilize the features and functionalities of Splitwise to facilitate open discussions and foster transparency in financial matters. When discrepancies or disputes arise, address them promptly and constructively to maintain healthy relationships and resolve issues amicably.
With Splitwise, you can focus on enjoying quality time with your friends or roommates, without the financial stress and strain. So, why not start using Splitwise today and experience the convenience and ease of managing shared expenses in a hassle-free way?


