Introduction
Welcome to the world of Splitwise, a convenient and user-friendly app that simplifies the process of splitting expenses with friends, family, or roommates. However, Splitwise doesn’t currently have a built-in payment method, which means you have to manually settle your balances with others. To make settling payments even easier, you can integrate PayPal into Splitwise. By doing so, you can effortlessly send and receive payments securely and conveniently through the platform.
In this article, we will guide you through the step-by-step process of adding PayPal to Splitwise. Whether you’re tech-savvy or new to these platforms, don’t worry – we’ve got you covered. With this integration, you can streamline the payment process and focus on enjoying your time with loved ones without the stress of managing expenses.
Before we jump into the process, let’s quickly discuss what PayPal is. PayPal is a widely used online payment system that allows you to send and receive money securely across various platforms. It’s trusted by millions of users worldwide for its reliable and convenient service.
Now that you have a basic understanding, let’s dive into the step-by-step guide on how to add PayPal to Splitwise. By the end of this article, you’ll be able to seamlessly settle expenses and simplify your financial transactions.
Step 1: Create a PayPal Account
The first step in integrating PayPal with Splitwise is to create a PayPal account if you don’t already have one. Here’s how you can do it:
- Go to the PayPal website or download the PayPal app from your device’s app store.
- Click on the “Sign Up” or “Create an Account” button. You’ll be prompted to choose between a “Personal” or “Business” account. For Splitwise transactions, a personal account is usually sufficient.
- Provide the required information, including your name, email address, and password. Make sure to use a strong and unique password to ensure the security of your account.
- Once you’ve completed the form, review the Terms and Conditions and Privacy Policy, then click “Agree and Create Account.”
- Next, you’ll need to link your bank account or credit card to your PayPal account. This allows you to fund your PayPal transactions or receive money from others.
- Follow the prompts to enter your bank account or credit card information. PayPal will securely verify and link the accounts.
- Once your account is set up and verified, you’re ready to move on to the next step of linking your PayPal account to Splitwise.
Remember to keep your PayPal account information safe and not share it with anyone. Additionally, it’s a good practice to regularly monitor your account and set up any necessary security measures provided by PayPal. This will help protect your funds and personal information from unauthorized access.
With your PayPal account ready to go, let’s proceed to the next step of linking it to Splitwise.
Step 2: Link your PayPal Account to Splitwise
In this step, we will guide you through the process of linking your PayPal account to Splitwise. This will enable Splitwise to access your PayPal balance and facilitate seamless payments. Here’s how you can do it:
- Open the Splitwise app or visit the Splitwise website and log in to your account.
- Once you’re logged in, navigate to the “Settings” or “Preferences” section. This is typically represented by a gear or cog icon.
- Look for the “Payments” or “Payment Methods” option. Click on it to proceed.
- In the payment methods section, search for the option to “Link PayPal Account” or something similar. Click on it to initiate the linking process.
- You may be prompted to enter your PayPal login credentials. Provide your PayPal email address and password to proceed.
- Once you’ve entered your credentials, click “Authorize” or “Grant Permission” to allow Splitwise to access your PayPal account.
- Upon successful authorization, Splitwise will notify you that your PayPal account has been linked.
It’s important to note that linking your PayPal account to Splitwise grants Splitwise access to your PayPal balance and transaction history. This is necessary for Splitwise to accurately track payments and balances owed. Rest assured, PayPal has robust security measures in place to safeguard your account information.
Once your PayPal account is successfully linked, you can move on to connecting Splitwise to PayPal in the next step.
Step 3: Connect Splitwise to PayPal
Now that your PayPal account is linked to Splitwise, the next step is to connect Splitwise to PayPal. This connection allows Splitwise to facilitate payments through your PayPal account. Follow these steps to connect Splitwise to PayPal:
- Open the Splitwise app or visit the Splitwise website and log in to your account.
- Navigate to the “Settings” or “Preferences” section, typically represented by a gear or cog icon.
- Find the “Payments” or “Payment Methods” option and click on it.
- In the payment methods section, search for the “Connect with PayPal” or similar option and click on it.
- You may be redirected to the PayPal website or app to authorize the connection. If prompted, provide your PayPal login credentials.
- Review the permissions that Splitwise is requesting, such as accessing your PayPal account for transactions and balance updates. Click “Authorize” or “Grant Permission” to proceed.
- After authorizing the connection, you’ll be redirected back to the Splitwise app or website.
Upon successful connection, Splitwise and PayPal will be synchronized, allowing you to make payments through PayPal directly within the Splitwise app or website. This integration saves you time and effort by streamlining the payment process.
Now that Splitwise is connected to PayPal, it’s time to set up PayPal as a payment method in Splitwise, which we’ll cover in the next step.
Step 4: Set Up PayPal as a Payment Method
Now that Splitwise is connected to your PayPal account, it’s time to set up PayPal as a payment method within Splitwise. By doing this, you’ll be able to conveniently make payments through PayPal for any expenses you owe. Here’s how you can set up PayPal as a payment method:
- Login to your Splitwise account via the app or website.
- Navigate to the “Settings” or “Preferences” section, usually indicated by a gear or cog icon.
- Find the “Payments” or “Payment Methods” option and click on it.
- Look for the “Add Payment Method” or similar button, and select PayPal from the available options.
- Authorize the connection by entering your PayPal login credentials if prompted.
- Once connected, you may be asked to select a funding source. Choose the desired option, such as your PayPal balance or linked bank account.
- Review and confirm the setup. You may have the option to set PayPal as the default payment method.
After completing these steps, PayPal will be set up as a payment method in Splitwise. This means that any expenses you owe can be paid directly through PayPal, conveniently and securely.
It’s worth noting that Splitwise will prioritize your PayPal balance for payments, if sufficient funds are available. If your PayPal balance is insufficient, Splitwise will automatically charge your linked bank account or credit card for the transaction.
With PayPal now set up as a payment method, you’re ready for the final step – making payments through PayPal on Splitwise.
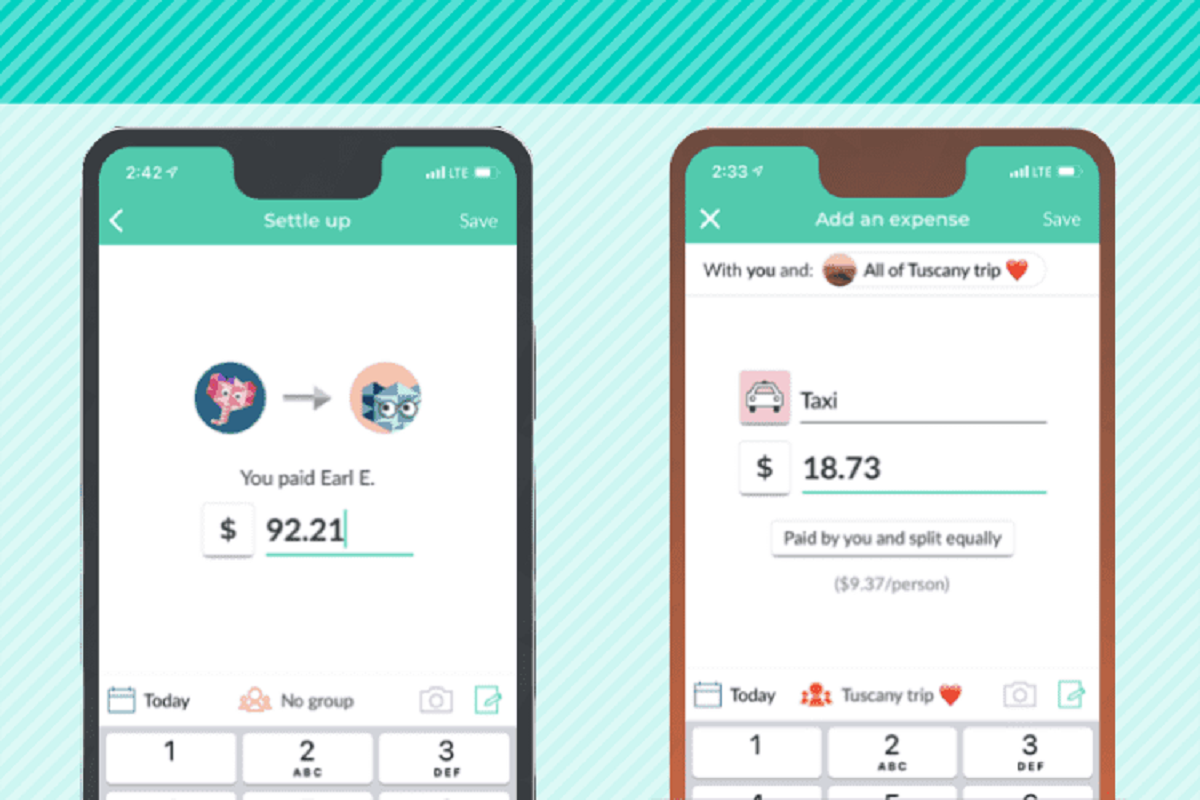
Step 5: Make Payments through PayPal on Splitwise
Now that you have successfully linked and set up PayPal as a payment method in Splitwise, you’re ready to make payments effortlessly. Here is a simple guide on how to make payments through PayPal on Splitwise:
- Login to your Splitwise account via the app or website.
- On the homepage or dashboard, you’ll see a list of expenses and balances.
- Select the expense for which you want to make a payment.
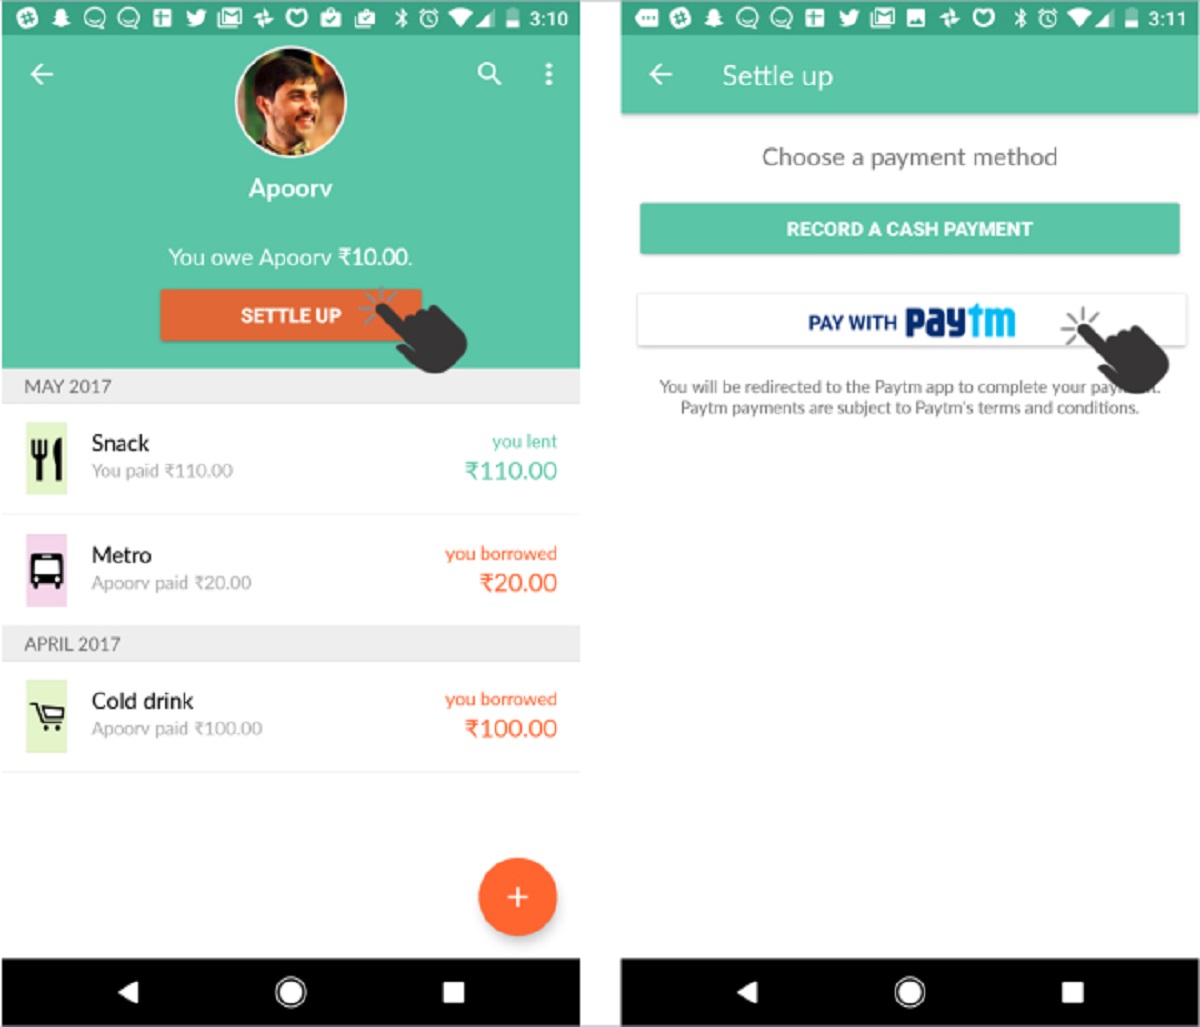
- Click on the “Pay” or “Settle Up” button next to the expense.
- Choose PayPal as the payment method from the available options.
- Enter the amount you want to pay and any additional notes or comments, if necessary.
- Review the payment details and click “Confirm” or “Pay” to proceed.
- You will be redirected to PayPal, where you can review the payment one final time.
- If everything looks good, click on “Pay Now” to complete the transaction.
- Once the payment is processed, you’ll receive a confirmation from PayPal and Splitwise.
It’s important to note that Splitwise doesn’t charge any additional fees for making payments through PayPal. However, keep in mind that standard PayPal transaction fees may apply, depending on your account type and the type of payment you’re making.
With PayPal integrated into Splitwise, you can easily manage and settle expenses with friends, family, or roommates. It eliminates the hassle of handling cash or manually transferring funds. The process is seamless, convenient, and secure.
So, start making your payments through PayPal on Splitwise and enjoy the simplicity of splitting expenses without the worry of handling cash or dealing with complicated bank transfers.
Conclusion
Adding PayPal to Splitwise provides a seamless and convenient way to settle expenses with friends, family, or roommates. By following the step-by-step process outlined in this guide, you can effortlessly link your PayPal account to Splitwise and streamline your payment transactions.
Creating a PayPal account and linking it to Splitwise is the first step. Once your accounts are connected, you can easily authorize the connection between Splitwise and PayPal. This integration allows you to set up PayPal as a payment method within Splitwise.
With PayPal set up as your payment method, you can easily make payments through Splitwise. Simply select the expense you want to settle, choose PayPal as the payment method, enter the payment details, and confirm the transaction. Within moments, you’ll have successfully paid your share of the expense.
Keep in mind that Splitwise prioritizes using your available PayPal balance for payments. If your balance is insufficient, Splitwise will automatically charge your linked bank account or credit card.
By integrating PayPal into Splitwise, you can say goodbye to the hassle of carrying cash or manually transferring funds. The process is secure, efficient, and user-friendly.
So why wait? Start using PayPal on Splitwise today and simplify the way you split expenses with your friends, family, or roommates. Say goodbye to the complications of traditional payment methods and embrace the convenience and ease of PayPal integration.