Introduction
Welcome to Splitwise, the popular expense-sharing app designed to simplify the task of splitting bills and tracking shared expenses among friends, roommates, and family members. With Splitwise, you can easily keep track of who owes whom, settle debts, and maintain transparency in your financial dealings. Before you dive into the world of Splitwise, it is essential to verify your account to ensure a secure and seamless experience.
Verification is a vital step in the account setup process, as it confirms your identity and protects your account from unauthorized access. By verifying your Splitwise account, you can gain access to additional features such as linking your bank account, enabling two-factor authentication, and increasing your account security. In this article, we will guide you through the steps to verify your Splitwise account and provide you with useful tips to enhance your account’s security.
Whether you are new to Splitwise or you’ve been using the app for some time, the verification process is simple and straightforward. By following the steps outlined in this guide, you can have your Splitwise account up and running in no time. So, let’s get started and ensure that your Splitwise account is verified and secure!
Step 1: Download the Splitwise App
The first step to verifying your Splitwise account is to download the Splitwise app on your smartphone or tablet. The app is available for both iOS and Android devices and can be easily found in the respective app stores. Simply open the App Store or Google Play Store, search for “Splitwise,” and click on the download button to install the app.
Downloading the Splitwise app allows you to have convenient access to your expenses and makes it easier to manage your shared finances on-the-go. The app provides a user-friendly interface with intuitive features that simplify the process of splitting bills and keeping track of shared expenses.
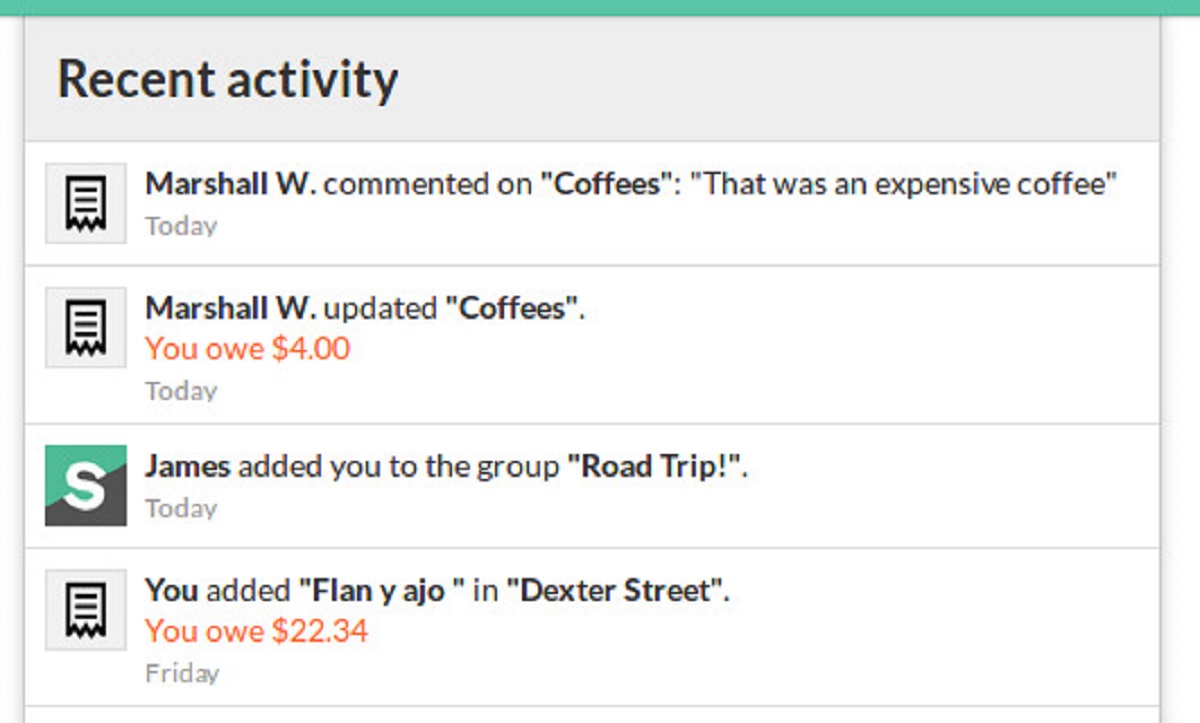
By having the Splitwise app installed on your device, you can quickly and easily access your Splitwise account whenever you need to add new expenses, settle debts, or view your recent activity. Additionally, the app sends push notifications to keep you updated on any new transactions or payment reminders, ensuring that you stay on top of your shared expenses.
To make the most of the Splitwise app, it’s important to keep it updated to the latest version. Developers frequently release updates that include bug fixes, feature enhancements, and improved security measures. By regularly updating the app, you can ensure a smooth and secure experience while using Splitwise.
Now that you have downloaded the Splitwise app, you are ready to proceed to the next step: signing up for a Splitwise account. In the next section, we will guide you through the process of signing up and creating a new account.
Step 2: Open the app and Sign Up
After downloading the Splitwise app, open it on your device to begin the sign-up process. Once the app is launched, you will see the option to sign in if you already have an account. Since we are focusing on creating a new account, tap on the “Sign Up” button to proceed.
On the Sign Up screen, you will be prompted to provide the necessary information to create your Splitwise account. This includes your name, email address, and a password. Make sure to enter accurate details, as they will be used to verify your account and communicate with you regarding your expenses.
Choose a strong and unique password for your Splitwise account. A strong password typically includes a combination of uppercase and lowercase letters, numbers, and special characters. Avoid using easily guessable passwords and refrain from using the same password for multiple online accounts to ensure the security of your Splitwise account.
Once you have entered the required information, click on the “Sign Up” button to create your Splitwise account. The app may take a moment to process your request and create your account. Once your account is successfully created, you will be redirected to the main interface of the Splitwise app.
It is worth noting that Splitwise also offers the option to sign up using your existing Facebook or Google account. If you prefer this method, you can simply select the respective option on the Sign Up screen and follow the prompts to link your social media account to Splitwise.
Signing up for a Splitwise account is an important step towards managing your shared expenses efficiently. With your account created, you can now proceed to the next step: verifying your email address. We will cover this process in detail in the next section.
Step 3: Verify your Email Address
Once you have signed up for a Splitwise account, it is crucial to verify your email address to ensure the security and authenticity of your account. Verifying your email address is a straightforward process that requires you to confirm your ownership of the provided email address.
To verify your email address, check the inbox of the email account you used during the sign-up process. You should receive an email from Splitwise with the subject line “Verify your email address.” Open this email and look for a verification link or button.
Clicking on the verification link/button will direct you to a web page confirming that your email address has been successfully verified. This step ensures that the email address provided during the sign-up process is valid and accessible by you. It also helps prevent unauthorized individuals from creating accounts using someone else’s email address.
If you do not receive the verification email in your inbox, check your spam or junk folder. In some cases, email filters may mistakenly mark the verification email as spam. If you still cannot find the verification email, you can select the option to resend the verification email from within the Splitwise app or website.
Upon successful verification of your email address, you can now proceed to use your Splitwise account with confidence. Verified email addresses also enable you to access enhanced features of Splitwise, such as linking your bank account and enabling two-factor authentication for added security.
With your email address verified, you can move on to the next steps in the verification process, which include optional actions such as adding your phone number and linking your bank account. We will explore these steps in detail in the upcoming sections.
Step 4: Add your Phone Number (optional)
Adding your phone number to your Splitwise account is an optional step but can be beneficial for various reasons. By linking your phone number, you can enable additional security features, such as two-factor authentication, and improve your account’s overall security.
To add your phone number, navigate to the account settings within the Splitwise app. Look for the section dedicated to contact information or privacy settings, where you will find an option to add your phone number. Click on this option, and you will be prompted to enter your phone number in the designated field.
When entering your phone number, make sure to include the correct country code and exclude any special characters or spaces. Double-check the accuracy of the phone number before confirming it to ensure notifications and verification messages are sent to the correct phone.
Once you have entered your phone number, you may receive a verification code via SMS. Enter this code into the app to confirm the ownership of the provided phone number. Verifying your phone number adds an extra layer of security to your account, as it requires you to have physical access to the registered phone to receive and enter the verification code.
Having your phone number linked to your Splitwise account can also improve communication and easily notify you about any important updates or reminders regarding your expenses. Splitwise may send you SMS notifications for activities such as new expense notifications, payment reminders, or notifications from friends or groups you are part of.
Remember, adding your phone number is optional, and you can choose not to link your phone if you prefer. Keep in mind that Splitwise follows strict privacy and security measures, and your phone number will not be shared with third parties without your consent.
Now that you have the option to add your phone number, let’s explore the next optional step: linking your bank account to your Splitwise account.
Step 5: Link your Bank Account (optional)
Linking your bank account to your Splitwise account is an optional step that can provide you with added convenience and streamline the process of settling expenses. By linking your bank account, you can easily transfer funds to settle debts directly from within the Splitwise app.
To link your bank account, navigate to the settings section of your Splitwise app. Look for the option related to linking your bank account or payment methods. Click on this option, and you will be guided through the process of connecting your bank account.
Depending on the country you reside in, Splitwise offers different methods to link your bank account, such as through popular payment platforms like PayPal or via direct bank transfers. Choose the method that is most convenient and secure for you.
When linking your bank account, you may be asked to provide your account information, such as your account number, routing number, or account holder’s name. Ensure that you enter the information accurately to prevent any issues with linking your bank account.
Splitwise takes the security of your bank account information seriously and follows industry-standard encryption protocols to protect your data. Your bank account information is stored securely and is only used for the purpose of settling expenses or transferring funds between Splitwise users.
One of the key benefits of linking your bank account to Splitwise is the ability to settle expenses directly from the app. When you owe someone money or have to reimburse a friend, you can simply use the “Settle Up” feature in Splitwise, and the app will guide you through the process of transferring funds from your bank account to theirs.
Linking your bank account also allows you to keep a record of your transaction history within the app, making it easier to track your expenses and maintain financial transparency among your friends or roommates.
Remember, linking your bank account is completely optional. If you prefer not to link your bank account, you can still manually settle expenses without the convenience of direct transfers from within the app.
With your bank account linked or your decision to skip this step, you are now ready to proceed to the next step: completing your profile. We will cover this in detail in the upcoming section.
Step 6: Complete Your Profile
Completing your profile on Splitwise is an important step that adds a personal touch to your account and allows others to identify you easily. By providing relevant information and uploading a profile picture, you can enhance your Splitwise experience and make it more engaging.
To complete your profile, navigate to the settings section of your Splitwise app and look for the profile or account settings option. Click on this option, and you will find various fields to update your profile information.
Start by entering your full name. Make sure to use your real name or a name you are commonly known by to avoid any confusion among your Splitwise contacts.
Next, consider adding additional details to your profile such as your location, a short bio, or any other relevant information that you are comfortable sharing. This can help others recognize and connect with you more easily, especially if you are part of multiple Splitwise groups.
One important aspect of completing your profile is uploading a profile picture. Choose a clear and recognizable photo of yourself so that your friends and contacts can easily identify you. A profile picture also adds a personal touch and helps create a sense of familiarity among Splitwise users.
It is worth noting that Splitwise respects your privacy and allows you to choose whether you want your profile picture and additional details to be visible to everyone or only to friends within your Splitwise network. You can adjust these privacy settings according to your preferences.
Having a complete and well-maintained profile not only improves recognition and communication but also fosters a sense of trust and transparency among your Splitwise contacts. It enhances the overall experience of using Splitwise and makes it easier to manage shared expenses with friends, family, or roommates.
Now that you have completed your profile, you are ready to proceed to the final steps of verifying your Splitwise account. In the next section, we will guide you through the process of account verification.
Step 7: Verify your Splitwise Account
Verifying your Splitwise account is an essential step in ensuring the security and authenticity of your account. By verifying your account, you can gain access to additional features and enhance the overall protection of your personal information and financial transactions.
To verify your Splitwise account, you will need to follow the instructions provided by the app. Typically, Splitwise will require you to choose a verification method, which can be either through email or phone verification.
If you have chosen email verification, you will receive a verification link in your registered email inbox. Click on the link to confirm and verify your account. Alternatively, if you have chosen phone verification, you will receive a verification code via SMS. Enter this code in the designated field to complete the verification process.
Verifying your account helps to prevent unauthorized access and ensures that you are the rightful owner of the account. It also adds an extra layer of security by reducing the chances of fraudulent activities and protecting your personal and financial information from being compromised.
During the verification process, Splitwise may also perform additional security checks to verify your identity. This may include confirming your personal details or requesting additional documents, especially if you are linking your bank account or engaging in high-value transactions.
It is important to note that Splitwise values privacy and follows strict security protocols to protect your data. Your personal and financial information is handled securely and is only used for the purpose of providing you with a seamless and secure expense-sharing experience.
By verifying your Splitwise account, you can enjoy the full benefits of the app and have peace of mind knowing that your account is protected. Verified accounts also enjoy priority access to customer support and may have access to exclusive features and promotions offered by Splitwise.
With your Splitwise account successfully verified, you are now ready to proceed to the final steps of securing your account. In the next sections, we will guide you through choosing a strong password and enabling two-factor authentication to further safeguard your Splitwise account.
Step 8: Choose a Strong Password
Choosing a strong password is vital in securing your Splitwise account and protecting your personal and financial information. A strong password significantly reduces the risk of unauthorized access and ensures the safety of your account.
When choosing a password for your Splitwise account, it is important to follow these best practices:
1. Use a Combination of Characters: Include a mix of uppercase and lowercase letters, numbers, and special characters (like !, @, #) in your password. This makes it more difficult for hackers to guess or crack your password.
2. Avoid Common and Predictable Passwords: Avoid using easily guessable passwords such as “password123” or “12345678”. Hackers can readily guess such passwords, leaving your account vulnerable to unauthorized access.
3. Length Matters: Opt for a password that is at least 8-12 characters long. The longer the password, the more secure it is against brute-force attacks.
4. Unique Password: Ensure that your Splitwise password is unique and not used for any other online accounts. Using the same password across multiple platforms increases the risk of your account being compromised if one of your passwords is breached.
5. Regularly Update Your Password: It is recommended to change your Splitwise password periodically, especially if you suspect any suspicious activity or if you’ve been using the same password for a long time.
Remember, your password is the key to your account’s security, so choose it wisely. Avoid sharing your password with anyone and refrain from storing it in an unsecured location.
Splitwise takes password security seriously, and all passwords are securely hashed and stored. This ensures that even if there was a breach, your actual password would remain protected. However, it is always best to be proactive and choose a strong password to safeguard your account.
With a strong password in place, you are now ready to take an additional step to fortify the security of your Splitwise account by enabling two-factor authentication. We will discuss this in the next step.
Step 9: Enable Two-Factor Authentication
Enabling two-factor authentication (2FA) adds an extra layer of security to your Splitwise account, making it more resistant to unauthorized access. 2FA requires you to provide an additional verification step, usually in the form of a unique code or prompt, in addition to your username and password.
To enable two-factor authentication on Splitwise, navigate to the account settings within the app and look for the security or privacy options. Locate the section related to two-factor authentication and follow the prompts to set it up.
Splitwise offers different methods of 2FA, including SMS verification, authenticator apps (like Google Authenticator or Authy), or hardware security keys. Choose the method that best suits your preferences and device compatibility.
When you log in to your Splitwise account after enabling 2FA, you will be prompted to provide a second form of verification. This can be a unique code that is sent to your registered mobile number via SMS, or a code generated by an authenticator app.
The addition of 2FA ensures that even if someone manages to steal or guess your password, they would still need access to the verification code to gain entry to your account. This makes it significantly more difficult for unauthorized individuals to gain control of your Splitwise account.
It’s important to securely store or remember your backup codes in case you lose access to your primary 2FA method. These codes act as a fail-safe and allow you to regain access to your account if you are unable to use your primary 2FA method.
Additionally, make sure to keep your registered mobile number updated on your Splitwise account to ensure that you receive the verification codes promptly.
Enabling two-factor authentication is a crucial step to reinforce the security of your Splitwise account. It adds an extra layer of protection, giving you peace of mind that your personal and financial information is safeguarded.
By following this step-by-step guide, including verifying your account, choosing a strong password, and enabling two-factor authentication, you can ensure the highest level of security for your Splitwise account. Enjoy the convenience and peace of mind that comes with managing your shared expenses with Splitwise!
Conclusion
Verifying your Splitwise account is an essential step in ensuring the security and authenticity of your account. By following the steps outlined in this guide, you can successfully verify your Splitwise account and enhance its security measures.
From downloading the Splitwise app to completing your profile, each step plays a crucial role in setting up a secure and seamless experience. By choosing a strong password and enabling two-factor authentication, you add additional layers of protection to your account.
It’s important to remember that Splitwise values your privacy and follows industry-standard security protocols to protect your personal and financial information. By linking your bank account or adding your phone number, you gain access to additional features and convenience while maintaining a secure environment.
By taking these steps to verify your Splitwise account and implementing the recommended security measures, you can have peace of mind while managing your shared expenses. Whether you’re splitting bills with friends, roommates, or family members, Splitwise is a powerful tool that simplifies the process and ensures fairness.
Don’t forget to regularly update your account information, keep your password secure, and review your settings to ensure your preferences align with your desired level of privacy and security.
Now that you have completed the verification process, you are ready to enjoy the seamless experience of Splitwise. Keep track of your shared expenses, settle debts with ease, and enjoy a more organized financial life.
Explore the various features and tools offered by Splitwise to streamline your expense-sharing process and enhance financial transparency within your groups. And remember, Splitwise is constantly evolving and improving, so stay informed about new updates and features to make the most of this incredible app.
Get started today and experience the convenience, simplicity, and security of managing shared expenses with Splitwise!