Introduction
So, you've decided to upgrade the sound of your electric guitar by installing a new pickup. Congratulations on taking this exciting step to enhance your instrument's tonal capabilities! A guitar pickup plays a crucial role in capturing the vibrations of the strings and converting them into electrical signals, ultimately shaping the unique sound of your guitar. Whether you're aiming for a brighter, punchier tone or a warmer, more mellow sound, installing a new pickup can significantly transform your playing experience.
In this comprehensive guide, we'll walk through the process of installing an electric guitar pickup, providing you with detailed steps and essential tips to ensure a successful outcome. By following these instructions and exercising patience and precision, you'll be well on your way to enjoying a customized, high-quality sound from your instrument.
Before we dive into the technical aspects of pickup installation, it's important to emphasize the satisfaction and sense of accomplishment that often accompany DIY guitar modifications. By learning to perform this task yourself, you'll not only gain a deeper understanding of your instrument's mechanics but also develop a stronger connection to the music you create. Additionally, the ability to customize your guitar's sound to suit your preferences is a valuable skill that can empower you as a musician.
As we embark on this journey, keep in mind that each guitar is unique, and the installation process may vary slightly depending on the model and type of pickup you're working with. Be sure to consult the specific instructions provided by the pickup manufacturer, as they may offer additional insights tailored to their product.
Now, let's gather the necessary tools and materials and prepare to breathe new life into your electric guitar with a fresh, powerful pickup installation.
Tools and Materials Needed
Before embarking on the electric guitar pickup installation journey, it’s essential to gather the appropriate tools and materials to ensure a smooth and efficient process. Here’s a comprehensive list of what you’ll need:
- Screwdrivers: Phillips and flathead screwdrivers will be necessary for removing the guitar’s pickguard and accessing the electronics cavity.
- Wire Cutters and Strippers: These tools are essential for cutting and stripping the wires, ensuring a proper connection.
- Soldering Iron and Solder: To secure the electrical connections, a soldering iron and solder are indispensable. Proper soldering ensures a reliable and durable bond between the pickup and the guitar’s electronics.
- Multimeter: This tool is useful for testing the continuity of the wires and ensuring that the connections are secure.
- Masking Tape: Using masking tape to mark the position of the old pickup and the new one can help ensure accurate placement during installation.
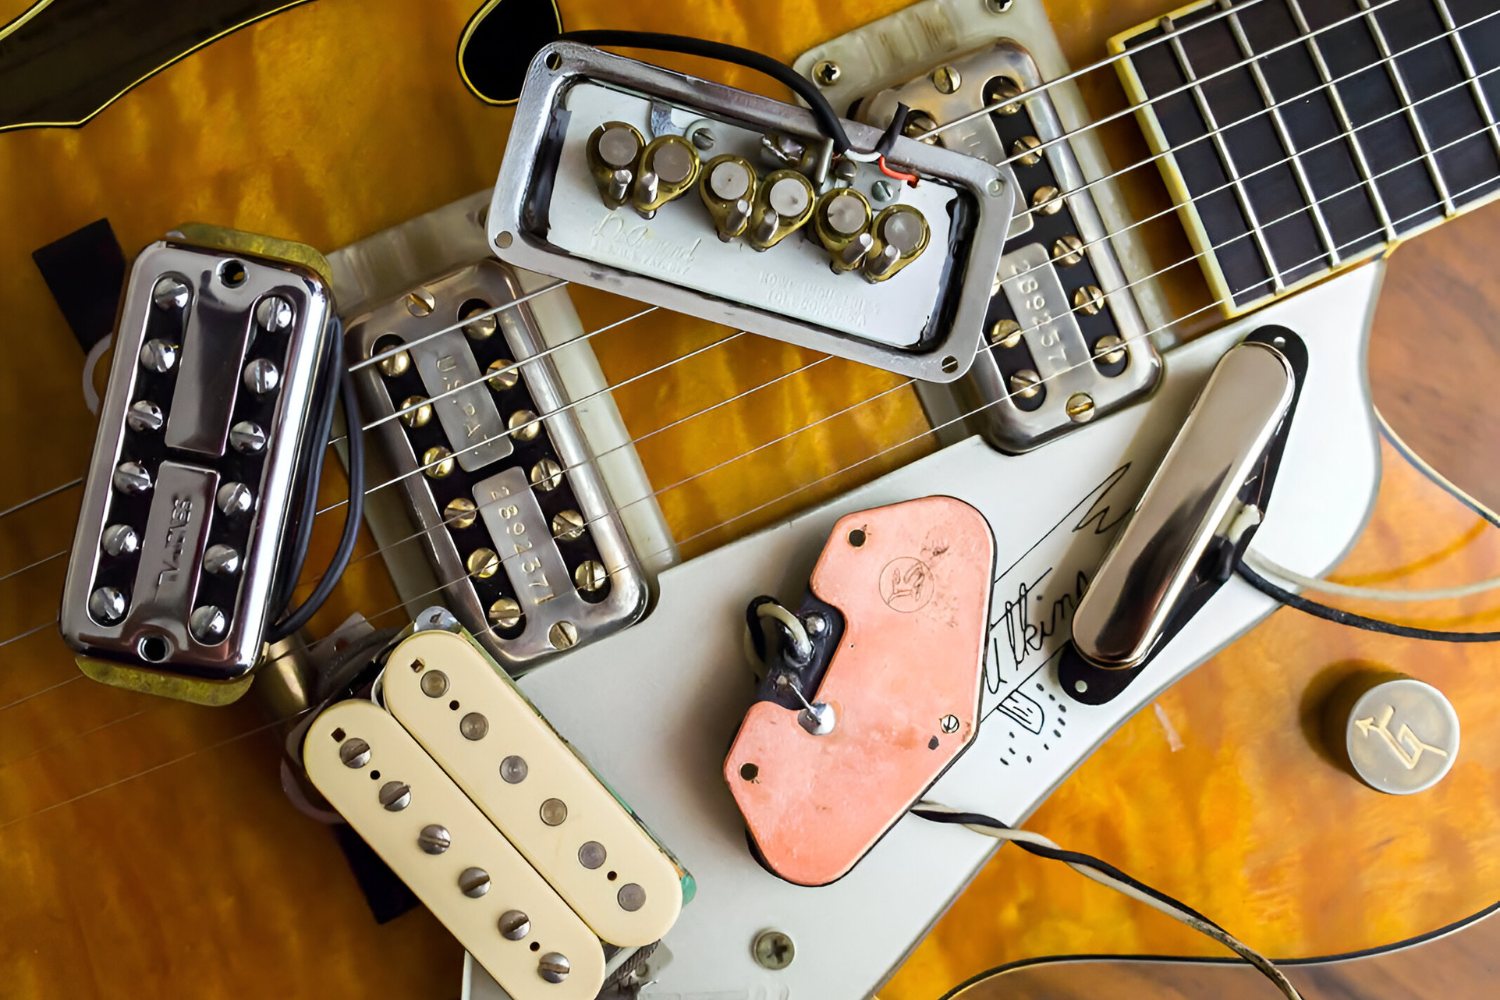
- New Pickup: Select a high-quality pickup that aligns with your tonal preferences and the genre of music you play. Whether you opt for single-coil, humbucker, or P90 pickups, choose one that complements your playing style and desired sound.
- Replacement Potentiometers and Capacitors (if necessary): Depending on the condition of your guitar’s electronics, you may need to replace the potentiometers and capacitors to maintain optimal performance.
- Cloth and Cleaner: A soft cloth and guitar cleaner will be useful for cleaning the guitar’s body and pickguard, ensuring a tidy workspace and preserving the instrument’s appearance.
- Workspace and Lighting: Set up a well-lit, spacious workspace where you can comfortably maneuver and access the guitar’s components.
By ensuring that you have these tools and materials at your disposal, you’ll be well-prepared to proceed with the pickup installation process. Now that you’re equipped with everything you need, let’s move on to the next step: removing the old pickup from your electric guitar.
Removing the Old Pickup
Before installing a new pickup, it’s crucial to remove the existing one from your electric guitar. This process requires careful attention to detail and a methodical approach to avoid damaging any components. Here’s a step-by-step guide to effectively removing the old pickup:
- Prepare Your Workspace: Find a well-lit, uncluttered workspace where you can comfortably lay your guitar on a soft surface, such as a clean towel or blanket, to prevent any scratches or dents.
- Loosen the Strings: To access the pickup easily, loosen the tension of the guitar strings by turning the tuning pegs counterclockwise. You don’t need to remove the strings entirely, but providing some slack will facilitate the pickup removal process.
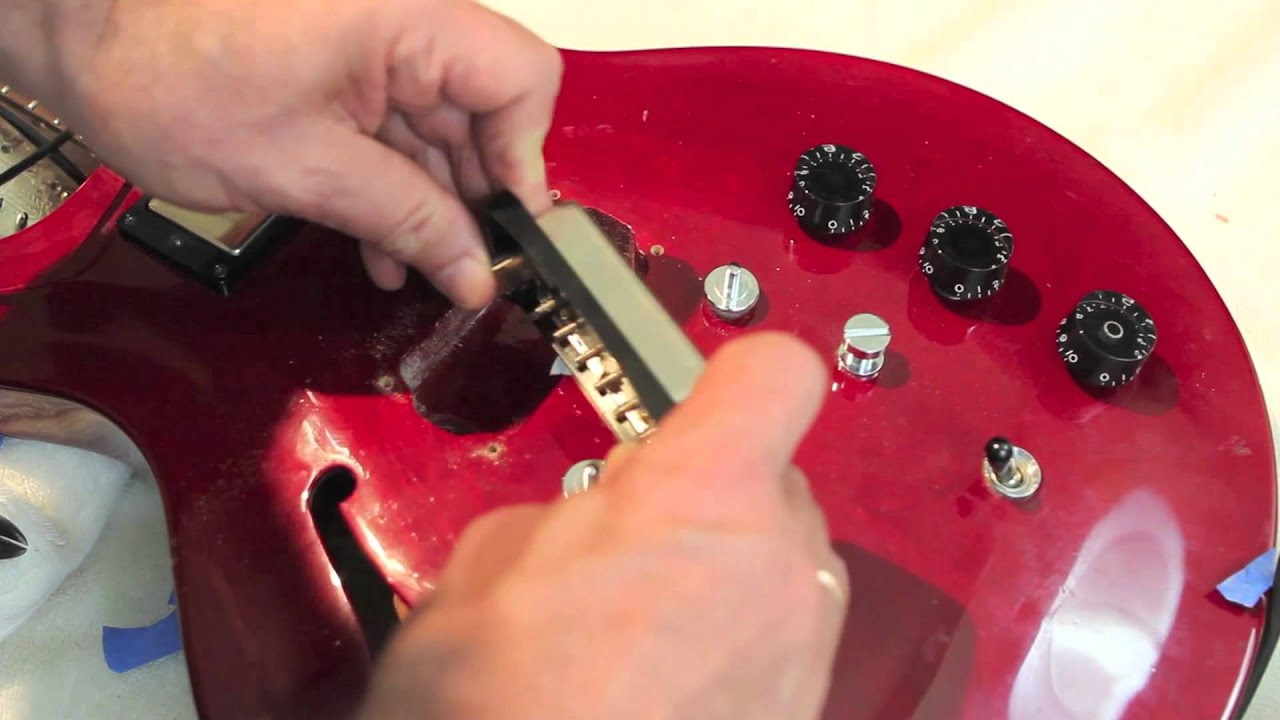
- Remove the Pickguard or Back Cover: Depending on your guitar’s design, you may need to remove the pickguard or back cover to access the pickup and its wiring. Use the appropriate screwdriver to carefully remove the screws holding the pickguard or cover in place, and set them aside in a secure location.
- Identify and Disconnect the Pickup Wires: Inside the electronics cavity, locate the wires connected to the pickup. It’s essential to take note of the wire colors and their corresponding attachment points to ensure proper reconnection later. Using wire cutters and strippers, carefully disconnect the wires from the pickup, making sure to leave enough length for re-soldering.
- Remove the Pickup: Once the wires are disconnected, carefully lift the old pickup out of its position. Be mindful of any springs or foam underneath the pickup, as these components may also need to be transferred to the new pickup, depending on the design of your guitar.
- Clean the Electronics Cavity: With the old pickup removed, take the opportunity to clean the electronics cavity using a soft cloth and guitar cleaner. Removing any dust or debris will create a clean environment for installing the new pickup.
By following these steps, you’ll effectively remove the old pickup from your electric guitar, setting the stage for the exciting installation of a new pickup. With the old pickup safely removed, it’s time to prepare the new pickup and ensure a seamless transition to enhanced tonal possibilities.
Preparing the New Pickup
As you embark on the journey of installing a new pickup in your electric guitar, it’s crucial to properly prepare the new component to seamlessly integrate it into your instrument. Here’s a detailed guide to preparing the new pickup for installation:
- Inspect the New Pickup: Before proceeding, carefully examine the new pickup to ensure that it’s free from any defects and that all necessary components, such as mounting screws and springs, are included. Verify that the pickup’s design and dimensions align with the specifications of your guitar.
- Transfer Additional Components: If your guitar’s original pickup included springs, foam, or other components beneath it, carefully remove and transfer these to the new pickup. Ensuring that the new pickup is equipped with the same components as the original will help maintain consistent positioning and functionality.
- Prepare the Pickup Wires: If the new pickup’s wires are not pre-soldered to the pickup, use wire cutters and strippers to trim and strip the wire ends, exposing a sufficient length for soldering. It’s essential to maintain uniform wire lengths to facilitate a tidy and organized connection to the guitar’s electronics.
- Verify Wiring Diagrams: Refer to the wiring diagrams provided by the pickup manufacturer to confirm the appropriate connections for your specific pickup model. Understanding the color codes and terminal assignments will ensure accurate wiring and prevent potential errors during the installation process.
- Position the New Pickup: Before proceeding with installation, position the new pickup in the designated location within the guitar’s body, aligning it with the corresponding screw holes. Using masking tape, mark the pickup’s position on the guitar’s body to facilitate precise placement during the installation phase.
- Ensure Compatibility with Electronics: If you’ve opted for a different type of pickup (e.g., switching from single-coil to humbucker), verify that your guitar’s electronics and cavity dimensions are compatible with the new pickup. Some modifications to the electronics cavity or pickguard may be necessary to accommodate the new pickup’s size and wiring configuration.
By meticulously preparing the new pickup and familiarizing yourself with its components and wiring, you’ll lay the groundwork for a successful installation process. With the new pickup primed and ready, it’s time to delve into the intricacies of installing it in your electric guitar, unlocking its sonic potential and breathing new life into your instrument.
Installing the New Pickup
With the old pickup removed and the new pickup meticulously prepared, it’s time to embark on the exciting process of installing the new pickup in your electric guitar. This pivotal step requires precision and attention to detail to ensure that the new pickup integrates seamlessly with your instrument. Here’s a comprehensive guide to installing the new pickup:
- Align the New Pickup: Begin by aligning the new pickup with the designated position on the guitar’s body, using the masking tape markers placed during the preparation phase as a guide. Ensure that the pickup is oriented correctly, with the pole pieces or coils positioned to capture the vibrations of the guitar strings effectively.
- Secure the Pickup: Using the provided mounting screws, carefully secure the new pickup in place, taking care not to overtighten the screws. This step is crucial in ensuring that the pickup remains stable and properly positioned within the guitar’s body.
- Connect the Pickup Wires: With the pickup securely in place, connect the pickup wires to the corresponding terminals in the guitar’s electronics cavity. Refer to the wiring diagram provided by the pickup manufacturer to ensure that the connections are accurate and aligned with the designated terminals.
- Solder the Connections: Using a soldering iron and solder, carefully solder the pickup wires to the appropriate terminals, ensuring secure and durable connections. Exercise caution to avoid excessive heat that could damage the guitar’s electronics, and verify the integrity of the solder joints by gently tugging on the wires after soldering.
- Adjust Pickup Height: Once the pickup is installed and connected, adjust its height to achieve the desired balance between string response and tonal characteristics. Experiment with different pickup heights to find the optimal position that complements your playing style and sonic preferences.
- Reassemble the Guitar: After confirming that the pickup is securely installed and the connections are sound, reassemble the pickguard or back cover, ensuring that all screws are tightened to secure the components in place.
By meticulously following these steps, you’ll successfully install the new pickup in your electric guitar, setting the stage for a transformative enhancement of your instrument’s tonal capabilities. With the new pickup securely in place, it’s time to move on to the crucial phase of testing and adjusting the pickup to achieve an optimal and personalized sound.
Testing and Adjusting the Pickup
After completing the installation of the new pickup in your electric guitar, it’s essential to thoroughly test and fine-tune its performance to ensure that it delivers the desired tonal characteristics and responsiveness. This phase allows you to make critical adjustments that can significantly impact the instrument’s sound and playability. Here’s a detailed guide to testing and adjusting the pickup:
- Check Electrical Connections: Before proceeding, carefully inspect the soldered connections to ensure that they are secure and free from any stray strands of wire that could cause shorts or interference. Use a multimeter to test the continuity of the connections and verify that the pickup is properly integrated into the guitar’s electronics.
- Reintroduce String Tension: Gradually bring the guitar strings back to their standard tuning, reestablishing tension to prepare for testing the pickup’s performance. As you tune the strings, listen for any unusual buzzing or interference that may indicate a wiring issue or improper pickup installation.
- Test Pickup Functionality: With the guitar plugged into an amplifier, individually test each pickup position (if your guitar has multiple pickups) to ensure that the new pickup is functioning correctly. Listen for consistent output and assess the tonal characteristics to gauge the pickup’s performance across different settings.
- Adjust Pickup Height and Balance: Experiment with adjusting the height of the new pickup to fine-tune its response and tonal qualities. By carefully raising or lowering the pickup, you can influence the balance between string articulation, sustain, and tonal warmth, allowing you to tailor the pickup’s performance to your preferences.
- Listen for Articulation and Clarity: Strum chords and play individual notes across the fretboard to evaluate the pickup’s articulation and clarity. Listen for any inconsistencies in output or tonal imbalances that may indicate the need for further adjustments to the pickup’s height or positioning.
- Assess Feedback and Noise: Test the pickup’s performance at higher volume levels and gain settings to identify any potential feedback or unwanted noise. Adjust the pickup height and distance from the guitar strings to mitigate feedback and minimize extraneous noise, ensuring a clean and controlled output.
By meticulously testing and adjusting the new pickup, you’ll optimize its performance and tailor its tonal characteristics to suit your playing style and sonic preferences. With the pickup fine-tuned and delivering a rich, responsive sound, you’ll be ready to unleash the full potential of your electric guitar, empowered by a customized and enhanced tonal palette.
Conclusion
Congratulations on successfully completing the installation of a new pickup in your electric guitar! By embarking on this journey, you’ve not only enhanced your instrument’s tonal capabilities but also gained valuable insights into the mechanics of your guitar’s electronics and the art of customization. As you reflect on the meticulous process of removing the old pickup, preparing and installing the new one, and fine-tuning its performance, it’s evident that your dedication and attention to detail have yielded a rewarding outcome.
Throughout this endeavor, you’ve embraced the spirit of craftsmanship and innovation, taking an active role in shaping the sonic identity of your instrument. The hands-on experience of soldering connections, adjusting pickup height, and evaluating tonal nuances has deepened your connection to your guitar and expanded your skill set as a musician and DIY enthusiast.
It’s important to recognize that the journey doesn’t end with the successful installation of the new pickup. As you continue to explore the sonic possibilities of your enhanced instrument, you’ll find opportunities to further refine its performance and unlock new creative avenues. Whether you’re delving into the expressive dynamics of a newly installed humbucker or reveling in the shimmering clarity of a fresh single-coil pickup, your journey of sonic discovery has only just begun.
As you immerse yourself in playing and experimenting with your revitalized electric guitar, remember the sense of accomplishment and empowerment that accompanies each note and chord. Your willingness to venture into the realm of pickup installation has not only enriched your playing experience but also deepened your understanding of the intricate interplay between instrument, player, and sound.
With your newly installed pickup, you’ve personalized and elevated the sonic character of your electric guitar, infusing it with your unique musical identity. As you continue to explore and create, may the rich, resonant tones emanating from your instrument serve as a testament to your dedication, creativity, and unwavering passion for music.
Embrace the journey, savor the sounds, and let your newfound sonic canvas inspire boundless musical expressions. Your electric guitar, now imbued with a fresh and vibrant voice, eagerly awaits the melodies and riffs that will flow from your fingertips, echoing the spirit of innovation and artistry that define your musical journey.