Introduction
Welcome to our guide on how to add a pickup to your acoustic guitar! Adding a pickup to your acoustic guitar can greatly expand its capabilities and open up a whole new world of possibilities for your music. Whether you’re a gigging musician looking to amplify your sound or a home player wanting to experiment with different effects, installing a pickup is a practical and exciting upgrade.
A pickup is a device that captures the vibrations of the guitar strings and converts them into an electrical signal that can be amplified and amplified through speakers or headphones. Acoustic guitars, unlike electric guitars, don’t have built-in pickups. However, with the right tools and materials, you can easily add a pickup to your acoustic guitar and take your playing to the next level.
In this guide, we’ll walk you through the process of adding a pickup to your acoustic guitar step by step. We’ll discuss the different types of pickups available, guide you on gathering the necessary materials, explain how to prepare your guitar for installation, and provide detailed instructions on wiring and testing the pickup. By the end of this guide, you’ll have a fully functional pickup installed in your acoustic guitar.
It’s important to note that adding a pickup to your acoustic guitar can require some basic knowledge of guitar electronics and soldering. If you’re not comfortable with these tasks, it’s always best to consult a professional technician. However, if you’re willing to take on the challenge, adding a pickup can be a rewarding and educational experience.
So, whether you’re looking to perform live on stage, record your music, or simply experiment with different sounds, adding a pickup to your acoustic guitar is a great investment. Let’s dive into the world of pickups and get started on adding one to your guitar!
Understanding Pickups
Before we delve into the process of adding a pickup to your acoustic guitar, let’s first understand what pickups are and how they work. A pickup is essentially a magnet wrapped with a coil of wire that detects the vibrations of the guitar strings. These vibrations create an electrical signal that can be amplified and reproduced through speakers or headphones.
Pickups come in different types, each with its own unique characteristics and sonic qualities. The two main types of pickups used for acoustic guitars are magnetic pickups and piezo pickups.
Magnetic pickups work by using magnets to create a magnetic field. When the guitar strings vibrate within this magnetic field, they induce a current in the coil of wire, generating an electrical signal. Magnetic pickups are known for their warm, rich, and natural tone. They are commonly found in electric guitars but can also be installed in acoustic guitars to amplify their sound.
Piezo pickups, on the other hand, work by converting the mechanical energy of the string vibrations into electrical signals. They consist of crystals or ceramic elements that produce an electrical charge when pressure is applied to them. Piezo pickups are known for their bright, clear, and percussive tone, making them popular among acoustic guitar players looking for a natural sound.
It’s important to note that the type of pickup you choose will greatly affect the tone and character of your amplified sound. Magnetic pickups tend to emphasize the natural resonance of the guitar body, while piezo pickups offer a more accurate representation of the strings’ vibrations. Ultimately, the choice between the two comes down to personal preference and the sound you want to achieve.
In addition to the types of pickups, it’s also worth considering the placement of the pickup. You can install a pickup either under the saddle, inside the soundhole, or using an external microphone. Each placement has its own advantages and disadvantages, affecting factors such as feedback resistance, ease of installation, and tonal response. Again, personal preference and the desired sound will dictate your pickup placement choice.
Now that we have a basic understanding of pickups and their types, we can move on to the exciting part: installing a pickup in your acoustic guitar. In the next section, we’ll discuss the materials you’ll need to gather before starting the installation process.
Types of Pickups
When it comes to choosing a pickup for your acoustic guitar, there are several options available to suit your needs and preferences. Let’s explore some of the most common types of pickups used in acoustic guitars.
- Magnetic Pickups: Magnetic pickups are commonly found in electric guitars but can also be installed in acoustic guitars. They use magnets to create a magnetic field that detects the vibrations of the guitar strings. Magnetic pickups are known for their warm, rich, and natural tone. They capture the resonance of the guitar body and deliver a classic electric guitar sound.
- Piezo Pickups: Piezo pickups are popular among acoustic guitar players seeking a natural and transparent sound. They work by converting the mechanical energy of the string vibrations into electrical signals. Piezo pickups consist of crystals or ceramic elements that produce an electrical charge when pressure is applied to them. They offer a bright, clear, and percussive tone that accurately represents the strings’ vibrations.
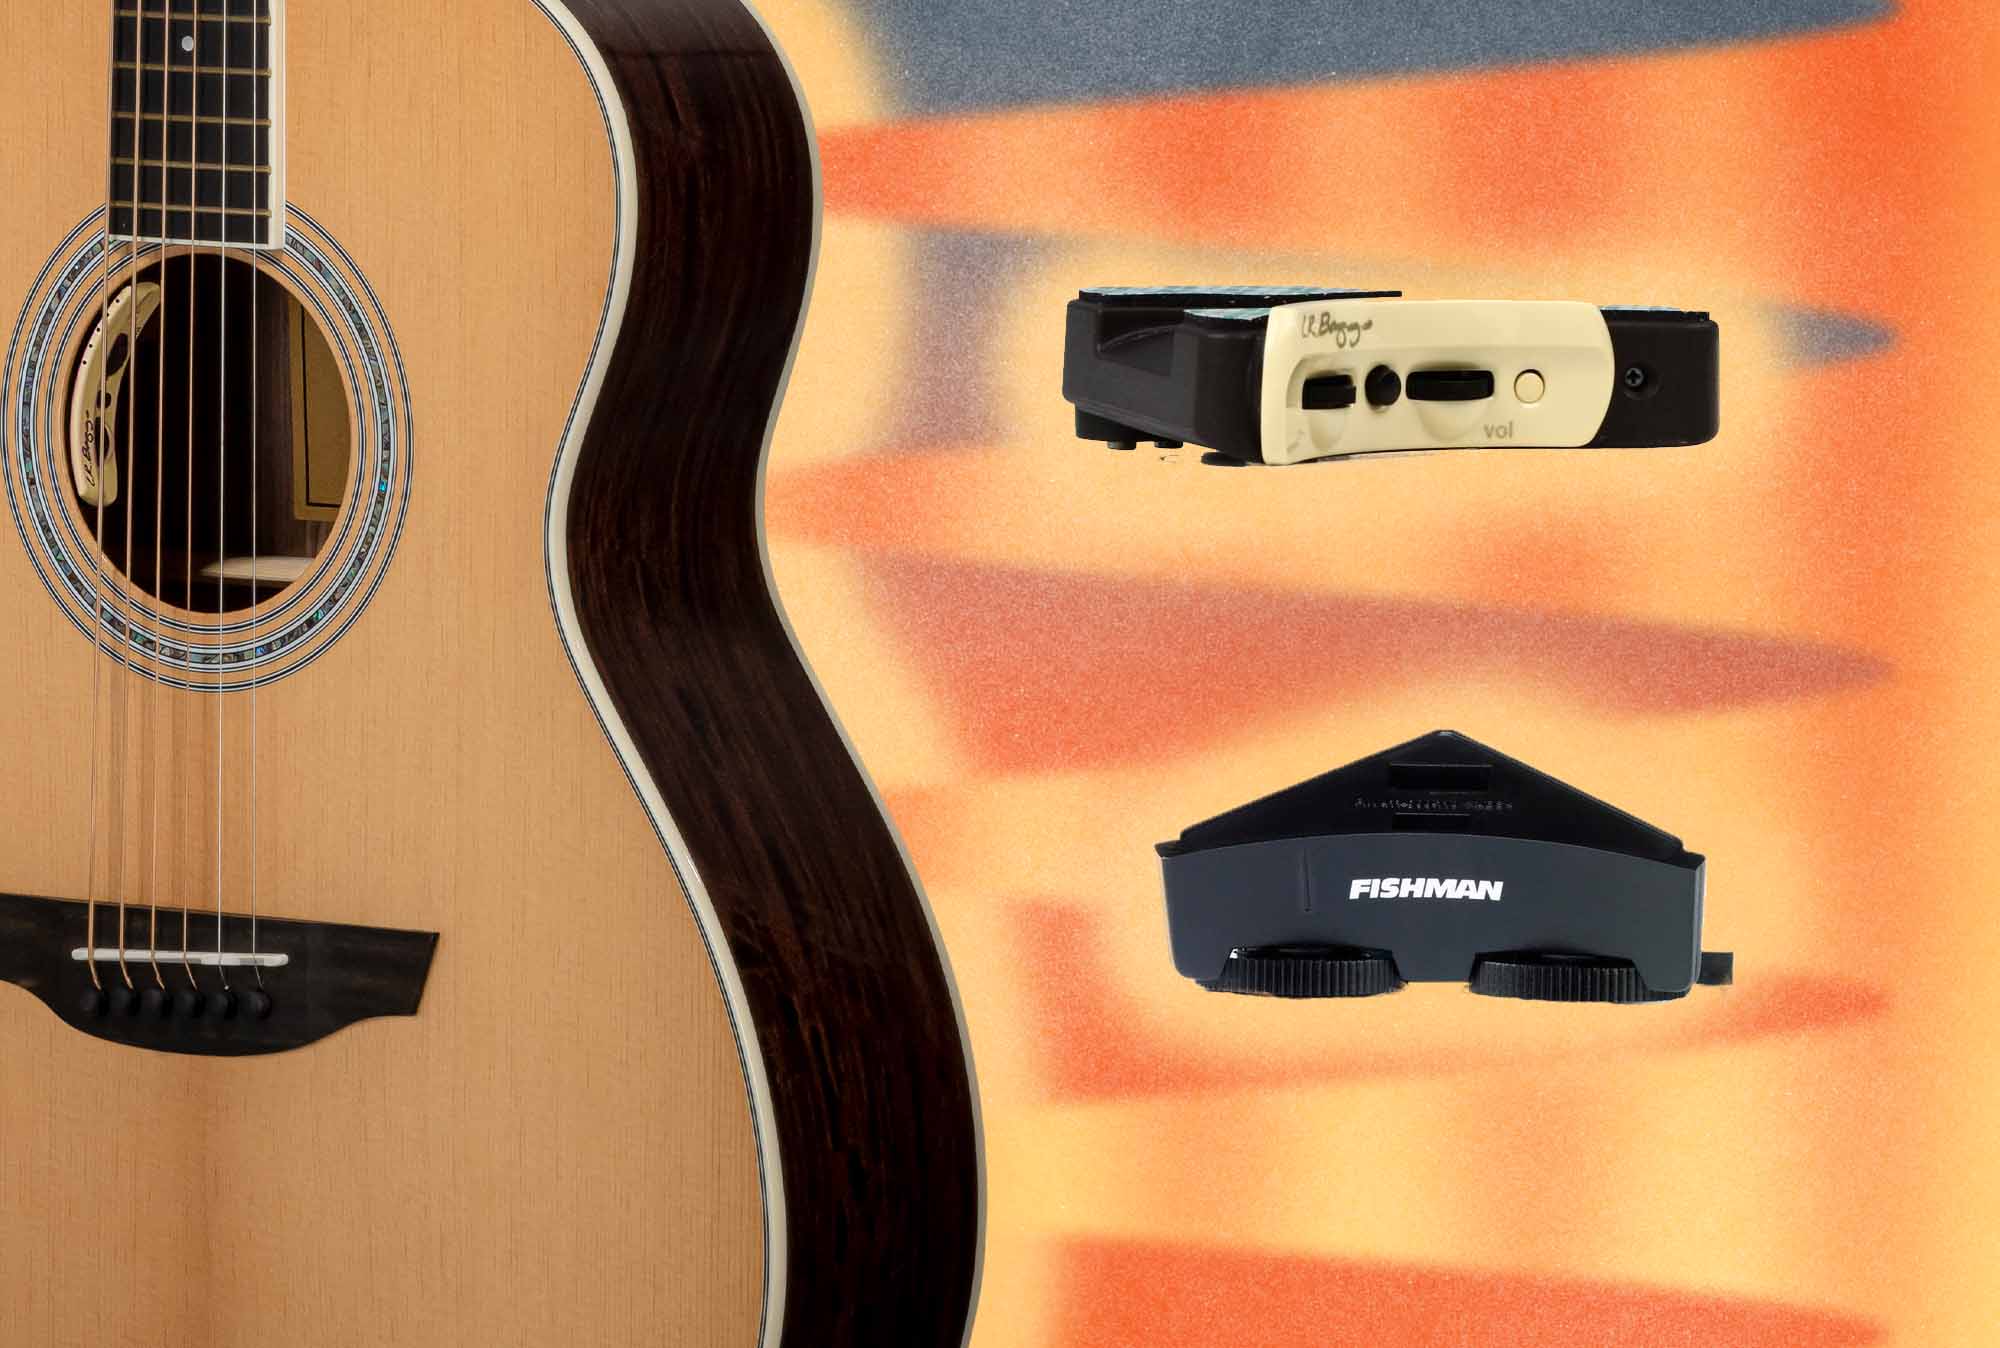
- Soundhole Pickups: Soundhole pickups, as the name suggests, are pickups that are placed inside the soundhole of the guitar. They are convenient to install and remove, making them a popular choice among players who want the option to switch between amplified and acoustic sound. Soundhole pickups capture the sound of the strings and the resonance of the guitar body to deliver a balanced and natural tone.
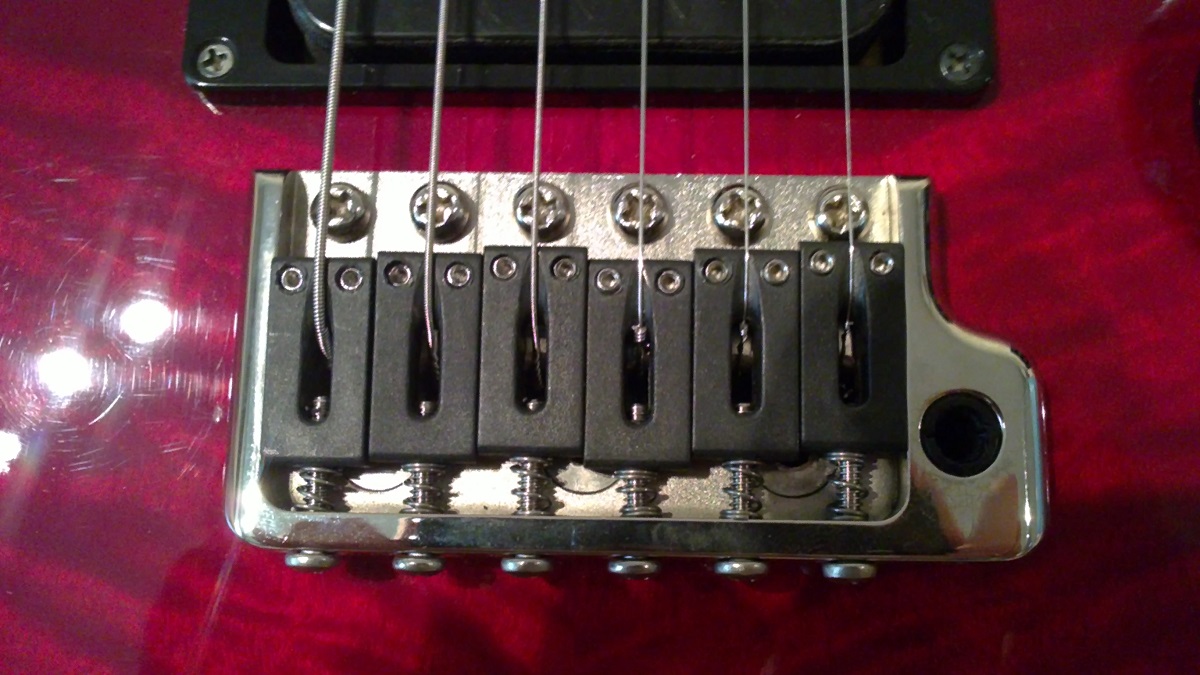
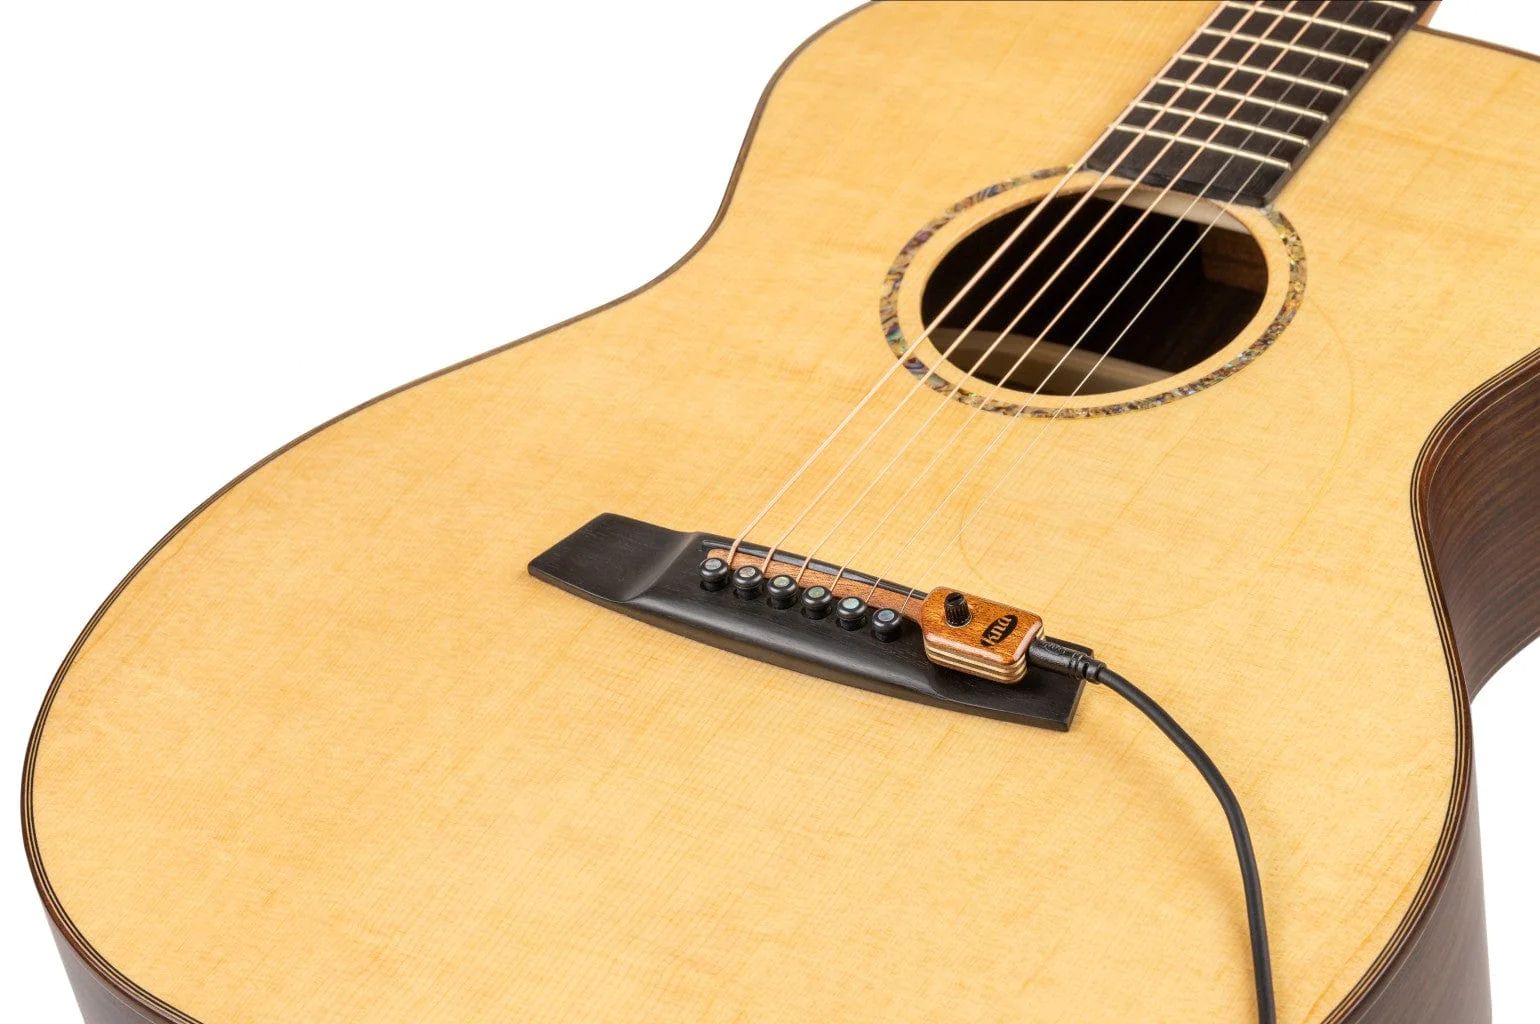
- Under-Saddle Pickups: Under-saddle pickups are installed under the saddle of the guitar bridge. They are discreet and offer a clean and unobtrusive look. Under-saddle pickups pick up the vibrations of the strings directly from the saddle, providing a balanced and even tone across the strings.
- Microphone Pickups: Microphone pickups use small microphones that are either installed internally or externally on the guitar. They capture the acoustic sound of the guitar and offer a dynamic and natural tone. Microphone pickups can be more prone to feedback, but they provide the most realistic representation of the guitar’s sound.
Each type of pickup has its own sonic characteristics, and the choice depends on the sound you want to achieve. Some players prefer the warmth and richness of magnetic pickups, while others opt for the natural and transparent tone of piezo pickups. The placement of the pickup also plays a role in the overall sound, with choices like soundhole or under-saddle pickups offering different tonal qualities.
When selecting a pickup for your acoustic guitar, consider factors such as the type of music you play, the desired sound, and your playing style. Experimenting with different types of pickups can help you find the perfect match for your musical needs.
Now that we’ve explored the different types of pickups, let’s move on to the next section, where we’ll discuss the step-by-step process of installing a pickup in your acoustic guitar.
Installing a Pickup
Installing a pickup in your acoustic guitar can be a rewarding and relatively straightforward process if you have the right tools and follow the proper steps. In this section, we’ll guide you through the step-by-step process of installing a pickup in your acoustic guitar.
Step 1: Gathering Materials
Before you begin, make sure you have all the necessary materials and tools. These may include the pickup of your choice, an output jack, wire, soldering iron, solder, pliers, screwdriver, masking tape, and a drill (if required). It’s important to choose a pickup that suits your preferences and fits your guitar’s design.
Step 2: Preparing the Guitar
Start by preparing your guitar for the installation process. This may involve removing the strings to provide easier access to the inside of the guitar and the pickup area. It’s essential to work in a clean and well-lit area to avoid losing any small components.
Step 3: Installing the Pickup
Next, you’ll install the pickup in your acoustic guitar. The placement will depend on the type of pickup you’re using. For under-saddle pickups, you’ll need to remove the saddle and carefully slide the pickup strip underneath it. Soundhole pickups can be easily inserted through the soundhole, while microphone pickups may require drilling a hole for mounting.
Step 4: Wiring the Pickup
Once the pickup is in place, you’ll need to wire it to the output jack. Follow the manufacturer’s instructions or a wiring diagram specific to your pickup model. This typically involves soldering wires to the pickup and output jack terminals, securing them with heat shrink tubing or electrical tape, and routing the wires neatly inside the guitar body.
Step 5: Testing the Pickup
After the wiring is complete, it’s time to test the pickup. Re-string your guitar and connect it to an amplifier or audio interface. Gently strum the strings and listen for the amplified sound. Make any necessary adjustments to the pickup height and placement to achieve the desired tone and volume levels.
Remember, installing a pickup may require basic knowledge of guitar electronics and soldering. If you’re not comfortable with these tasks, it’s always best to consult a professional technician for assistance.
Now that you have successfully installed the pickup in your acoustic guitar, you can enjoy the amplified sound and explore new possibilities with your playing. In the next section, we’ll discuss how to adjust your pickup to achieve the best possible sound.
Step 1: Gathering Materials
Before you begin the installation process, it’s essential to gather all the necessary materials and tools. Having everything you need at hand will ensure a smooth and efficient process. Here are the materials you’ll need for installing a pickup in your acoustic guitar:
- Pickup: Choose a pickup that suits your needs and preferences. Determine whether you want a magnetic pickup, piezo pickup, soundhole pickup, under-saddle pickup, or microphone pickup.
- Output Jack: You’ll need an output jack to connect your guitar to an amplifier or audio interface. Ensure that the output jack is compatible with the pickup and your guitar’s design.
- Wire: Use wire suitable for guitar electronics. It’s recommended to use shielded wire to reduce the risk of interference and noise.
- Soldering Iron and Solder: A soldering iron and solder are essential for connecting the wires to the pickup and output jack. Use a soldering iron with adjustable temperature settings and quality solder to ensure secure connections.
- Pliers: Pliers will come in handy for cutting wires to the appropriate length, bending them to fit, and securing connections if necessary.
- Screwdriver: Depending on the pickup type and installation method, you may need a screwdriver to remove or adjust certain components.
- Masking Tape: Masking tape can be used to protect the guitar’s finish and prevent any accidental scratches or damage during the installation process.
- Drill (if required): Some pickups may require drilling holes for mounting. If needed, ensure you have the appropriate drill bit and a drill suitable for working with wood.
It’s important to choose high-quality materials that are compatible with your guitar and pickup. Poor-quality materials may lead to subpar sound quality, weak connections, or even damage to your guitar.
Before starting the installation, double-check that you have all the necessary materials and tools. This will save you from interruptions and ensure a more efficient process. It’s always a good idea to have some extra wire and solder on hand in case you need to make adjustments or repairs during the installation.
With all the materials gathered, you’re ready to move on to the next step of preparing your guitar for the pickup installation. Stay tuned!
Step 2: Preparing the Guitar
Preparing your guitar for the pickup installation is an important step to ensure a smooth and successful process. By taking the time to properly prepare your guitar, you’ll create the ideal environment for installing the pickup and minimize the risk of any damage. Follow these steps to prepare your guitar:
1. Remove the Strings:
Start by loosening and removing the strings from your acoustic guitar. Removing the strings will provide easier access to the inside of the guitar and the pickup area. Use caution when detaching the strings to prevent any damage to the bridge or other components of the guitar.
2. Clean the Guitar:
Take this opportunity to give your guitar a thorough cleaning. Use a soft cloth or a guitar cleaning solution to remove any dirt, dust, or grime from the guitar’s body, neck, and fretboard. Cleaning the guitar will not only make the installation process more pleasant but also ensure that the pickup adheres properly to the guitar’s surface.
3. Access the Pickup Area:
Depending on the type of pickup you’re installing, you may need to access specific areas of the guitar. For under-saddle pickups, you’ll need to remove the saddle from the bridge to make room for the pickup strip. For soundhole pickups, you’ll need to remove any protective covers or pickguards that may be in the way. Follow the manufacturer’s instructions for your specific pickup type.
4. Ensure a Clean and Well-Lit Workspace:
Before you proceed with the installation, make sure you’re working in a clean and well-lit area. Clear any clutter from your workspace, ensuring you have enough room to maneuver around the guitar. Good lighting will enable you to see the installation process clearly and reduce the chances of making any mistakes.
5. Protect the Guitar’s Finish:
Using masking tape, cover any areas of the guitar’s body or neck that are at risk of accidental scratches or damage during the installation. This extra precaution will help maintain the guitar’s pristine appearance and protect it from any unintended mishaps.
By following these preparatory steps, you’ll set the stage for a successful pickup installation process. With your guitar clean and ready and your workspace organized, you’re now ready to move on to the exciting phase of installing the pickup in your acoustic guitar.
Step 3: Installing the Pickup
Now that you’ve prepared your guitar for installation, it’s time to install the pickup. The process will vary depending on the type of pickup you’ve chosen and its specific installation requirements. Here are some general steps to guide you through the installation process:
1. Follow the Manufacturer’s Instructions:
Read the manufacturer’s instructions that came with your pickup carefully. Different pickups may have specific installation procedures or requirements unique to their design. Following the instructions will ensure that you install the pickup correctly and maximize its performance.
2. Position the Pickup:
Determine the ideal position for your pickup. This will depend on the type of pickup and tonal characteristics you’re aiming for. Under-saddle pickups should be placed beneath the saddle, while soundhole pickups need to be inserted through the soundhole. Some pickups may require drilling holes if external mounting is necessary. Take your time to align the pickup properly and ensure a secure fit.
3. Secure the Pickup:
Once you’ve positioned the pickup, secure it in place. Follow the manufacturer’s instructions regarding any screws, adhesive materials, or clamping mechanisms provided. Make sure the pickup is firmly attached to the guitar, as a loose or unstable installation can affect the sound quality and longevity of the pickup.
4. Test the Pickup Placement:
Before moving on to the wiring stage, strum the strings lightly and listen to the sound produced. Pay attention to the pickup’s positioning and its impact on the amplified sound. Make any necessary adjustments to the pickup’s placement to achieve the desired tonal balance and volume.
Note that certain pickups might require professional installation or adjustment if you’re unsure about the process or lack the necessary tools. Consulting a guitar technician can ensure a precise installation and optimal performance of your pickup.
With the pickup properly installed and positioned, you’re now ready to proceed to the next step: wiring the pickup to the output jack. This crucial step will allow you to connect your guitar to an amplifier or audio interface and start enjoying the amplified tones of your acoustic guitar.
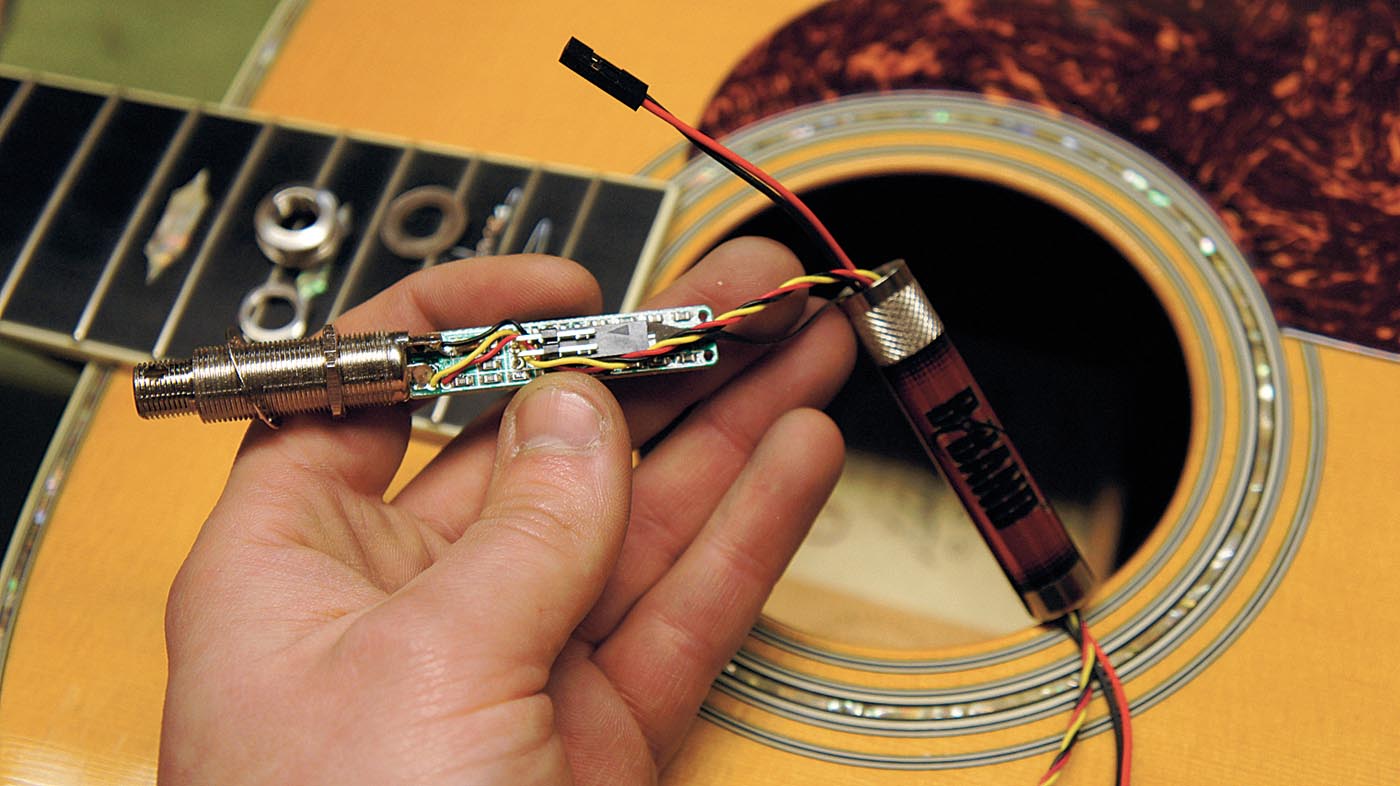
Step 4: Wiring the Pickup
With the pickup successfully installed, the next step is to wire it to the output jack. This will allow the electrical signal generated by the pickup to be transferred to an amplifier or audio interface. Here’s a step-by-step guide to help you with the wiring process:
1. Gather the Necessary Materials:
Make sure you have all the required materials ready, including wire, solder, a soldering iron, heat shrink tubing or electrical tape for insulation, pliers for cutting and stripping wires, and a wiring diagram specific to your pickup.
2. Understand the Wiring Diagram:
Refer to the wiring diagram provided by the pickup manufacturer or search for a diagram specific to your pickup model. The wiring diagram outlines the connections between the pickup, volume and tone controls, and the output jack. Study the diagram to understand the correct wiring sequence and color codes, if applicable.
3. Connect the Pickup to the Output Jack:
Start by connecting the wires from the pickup to the corresponding terminals on the output jack. Strip a small section of insulation from the pickup wires, then twist and solder them onto the appropriate terminals. Pay attention to the positive and negative terminals on the pickup and match them correctly with the jack terminals.
4. Insulate the Connections:
To ensure a secure and long-lasting connection, insulate the soldered joints using heat shrink tubing or electrical tape. This will protect the connections from damage and reduce the risk of interference or short circuits. Slide the heat shrink tubing over the soldered joints before soldering and heat it with a heat gun or lighter to shrink it into place.
5. Route the Wiring Neatly:
Route and organize the wiring neatly inside the guitar body to prevent any entanglement or interference with other components. Use small cable ties or adhesive clips to secure the wires in place, keeping them away from the guitar’s vibrating parts.
6. Test the Wiring:
Before closing up the guitar, test the circuitry by connecting the guitar to an amplifier or audio interface. Gently strum the strings and listen for the amplified sound. Check for any buzzing, humming, or intermittent connections that may require adjustment or re-soldering.
If you’re not confident in your soldering skills or wiring knowledge, it’s always wise to seek assistance from a professional guitar technician. They can ensure a secure and proper wiring job, minimizing the risk of any damage to your guitar or pickup.
With the pickup successfully wired to the output jack, you’re now ready to move on to the final step: testing and adjusting the pickup to achieve the best possible sound.
Step 5: Testing the Pickup
After wiring the pickup to the output jack, it’s time to test the functionality and performance of the pickup. Testing will ensure that the pickup is functioning properly and that you’re getting the desired sound from your acoustic guitar. Follow these steps to test your pickup:
1. Re-string Your Guitar:
Before testing the pickup, re-string your acoustic guitar with new or properly tuned strings. Fresh strings will provide a more accurate representation of the pickup’s performance and tone.
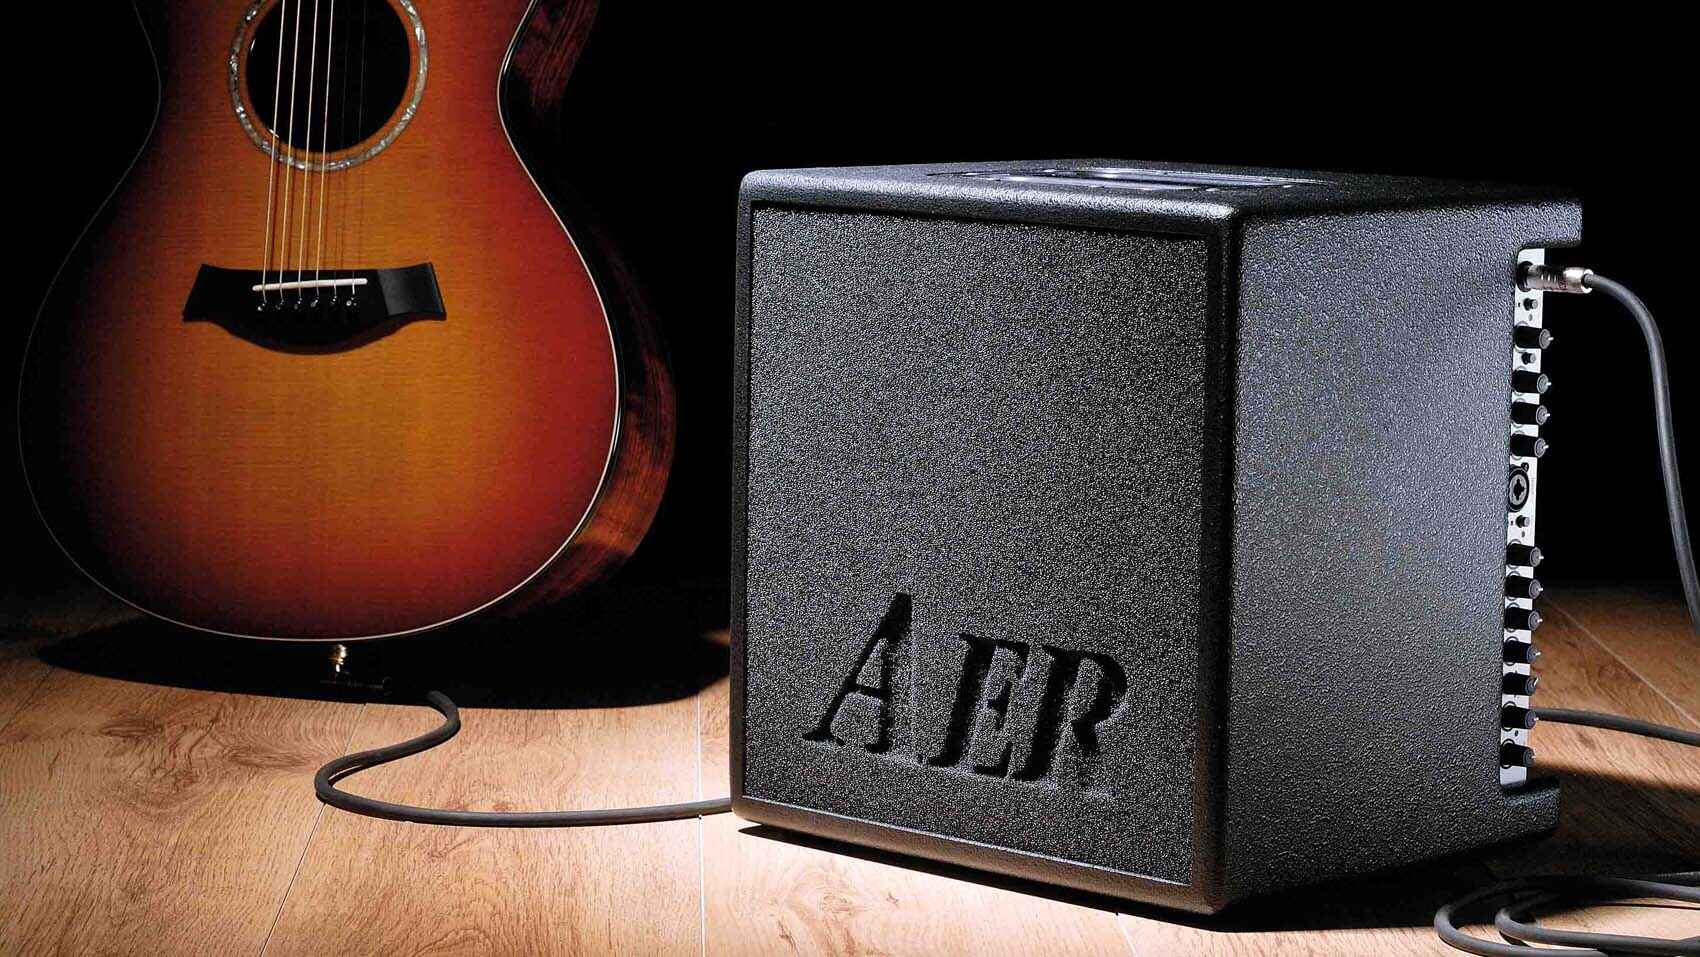
2. Connect to an Amplifier or Audio Interface:
Plug the output jack of your guitar into an amplifier or audio interface. Ensure that the volume is set to an appropriate level and that any tone controls on your amplifier or interface are set neutrally.
3. Gently Strum and Play:
Begin by gently strumming the guitar strings. Listen carefully to the amplified sound and assess the pickup’s performance. Pay attention to the tone, volume, and clarity of the sound. Play different chords and techniques to thoroughly test the pickup across the full range of your playing.
4. Adjust the Pickup:
If necessary, make adjustments to the pickup’s placement and height to achieve the desired sound. Experiment by raising or lowering the pickup or slightly altering its angle to find the optimal position for your playing style and sound preferences.
5. Evaluate Tone and Volume:
Listen critically to the tone and volume of the pickup. Assess whether the tone is balanced across all strings and if the volume is consistent when playing softly and loudly. Take note of any tonal imbalances or volume discrepancies that may require further adjustments.
6. Address Any Issues:
If you encounter any buzzing, distortion, or other unwanted sounds, troubleshoot the issue. Check for loose connections, examine the wiring, and ensure that all components are properly secured and insulated. If necessary, consult a professional guitar technician for assistance in addressing any issues.
By thoroughly testing the pickup, you can ensure that it’s performing as desired and producing the sound you want from your acoustic guitar. Don’t be afraid to experiment with different settings and adjustments to achieve the best sound quality.
Once you’re satisfied with the testing and adjustments, you can proceed to the final step: fine-tuning the pickup and making any necessary final adjustments to optimize its performance.
Adjusting the Pickup
After testing the pickup and assessing its performance, you may find the need to make further adjustments to fine-tune its sound and optimize its performance. Here are some steps to help you in adjusting the pickup:
1. Pickup Height:
One of the critical aspects of adjusting a pickup is finding the optimal height. Different pickup types, such as under-saddle pickups or soundhole pickups, may require different adjustments. Generally, adjusting the pickup closer to the strings will result in a stronger and louder output, while moving it farther away can create a more balanced and natural sound. Experiment with small adjustments to find the sweet spot that suits your playing style and sonic preferences.
2. Angle and Orientation:
Along with adjusting the height, altering the angle or orientation of the pickup can affect the sound. Tilting the pickup slightly can impact the tonal response, emphasizing certain frequencies or adjusting the overall balance. Experiment with small adjustments, and listen attentively to determine the changes in tone and dynamics.
3. Pole Piece Adjustment (if applicable):
If your pickup has adjustable pole pieces, you can fine-tune the individual string balance. With a screwdriver or a specialized tool, you can raise or lower the individual pole pieces to adjust the output of each string. This allows you to compensate for any inconsistencies or imbalances in the volume or tone of the strings.
4. Fine-tuning Tone and Volume Controls:
If your guitar’s electronics include tone and volume controls, experiment with these adjustments. These controls can shape the overall sound of the pickup and allow you to dial in the desired tone. Make slight adjustments to find the ideal settings that complement your playing style and the specific sound you’re aiming for.
5. Play Different Techniques:
Test the pickup’s performance across different playing techniques and musical styles. Strum chords, play single notes, and try various dynamics to ensure that the pickup responds accurately to your playing. Listen for any inconsistencies, muddiness, or excessive brightness that may require further adjustments.
6. Seek Feedback from Others:
If possible, seek feedback from other musicians or experienced guitarists. Their opinions can provide valuable insights and objective feedback on the performance of your pickup. Consider their suggestions and make adjustments accordingly to enhance your pickup’s overall sound and performance.
Remember, adjustments to the pickup’s position, height, and other parameters should be made gradually and in small increments. Take your time in experimenting and fine-tuning to achieve the best possible sound that matches your personal preferences and playing style.
Once you’re satisfied with the adjustments and happy with the pickup’s performance, you can confidently use your acoustic guitar with the newly installed pickup in various musical settings.
Conclusion
Congratulations! You have successfully learned how to add a pickup to your acoustic guitar. By following the step-by-step process outlined in this guide, you have expanded the capabilities of your instrument and opened up a world of possibilities for your musical expression. Whether you’re a gigging musician or a home player, having a pickup installed in your acoustic guitar allows you to amplify your sound, experiment with different effects, and unleash your creativity.
Throughout this guide, we discussed various aspects of adding a pickup to an acoustic guitar. You gained an understanding of different pickup types, such as magnetic pickups and piezo pickups, and their sonic characteristics. You also learned the importance of preparing your guitar and gathering the necessary materials before beginning the installation process.
Installing a pickup requires attention to detail and some knowledge of guitar electronics and soldering. By carefully following the step-by-step instructions, you successfully installed the pickup, wired it to the output jack, and tested its functionality. Adjustments were made to achieve the desired sound, including adjusting the pickup’s height, angle, and orientation.
Remember, the process of installing and adjusting a pickup may take some time and experimentation to find the perfect settings that suit your playing style and tonal preferences. Don’t be afraid to make small incremental changes and seek feedback from others to fine-tune your pickup setup.
Adding a pickup to your acoustic guitar opens up a world of opportunities, whether you’re performing on stage, recording music, or simply exploring new sonic territories. Embrace this new chapter in your musical journey and enjoy the versatility and amplified sound your pickup-equipped acoustic guitar brings.
We hope this guide has been informative and helpful in your journey to add a pickup to your acoustic guitar. Now it’s time to plug in, turn up the volume, and let your music soar!