Introduction
So, you've got an electric guitar and you're ready to take its sound to the next level. One way to do that is by attaching a new pickup. A pickup is a crucial component of your electric guitar that captures the vibrations of the strings and converts them into electronic signals, which can then be amplified. Upgrading your pickup can significantly impact the tone and versatility of your instrument, allowing you to explore a wide range of sounds.
Whether you're looking to achieve a cleaner, crisper tone, a warmer and more vintage sound, or a high-output, aggressive sound, choosing the right pickup and attaching it properly is essential. This guide will walk you through the process of attaching a new pickup to your electric guitar, providing step-by-step instructions and valuable tips to help you achieve the best results.
By following this guide, you'll learn how to remove the old pickup, prepare the new pickup for installation, and attach the new pickup correctly. We'll also cover the crucial step of testing the pickup to ensure it's functioning as intended. So, grab your tools, prepare your workspace, and let's dive into the exciting world of customizing your electric guitar's sound!
Tools and Materials Needed
Before you begin the process of attaching a new pickup to your electric guitar, it’s essential to gather the necessary tools and materials. Having the right equipment at hand will ensure a smooth and efficient installation process. Here’s a list of the tools and materials you’ll need:
- Screwdriver Set: A set of screwdrivers with various head types, including Phillips and flathead, to remove the pickguard and access the pickup.
- Wire Cutters and Strippers: These tools are essential for cutting and stripping the wires connected to the old pickup and preparing the wires for the new pickup.
- Soldering Iron and Solder: You’ll need these to solder the connections between the new pickup and the guitar’s wiring. Make sure to use a soldering iron with a fine tip for precision.
- New Pickup: Choose a pickup that suits your desired tone and playing style. There are various types of pickups, including single-coil, humbucker, and P90, each offering distinct sonic characteristics.
- Replacement Potentiometers (Optional): If you’re upgrading the entire electronics setup, you may need to replace the potentiometers (pots) that control volume and tone. Make sure to select pots with the appropriate resistance values.
- Desoldering Pump or Solder Wick (Optional): In case you need to remove the existing solder from the guitar’s wiring, a desoldering pump or solder wick can be helpful.
- Multimeter (Optional): A multimeter can be useful for testing the continuity of the wiring and ensuring proper connections.
- Workspace and Lighting: Set up a well-lit workspace with ample room to maneuver. Good lighting is crucial for seeing small components and making precise connections.
By ensuring you have all the necessary tools and materials ready, you’ll be well-prepared to tackle the pickup attachment process with confidence and precision.
Removing the Old Pickup
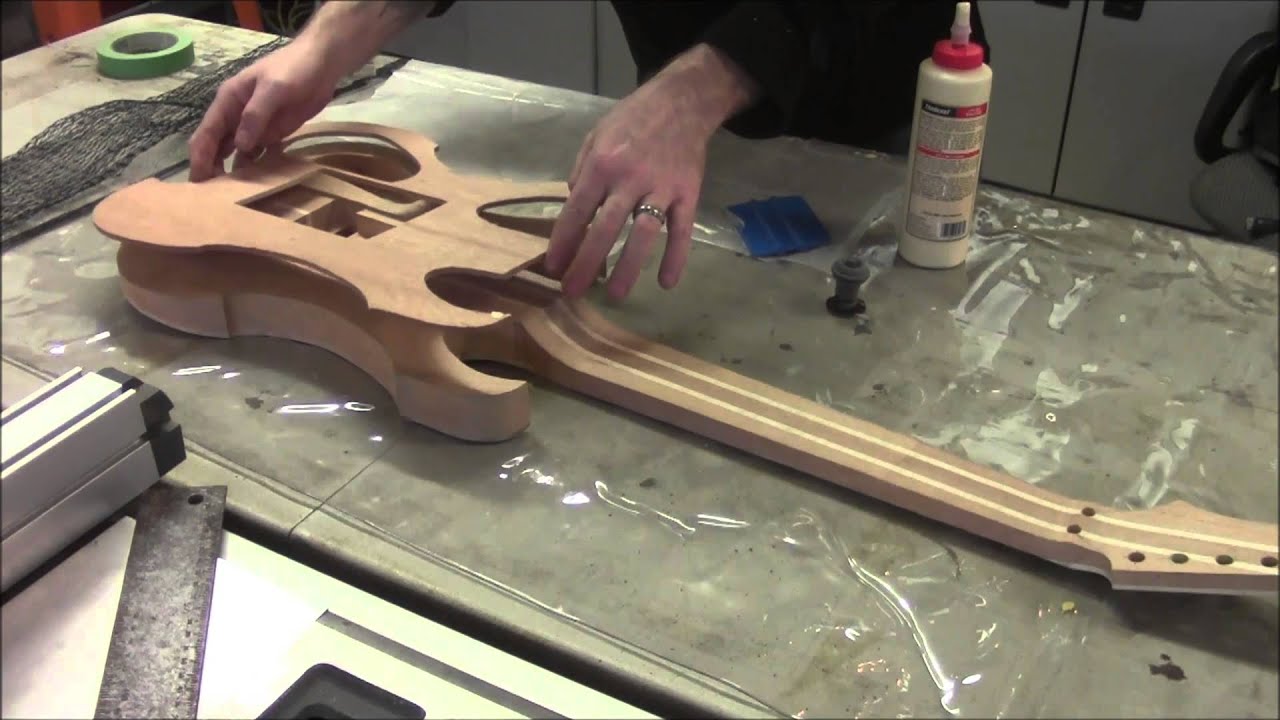
Before you can install a new pickup on your electric guitar, you’ll need to remove the existing one. This process involves careful disassembly to ensure that the old pickup is safely detached without causing any damage to the guitar’s body or internal components. Here’s a step-by-step guide to removing the old pickup:
- Prepare Your Workspace: Find a flat, stable surface to work on and ensure that it’s well-lit. Lay down a soft cloth or blanket to protect the guitar’s finish from scratches or dings.
- Loosen the Strings: To access the pickup and pickguard, it’s best to loosen the tension of the guitar strings. You don’t need to remove the strings entirely, but reducing the tension will make it easier to work inside the guitar.
- Remove the Pickguard or Back Cover: Depending on the guitar model, the pickup may be mounted on the pickguard or accessible through a back cover. Use the appropriate screwdriver to carefully remove the screws holding the pickguard or back cover in place. Keep the screws in a safe place for reassembly.
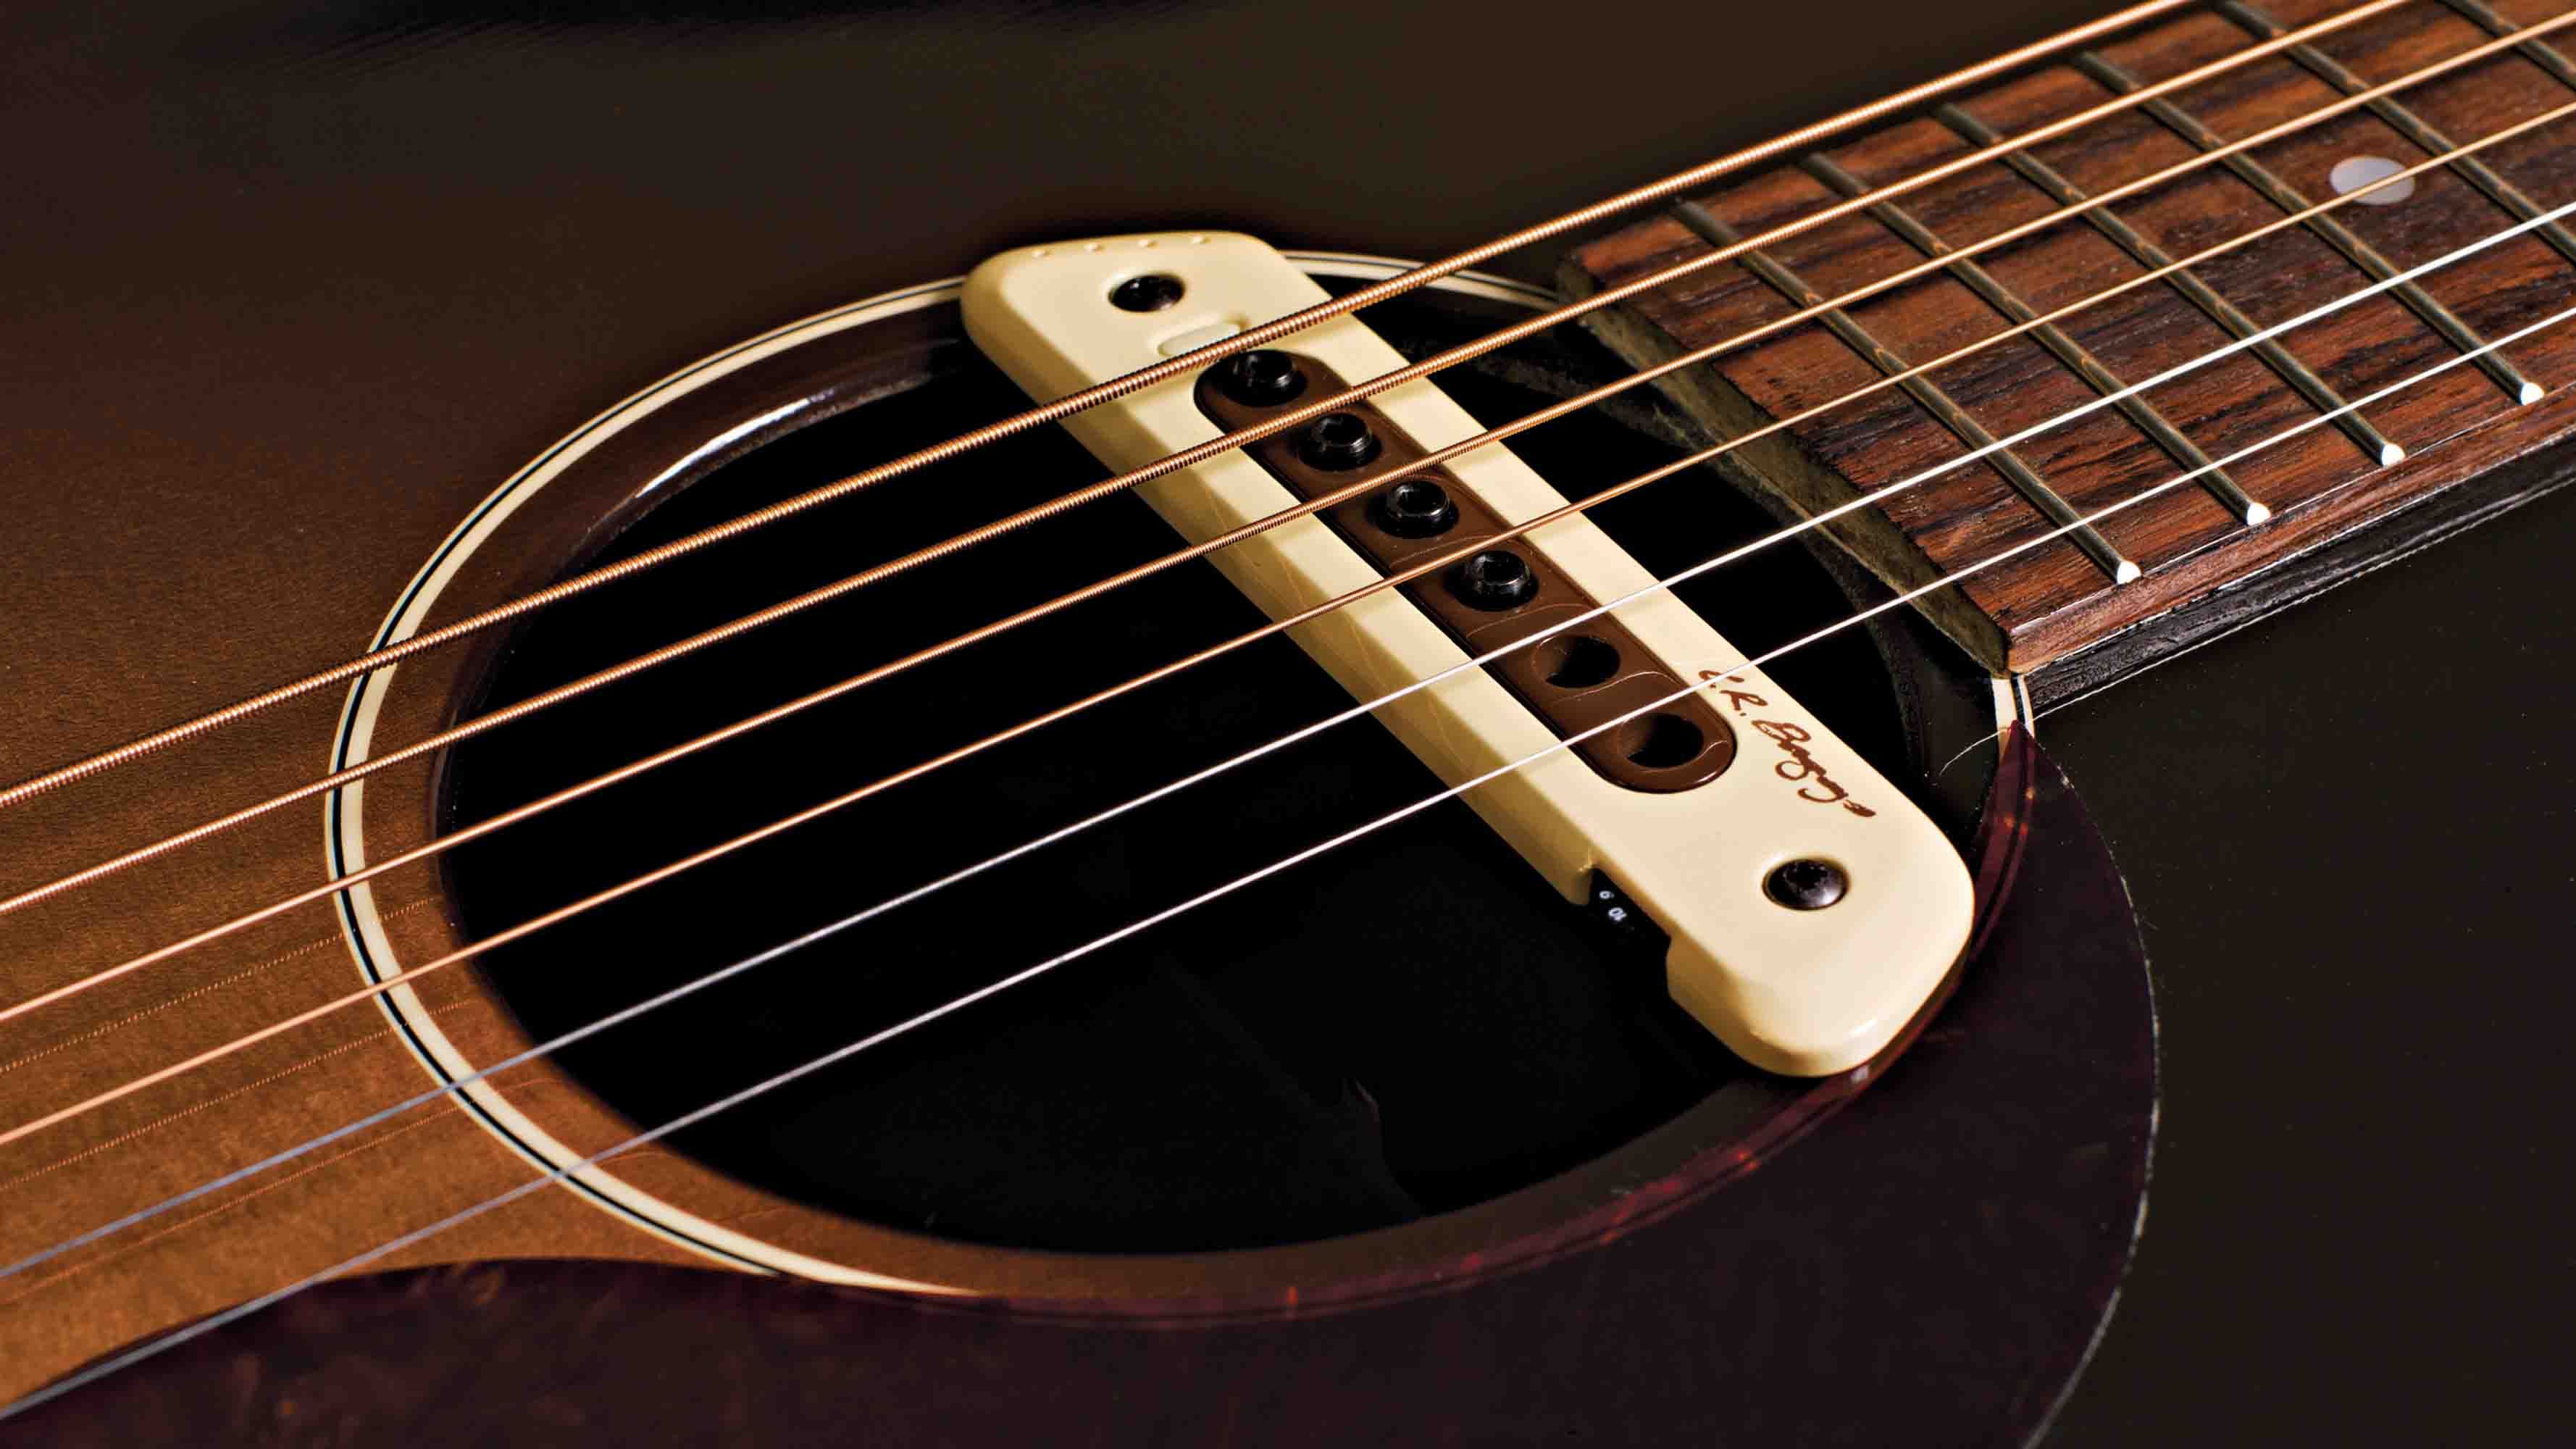
- Identify the Pickup Connections: Once the pickguard or back cover is off, you’ll see the old pickup and its connections to the guitar’s wiring. Take note of how the pickup is wired, including the color-coding of the wires and their attachment points.
- Disconnect the Pickup: Using wire cutters and strippers, carefully disconnect the wires attached to the old pickup. If the wires are soldered, you’ll need to desolder them using a soldering iron and desoldering pump or solder wick. Take your time to avoid damaging the wiring or the pickup itself.
- Remove the Pickup: With the wires detached, carefully lift the old pickup out of its mounting position. Be gentle to avoid any unnecessary strain on the guitar’s body or the remaining wiring.
By following these steps, you can safely remove the old pickup from your electric guitar, setting the stage for the installation of a new pickup to elevate your instrument’s sonic capabilities.
Preparing the New Pickup
Before attaching the new pickup to your electric guitar, it’s essential to prepare the pickup and its wiring for installation. Proper preparation ensures that the new pickup will integrate seamlessly with your guitar’s electronics and deliver optimal performance. Here’s a detailed guide to preparing the new pickup:
- Inspect the New Pickup: Carefully examine the new pickup to ensure that it’s free from any defects or damage. Check the pickup’s construction, pole pieces, and wiring to confirm that everything is in good condition.
- Review the Wiring Diagram: If the new pickup comes with a wiring diagram or installation instructions, review them thoroughly. Understanding the pickup’s wiring configuration and color-coding will help you make accurate connections to the guitar’s existing wiring.
- Prepare the Pickup Leads: If the pickup’s leads are not pre-soldered, use wire strippers to remove a small amount of insulation from the ends of the pickup wires. This will expose the conductive metal and allow for proper soldering to the guitar’s wiring.
- Check Compatibility: Ensure that the new pickup is compatible with your guitar’s setup in terms of size, mounting style, and electrical specifications. If any modifications are necessary, such as enlarging the pickup cavity or adjusting the mounting screws, address them before proceeding with the installation.
- Verify Polarity and Phase: Some pickups have specific polarity or phase requirements to align with the guitar’s other pickups or electronics. Verify the correct orientation of the pickup’s magnetic polarity to maintain consistent phasing with the rest of the instrument’s pickups.
- Prepare Soldering Equipment: Heat up your soldering iron and ensure that it’s clean and free of any residue from previous use. Having a well-maintained soldering iron is crucial for creating reliable connections between the pickup and the guitar’s wiring.
By meticulously preparing the new pickup and familiarizing yourself with its wiring, you’ll be well-equipped to proceed with the precise installation process, setting the stage for an enhanced sonic experience with your electric guitar.
Attaching the New Pickup
Now that the old pickup has been removed and the new pickup is prepared, it’s time to attach the new pickup to your electric guitar. Properly securing the new pickup and making accurate connections is crucial for ensuring optimal performance and sound quality. Follow these detailed steps to attach the new pickup:
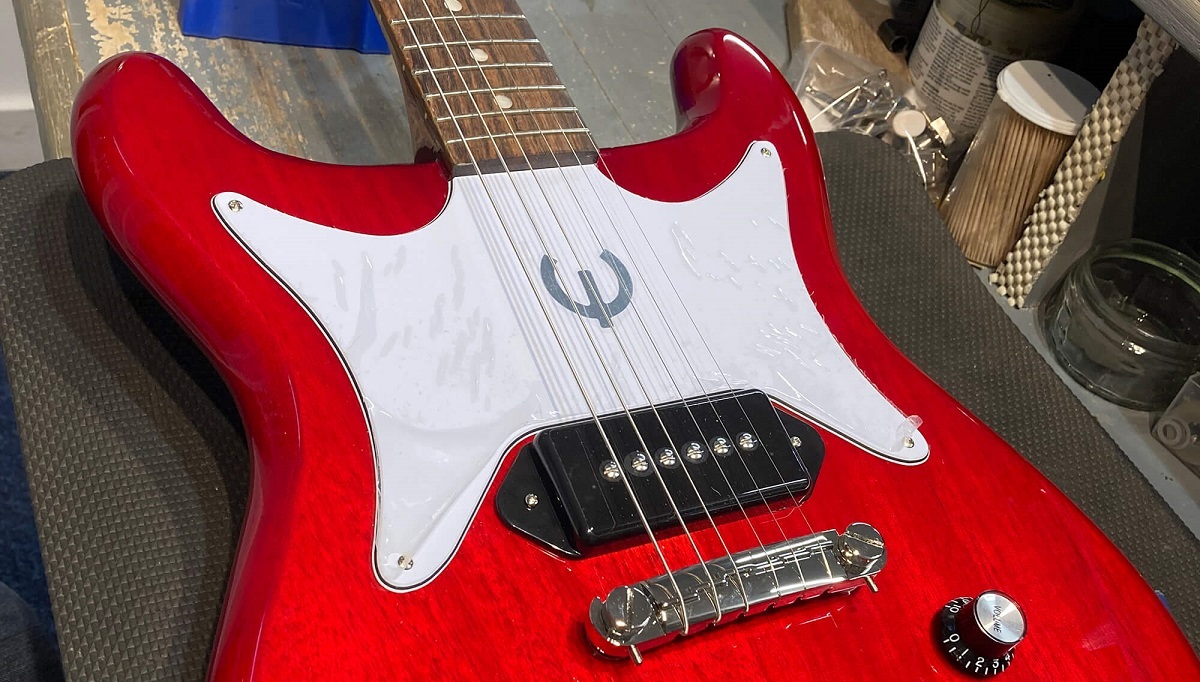
- Position the New Pickup: Carefully place the new pickup into the designated mounting position, ensuring that it aligns correctly with the pickup cavity and the screw holes for secure attachment. Double-check the orientation to match any specific polarity or phase requirements.
- Secure the Pickup: Using the appropriate screws or mounting hardware, gently fasten the new pickup in place. Be cautious not to overtighten the screws, as this could potentially damage the pickup or the guitar’s body.
- Connect the Pickup Wires: If the pickup wires were not pre-soldered, carefully solder each wire to its corresponding terminal on the guitar’s wiring. Refer to the wiring diagram or color-coding to ensure the correct connections for the pickup’s hot, ground, and coil-splitting wires.
- Insulate the Connections: After soldering the connections, use heat-shrink tubing or electrical tape to insulate and protect the soldered joints. This safeguards the connections from short circuits and prevents unintended contact with other components.
- Adjust Pickup Height (Optional): Depending on your preference and the pickup’s specifications, you may need to adjust its height to achieve the desired balance between output, clarity, and string response. Follow the pickup manufacturer’s recommendations for optimal height adjustments.
- Reassemble the Guitar: Once the new pickup is securely attached and the connections are insulated, reassemble the pickguard or back cover using the original screws. Ensure that everything is properly aligned and tightened, and restring the guitar to the desired tension.
By meticulously following these steps, you can successfully attach the new pickup to your electric guitar, setting the stage for an enhanced sonic experience and expanded tonal possibilities.
Testing the Pickup
After attaching the new pickup to your electric guitar, it’s essential to thoroughly test its functionality and sonic characteristics. Proper testing ensures that the pickup is operating as intended and that it integrates seamlessly with your instrument’s electronics. Follow these steps to test the new pickup and make any necessary adjustments:
- Visual Inspection: Before proceeding with sound testing, visually inspect the connections, ensuring that all soldered joints are secure and properly insulated. Check for any loose wires or potential points of contact that could cause electrical issues.
- Amplifier Connection: Connect your electric guitar to an amplifier using a high-quality instrument cable. Ensure that the amplifier is in good working condition and set to a clean, neutral sound profile to accurately assess the pickup’s output.
- Signal Verification: Strum the guitar strings and verify that the amplifier registers the signal from the new pickup. Listen for any unusual buzzing, humming, or intermittent signal loss, which may indicate wiring issues or improper grounding.
- Tonal Evaluation: Play through various musical passages and test the pickup’s tonal characteristics across different playing styles and techniques. Pay attention to the pickup’s response to dynamics, its frequency range, and any tonal nuances specific to its design.
- Adjustment and Fine-Tuning: If you notice any tonal imbalances, excessive noise, or unwanted feedback, consider making adjustments to the pickup height, pole piece height (if applicable), or the wiring connections. Fine-tune the pickup’s settings to achieve the desired tonal qualities and responsiveness.
- Test in Different Environments: To assess the pickup’s performance comprehensively, test your guitar in various environments, including rehearsal spaces, recording studios, and live performance settings. Evaluate how the pickup responds to different acoustics and ambient noise levels.
- Seek Professional Assistance (If Needed): If you encounter persistent issues or uncertainties regarding the pickup’s performance, consider seeking assistance from a qualified guitar technician or luthier. Professional expertise can help address any technical challenges and optimize the pickup’s functionality.
By diligently testing the new pickup and making any necessary adjustments, you can ensure that it enhances your electric guitar’s sonic capabilities and provides a satisfying playing experience across diverse musical contexts.
Conclusion
Congratulations! You’ve successfully navigated the process of attaching a new pickup to your electric guitar, unlocking a world of sonic possibilities and personalized tone. By following the step-by-step guide provided in this article, you’ve gained valuable insights into the meticulous process of upgrading your instrument’s pickup system. From the careful removal of the old pickup to the precise attachment and testing of the new pickup, you’ve embarked on a journey to tailor your guitar’s sound to your unique preferences and playing style.
As you reflect on this experience, it’s important to recognize the transformative impact that a new pickup can have on your electric guitar’s sonic character. Whether you’ve opted for a vintage-inspired single-coil pickup, a high-output humbucker, or a versatile P90, the tonal landscape of your instrument has undoubtedly evolved, offering new tonal textures and expressive capabilities.
Furthermore, the hands-on nature of this process has allowed you to deepen your understanding of your instrument’s internal components and the intricate interplay between pickups, wiring, and amplifier interaction. This knowledge empowers you to make informed decisions about future upgrades and modifications, enhancing your overall proficiency as a guitar enthusiast.
By embracing the art of pickup installation, you’ve embarked on a journey of sonic exploration and customization, aligning your instrument more closely with your artistic vision and sonic aspirations. Your electric guitar now stands as a unique extension of your musical identity, ready to inspire and captivate with its personalized voice.
As you continue to delve into the world of guitar customization and sonic innovation, remember that each modification, no matter how subtle, contributes to the evolution of your instrument and your artistic journey. Embrace the process, cherish the sonic transformations, and let your newfound tonal palette inspire your musical endeavors.
With the new pickup seamlessly integrated into your electric guitar, you’re poised to embark on a musical odyssey filled with creativity, expression, and the boundless potential of your instrument’s enhanced sonic character.