Introduction
Converting an acoustic guitar into an electric guitar is an exciting project that can open up a whole new realm of sonic possibilities. By adding a pickup and making a few modifications, you can transform your acoustic guitar into a versatile instrument that can be amplified and manipulated to fit various musical styles, from folk to rock to jazz.
While there are many electric guitars available on the market, some guitarists have a strong attachment to their acoustic instrument and prefer to modify it rather than purchasing a new one. Converting an acoustic guitar into an electric guitar allows you to preserve the unique tone and characteristics of your acoustic while giving you the opportunity to explore the sonic realm of electric guitar sounds.
Before you dive into the conversion process, it’s important to gather all the necessary materials and tools. You’ll need a guitar pickup, wire cutters, soldering iron, solder, drill, screwdriver, and various other electrical components. These can be found in guitar stores or online. Make sure to choose a pickup that suits your desired sound and matches the size and shape of your guitar.
Once you have everything ready, you can begin removing the acoustic components of your guitar. This includes carefully removing the strings, bridge pins, and saddle. It’s crucial to handle these parts with care to avoid damaging them or the guitar itself. Next, you’ll need to create a cavity inside the body of the guitar to accommodate the pickup.
After the acoustic components are removed, you can start installing the pickup. This involves placing it in the cavity and securing it using screws or adhesive. It’s essential to position the pickup correctly and ensure that it’s properly aligned with the strings to achieve optimal sound transfer. Once the pickup is securely in place, it’s time to wire it to the controls.
Wiring the pickup involves connecting it to volume and tone controls, which will allow you to adjust the sound of your electric guitar. This process requires some basic knowledge of electronics and soldering. It’s important to follow a wiring diagram specific to your pickup and understand the different connections.
Adding volume and tone controls will give you the ability to shape your sound and achieve various tones. These controls can be mounted on the body of the guitar or placed on a separate control panel, depending on your preference. The placement should be comfortable and easily accessible while playing.
Finally, you’ll need to install a jack to connect your guitar to an amplifier or other external audio equipment. This involves drilling a hole in the body of the guitar and attaching the jack securely. Be cautious when drilling to avoid splintering or damaging the wood.
Once all the modifications are complete, it’s crucial to test and adjust the setup. Plug in your newly converted electric guitar and check for any issues with the sound, volume, or controls. You may need to make minor adjustments to achieve the best performance.
Converting an acoustic guitar into an electric guitar is a rewarding process that allows you to explore new musical possibilities without losing the distinctive qualities of your acoustic instrument. With some patience, basic knowledge of electronics, and the right tools, you can create your own unique electric guitar that reflects your personal style and preferences.
Gathering the Materials
Before starting the conversion process, it’s essential to gather all the necessary materials and tools. Here’s a list of items you’ll need to get your hands on:
- Guitar Pickup: Choose a pickup that complements your desired sound. There are various types available, such as single-coil, humbucker, or piezo pickups. Consider the tone and output you want to achieve.
- Wire Cutters: You’ll need wire cutters to trim and strip the wires during the wiring process. Make sure you have a high-quality pair that can make clean and precise cuts.
- Soldering Iron: A soldering iron is necessary for the wiring process. You’ll use it to solder the connections between the pickup and other electrical components. A 30W soldering iron is usually sufficient for this job.
- Solder: High-quality solder is crucial for creating secure and reliable connections. Choose a solder with a rosin core for easy and effective soldering.
- Drill: You’ll need a drill with a suitable bit size to create the necessary holes for the pickup wiring and the jack installation.
- Screwdriver: A screwdriver is required for mounting the pickup and securing the components. Make sure you have the appropriate screwdriver size for your specific guitar and pickup.
- Control Pots and Knobs: If you plan to add volume and tone controls, you’ll need control pots, usually 250K or 500K resistance, along with knobs that match the style and aesthetics of your guitar.
- Output Jack: An output jack is crucial for connecting your guitar to an amplifier or other audio equipment. Choose a durable and reliable output jack suitable for electric guitars.
- Electrical Wires: You’ll need wires to connect the pickup, controls, and output jack. Make sure to use shielded and insulated wires to prevent unwanted noise and interference.
- Electrical Tape or Heat Shrink Tubing: These are essential for insulating and protecting the soldered connections. Use electrical tape or heat shrink tubing to cover the exposed wires and solder joints.
- Protective Gear: Don’t forget to wear safety goggles and heat-resistant gloves when using the soldering iron to protect yourself from potential hazards.
When purchasing these materials, it’s advisable to buy from reputable guitar stores or online retailers that specialize in guitar parts and accessories. This ensures that you’re getting high-quality components that are suitable for guitar modifications.
Gathering all the necessary materials beforehand will make the conversion process smoother and more efficient. Remember to double-check your inventory and ensure that you have all the required tools and components before beginning the project.
Removing the Acoustic Components
Before you can convert your acoustic guitar into an electric guitar, you’ll need to remove the acoustic components. This process requires careful handling and attention to avoid any damage to the guitar. Here’s a step-by-step guide on how to remove the acoustic components:
- Remove the strings: Start by loosening the tension on all the strings and then carefully remove them from the tuning pegs. Gently unwind each string and set them aside. Be cautious not to scratch the body of the guitar.
- Take off the bridge pins: Acoustic guitars usually have bridge pins that hold the strings in place. Use a bridge pin puller or a pair of pliers to carefully remove each pin. Keep them in a safe place as you’ll need them later for restringing your guitar.
- Remove the saddle: The saddle is a small piece located on the bridge of the guitar that helps transmit vibrations to the body. Carefully lift it out of its slot using a small screwdriver or a specialized tool. Be gentle to avoid causing any damage to the saddle or the guitar.
- Detach the pickguard (if any): Some acoustic guitars may have a pickguard attached to the body. Use a hairdryer to gently warm the adhesive underneath the pickguard, making it easier to peel off. Take your time and gradually peel off the pickguard, being mindful not to damage the guitar’s finish.
- Remove any other acoustic components: Depending on your guitar, there may be additional components that need to be removed, such as an acoustic soundhole cover or internal bracing. Carefully assess your guitar and remove any unnecessary acoustic elements to prepare for the electric guitar conversion process.
It’s crucial to handle these components with care and avoid using excessive force when removing them. By being gentle and mindful, you can prevent any unwanted damage to the guitar’s body or its acoustic components.
Once you have successfully removed all the acoustic components, you’ll be left with a clean canvas ready for the electric guitar conversion.
Remember to keep all the removed components in a safe place as you may want to restore your guitar to its original acoustic state in the future. Properly storing these components will ensure they remain intact and undamaged.
Installing the Pickup
Installing the pickup is a crucial step in converting your acoustic guitar into an electric guitar. The pickup is responsible for capturing the vibrations of the strings and converting them into an electric signal. Follow these steps to properly install the pickup:
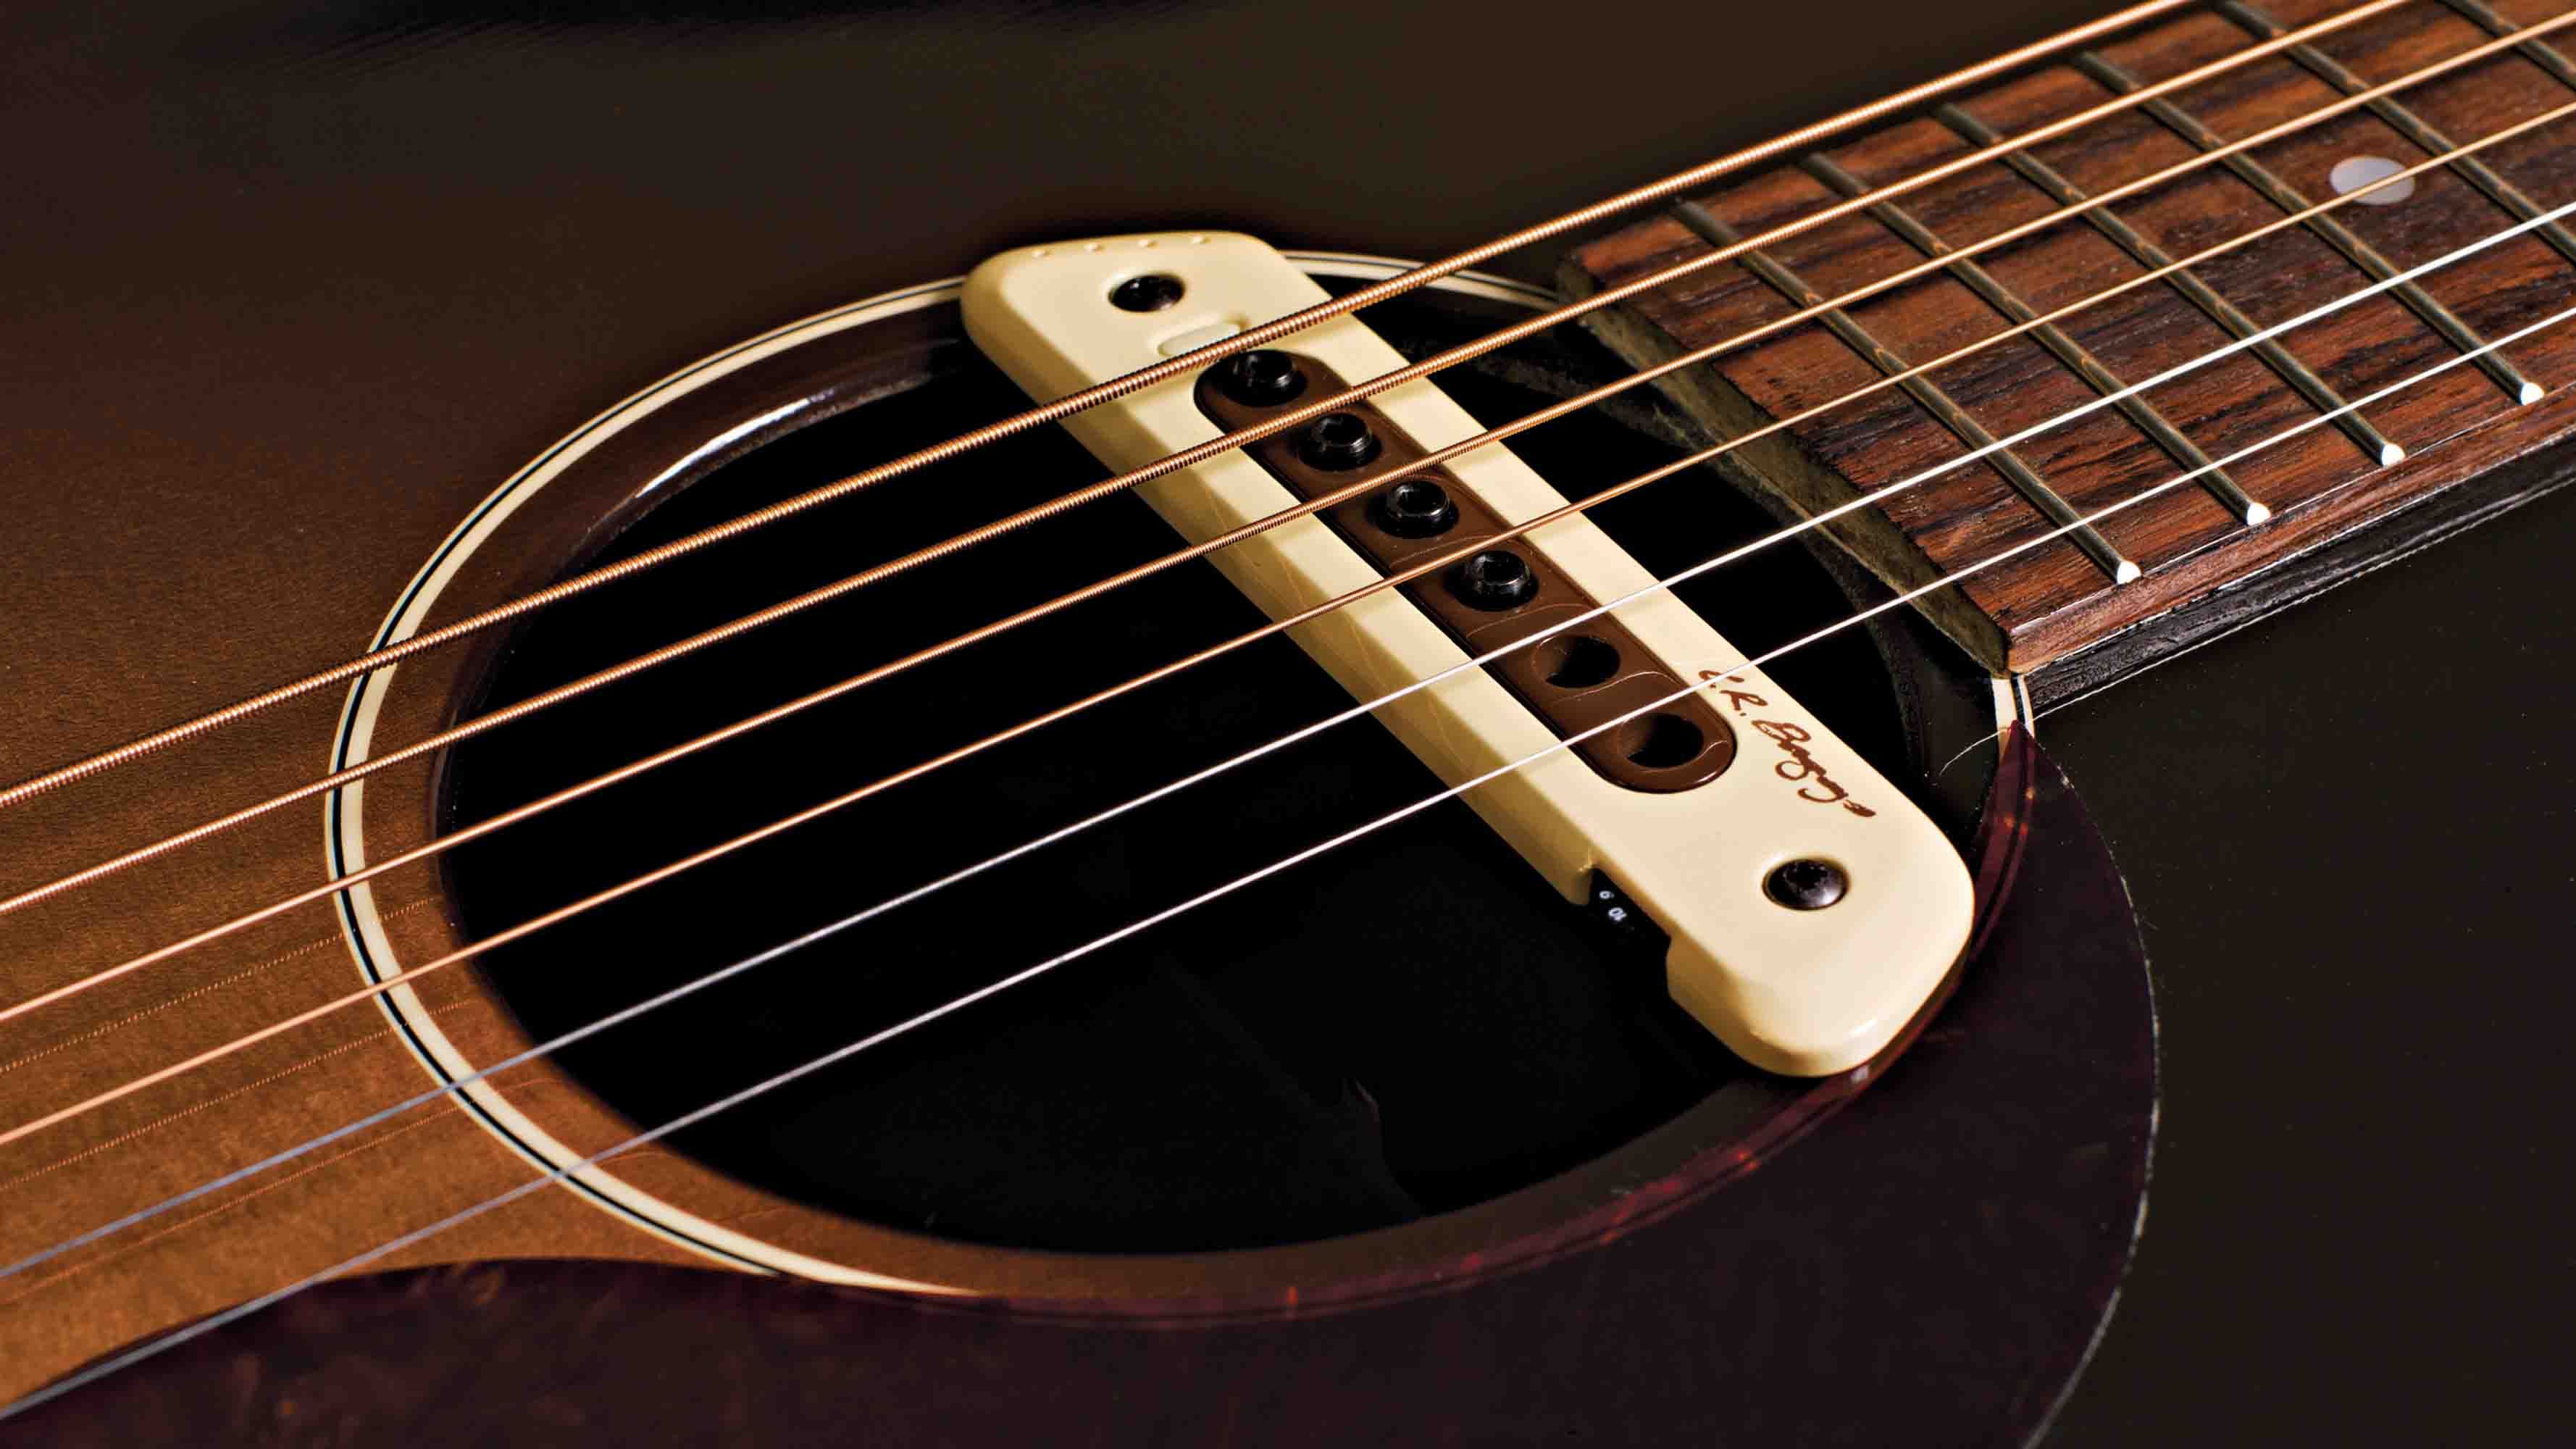
- Choose the pickup location: Determine the ideal location for your pickup installation. The most common placement is under the strings, either between the soundhole and bridge or inside the soundhole. Ensure that the pickup is aligned with the strings to ensure optimal sound transfer.
- Create a cavity for the pickup: Using a drill with an appropriate bit size, carefully create a hole in the desired location to accommodate the pickup. Take caution to avoid damaging the guitar body. If the pickup is going inside the soundhole, you may need to enlarge the existing hole slightly.
- Prepare the pickup: If your pickup requires any preparation, such as removing adhesive backing or attaching the necessary mounting brackets, follow the instructions provided by the manufacturer. It’s important to handle the pickup with care to prevent any damage.
- Place the pickup in the cavity: Insert the pickup into the cavity you created, ensuring that it fits snugly. Secure the pickup using the provided mounting screws or adhesive. Double-check that the pickup is aligned and properly positioned to capture the vibrations of the strings.
- Adjust the pickup height: Once the pickup is installed, you may need to adjust its height to achieve the desired sound. Lowering the pickup closer to the strings will result in a stronger signal, while raising it slightly will reduce the signal. Experiment with different heights to find the balance that suits your playing style.
It’s essential to follow the manufacturer’s instructions and any specific guidelines provided with your pickup. Different pickups may have varying installation requirements, so it’s crucial to attentively read through the documentation.
During the installation process, ensure that the pickup is securely mounted and that there are no loose connections. A loose pickup can cause unwanted buzzing or reduced signal quality.
Once the pickup is successfully installed, you’re one step closer to transforming your acoustic guitar into an electric instrument. The pickup will capture the string vibrations, allowing you to amplify and manipulate your guitar’s sound to suit a wide range of musical styles.
Wiring the Pickup
Wiring the pickup is a crucial part of converting your acoustic guitar into an electric guitar. It involves connecting the pickup to the volume and tone controls, allowing you to adjust the sound of your instrument. Follow these steps to effectively wire the pickup:
- Prepare the necessary tools and materials: Gather all the required tools, including a soldering iron, solder, wire cutters, and electrical wires. Ensure that you have the appropriate wire for the pickup and the controls.
- Refer to a wiring diagram: Depending on the type of pickup and controls you have, refer to a wiring diagram specific to your setup. This will guide you through the connections and ensure everything is properly wired.
- Solder the pickup wires: Start by stripping the insulation from the pickup wires. Use the wire cutters to carefully remove a small portion of insulation from each wire. Then, heat up the soldering iron and apply a small amount of solder to the exposed wire ends. Connect each wire to the appropriate terminal on the pickup according to the wiring diagram.
- Connect the controls: From the pickup, you’ll need to connect wires to the volume and tone controls. Again, refer to the wiring diagram and solder the wires to the appropriate terminals on each control potentiometer. Keep the wires neat and secure, ensuring there are no loose connections.
- Grounding the circuit: To reduce unwanted noise and interference, it’s important to establish a ground connection for your circuit. Connect a wire to the ground terminal on one of the control pots and solder it to the back of one of the control potentiometers or a designated grounding point on your guitar.
- Insulate the connections: After the wiring is complete, it’s crucial to insulate and protect the connections. Use electrical tape or heat shrink tubing to cover exposed wires and solder joints, preventing any accidental short circuits and ensuring a clean and professional finish.
During the wiring process, it’s imperative to be careful and meticulous. Double-check the connections and ensure that everything is properly soldered and securely in place. It may be helpful to have a wiring diagram and reference guide handy to avoid any confusion during the process.
Keep in mind that different pickup and control setups may have slightly different wiring requirements. Always refer to the specific instructions and diagrams provided by the manufacturer of your pickup and controls.
Once the pickup is properly wired, you’ll have control over the sound of your electric guitar, allowing you to shape your tone and explore different sonic possibilities.
Adding Volume and Tone Controls
Adding volume and tone controls to your converted electric guitar allows you to have greater control over the sound and tone of your instrument. These controls are essential for shaping the output to suit your musical style and preference. Follow these steps to effectively add volume and tone controls:
- Choose the control layout: Decide where you want to place the volume and tone controls on your guitar. You can mount them directly on the guitar body or opt for a separate control panel.
- Drill the necessary holes: If you choose to mount the controls on the guitar body, use a drill with an appropriate bit size to create holes for the control pots. Ensure that the holes are positioned correctly and aligned with your preferred control layout.
- Attach the control pots: Once the holes are drilled, insert the control pots into the holes from the front of the guitar body. Secure them in place using the provided mounting nuts and washers. Make sure the control pots are firmly attached and flush against the guitar body.
- Connect the wires: With the control pots in place, it’s time to connect the wires. Refer to the wiring diagram specific to your setup and solder the wires from the pickup and output jack to the corresponding terminals on the control pots. Pay attention to the correct connections to ensure proper functionality.
- Test the controls: Once the wiring is complete, it’s essential to test the volume and tone controls. Plug your electric guitar into an amplifier or audio equipment and gradually adjust the volume and tone knobs. Ensure that the controls are working as intended and that there are no issues with the sound output.
- Mount the control panel (optional): If you choose to have a separate control panel, follow the manufacturer’s instructions to attach it to your guitar. This may involve drilling holes and mounting screws or other fasteners to secure the control panel in place.
When adding volume and tone controls, it’s crucial to consider their placement for ease of access and comfort while playing. Experiment with different control layouts to find the setup that works best for you.
It’s also important to use high-quality control pots and knobs that can withstand frequent usage and provide a smooth and reliable operation. This will ensure a long-lasting and satisfying user experience.
Once the volume and tone controls are successfully installed, you’ll have the ability to shape your guitar’s tone, volume, and overall sound, giving you greater versatility and control over your playing experience.
Installing a Jack
Installing a jack is a crucial step in converting your acoustic guitar into an electric guitar. The jack serves as the connection point between your guitar and an amplifier or other external audio equipment. Here’s a step-by-step guide to installing a jack:
- Choose the jack location: Determine the ideal location for the jack on your guitar. Common placements include the side of the guitar body or the endpin area. Consider accessibility and aesthetics when choosing the location.
- Prepare the necessary tools: Gather the tools you’ll need, including a drill with an appropriate bit size for the jack, a screwdriver, and sandpaper for finishing.
- Mark the spot: Using a pencil or tape, mark the exact spot where you want to install the jack. Take measurements and ensure the placement is centered and aligned with the guitar body.
- Drill the hole: Carefully drill a hole at the marked spot, using the appropriate bit size for your jack. Take caution to drill straight and avoid damaging the guitar’s finish. If necessary, start with a smaller pilot hole and gradually increase the size to match the diameter of the jack.
- Fit the jack: Insert the jack into the hole you drilled, ensuring a firm fit. If it’s a flush-mount jack, make sure it sits flat against the guitar body. If it’s a barrel jack, secure it with the provided nut on the inside of the guitar.
- Solder the wires: Identify the two wires connected to the jack. Typically, there will be a hot (signal) wire and a ground wire. Strip the insulation from the wires, and solder them to their respective terminals on the jack. Follow the wiring diagram if available and refer to any instructions provided by the jack manufacturer.
- Test the connection: Once the wiring is complete, test the jack by plugging your guitar into an amplifier or audio equipment. Ensure that there are no issues with the sound output and that the connection is secure.
- Finish the installation: If necessary, use sandpaper to smooth any rough edges around the drilled hole. This helps in achieving a finished look and prevents any sharp edges that could cause discomfort or damage.
It’s important to handle the jack and wires with care during the installation process to avoid any damage or loose connections. Double-check all the connections and ensure they are securely soldered or tight.
When installing the jack, take your time and work methodically to achieve a professional and clean result. Properly installing the jack is essential for maintaining a reliable and stable connection between your guitar and external audio equipment.
Once the jack is successfully installed, you’ll have the convenience of connecting your electric guitar to an amplifier or other audio equipment, allowing you to amplify and shape your sound to suit your musical preferences.
Testing and Adjusting the Setup
After completing the conversion process and installing all the necessary components, it’s crucial to test and adjust the setup of your newly converted electric guitar. This step ensures that everything is functioning properly and allows you to fine-tune the instrument for optimal performance. Follow these guidelines to effectively test and adjust the setup:
- Check the electrical connections: Prior to testing the sound output, inspect all the electrical connections. Verify that the wires are securely soldered and insulated and that there are no loose connections or exposed wires.
- Connect to an amplifier: Plug your electric guitar into an amplifier or audio equipment using a high-quality instrument cable. Ensure that the amplifier is turned on and set to an appropriate volume level.
- Test the sound output: Strum the guitar strings and listen to the sound coming through the amplifier. Check for any issues such as distortion, buzzing, weak signals, or loss of volume. Make note of any adjustments that need to be made.
- Adjust pickup height: If the sound output is uneven or unbalanced, adjust the height of the pickup. Raising or lowering the pickup slightly can significantly affect the sound quality. Experiment with different heights until you achieve a balanced and desired tone.
- Tweak volume and tone controls: Use the volume and tone controls to further refine the sound. Play around with different settings to achieve the desired sound for different playing styles and musical genres.
- Check for any unwanted noise: Pay close attention to any unwanted background noise, hum, or interference. If you notice any, it could indicate a grounding issue or a loose connection. Double-check the grounding wire and ensure all connections are secure.
- Inspect overall playability: Beyond the sound output, assess the playability of the instrument. Check for any issues with the action, intonation, or string height. Make the necessary adjustments to ensure a comfortable and enjoyable playing experience.
- Make minor adjustments: If you encounter any issues or areas for improvement, be prepared to make minor adjustments. This could include adjusting the truss rod for proper neck relief, fine-tuning the bridge or saddle, or making any necessary changes to the setup to optimize playability and sound quality.
Throughout the testing and adjusting process, it’s important to be patient and attentive. Take the time to carefully listen and evaluate the sound, and make any necessary tweaks to achieve the desired outcome.
Remember that every electric guitar setup is unique, and it may take some trial and error to find the perfect balance of tone, playability, and comfort. Don’t hesitate to seek guidance from experienced guitarists or instrument technicians if you encounter any challenges during the testing and adjusting process.
By conducting thorough testing and making the necessary adjustments, you can ensure that your converted electric guitar is fully optimized, allowing you to unleash its true potential and enjoy the playing experience to the fullest.
Conclusion
Converting an acoustic guitar into an electric guitar is a thrilling project that enables you to explore new sonic territories while maintaining the unique qualities of your acoustic instrument. Throughout the process, you have learned how to gather the necessary materials, remove the acoustic components, install a pickup, wire the pickup, add volume and tone controls, install a jack, and test and adjust the setup.
By gathering the right materials, such as a suitable pickup, wire cutters, soldering iron, and more, you set the foundation for a successful conversion. Removing the acoustic components required careful handling, ensuring that the guitar remained undamaged.
Installing the pickup was a critical step, as it captured the vibrations of the strings and transformed them into an electric signal. The wiring process allowed you to connect the pickup to volume and tone controls, providing you with the ability to shape and control your guitar’s sound.
Adding volume and tone controls further enhanced the versatility of your electric guitar, as you could now adjust the volume and tone to your liking. Installing a jack was necessary for connecting your guitar to an amplifier or other external equipment, enabling you to amplify and project your sound.
Finally, testing and adjusting the setup ensured that your converted electric guitar was working optimally. By checking the electrical connections, ensuring balanced sound output, adjusting pickup height, and making any necessary tweaks, you fine-tuned the instrument for the best performance.
With the completion of the conversion process, you have successfully transformed your acoustic guitar into an electric instrument that offers an expanded range of sonic possibilities. Whether you desire the crunch of rock, the warmth of jazz, or the clarity of folk, your converted electric guitar is ready to deliver.
Remember, this process requires attention to detail, patience, and the willingness to experiment. If you encounter challenges along the way, don’t hesitate to seek guidance from experienced guitarists or instrument technicians.
Now that you have completed the conversion, it’s time to plug in your electric guitar, unleash your creativity, and explore the thrilling world of electric guitar playing. Enjoy the journey and let your newfound instrument inspire you to new musical heights!


