Introduction
Welcome to this guide on how to connect a soundbar to your Roku TV. If you’re looking to enhance your TV viewing experience by adding a soundbar, you’ve come to the right place. A soundbar is a popular audio accessory that offers superior sound quality and immersion compared to built-in TV speakers.
Connecting a soundbar to your Roku TV will allow you to enjoy rich, immersive sound while watching your favorite movies, TV shows, and sports events. Whether you’re a movie buff, a sports enthusiast, or simply someone who appreciates high-quality audio, connecting a soundbar to your Roku TV is a great way to upgrade your entertainment setup.
In this guide, we will walk you through the steps to connect your soundbar to your Roku TV. We will cover everything you need to know, from gathering the necessary equipment to making the correct audio connections and optimizing the sound settings.
Before we get started, it’s important to note that the specific steps and requirements may vary depending on the model of your Roku TV and the soundbar you’re using. However, the general principles and concepts discussed in this guide should apply to most Roku TVs and soundbars.
If you’re excited to improve your audio experience and immerse yourself in the sound of your favorite movies and TV shows, let’s get started with the step-by-step process of connecting your soundbar to your Roku TV.
Step 1: Gather the necessary equipment
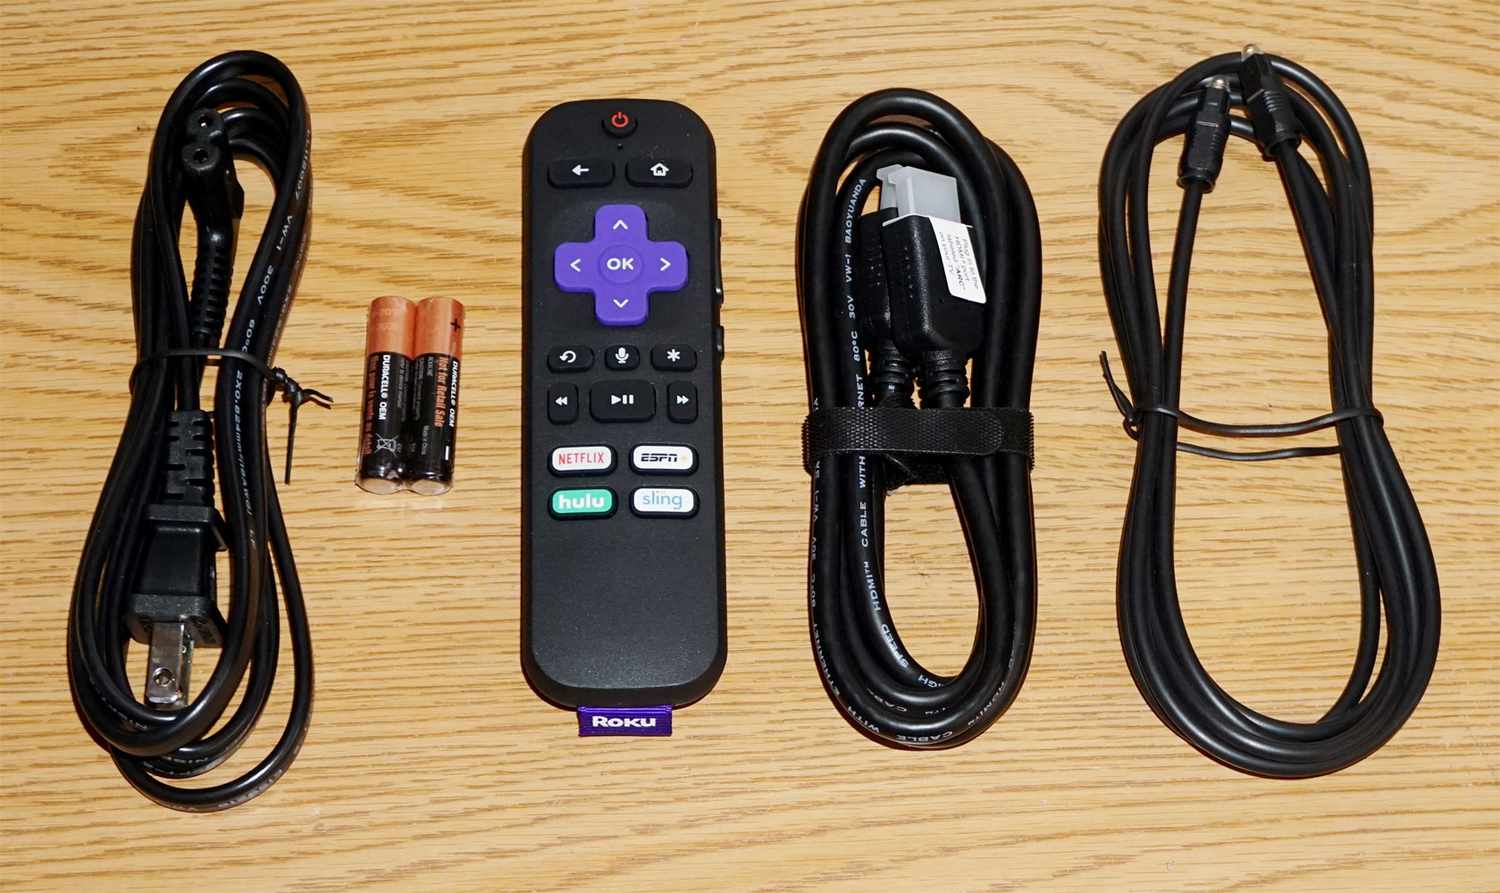
Before you begin connecting your soundbar to your Roku TV, it’s important to gather all the necessary equipment. Here’s a list of what you’ll need:
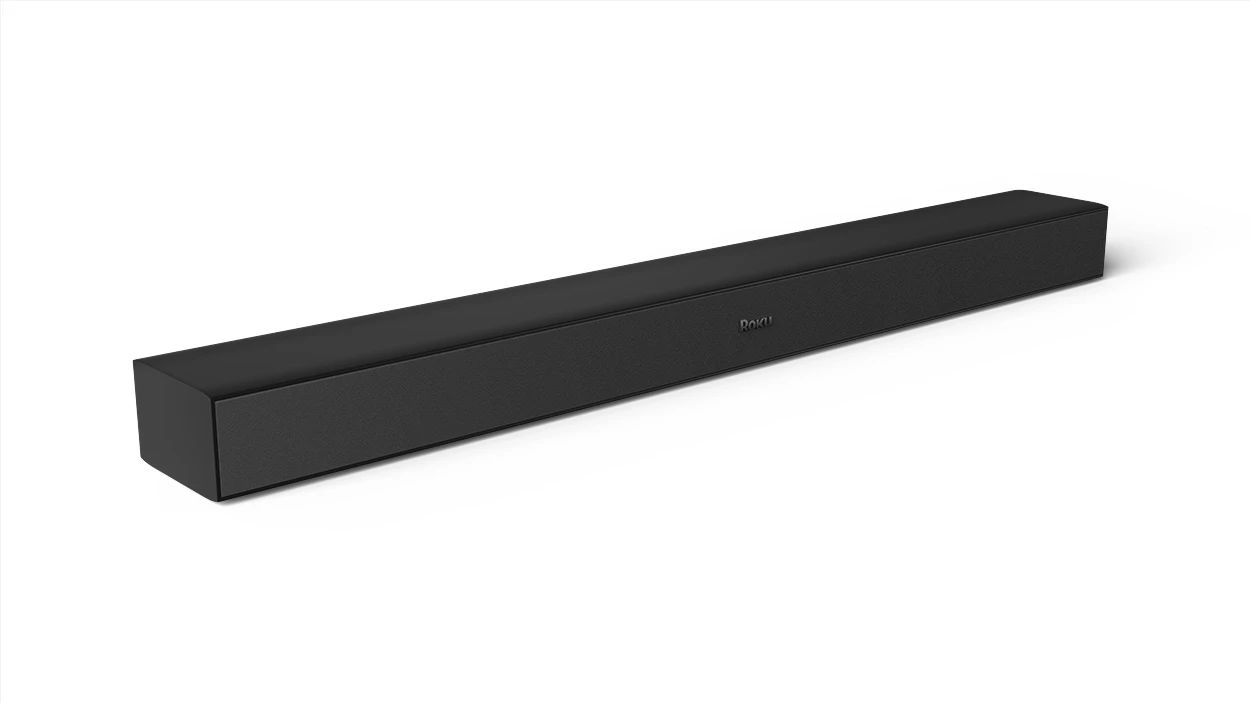
- Soundbar: Choose a soundbar that suits your preferences and budget. There are various options available, ranging from basic 2-channel soundbars to more advanced models with subwoofers and surround sound capabilities. Consider factors such as sound quality, connectivity options, and the space available in your entertainment setup.
- HDMI cable: You’ll need an HDMI cable to connect your Roku TV to the soundbar. Make sure to get a high-quality HDMI cable that supports ARC (Audio Return Channel) if your soundbar and TV have ARC capability. This will enable the soundbar to receive audio signals from the TV and allow for seamless communication between the two devices.
- Power cables: Ensure that you have the necessary power cables for both the soundbar and the Roku TV. Most soundbars come with their own power cords, while the Roku TV will have its own power cable.
- Remote control: Have the remote control for your Roku TV handy. This will be needed when navigating the TV settings and making the necessary audio adjustments.
- Optional: Optical cable or AUX cable: Depending on the connectivity options available on your soundbar and Roku TV, you may need an additional optical cable or AUX cable. These cables can provide alternative audio connection options if your soundbar does not have HDMI ARC capability or if you prefer to use a different audio connection method.
By gathering these essential items beforehand, you’ll ensure a smooth and hassle-free setup process when connecting your soundbar to your Roku TV. Once you have everything ready, you’re all set to move on to the next step.
Step 2: Find the audio output options on your Roku TV
Before connecting your soundbar to your Roku TV, it’s important to locate the audio output options on your TV. This will help you identify the best way to connect the soundbar and ensure compatibility with your TV’s audio settings. Here’s how you can find the audio output options:
- Access the settings menu: Using your remote control, navigate to the home screen of your Roku TV and locate the settings menu. It is usually represented by a gear or wrench icon.
- Select “Audio” settings: Within the settings menu, look for an option that mentions “Audio,” “Sound,” or “Sound settings.” Use the arrow buttons on your remote control to navigate to this option and press the OK or Select button to access the audio settings.
- Explore the audio settings menu: Once you’re in the audio settings menu, you should see a list of options related to audio output. Look for terms such as “Audio output,” “Audio settings,” or “Audio output format.” These options may vary depending on your Roku TV model.
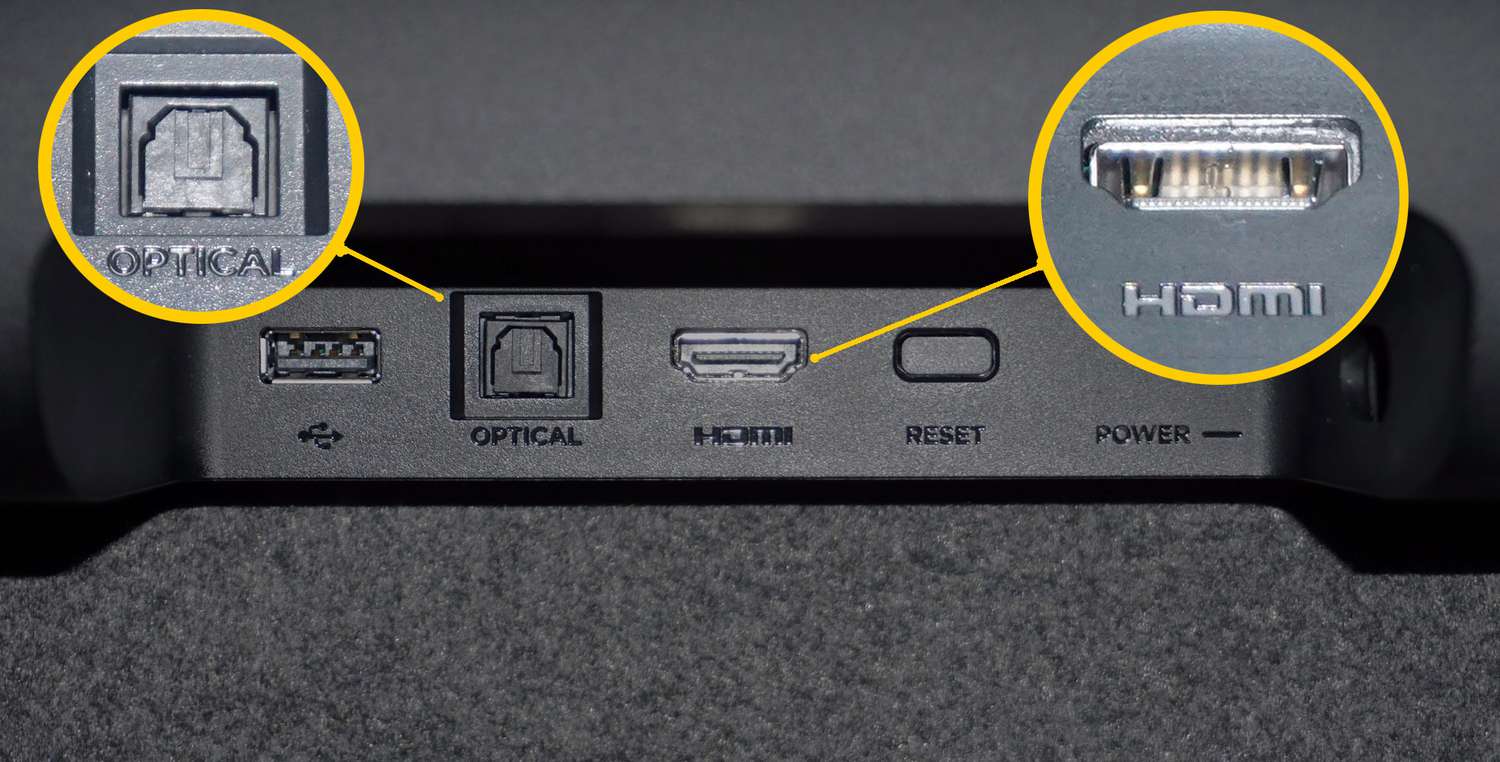
- Identify the available audio outputs: Within the audio settings menu, you will find a list of available audio outputs on your Roku TV. These can include options such as “HDMI ARC,” “Optical Out,” or “AUX Out.” Note down the options available as this information will help you choose the appropriate method to connect your soundbar.
It’s worth mentioning that not all Roku TV models will have the same audio output options. The availability of certain audio outputs like HDMI ARC or optical out may depend on the specific model and its features.
Once you have identified the audio output options on your Roku TV, you’re one step closer to connecting your soundbar. In the next step, we will guide you through the process of connecting the soundbar to your Roku TV using HDMI ARC.
Step 3: Connect the soundbar to your Roku TV using HDMI ARC
Now that you have located the audio output options on your Roku TV, it’s time to connect the soundbar using HDMI ARC (Audio Return Channel). HDMI ARC allows for both audio and video signals to be transmitted through a single HDMI cable, simplifying the setup process. Here’s how you can connect your soundbar to your Roku TV using HDMI ARC:
- Identify the HDMI ARC port: Look for the HDMI ARC port on your Roku TV. It is usually labeled as “HDMI ARC” or “ARC.” This port enables the two-way communication between the TV and the soundbar.
- Connect the HDMI cable: Take the HDMI cable and plug one end into the HDMI ARC port on your Roku TV. Make sure it’s securely connected to avoid any loose connections or interruptions in the audio signal.
- Connect the other end of the HDMI cable: Now, plug the other end of the HDMI cable into the HDMI ARC input on your soundbar. This input is also labeled as “HDMI ARC.”
- Power on the devices: Turn on both your Roku TV and the soundbar. Ensure that they are powered up and ready for use.
- Select the HDMI ARC input on your soundbar: Use the soundbar’s remote control or front panel buttons to select the HDMI ARC input as the active source. This will ensure that the soundbar receives the audio signals from your Roku TV.
- Adjust the volume control: Test the soundbar’s volume control by using the TV’s remote control. If the volume adjusts accordingly, it means the soundbar is properly connected and ready to enhance your TV audio.
Connecting the soundbar to your Roku TV using HDMI ARC simplifies the setup process and allows for seamless communication between the devices. However, it’s important to note that not all Roku TVs or soundbars may have HDMI ARC capability. If your devices do not support HDMI ARC, you can explore other audio connection options such as optical out or AUX out, which will be covered in the next step.
Now that your soundbar is connected using HDMI ARC, it’s time to move on to the next step and set up the soundbar settings on your Roku TV.
Step 4: Set up the soundbar settings on your Roku TV
After successfully connecting your soundbar to your Roku TV, it’s important to set up the soundbar settings on your TV to ensure optimal audio performance. Here’s how you can do it:
- Access the settings menu: Using your Roku TV remote, navigate to the home screen and locate the settings menu. Look for the gear or wrench icon and select it to access the settings.
- Access the audio settings: Within the settings menu, find and select the “Audio” option to access the audio settings. This is where you can adjust the soundbar settings and make necessary adjustments.
- Select the soundbar as the audio output: In the audio settings menu, find the option to select the soundbar as the audio output device. This might be labeled as “Audio output device,” “Soundbar,” or something similar. Choose the soundbar from the available options to ensure that the audio signals are correctly routed through the soundbar.
- Adjust soundbar settings: Depending on your soundbar model, you may have additional settings to customize the sound output. This can include options such as sound modes, equalizer settings, or audio enhancements. Explore these settings and adjust them to your preference to enhance your audio experience.
- Test the soundbar settings: To ensure that the soundbar settings are properly configured, play some audio or video content on your Roku TV. Listen carefully and make adjustments as needed to achieve the desired sound quality and balance. You can also use the remote control of your soundbar to control the volume and make any necessary adjustments on the soundbar itself.
Setting up the soundbar settings on your Roku TV is crucial for optimizing the audio performance. Experiment with the available settings to find the right balance that suits your preferences and maximizes your viewing experience.
With the soundbar settings now properly configured, you’re ready to move on to the next step, where we will explore how to adjust the soundbar and Roku TV settings for optimal sound quality.
Step 5: Adjust the soundbar and Roku TV settings for optimal sound quality
Now that your soundbar is connected and the settings are configured on your Roku TV, it’s time to fine-tune the audio settings for the best sound quality. Adjusting the soundbar and Roku TV settings can help optimize the audio output and provide an immersive experience. Here’s what you can do:
- Balance the audio levels: Play some content on your Roku TV and listen carefully to the sound output. Ensure that the volume levels are balanced between the soundbar and the TV. If the soundbar is overpowering, you may need to adjust the volume settings on both devices to achieve a more balanced sound.
- Explore sound modes: Many soundbars offer various sound modes or presets designed to enhance specific types of content, such as movies, music, or sports. Experiment with these modes to find the one that suits your preferences and provides the best audio performance for the content you’re watching.
- Adjust equalizer settings: Some soundbars allow you to adjust the equalizer settings, enabling customization of the audio frequencies to suit your preferences. Fine-tuning the bass, treble, and other audio frequencies can help enhance the clarity and depth of the sound.
- Enable virtual surround sound: If your soundbar supports virtual surround sound technology, consider enabling it to create a more immersive audio experience. This technology uses audio processing algorithms to simulate surround sound, making you feel like you’re in the middle of the action.
- Explore Roku TV audio settings: In addition to the soundbar settings, make sure to explore the audio settings on your Roku TV. These settings may include options to adjust the audio output format, equalizer settings, or even advanced audio features. Experiment with these settings to find additional ways to enhance the audio output.
Take your time to experiment with different settings and fine-tune them according to your preference. It’s a personal choice, and what sounds best to you may vary from what others find ideal.
By adjusting the soundbar and Roku TV settings for optimal sound quality, you’ll be able to fully enjoy a cinematic sound experience in the comfort of your own home. Once you’re satisfied with the settings, it’s time to move on to the final step and test the soundbar connection.
Step 6: Test the soundbar connection and make adjustments if necessary
After setting up and adjusting the soundbar and Roku TV settings, it’s crucial to test the soundbar connection to ensure that everything is working correctly. Here’s what you can do to test the connection and make any necessary adjustments:
- Play various types of content: Test the soundbar connection by playing different types of content on your Roku TV, such as movies, TV shows, music, or sports events. Pay attention to the sound quality, clarity, and volume levels to ensure they meet your expectations.
- Listen for audio synchronization: Check if the audio is in sync with the video on your Roku TV. If you notice any delay or out-of-sync audio, you may need to make adjustments in the sound settings on your TV or soundbar to correct the issue.
- Make audio adjustments: If you’re not satisfied with the sound quality or balance, you can make further adjustments. This can include fine-tuning the volume levels, changing the sound modes, or adjusting the equalizer settings on your soundbar and Roku TV.
- Ensure consistent audio performance: Test the soundbar connection over a period of time to ensure consistent audio performance. Check for any fluctuations in the sound output, unexpected volume changes, or any other anomalies. If you encounter any issues, refer to the user manual of your soundbar and Roku TV for troubleshooting suggestions.
- Seek professional assistance if needed: If you encounter persistent issues with your soundbar connection or are unable to resolve any challenges on your own, consider seeking assistance from a professional technician or contacting the customer support of your soundbar or Roku TV manufacturer.
It’s important to remember that each setup may be unique, and what works well for one person may require adjustments for another. Take the time to fine-tune the soundbar connection according to your preferences, ensuring an optimal audio experience.
By completing the testing phase and making any necessary adjustments, you can fully enjoy the enhanced sound quality offered by your soundbar and Roku TV combo.
Congratulations! You’ve successfully connected and configured your soundbar to your Roku TV. Sit back, relax, and immerse yourself in a whole new level of audio enjoyment!
Conclusion
Connecting a soundbar to your Roku TV is a fantastic way to enhance your TV viewing experience by enjoying immersive sound and improved audio quality. Throughout this guide, we’ve walked you through the step-by-step process of setting up and connecting your soundbar to your Roku TV.
Starting with gathering the necessary equipment and locating the audio output options on your Roku TV, we then moved on to connecting the soundbar using HDMI ARC. We discussed setting up the soundbar and Roku TV settings to optimize sound quality, adjusting the various audio settings available, and fine-tuning them to your preferences.
Afterwards, we emphasized the importance of testing the soundbar connection and making any necessary adjustments to ensure a seamless audio experience. By playing different types of content, checking for audio synchronization, and listening for consistent performance, you can ensure that your soundbar connection is functioning properly.
Remember, the specific steps and options may vary depending on your Roku TV model and soundbar. Always consult the user manual and support resources provided by the manufacturers for detailed instructions and troubleshooting advice.
Now that you’ve completed the setup process and tested your soundbar connection, it’s time to sit back, relax, and enjoy your favorite movies, TV shows, and sports events with immersive sound and exceptional audio quality.
Upgrade your entertainment experience today by connecting a soundbar to your Roku TV and be prepared to be blown away by the incredible sound coming from your audio setup!