Introduction
Logitech Capture is a powerful software tool that allows you to unleash the full potential of your Logitech webcam. Whether you’re a content creator, a streamer, or simply looking to enhance your video communication, Logitech Capture offers a range of features and settings that can take your videos to the next level. In this guide, we’ll walk you through the process of using Logitech Capture from start to finish.
With Logitech Capture, you can not only record high-quality videos, but also customize your camera settings, apply filters and effects, add text and graphics, and much more. It’s a comprehensive solution that empowers you to produce professional-looking content without the need for expensive equipment or complicated software.
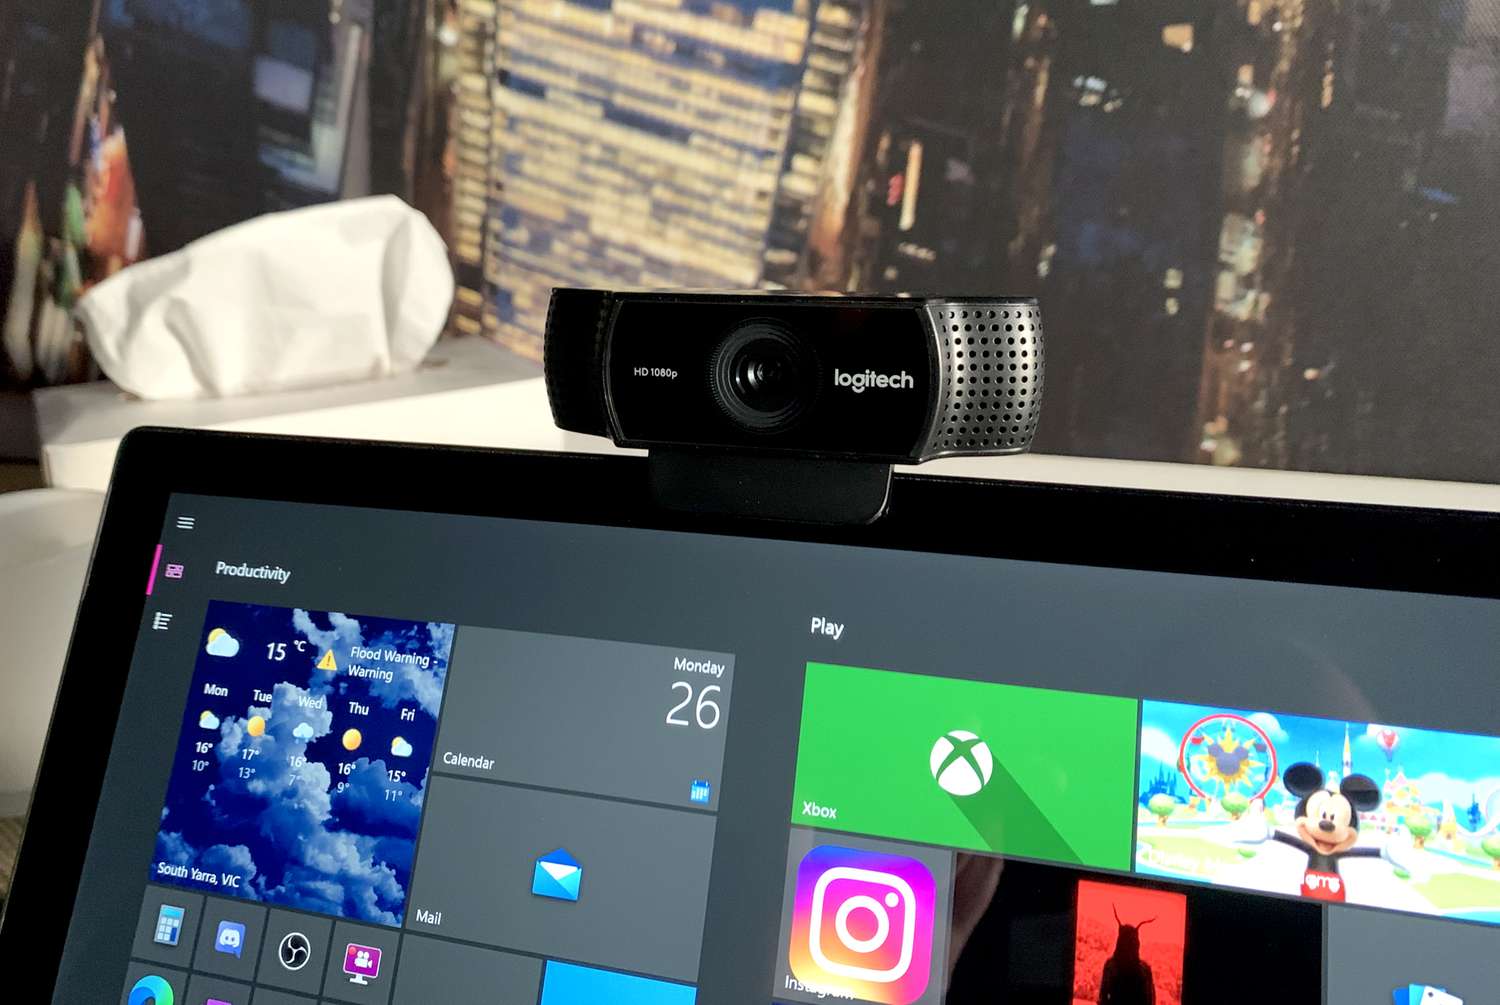
Downloading and installing Logitech Capture is a breeze. Simply visit the Logitech website, locate your specific webcam model, and download the software. Once installed, you’ll be able to connect and set up your webcam with ease. Whether you’re using a Logitech C920 or a Logitech Brio, Logitech Capture is compatible with a wide range of Logitech webcams, ensuring a seamless and intuitive experience.
Understanding the Logitech Capture interface is essential to maximizing its potential. From adjusting camera settings to managing multiple cameras, Logitech Capture offers a user-friendly interface that allows you to effortlessly navigate through its various features. You’ll find options to enhance your video with filters and effects, adjust audio settings, and even add text and graphics to your videos for a personalized touch.
Recording and saving your videos is a straightforward process with Logitech Capture. The software allows you to capture videos in different resolutions and frame rates, ensuring that you have the flexibility to choose the settings that best suit your needs. Once you’re satisfied with your recorded video, Logitech Capture offers convenient sharing options, allowing you to easily showcase your content across different platforms.
Throughout this guide, we’ll provide step-by-step instructions on how to use Logitech Capture effectively. We’ll also address common troubleshooting issues that you may encounter along the way. By the end of this guide, you’ll be equipped with the knowledge and skills to harness the full potential of Logitech Capture and create engaging, professional-quality videos.
Downloading and Installing Logitech Capture
To begin using Logitech Capture, you’ll need to download and install the software. Follow the steps below to get started:
- Visit the Logitech website: Open your web browser and go to the official Logitech website.
- Find your webcam model: Browse through the website to locate your specific Logitech webcam model. Logitech Capture is compatible with a wide range of Logitech webcams, so you’ll likely find your model listed.
- Go to the product support page: Once you’ve found your webcam model, navigate to its product support page.
- Download Logitech Capture: On the product support page, you should find a section dedicated to downloads. Look for the Logitech Capture software and click on the download link.
- Run the installation file: After the software has finished downloading, locate the installation file in your downloads folder or the location where you saved it. Double-click the file to run the installation wizard.
- Follow the installation prompts: The installation wizard will guide you through the setup process. Follow the on-screen instructions to proceed with the installation. You may be asked to agree to the software’s terms and conditions before proceeding.
- Connect your Logitech webcam: Once the installation is complete, connect your Logitech webcam to your computer using the provided USB cable. Ensure that the webcam is securely connected to a USB port.
- Launch Logitech Capture: After connecting your webcam, launch the Logitech Capture software. You can usually find it in your computer’s list of installed programs or search for it in the start menu.
That’s it! You have successfully downloaded and installed Logitech Capture. Now you’re ready to connect and set up your Logitech webcam for optimal performance.
Note: If you encounter any issues during the download or installation process, refer to the troubleshooting section of this guide for possible solutions.
Connecting and Setting Up Your Logitech Device
After installing Logitech Capture, the next step is to connect and set up your Logitech webcam. Follow these steps to ensure a smooth and hassle-free process:
- Connect your webcam: Plug the USB cable of your Logitech webcam into an available USB port on your computer. Make sure the connection is secure.
- Wait for the device to be recognized: Once connected, your computer should automatically recognize the Logitech webcam and install any necessary drivers. This process may take a few moments.
- Launch Logitech Capture: Open the Logitech Capture software on your computer. You can usually find it in your list of installed programs or by searching for it in the start menu.
- Select your Logitech webcam: In the Logitech Capture interface, you should see a list of available webcams. Select your Logitech webcam from the list.
- Check the preview: Once you’ve selected your webcam, the interface will display a live preview of the video feed from your camera. This allows you to ensure that the camera is working correctly.
- Adjust camera settings: Click on the settings icon in the Logitech Capture interface to access the camera settings. Here, you can make adjustments such as resolution, frame rate, autofocus, exposure, and more. Experiment with these settings to achieve the desired video quality.
- Test the microphone (if applicable): If your Logitech webcam has a built-in microphone, ensure that it is properly configured. Open the audio settings in Logitech Capture and check that the correct microphone is selected and the levels are adjusted appropriately.
- Position your webcam: Take some time to position your webcam for the best angle and composition. Consider factors such as lighting, background, and your positioning in the frame to achieve the desired visual effect.
Once you’ve completed these steps, you’re ready to start utilizing your Logitech webcam with Logitech Capture. Remember, you can always revisit the camera settings and make further adjustments as needed to optimize your video recordings.
Now that your Logitech webcam is connected and set up, it’s time to explore the various features and settings of Logitech Capture to enhance your videos. The next section will guide you through the interface and help you understand its functionalities.
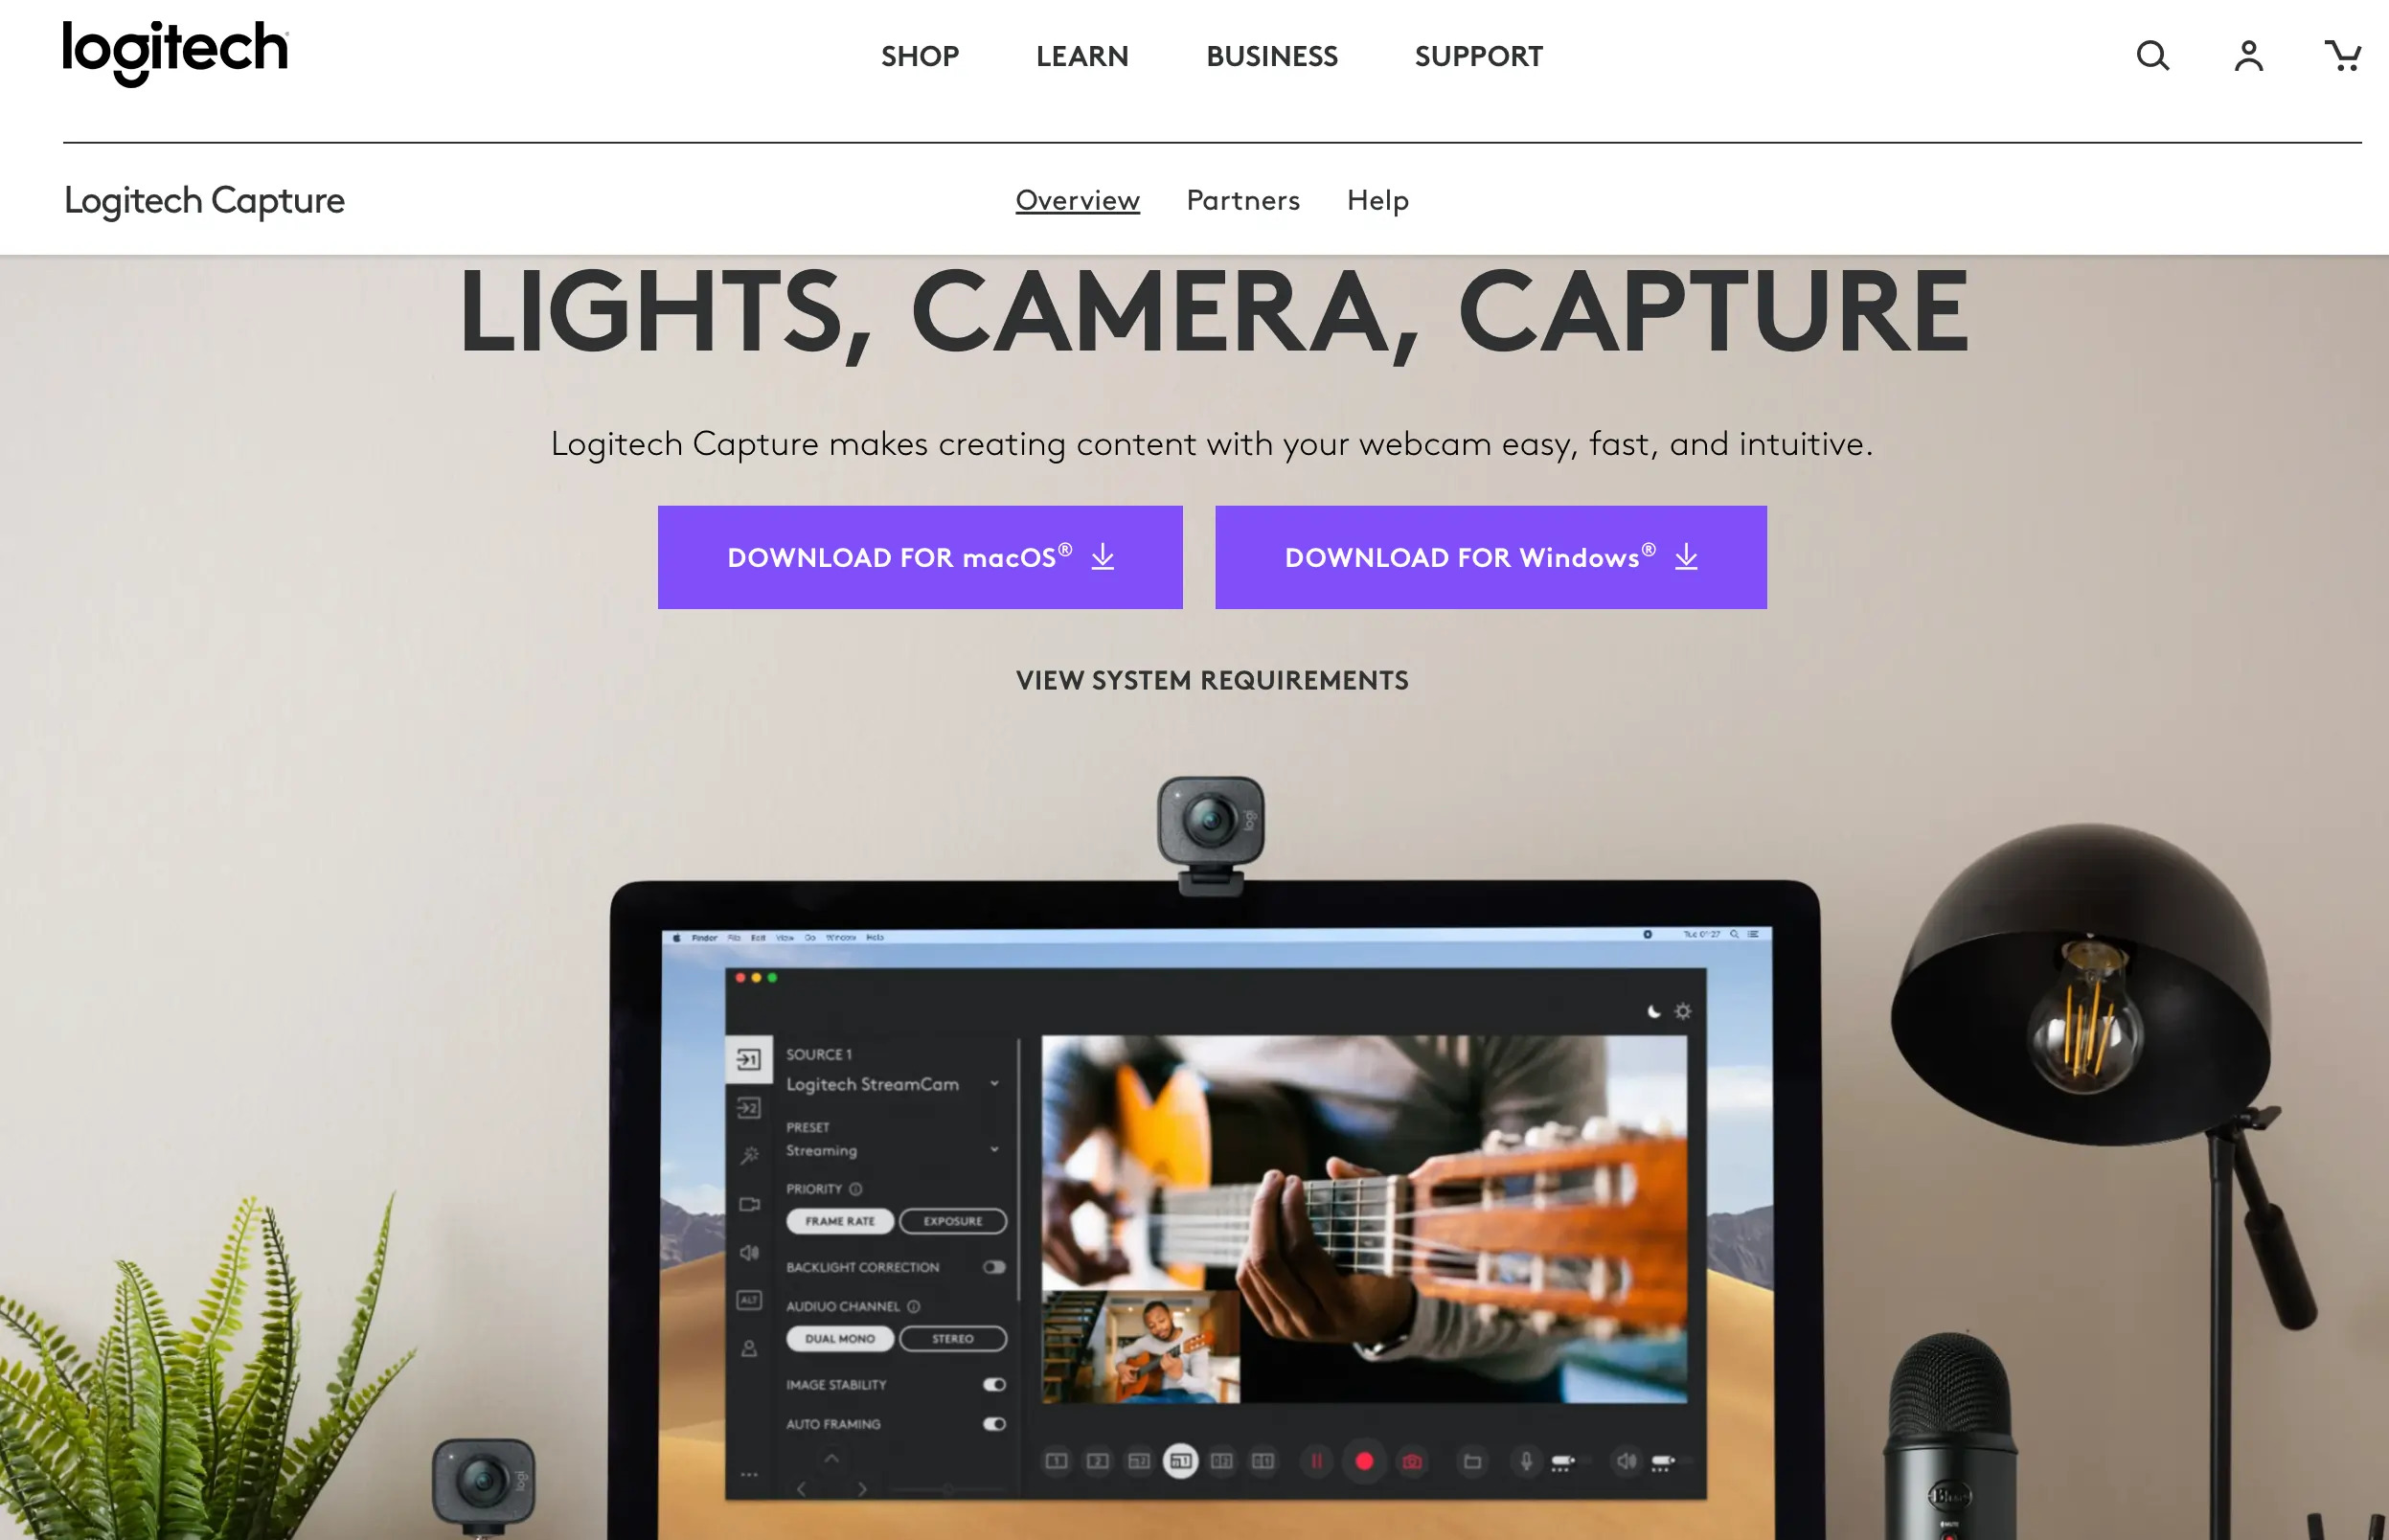
Understanding the Logitech Capture Interface
The Logitech Capture interface serves as the control center for managing and customizing your Logitech webcam settings. By familiarizing yourself with the different elements of the interface, you’ll be able to easily navigate through its features and unleash your creativity. Let’s take a closer look at the key components:
- Live Preview: The live preview window displays a real-time video feed from your Logitech webcam. This allows you to see how you will appear on camera and make adjustments accordingly.
- Settings Menu: The settings icon provides access to camera settings. Here, you can adjust various parameters to fine-tune your video quality, such as resolution, frame rate, autofocus, exposure, and more.
- Multiple Camera Support: If you have multiple Logitech webcams connected to your computer, you can switch between them using the camera switcher. This is particularly useful for content creators or individuals who need to capture videos from different angles or perspectives.
- Filters and Effects: Logitech Capture offers a range of filters and effects that can be applied to enhance the visual appeal of your videos. From color correction to image adjustments, these tools allow you to add a creative touch to your recordings.
- Text and Graphics: The text and graphics feature enables you to overlay text, logos, or graphics onto your videos. This is great for adding captions, branding, or visual elements to personalize your content.
- Recording Controls: The recording controls allow you to start, pause, and stop video recording. You can also set a countdown timer to give yourself time to get ready before recording begins.
- Timeline: The timeline displays the recorded video clips in chronological order. From here, you can easily preview, trim, or delete clips before saving or sharing your final video.
- Save and Share: Once you’re satisfied with your recorded video, you can save it to your computer and choose from various sharing options to distribute your content across different platforms.
Getting acquainted with the Logitech Capture interface may take a little practice, but once you’re familiar with its functionalities, you’ll have full control over your Logitech webcam and be able to produce high-quality videos with ease.
In the next sections, we’ll delve into specific features and settings that Logitech Capture offers, including adjusting camera settings, managing multiple cameras, applying filters and effects, and more.
Adjusting Camera Settings
One of the key features of Logitech Capture is the ability to adjust camera settings to achieve the desired video quality and appearance. By fine-tuning the camera parameters, you can ensure that your videos are crisp, well-lit, and visually appealing. Here’s how you can adjust the camera settings in Logitech Capture:
- Open the settings menu: Click on the settings icon in the Logitech Capture interface. This will open a menu where you can access various camera settings.
- Resolution: Choose the resolution that best suits your needs. Logitech Capture offers a range of options, from standard definition to high definition, depending on your webcam model and capabilities.
- Frame Rate: Adjust the frame rate to determine how smooth your video appears. Higher frame rates result in smoother playback, but may require more processing power and storage space.
- Autofocus: Enable or disable autofocus depending on your requirements. Autofocus can be useful for scenarios where you or objects in the frame may move during recording, ensuring that the subject remains sharp and in focus.
- Exposure: Adjust the exposure to control the amount of light that enters the camera. Increase the exposure in low-light conditions to brighten the image, or decrease it in bright environments to avoid overexposure.
- White Balance: Set the white balance to accurately represent the colors in your video. You can choose from preset options like daylight, fluorescent, or tungsten, or manually adjust the white balance based on the lighting conditions.
- Zoom: If your Logitech webcam supports it, you can adjust the zoom level to capture a closer or wider view. This can be particularly useful when you need to focus on specific details or capture a larger area.
- Pan and Tilt: Some Logitech webcams allow for pan and tilt adjustments, allowing you to change the camera’s horizontal and vertical position. This can be useful for tracking movement or capturing a wider field of view.
Experiment with these camera settings to achieve the desired look and feel for your videos. It’s a good idea to preview the changes in the live preview window to ensure that the adjustments have the desired effect.
Remember, the optimal camera settings may vary depending on factors such as lighting conditions, the subject of your video, and personal preferences. Don’t be afraid to try different settings and see what works best for your specific needs.
Now that you’re familiar with adjusting camera settings, the next section will explore the functionality of managing and switching between multiple cameras with Logitech Capture.
Managing and Switching Between Multiple Cameras
Logitech Capture provides the convenience of managing and switching between multiple cameras, allowing you to capture videos from different angles or perspectives. This feature is particularly useful for content creators, streamers, or anyone who wants to enhance their video content with multi-camera setups. Here’s how you can manage and switch between multiple cameras in Logitech Capture:
- Connect additional Logitech webcams: If you have multiple Logitech webcams, connect them to your computer using the provided USB cables. Ensure each webcam is securely connected.
- Select camera source: In the Logitech Capture interface, click on the camera switcher icon. This will display a list of connected Logitech webcams. Select the desired camera source from the list.
- Preview camera feed: Once you’ve selected a camera source, the live preview window will display the video feed from that particular webcam. Use this preview to ensure that the camera is positioned correctly and capturing the desired angle.
- Switch cameras during recording: If you’re recording a video and want to switch between multiple cameras, you can do so seamlessly within Logitech Capture. Click on the camera switcher icon and select the desired camera source. The software will instantly switch the video feed, allowing you to capture different perspectives without interrupting your recording session.
- Adjust settings for each camera: Logitech Capture allows you to customize settings individually for each connected camera. This means you can fine-tune the resolution, frame rate, exposure, and other parameters for each webcam, optimizing the video quality based on your specific requirements.
With the ability to manage and switch between multiple cameras, Logitech Capture gives you the flexibility to create dynamic and engaging video content. Whether you’re conducting interviews, hosting live events, or simply looking to add variety to your videos, this feature empowers you to experiment and explore different camera setups.
Keep in mind that while Logitech Capture supports multiple cameras, the number of cameras you can connect and use simultaneously may vary depending on your computer’s processing power and available USB ports. It’s always a good idea to check the system requirements and ensure that your computer meets the necessary specifications.
Now that you’re familiar with managing and switching between multiple cameras, the next section will delve into the exciting world of enhancing your videos with filters and effects using Logitech Capture.
Enhancing Video with Filters and Effects
Logitech Capture offers a wide range of filters and effects that can add a creative touch to your videos. Whether you want to enhance the colors, apply artistic effects, or give your videos a professional look, these features allow you to easily customize the visual aesthetics. Here’s how you can enhance your videos with filters and effects in Logitech Capture:
- Open the filters and effects menu: Click on the filters and effects icon in the Logitech Capture interface. This will open a menu where you can explore different options to enhance your video.
- Choose from preset filters: Logitech Capture provides a collection of preset filters that can instantly transform the look of your videos. These filters range from subtle enhancements to bold artistic styles. Preview each filter to see how it affects your video and choose the one that best suits your desired aesthetic.
- Customize filter settings: Logitech Capture also allows you to customize the parameters of each filter, giving you full control over the intensity and specific aspects of the effect. Adjust settings such as brightness, contrast, saturation, or opacity to fine-tune the filter’s impact on your video.
- Add overlays and borders: Along with filters, Logitech Capture enables you to add overlays and borders to your videos. These elements can help you create a professional look or add a personalized touch. Choose from a variety of options such as logos, frames, or customized text overlays.
- Experiment with effects: Logitech Capture offers creative effects that can be applied to your videos. These effects range from artistic styles like pencil sketches or watercolor painting to novelty effects like distortion or mirror image. Play around with different effects to add a unique visual flair to your videos.
- Real-time preview: As you apply filters and effects, the live preview window in Logitech Capture will give you a real-time view of how your video looks. This allows you to make adjustments and fine-tune the settings until you achieve the desired visual result.
By leveraging the filters and effects in Logitech Capture, you can elevate the visual quality and impact of your videos. The ability to customize these elements allows you to create a distinct style and make your videos stand out from the crowd.
Remember, the choice of filters and effects should align with the message and tone of your content. It’s important to strike a balance between enhancing the visual appeal and maintaining the overall purpose of your videos.
In the next section, we’ll explore how to adjust the audio settings in Logitech Capture to ensure clear and high-quality sound in your videos.
Adjusting Audio Settings
Clear and high-quality audio is crucial for creating engaging and professional videos. Logitech Capture offers several audio settings that allow you to ensure optimal sound recording with your Logitech webcam. Here’s how you can adjust the audio settings in Logitech Capture:
- Open the audio settings: Click on the audio settings icon in the Logitech Capture interface. This will bring up the audio settings menu where you can make adjustments.
- Select the microphone source: If you have multiple microphones connected to your computer, choose the correct microphone source from the list. Logitech Capture will capture audio from the selected microphone.
- Adjust the microphone levels: Ensure that the microphone levels are appropriately balanced. You can adjust the input volume to prevent audio distortion or make it louder if the sound is too soft. It’s recommended to do a test recording and adjust the levels accordingly.
- Enable noise suppression: Logitech Capture offers a noise suppression feature that helps reduce background noise during recording. Enable this feature to improve the clarity and quality of your audio.
- Monitor audio levels: The audio level meter in Logitech Capture allows you to visually monitor the sound input. Make sure the audio levels are within an optimal range to avoid clipping or distortion.
- Test audio playback: Logitech Capture also provides a playback feature that allows you to listen to recorded audio clips. Use this feature to ensure that the audio sounds clear and balanced. If necessary, make further adjustments to the microphone levels or noise suppression settings.
By adjusting the audio settings in Logitech Capture, you can enhance the overall quality of your videos. Clear and crisp audio not only improves the viewer’s experience but also ensures that your message is effectively conveyed.
In addition to the built-in microphone of your Logitech webcam, you can also use external microphones for improved audio quality. Logitech Capture allows you to select the desired microphone source, giving you the flexibility to choose the most suitable option for your recording setup.
Remember to consider the acoustic environment and minimize any potential sources of background noise that may affect the audio recording. Using a quiet and controlled setting can greatly improve the clarity of the audio in your videos.
Now that you’ve adjusted the audio settings, it’s time to explore how to add text and graphics to your videos using Logitech Capture.
Adding Text and Graphics to Your Videos
Logitech Capture allows you to add text and graphics to your videos, providing a personalized touch and enhancing the visual appeal of your content. Whether you want to include captions, overlay logos, or create custom graphics, here’s how you can add text and graphics to your videos using Logitech Capture:
- Click on the text and graphics icon in the Logitech Capture interface. This will open the text and graphics editor.
- Choose the type of element you want to add: Logitech Capture offers options to add text, logos, overlays, and lower-thirds. Select the desired element based on your specific requirements.
- Customize the element: Once you’ve chosen the type of element, you can customize it further. Edit the text, choose the font style, adjust the size and position, and even set the transparency level. With logos and overlays, you can upload and position your own images.
- Apply animations (if available): Logitech Capture provides animations that can be applied to text and graphics elements, adding dynamic movement to your videos. You can choose from various animation styles to make your content more visually engaging.
- Preview the final result: As you make changes to the text and graphics, the live preview window in Logitech Capture will display the video with the added elements. This allows you to visualize how the text and graphics will appear in the final video.
- Save and apply: Once you’re satisfied with the text and graphics placement, click the “Apply” button to overlay them onto your video. The applied elements will then be included in your recording.
Adding text and graphics can be a powerful way to convey additional information, highlight key points, or reinforce your branding. It allows you to customize your videos and make them more visually appealing and engaging for your audience.
When using text and graphics, it’s important to strike a balance between their visibility and the main focus of your video. Avoid cluttering the screen with excessive elements that may distract from the main content.
Experiment with different styles, fonts, and placements to find the best combination that aligns with your video’s purpose and enhances its overall impact. The ability to add these text and graphics elements in Logitech Capture offers a great opportunity for customization and creativity.
Next, we’ll explore the process of recording and saving your videos using Logitech Capture.
Recording and Saving Your Videos
Logitech Capture provides a seamless and user-friendly experience when it comes to recording and saving your videos. Whether you’re creating vlogs, tutorials, or video presentations, Logitech Capture offers a range of options to ensure your recordings are saved in the desired format and quality. Here’s how you can record and save your videos using Logitech Capture:
- Position yourself or the subject in the frame: Before starting the recording, make sure you are correctly positioned or your subject is in the desired frame. Take into consideration factors such as lighting, background, and camera angle to achieve the visual effect you want.
- Click on the record button in the Logitech Capture interface to start your recording. You can also use the hotkey shortcut if you’ve set it up.
- During the recording, you can pause and resume the video by clicking the pause button. This is useful if you need to take breaks or want to stitch multiple segments together later.
- When you’re finished recording, click the stop button to end the recording. The captured video will be automatically saved to your computer.
- Logitech Capture allows you to choose the destination folder for your saved videos. You can specify the location where you want your recordings to be saved by setting the default folder in the settings menu.
- You can also customize the video resolution, frame rate, and format by accessing the recording settings in Logitech Capture. Choose the settings that best suit your needs and preferences.
- After saving your video, you can review it using the built-in playback feature in Logitech Capture. This allows you to preview your recording and ensure that everything looks and sounds as intended.
Logitech Capture simplifies the process of recording and saving your videos, allowing you to focus on creating content without the need for complex workflows or external software.
Keep in mind that the final video quality and size will depend on the selected settings and the capabilities of your Logitech webcam. It’s important to strike a balance between video quality and file size, especially if you intend to share or upload your recordings.
By understanding the recording and saving process in Logitech Capture, you can confidently capture your videos and store them in the desired format and location.
Now that you have saved your videos, the next section will guide you through the options for sharing your content.
Sharing Your Captured Videos
Once you’ve recorded and saved your videos using Logitech Capture, you’ll likely want to share them with others. Logitech Capture offers convenient options for sharing your content across various platforms and channels. Here’s how you can share your captured videos:
- Locate your saved videos: Open the folder where Logitech Capture saves your recorded videos. By default, the videos are saved to the specified destination folder on your computer.
- Select the video you want to share: Browse through the list of saved videos and choose the one you want to share. You can select multiple videos if desired.
- Choose your sharing method: Logitech Capture offers multiple ways to share your videos. You can upload them directly to video-sharing platforms like YouTube or Vimeo, or share them on social media platforms, such as Facebook or Twitter. Additionally, you can send the videos via email or transfer them to external storage devices.
- Upload to video-sharing platforms: If you want to share your video on a video-sharing platform, Logitech Capture provides options to directly upload your video. Simply follow the prompts to connect your account and choose the desired settings, such as video title, description, tags, and privacy settings.
- Share on social media: Logitech Capture allows you to share your videos on popular social media platforms. With a few clicks, you can post your videos on platforms like Facebook, Twitter, Instagram, or any other social media platform you prefer.
- Email or transfer your videos: If you want to share your videos privately, you can send them via email or transfer them to external storage devices such as USB drives or cloud storage platforms.
When sharing your captured videos, consider the platform or audience for which the content is intended. Each platform may have specific guidelines or recommendations for video format, size, or resolution. It’s worth checking the requirements beforehand to ensure your videos are shared in the best possible quality.
Logitech Capture simplifies the sharing process, allowing you to easily distribute your videos to your desired online destinations or personal networks. The flexibility provided by Logitech Capture ensures that your content reaches the target audience effectively.
Now that you’re familiar with sharing your captured videos, the next section will address common troubleshooting issues that may arise while using Logitech Capture.
Troubleshooting Common Issues
While Logitech Capture is a reliable and user-friendly software, you may encounter some common issues along the way. Here are some troubleshooting tips to help you address and resolve these issues:
- Ensure proper installation: If Logitech Capture is not functioning properly, make sure that it is correctly installed on your computer. Reinstall the software if needed and ensure that you have the latest version available.
- Check webcam connections: If your Logitech webcam is not being recognized or is not functioning, check the USB connection. Ensure that the webcam is securely connected to an available USB port. Try connecting the webcam to a different USB port or using a different USB cable if necessary.
- Update drivers: Outdated webcam drivers can cause compatibility issues with Logitech Capture. Visit the Logitech website or your computer manufacturer’s website to download and install the latest drivers for your webcam.
- Restart your computer: Sometimes, a simple restart can resolve minor software conflicts or system glitches. Restart your computer and relaunch Logitech Capture to see if the issue persists.
- Adjust camera and audio settings: If you’re experiencing issues with video quality or audio, check the settings in Logitech Capture. Ensure that the camera resolution, frame rate, and audio levels are properly configured for optimal performance.
- Check system requirements: Logitech Capture has specific system requirements. Ensure that your computer meets the minimum requirements for the software to function smoothly. Insufficient system resources can cause performance issues, lag, or freezing.
- Refer to the user manual or online resources: Logitech provides user manuals and online support resources for their webcams and Logitech Capture. Consult these resources for detailed troubleshooting steps or search for common issues specific to your webcam model.
- Contact customer support: If you’ve tried the troubleshooting steps above and are still experiencing issues, reach out to Logitech customer support for further assistance. They can provide personalized recommendations or help resolve any specific issues you may be facing.
Remember, troubleshooting steps may vary depending on your specific situation and webcam model. It’s always a good idea to refer to the product documentation or seek support from Logitech if needed.
By addressing common issues and resolving them promptly, you can ensure a smooth and satisfactory experience when using Logitech Capture.
Now that we’ve covered troubleshooting, let’s summarize what you’ve learned and conclude the guide to using Logitech Capture effectively.
Conclusion
Logitech Capture is a powerful software tool that empowers users to unlock the full potential of their Logitech webcams. With its range of features, intuitive interface, and customizable settings, Logitech Capture provides a seamless and user-friendly experience for recording, editing, and sharing videos.
In this guide, we covered the key aspects of using Logitech Capture effectively. We started by downloading and installing the software, ensuring a smooth setup process. We then explored connecting and setting up Logitech webcams, understanding the interface, adjusting camera settings, managing multiple cameras, enhancing videos with filters and effects, adjusting audio settings, and adding text and graphics. We also discussed the process of recording and saving videos, as well as sharing them across platforms.
Throughout the guide, we emphasized the importance of creativity and customization while using Logitech Capture. By experimenting with different settings, adding text and graphics, and applying filters and effects, users can add a personal touch and elevate the visual appeal of their videos. Additionally, troubleshooting common issues ensures a smooth experience and allows users to overcome any challenges that may arise.
As you continue to explore Logitech Capture, don’t be afraid to unleash your creativity and experiment with different features. Take advantage of the software’s capabilities to create professional-quality videos that captivate your audience.
Remember to refer to the Logitech user manual, online resources, and customer support for specific guidance and assistance tailored to your webcam model and individual requirements.
Now that you have a comprehensive understanding of Logitech Capture, it’s time to dive in and bring your videos to life. Enjoy the journey of creating captivating and engaging content with the power of Logitech Capture!