Introduction
Welcome to the world of Instagram filters! In today’s digital age, social media platforms like Instagram have become the go-to place for sharing photos and displaying our creativity. One of the standout features of Instagram is its wide array of filters that allow users to enhance their photos with just a few taps.
Filters, in the context of Instagram, are like digital lenses that add a layer of visual effects to your photos. From giving your images a vintage feel to making them pop with vibrant colors, filters are a powerful tool for transforming your ordinary pictures into eye-catching masterpieces.
Using filters can help you establish a consistent aesthetic or theme for your Instagram feed, creating a cohesive and visually appealing look. Whether you’re a professional photographer or just someone who loves capturing everyday moments, learning how to use filters effectively can significantly elevate the quality of your Instagram content.
In this article, we will explore the different aspects of using filters on Instagram. From choosing the right filter to applying them to your photos, adjusting intensity, and even creating your own unique filters, we will cover everything you need to know to make the most out of this feature.
So, if you’re ready to dive into the art of Instagram filters and take your photography skills to the next level, let’s get started!
Choosing the Right Filter
When it comes to choosing the right filter for your Instagram photo, the options can be overwhelming. With dozens of filters to choose from, each offering a unique style and mood, it’s essential to select the one that best complements your image and conveys the desired message.
Start by considering the subject matter and the overall tone of your photo. If you’re capturing a stunning landscape, filters that enhance the colors and bring out the details might be a good choice. On the other hand, if you’re sharing a more intimate portrait, a filter that softens the lighting and adds a subtle glow can create a dreamy and ethereal effect.
Another factor to consider is the mood you want to evoke. Instagram filters range from warm and cozy tones to cool and vibrant ones. For a sunny beach photo, you might opt for a filter with warm hues that enhance the golden hour atmosphere. If you’re posting a moody evening shot, a filter with cooler tones may help intensify the ambiance.
Experimenting with different filters is also a great way to discover new styles and find your signature look. You can apply a filter and compare it with the original photo by tapping on the filter once it’s selected. Slide your finger across the screen to adjust the intensity and find the perfect balance that enhances your photo without overpowering it.
Remember, there’s no right or wrong choice when it comes to filters. It’s all about personal preference and how you want your photos to be perceived. So, don’t be afraid to get creative and try out different options until you find the one that perfectly suits your vision for each photo.
Now that you have an understanding of how to choose the right filter for your Instagram photos, let’s move on to the next step: applying filters!
Applying Filters
Once you have selected the perfect filter for your Instagram photo, it’s time to apply it and bring your image to life. Applying filters on Instagram is a simple and straightforward process that can be done in just a few taps.
To apply a filter, follow these steps:
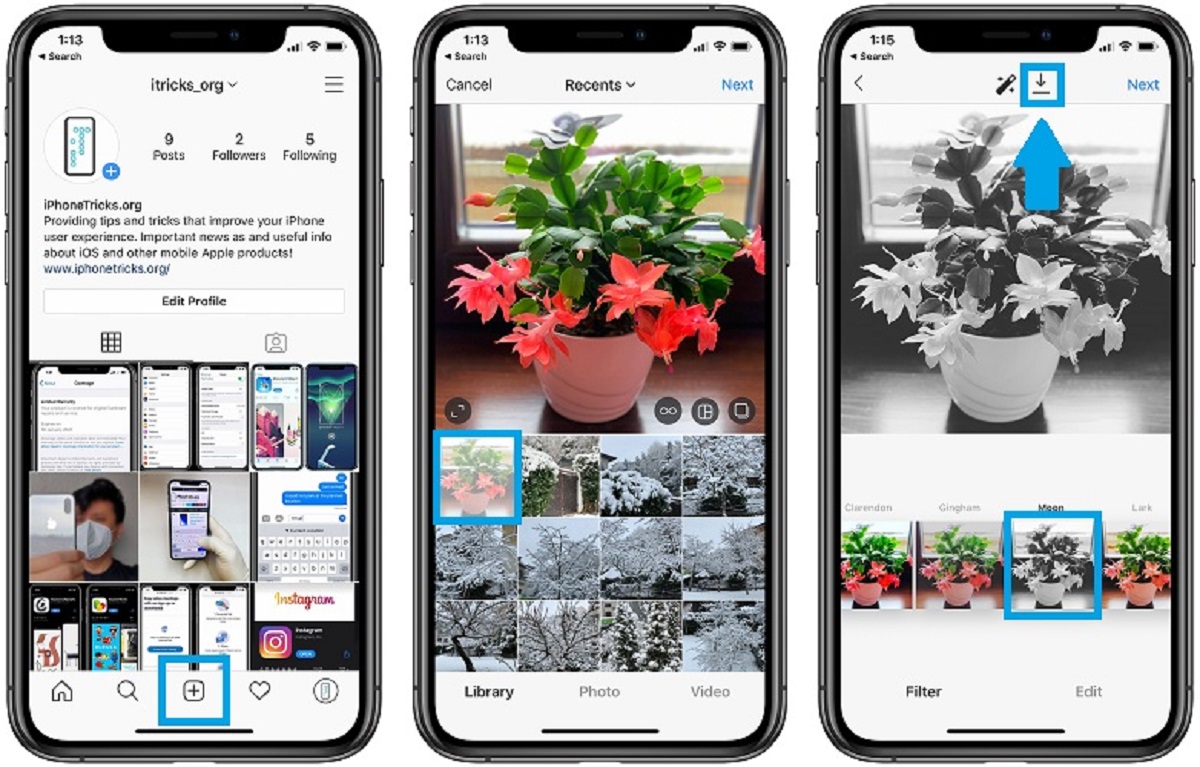
- Open the Instagram app on your mobile device and tap the camera icon located at the bottom center of the screen.
- Select the photo you want to edit from your camera roll or take a new picture using the Instagram camera.
- Once you have chosen your photo, you will see a series of filters displayed along the bottom of the screen. Swipe left or right to browse through the different options.
- As you swipe through the filters, the preview of your photo will change in real-time, allowing you to see the effect of each filter on your image.
- When you find the desired filter, simply tap on it to apply it to your photo. The filter will be immediately added, enhancing your image with its unique style and visual effects.
After applying a filter, you can further customize the look of your photo by adjusting the intensity. To do this, simply tap on the filter once it’s selected, and a sliding bar will appear. Slide your finger left or right to increase or decrease the intensity of the filter effect.
It’s important to note that Instagram also provides additional editing tools that can be used in conjunction with filters. These tools allow you to make further adjustments to things like brightness, contrast, saturation, and more. To access these tools, tap on the Edit icon located on the bottom right of the screen after selecting a filter.
By combining filters with these editing tools, you can fine-tune your photo to achieve the desired look and align it with your creative vision.
With your selected filter applied and any desired adjustments made, your photo is now ready to be saved and shared with the world. In the next section, we will explore saving and sharing filtered photos on Instagram.
Adjusting Filter Intensity
Instagram provides the flexibility to adjust the intensity of the filters to suit your preferences and highlight the best features of your photos. The ability to fine-tune the filter intensity allows you to create a more personalized and tailored look for your images.
When you apply a filter to your photo, you have the option to adjust its intensity. Here’s how:
- Select a photo and choose a filter by swiping left or right on the available options.
- Once you have applied a filter, tap on it to reveal a sliding bar at the bottom of the screen.
- Slide your finger to the left to decrease the intensity of the filter or to the right to increase it.
- Observe the changes in real-time as you adjust the intensity, allowing you to find the perfect balance that enhances your photo without overpowering it.
By adjusting the filter intensity, you can tailor the visual effects to match the specific characteristics and mood of your photo. For example, if the filter you’ve chosen adds too much saturation, toning down the intensity can create a more natural and balanced look. On the other hand, increasing the filter intensity can make colors more vibrant and add an artistic touch to your image.
It’s worth noting that not all filters provide the same level of adjustment. Some filters offer a broader range of intensity variations, while others may have more subtle changes. Take the time to experiment with different filters and their intensity levels to find the perfect combination that suits your style.
Remember, adjusting the filter intensity is a personal preference, and there are no strict rules. It’s all about enhancing your photo in a way that best portrays your vision and resonates with your audience.
Now that you have mastered adjusting the intensity of Instagram filters, let’s explore some of the advanced editing tools that can be utilized alongside filters to further enhance your photos.
Using Advanced Editing Tools with Filters
While filters alone can greatly enhance the appearance of your photos on Instagram, the platform also offers a range of advanced editing tools to further refine and perfect your images. These tools allow you to make precise adjustments to various aspects such as brightness, contrast, saturation, sharpness, and more.
Here’s how you can take advantage of the advanced editing tools in conjunction with filters:
- Select a photo and apply a filter of your choice.
- After applying the filter, tap on the Edit icon located on the bottom right of the screen.
- You will now have access to a variety of editing tools such as brightness, contrast, saturation, highlights, shadows, and more.
- Adjust the sliders for each editing tool to fine-tune the specific aspects of your photo.
- As you make changes, observe how they interact with the filter you’ve applied and how they affect the overall look of the image.
Using the advanced editing tools allows you to have more control over the final outcome of your photo. You can tweak the brightness to ensure the subject stands out, increase the contrast for a more dynamic image, adjust the saturation to bring out the colors, or play with the highlights and shadows to add depth and dimension.
Furthermore, Instagram also provides tools like cropping, rotation, and perspective correction that allow you to fine-tune the composition of your photo. You can straighten horizons, eliminate distracting elements, or even experiment with different aspect ratios to enhance the visual impact.
By combining the power of filters with the advanced editing tools, you can create stunning and unique visuals that truly reflect your artistic vision and style. These tools enable you to transform your photos into captivating pieces of art that stand out in the sea of images on Instagram.
Now that you are familiar with the advanced editing tools available on Instagram, let’s move on to the next section where we will explore how to save and share your filtered photos.
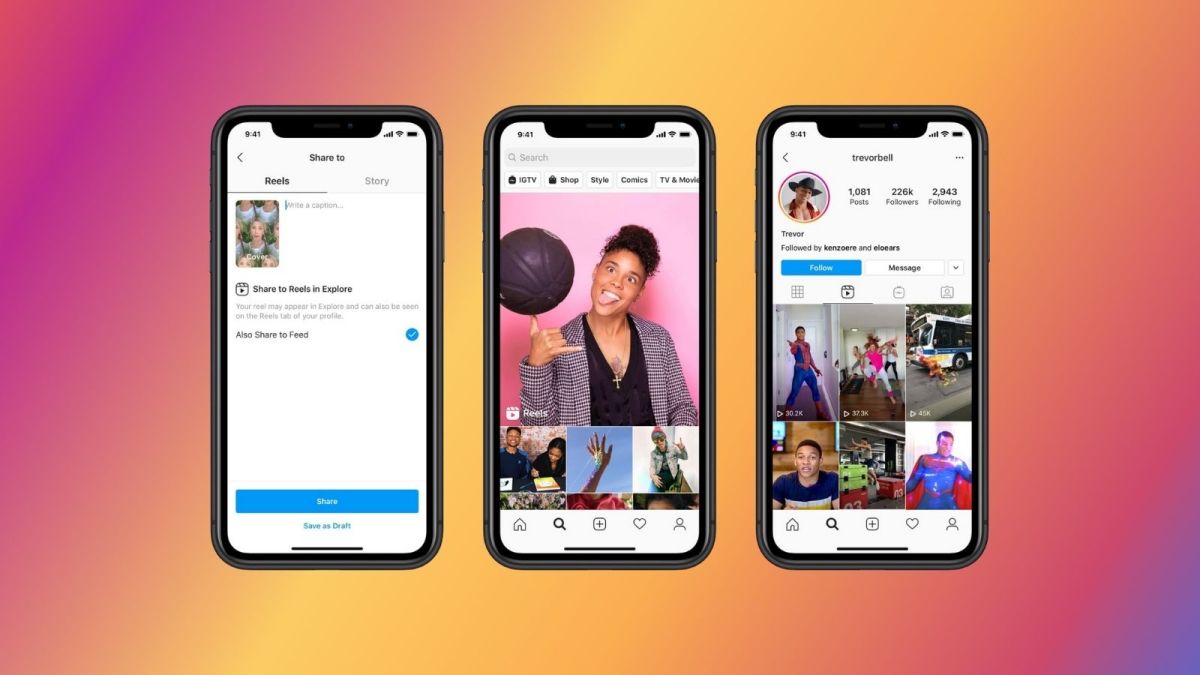
Saving and Sharing Filtered Photos
Once you have applied filters and made any additional adjustments to your photo, it’s time to save and share your masterpiece on Instagram. Here’s how you can save and share your filtered photos:
- After applying filters and making edits, tap on the Next button located in the top right corner of the screen.
- You will be taken to the final editing screen where you can add captions, tag people, and include hashtags. Write a compelling caption that complements your photo and engages your audience.
- Consider using relevant hashtags to increase the discoverability of your post. Hashtags help users find content related to specific topics, events, or themes.
- Tag any relevant people or accounts in your photo. This not only gives credit to the people involved but also increases the chances of your photo being seen by a wider audience.
- Once you have written the caption and added any necessary tags, tap on the Share button located in the top right corner of the screen.
- Your filtered photo will now be shared on your Instagram feed, visible to your followers and potentially discoverable by others through hashtags and tagging.
Additionally, you can choose to share your filtered photo on other social media platforms like Facebook, Twitter, or Tumblr by linking your Instagram account. This helps expand your reach and allows you to connect with a broader audience.
It’s important to note that saving the filtered photo to your device is slightly different from sharing it on Instagram. When you save the photo, it saves with the applied filter and any adjustments made, maintaining the enhanced look. To save the filtered photo to your device, simply tap on the Download button or the Save Photo option, depending on your device.
Remember, a well-edited and visually captivating photo combined with compelling captions and relevant hashtags can significantly increase the engagement and reach of your post. So, take the time to craft an engaging message that resonates with your audience.
Now that you know how to save and share your filtered photos, let’s uncover some hidden filters on Instagram in the next section.
Exploring Hidden Filters
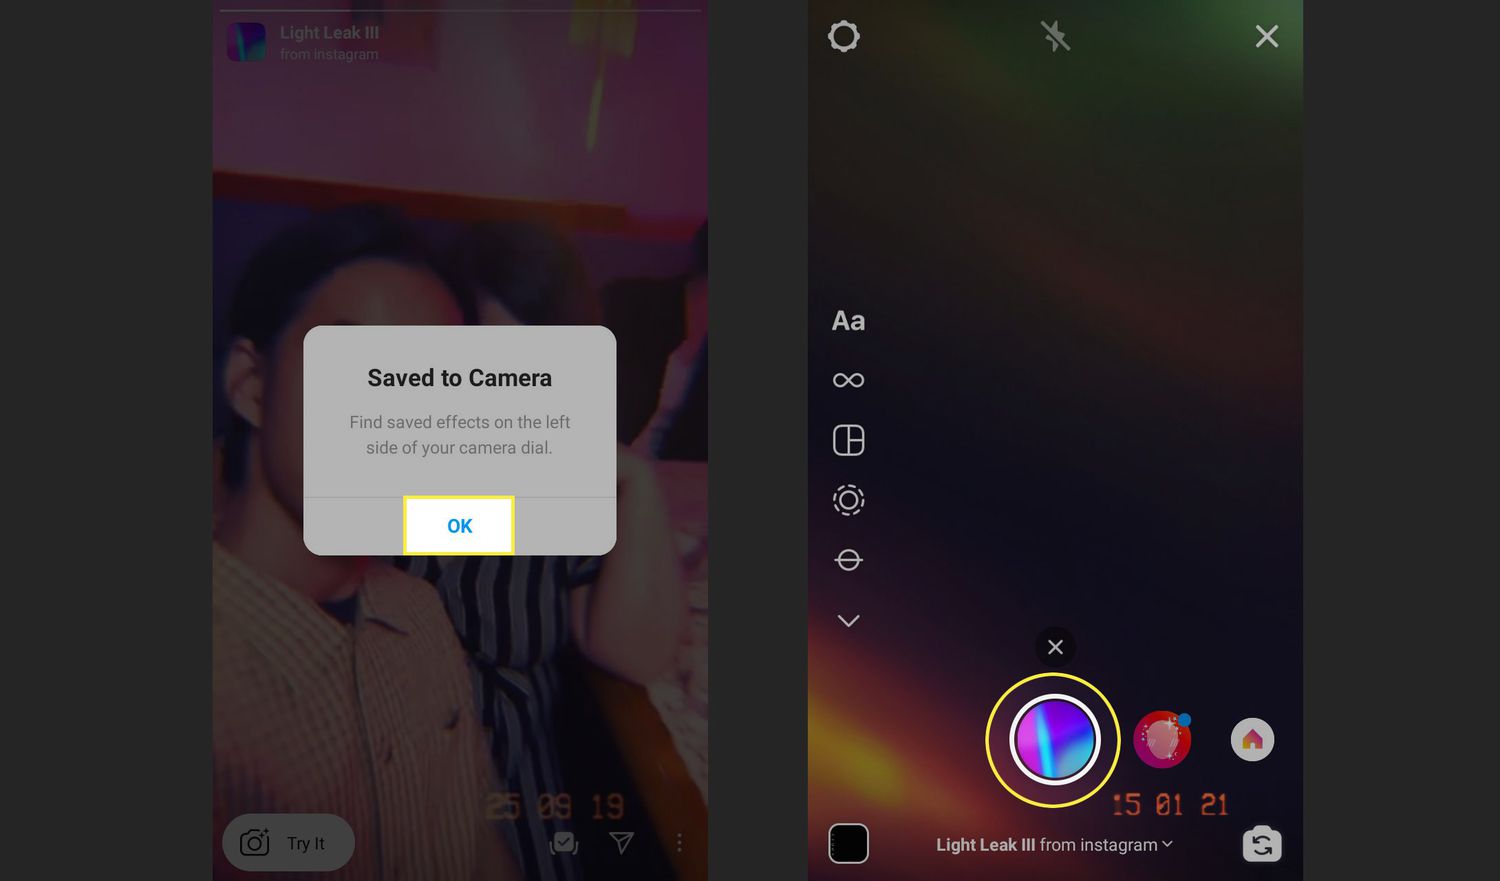
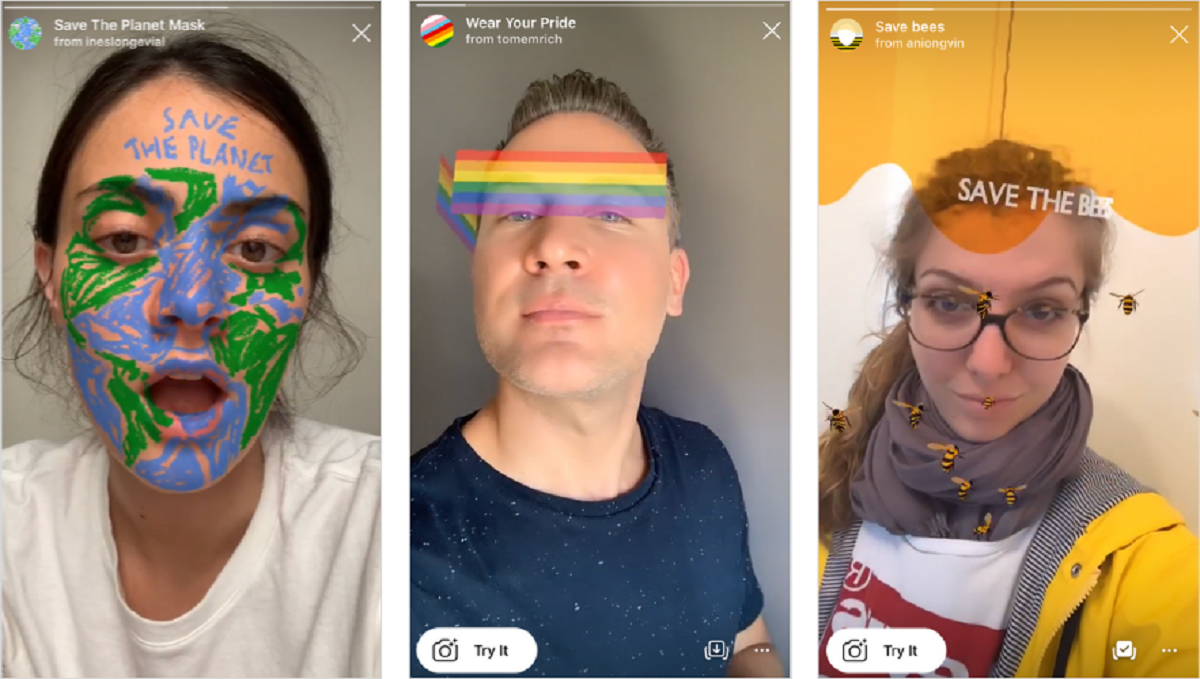
While Instagram offers a wide range of default filters for you to choose from, there are also hidden filters that can add a unique touch to your photos. These hidden filters are not readily visible in the filter selection menu, but with a little exploration, you can unlock their creative potential. Here’s how you can discover and access hidden filters on Instagram:
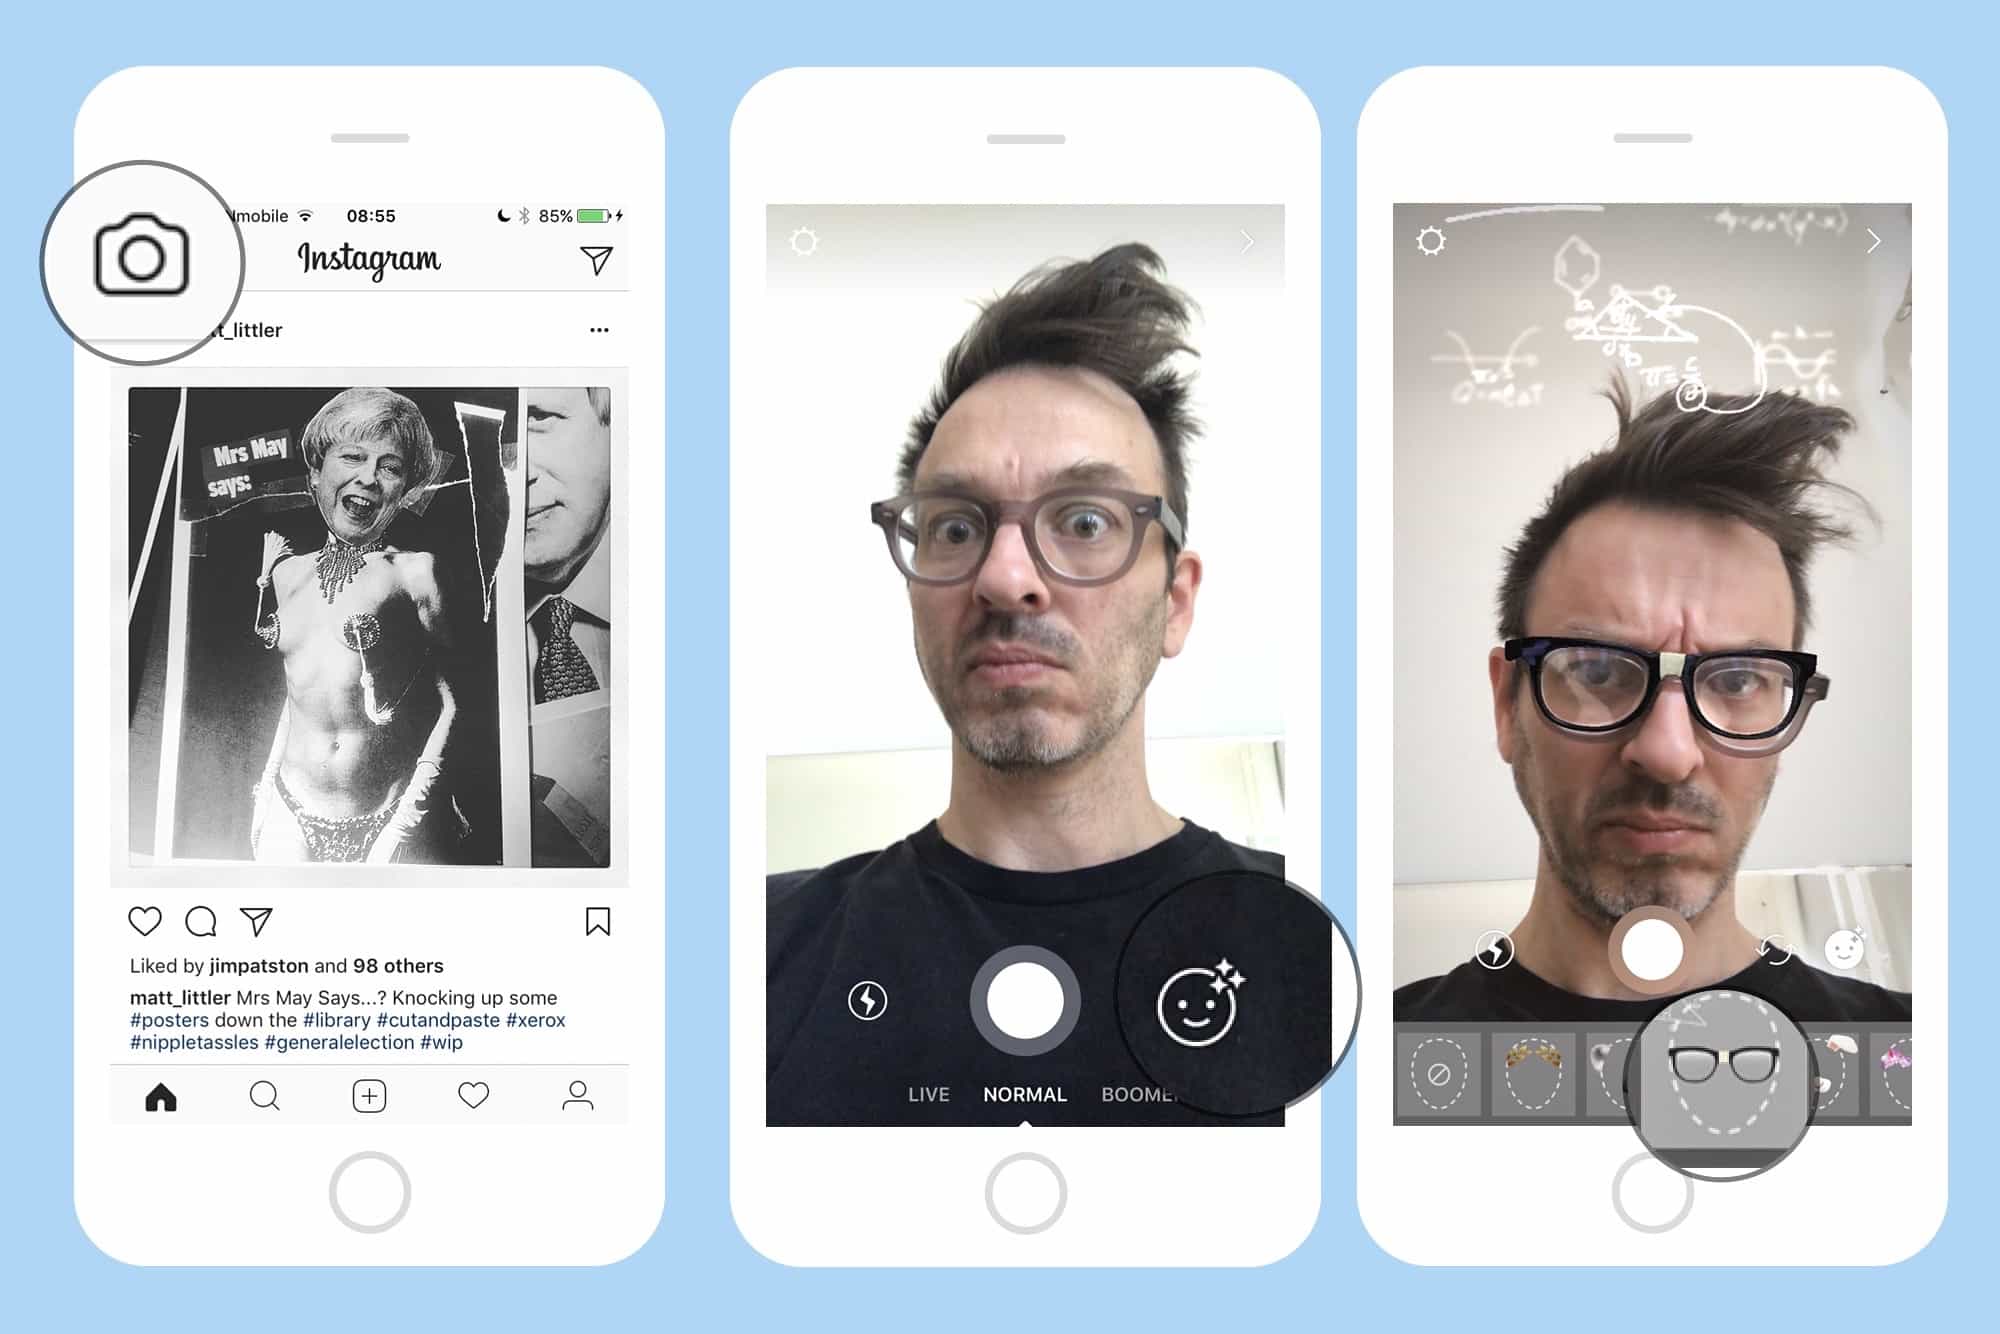
- Open the Instagram app on your mobile device and tap on the camera icon to access the camera screen.
- Swipe left on the filter selection menu to reach the end of the available filters.
- Once you have reached the end, you will notice a small smiley face icon (or another symbol) appear, indicating that there are hidden filters to be found.
- Tap on the smiley face icon to reveal a collection of hidden filters that you can now access.
- Scroll through the hidden filters and experiment with different combinations to find the ones that resonate with your style and vision.
- Once you have found a hidden filter that you like, apply it to your photo and make any necessary adjustments.
- Proceed with saving and sharing your filtered photo as you normally would.
Exploring the hidden filters allows you to add a unique and unexpected element to your photos. These filters often offer unconventional and distinctive visual effects that can set your images apart from the rest. So, don’t hesitate to delve into the hidden filter collection and let your creativity shine.
Keep in mind that Instagram occasionally updates its hidden filters, so it’s worth checking from time to time to see if any new filters have been added. This way, you can stay ahead of the curve and continue to surprise your audience with fresh and captivating content.
Now that you know how to uncover hidden filters, let’s dive into the exciting world of creating your own unique filters on Instagram.
Creating Your Own Unique Filters
If you’re looking to give your Instagram photos a truly original and personal touch, why not create your own unique filters? Instagram provides a variety of tools and features that allow you to customize the look and feel of your photos, giving them a distinct style that is entirely your own. Here are some ways to create your own unique filters on Instagram:
- Start with a Reference Image: Find a photo that embodies the aesthetic or style you want to achieve. This will serve as your reference image as you create your filter.
- Use the Editing Tools: Instagram’s editing tools such as brightness, contrast, saturation, and more can help you fine-tune the overall look of your reference image. Experiment with different settings to achieve the desired effect.
- Save Your Edits: Once you’re satisfied with the adjustments you’ve made to your reference image, save it as a separate file. This will serve as the base for your custom filter.
- Explore Third-Party Apps: There are several third-party apps available that offer more advanced editing capabilities and filter customization options. These apps allow you to create and save your own unique filters, which can then be applied to your Instagram photos.
- Experiment with Texture and Overlays: To add an extra layer of creativity to your filters, consider using textures or overlays. These elements can add depth, character, and unique effects to your photos.
- Save and Apply Your Custom Filter: Once you have created your custom filter, save it within your editing app or export it as an image file. You can then apply this filter to your photos directly in the Instagram app.
- Keep Refining and Experimenting: Creating your own unique filters is an ongoing process of experimentation and refinement. Continuously tweak and adjust your filters until you achieve the desired look and feel.
Creating your own unique filters allows you to truly express your creativity and establish a distinctive visual style on Instagram. Whether you want to create a vintage-inspired filter, a whimsical dream-like effect, or a bold and vibrant look, the possibilities are endless.
Remember, the key to creating successful custom filters is to experiment, have fun, and let your imagination run wild. Develop your own signature style and watch your photos stand out in the Instagram feed.
Now that you’re equipped with the knowledge of creating your own unique filters, let’s move on to some tips for using filters on Instagram successfully.
Tips for Using Filters on Instagram Successfully
Now that you have a good understanding of how to use filters on Instagram, let’s explore some tips to help you make the most out of this feature and create stunning visuals:
- Consistency is Key: Try to establish a consistent theme or aesthetic for your Instagram feed by using the same or similar filters for a cohesive look. This helps create a visually pleasing and harmonious feed.
- Consider Your Audience: Before applying a filter, think about the preferences and expectations of your target audience. Understanding their tastes can help you choose filters that resonate with them and increase engagement.
- Enhance, Don’t Oversaturate: While filters can enhance the appearance of your photos, be mindful not to overdo it. Use the filter intensity slider to strike a balance that enhances your photo without making it look overly edited.
- Experiment with Different Filters: Don’t be afraid to try various filters and combinations to discover new styles and effects. Explore both the standard and hidden filters to find the ones that best complement your photos.
- Keep It Natural: If you prefer a more natural look for your photos, opt for filters that subtly enhance the colors and details without drastically changing the image. This can give your photos an authentic and organic feel.
- Use Filters as a Starting Point: Filters are a great foundation, but don’t be afraid to further customize your photos using the advanced editing tools. Fine-tune settings such as brightness, contrast, and sharpness to polish your images.
- Consider Context and Story: Choose filters that enhance the mood and complement the story behind your photo. Think about how the filter contributes to the overall narrative and helps convey the emotion or message you want to communicate.
- Go Beyond Filters: Remember that filters are just one aspect of photo editing on Instagram. Explore other editing tools, such as cropping, rotation, and perspective correction, to further refine and enhance your photos.
- Seek Inspiration: Look for inspiration from other photographers or Instagram influencers who have a similar style or aesthetic. Analyze their use of filters and editing techniques to gain insights and inspiration for your own work.
- Trust Your Creativity: Ultimately, the most important tip is to trust your creative instincts. Don’t be afraid to experiment, break the rules, and create your own unique style. Let your creativity shine through in every photo you share on Instagram.
By following these tips, you can harness the power of filters on Instagram to create stunning visuals that captivate your audience and truly reflect your artistic vision.
Now that you’re armed with these tips, go forth and explore the world of Instagram filters with confidence and creativity!
Conclusion
Filters have become an integral part of the Instagram experience, allowing users to enhance their photos and express their creativity with just a few taps. In this article, we covered various aspects of using filters on Instagram, from choosing the right filter to applying them, adjusting the intensity, and even creating your own unique filters.
Choosing the right filter involves considering the subject matter, mood, and desired aesthetic of your photo. By experimenting with different filters and adjusting the intensity, you can create visuals that truly stand out and resonate with your audience.
We also explored the advanced editing tools available on Instagram, which allow you to fine-tune your photos further. These tools, in combination with filters, give you full control over the look and feel of your images.
Additionally, we unraveled hidden filters and discussed how you can unlock them to add a unique touch to your photos. Furthermore, we delved into the exciting realm of creating your own unique filters, empowering you to develop your signature style and artistic vision.
Lastly, we shared valuable tips to help you use filters successfully on Instagram, encouraging consistency, experimentation, and listening to your creative instincts.
With the knowledge gained from this article, you are now equipped to make the most out of filters on Instagram, transforming your ordinary photos into captivating masterpieces that leave a lasting impression on your audience.
So, go ahead, apply filters, unleash your creativity, and let your photos shine on the vibrant canvas of Instagram!