Introduction
Welcome to the digital age where social media platforms have transformed the way we share our lives with others. Among the many popular platforms, Instagram stands out as a visual playground that allows users to express themselves through photos and videos. If you’re new to Instagram or simply want to learn how to add photos to your posts, you’ve come to the right place.
Instagram provides a seamless user experience, allowing you to effortlessly share your favorite moments with friends, family, or the world. Whether you want to showcase your photography skills, share cherished memories, or promote a business, adding photos to your Instagram posts is an essential skill to master.
In this guide, we will walk you through the step-by-step process of adding photos to your Instagram posts. From capturing the perfect shot to editing and sharing it with your followers, we’ve got you covered. So, grab your smartphone or tablet, open up Instagram, and let’s get started!
Before we dive into the details, it’s important to note that Instagram is compatible with both iOS and Android devices. The app provides a consistent experience across platforms, ensuring that you can follow along regardless of the device you’re using.
Whether you’re an avid photographer or just starting out, Instagram offers a variety of tools and features to enhance your posts. From filters that add a touch of magic to cropping and adjusting the composition, you have the power to create visually stunning content that captures the essence of the moment.
So, if you’re ready to learn how to add photos to your Instagram posts, let’s jump into the first step: opening the Instagram app.
Step 1: Open Instagram
The first step towards adding photos to your Instagram posts is to open the Instagram app on your smartphone or tablet. Locate the app icon on your device’s home screen or in your app drawer, and tap on it to open the app.
If you don’t have the Instagram app installed on your device, you can download it for free from the App Store (iOS) or the Google Play Store (Android). Simply search for “Instagram” in the respective store, tap on the app, and follow the prompts to download and install it on your device.
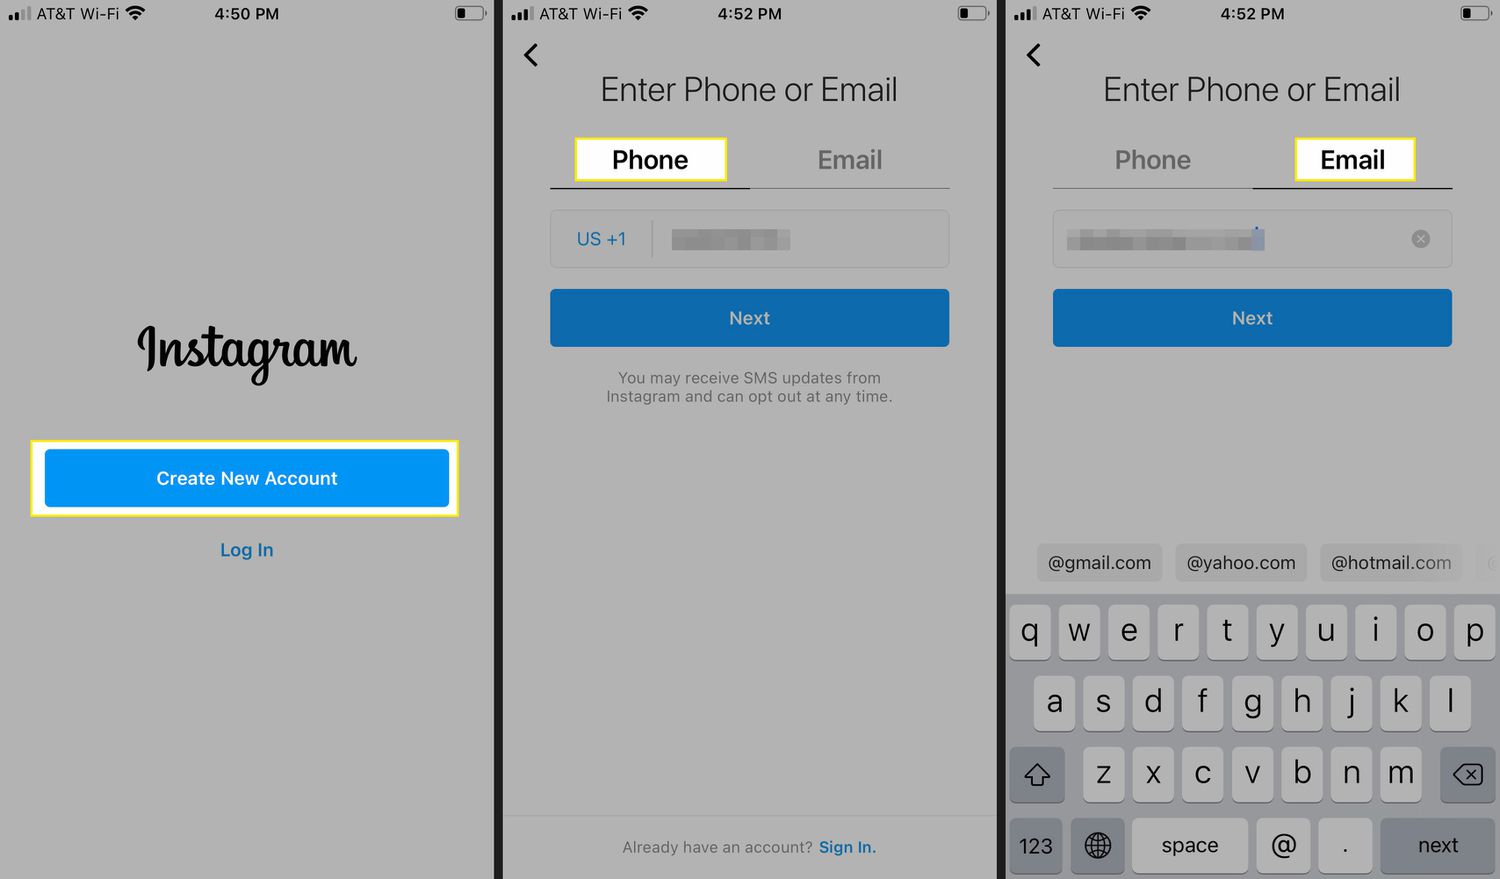
Once you have opened the Instagram app, you will be greeted with the login screen. If you already have an Instagram account, enter your login credentials (username and password) and tap on “Log In” to access your account. If you don’t have an account, you can sign up for a new account by tapping on “Sign up” and following the registration process.
It’s important to note that Instagram allows you to create either a personal account or a business account. Personal accounts are ideal for individuals who want to share their personal photos and connect with friends and family. Business accounts, on the other hand, are designed for businesses and organizations looking to promote their products or services.
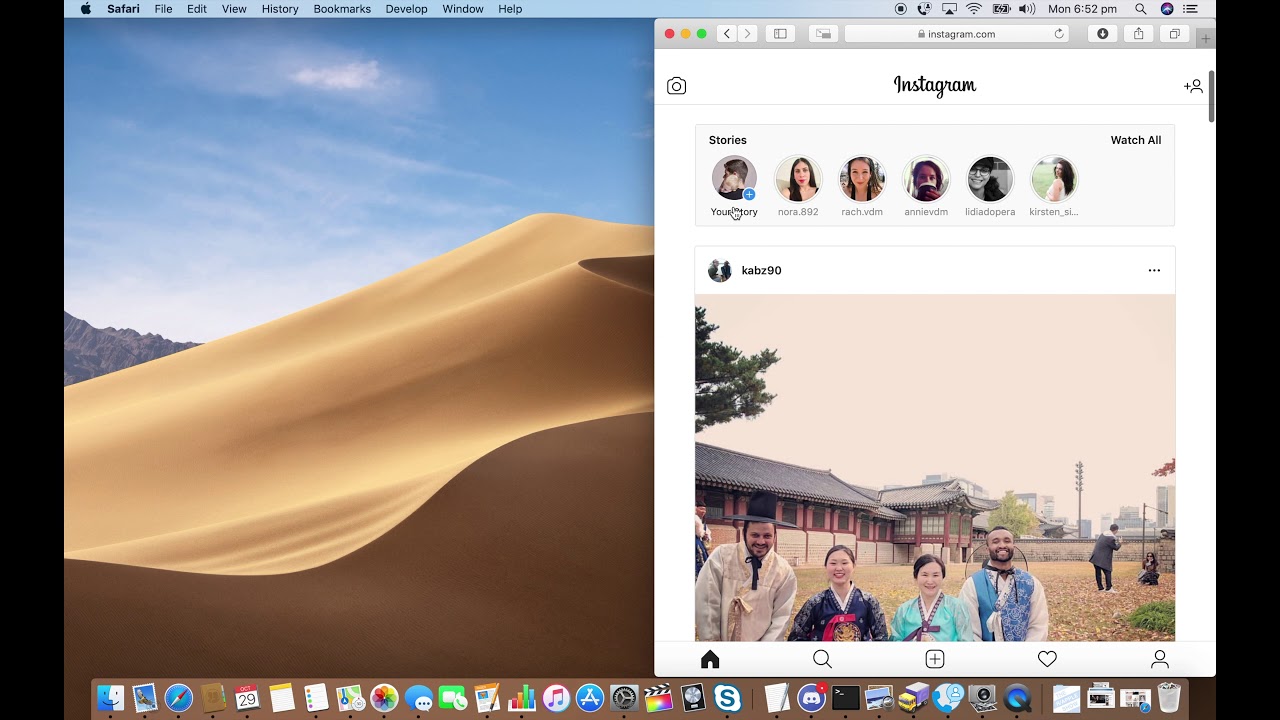
Once you have logged in to your Instagram account, you will be taken to your Instagram home feed, where you can see posts from the people you follow. Now that you have successfully opened the Instagram app, you are ready to move on to the next step: accessing the camera screen.
Step 2: Access the Camera Screen
Now that you have opened the Instagram app and logged into your account, it’s time to access the camera screen. The camera screen is where you can take photos or record videos directly within the Instagram app. To access the camera screen, look for the camera icon at the top left or bottom center of the screen and tap on it.
When you tap on the camera icon, you will be taken to the camera screen, which is the heart of Instagram’s photo and video sharing experience. Here, you have a variety of options to choose from:
- Photo mode: This is the default mode when you open the camera screen. In photo mode, you can take a single photo by tapping on the circle button at the bottom of the screen.
- Video mode: To switch to video mode, simply swipe your finger from left to right on the screen, or tap on the “Video” option at the bottom of the screen. In video mode, you can record a video by holding down the circle button for the desired duration.
- Boomerang mode: If you want to create a looping video, swipe your finger from right to left on the screen, or tap on the “Boomerang” option. In Boomerang mode, you can capture a short video that plays back and forth in a loop.
- Superzoom mode: To add dramatic zoom effects to your videos, tap on the “Superzoom” option. You can choose from various superzoom effects, such as “Dramatic” or “Paparazzi,” to add a touch of flair to your videos.
- Hands-free mode: If you prefer to record videos without holding down the circle button, tap on the “Hands-Free” option. This allows you to start and stop video recording with a single tap.
Choose the mode that best suits your creative vision and the content you want to share. Whether you’re capturing a stunning landscape, a delicious meal, or a funny moment with friends, the camera screen offers a range of options to capture your desired shot.
Now that you have accessed the camera screen and familiarized yourself with the different modes, it’s time to move on to the next step: taking a photo or recording a video.
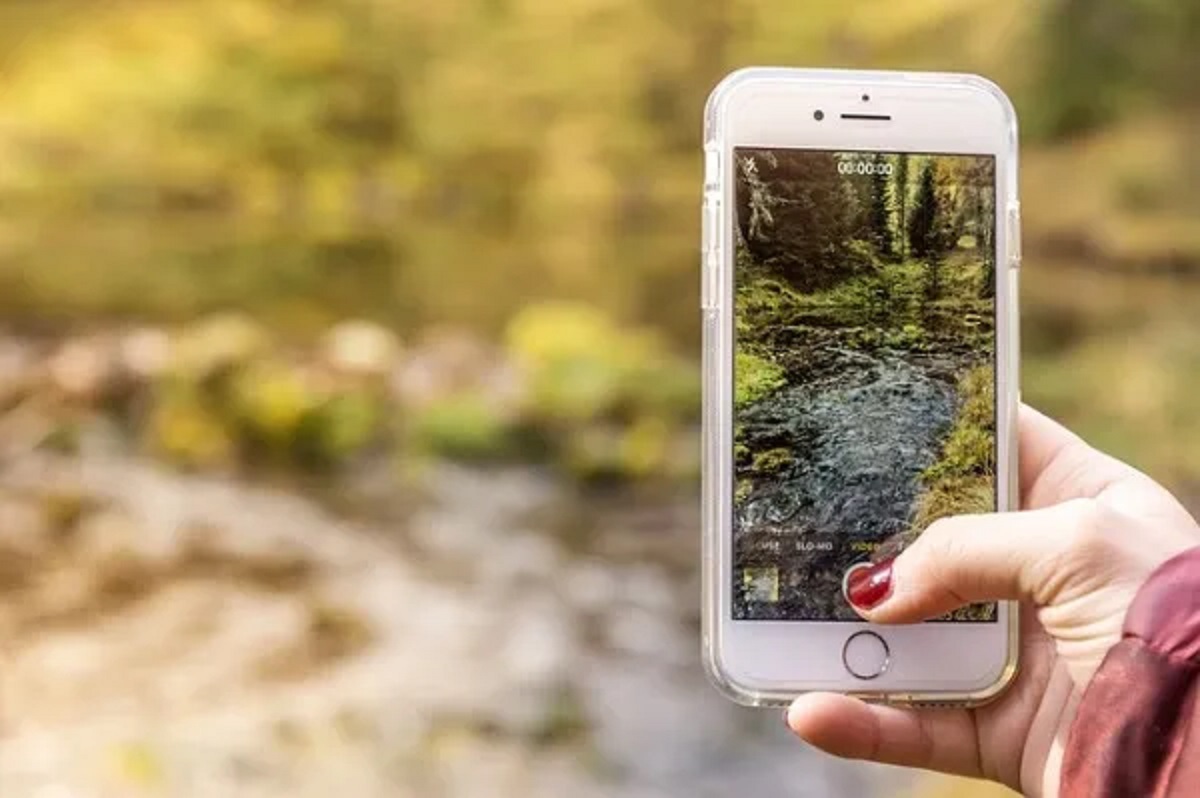
Step 3: Take a Photo
Once you have accessed the camera screen in the Instagram app, you can proceed to capture the perfect photo to share with your followers. Whether you’re aiming for a stunning landscape, a candid moment, or a carefully composed shot, taking a photo on Instagram is a simple and intuitive process.
To take a photo, make sure you are in the “Photo” mode on the camera screen. You will see a circle button at the bottom center of the screen. Position your subject in the frame, ensuring that it is well-lit and in focus. You can tap on the screen to adjust the focus and exposure if needed.
When you’re ready to take the photo, simply tap on the circle button once. The camera will capture the image, and you will see a thumbnail preview of the photo at the bottom right corner of the screen. You can tap on this preview to view the captured photo in full screen.
If you’re not satisfied with the photo you captured, you can tap on the “X” button at the top left corner of the screen to discard it and retake the photo. This allows you to ensure that you capture the best possible shot before proceeding to the next step.
Instagram also offers additional features to enhance your photo-taking experience. For example, you can use the grid overlay on the camera screen to help you compose your shot according to the rule of thirds or other composition guidelines. To enable the grid, go to your device’s settings, find the “Camera” or “Photos & Camera” section, and toggle on the grid option.
Additionally, Instagram provides a flash option that you can enable or disable based on the lighting conditions. If you’re in a low-light environment and need some extra illumination, tap on the lightning bolt icon at the top left corner of the screen to activate the flash.
Once you have taken a photo that you’re happy with, it’s time to move on to the next step: tapping on the camera roll icon to access your gallery and choose a photo to share.
Step 4: Tap on the Camera Roll Icon
After capturing a photo on the Instagram camera screen, you have the option to choose a photo from your device’s gallery to share on your post. To access your gallery, you need to tap on the camera roll icon, which is located at the bottom left corner of the screen.
When you tap on the camera roll icon, it will open up your device’s gallery where you can browse through your photos and select the one you want to include in your Instagram post. You can swipe left or right to scroll through your gallery or use the thumbnails at the bottom of the screen to navigate.
As you browse through your gallery, you might notice that the photos are organized in albums or folders. This depends on how your device’s gallery is set up. You can tap on a specific album or folder to view its contents and choose a photo from there.
It’s important to choose a photo that aligns with the theme or concept of your Instagram post. Consider the composition, lighting, and overall visual appeal of the photo. You want to select a photo that will capture the attention of your followers and effectively convey the message or story you intend to share.
Once you have found the photo you want to use, tap on it to select it. You will see a checkmark or a selected indicator appear on the photo, indicating that it has been chosen for your Instagram post.
If you can’t find the specific photo you’re looking for in your device’s gallery, you can tap on the “All Photos” or “All Media” option at the top of the screen to view all the photos on your device. This will give you a broader selection to choose from.
Once you have selected the photo you want to use, it’s time to move on to the next step: editing your photo to enhance its visual appeal or applying filters for a unique look.
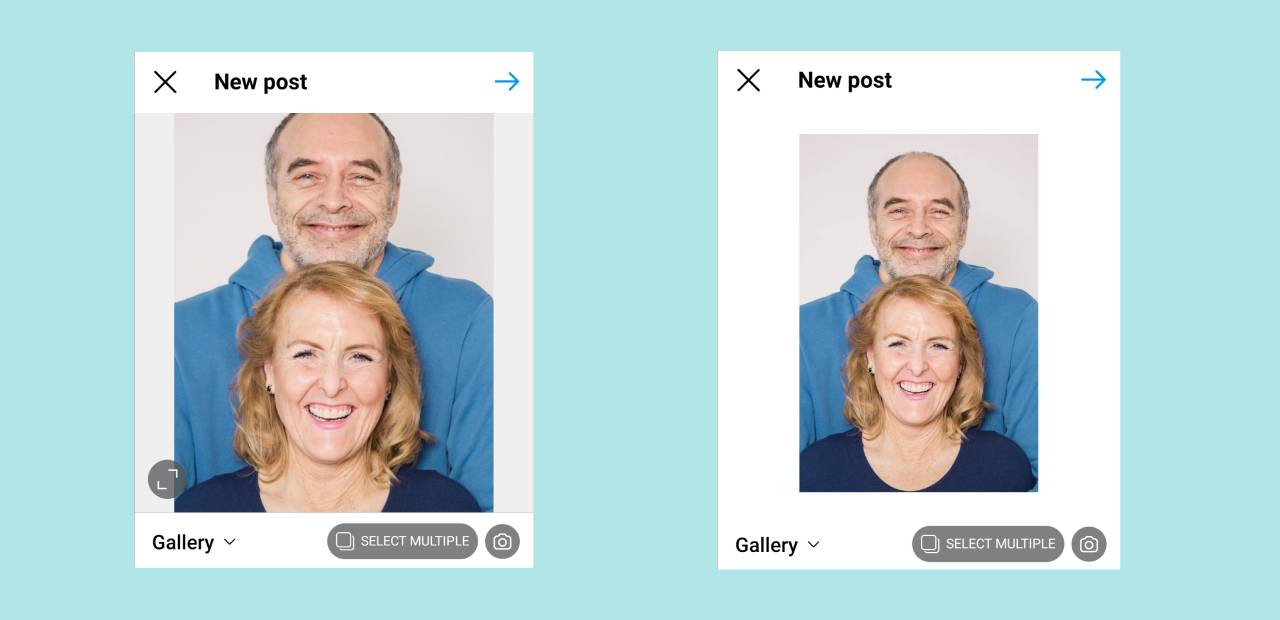
Step 5: Choose a Photo from Your Gallery
After tapping on the camera roll icon on the Instagram camera screen, you will be presented with the option to choose a photo from your device’s gallery. This step allows you to select a photo that you have previously captured and stored on your device to include in your Instagram post.
When you tap on the camera roll icon, it will open up your device’s gallery, where you can browse through all the photos and albums on your device. You can swipe left or right to scroll through your gallery or use the thumbnails at the bottom of the screen to navigate.
As you browse through your gallery, you may notice that the photos are organized into different albums or folders based on factors such as date, location, or specific events. This organization can make it easier for you to find a specific photo based on your needs.
Take your time to choose a photo that aligns well with the message, theme, or concept of your Instagram post. Consider elements such as composition, lighting, and visual appeal while selecting the photo. You want to choose an image that grabs the attention of your followers and effectively communicates your intended message.
Once you have found the ideal photo, tap on it to select it for your Instagram post. You will see a checkmark or a selected indicator appear on the photo, indicating that it has been chosen.
If you can’t find the desired photo in the current folder or album, you can tap on the back or browse button to navigate to other albums or folders in your gallery. This allows you to access a wider range of photos and select the most suitable one for your Instagram post.
Moreover, if you remember the date, location, or specific details about the photo you want to use, you can make use of the search function provided in some gallery apps. Simply input the relevant keywords in the search bar to locate the desired photo quickly and effortlessly.
Once you have chosen the perfect photo from your device’s gallery, you are now ready to move on to the next step: editing your photo to enhance its visual appeal or applying filters for a unique and engaging look.
Step 6: Edit Your Photo
After selecting a photo from your device’s gallery for your Instagram post, you have the option to edit the photo before sharing it with your followers. Editing your photo can help enhance its visual appeal, adjust the brightness and contrast, apply filters, and make other adjustments to ensure that it looks its best.
Instagram provides a range of editing tools that allow you to make various adjustments to your photo. To access these editing tools, tap on the “Edit” button, which usually looks like a horizontal slider or a pencil icon, located at the bottom of the screen.
Once you tap on the Edit button, you will be presented with a set of editing options that you can use to modify your photo:
- Brightness: Adjust the overall brightness of your photo to make it brighter or darker.
- Contrast: Enhance the contrast between light and dark areas in your photo for a more dramatic effect.
- Saturation: Increase or decrease the intensity of colors in your photo to make them more vibrant or muted.
- Highlights: Adjust the brighter parts of your photo to reveal or hide details in those areas.
- Shadows: Modify the darker parts of your photo to bring out or soften details in those areas.
- Sharpen: Enhance the sharpness and clarity of your photo to make it appear more defined and crisp.
- Vignette: Add a subtle dark or light border around the edges of your photo to draw attention to the center.
- Tilt Shift: Apply a selective blur effect to specific areas of your photo while keeping other parts in focus.
You can use any combination of these editing options to achieve the desired look for your photo. Experiment with different settings and adjustments to find the perfect balance.
It’s important to note that you can always revert back to the original version of your photo by tapping on the “Reset” or “Cancel” button, depending on your device and the Instagram version you are using.
Once you are satisfied with the edits you have made to your photo, you can proceed to the next step: adding filters (if desired) to further enhance the look of your image.
Step 7: Add Filters (Optional)
After editing your photo in the Instagram app, you have the option to further enhance its appearance by applying filters. Filters are pre-designed sets of adjustments that can instantly change the look and feel of your photo, giving it a specific style or mood.
To add a filter to your photo, tap on the “Filter” option located at the bottom of the screen. This will display a carousel of available filters, each represented by a thumbnail image that showcases the effect it applies to your photo.
Instagram offers a wide range of filters to choose from, ranging from vibrant and colorful options to black and white or vintage-inspired filters. By scrolling through the carousel, you can preview how each filter will transform your photo in real-time.
When selecting a filter, keep in mind the overall aesthetic you want to achieve and how it complements the content of your photo. Some filters may enhance specific colors or add a particular tone, so you may need to experiment with different options to find the perfect one.
Note: Each filter has an adjustable intensity slider, allowing you to control the strength of the effect. You can slide the bar left or right to decrease or increase the filter’s impact on your photo.
If you prefer to have more control over the individual elements of your photo’s appearance, you can skip the filters and proceed to the next step. This way, you can manually fine-tune the settings for brightness, contrast, saturation, and other attributes to achieve a customized look.
Keep in mind that adding a filter is an optional step in the photo-sharing process. Some photos may already have the desired aesthetic and may not require the use of filters. It’s all about personal preference and selecting the option that best showcases your artistic vision.
Once you have chosen a filter (or opted not to use one), you can move on to the next step: adjusting and cropping your photo, if needed, to ensure it is framed perfectly for your Instagram post.
Step 8: Adjust and Crop Your Photo (Optional)
After applying a filter (if you chose to do so) or editing your photo in the Instagram app, you have the option to further adjust and crop your photo to ensure it is framed perfectly for your Instagram post. This step allows you to fine-tune the composition, orientation, and dimensions of your photo to enhance its visual appeal.
To access the adjustment and cropping tools, tap on the “Edit” button once again, located at the bottom of the screen. This will bring up a menu with additional options to modify your photo.
Within the adjusting and cropping menu, you will find a variety of tools that enable you to make specific modifications to your photo:
- Brightness: Slide the bar left or right to adjust the overall brightness of your photo.
- Contrast: Increase or decrease the contrast between light and dark areas of your photo.
- Structure: Enhance the details and textures in your photo, giving it a more defined look.
- Warmth: Adjust the color temperature of your photo, making it warmer (more yellow/orange) or cooler (more blue).
- Saturation: Increase or decrease the intensity of colors in your photo.
- Highlights: Adjust the brightness of the brighter areas of your photo, bringing out or toning down details.
- Shadows: Enhance or soften the visibility of details in the darker areas of your photo.
- Vignette: Add a subtle dark or light border around the edges of your photo to draw focus to the center.
In addition to these adjustment tools, you can also crop your photo to specific dimensions or aspect ratios. Tap on the crop icon, usually represented by a square or a rectangle, to open the cropping interface.
Within the cropping interface, you have the flexibility to manually adjust the size and position of your photo. Simply pinch and zoom on the screen to resize your photo, or drag the corners and edges to define the desired crop.
Instagram provides various crop ratios, including square (1:1), portrait (4:5), landscape (1.91:1), and more. Choose a crop ratio that suits the content and composition of your photo, ensuring that it fits well within the Instagram post frame.
Once you are satisfied with the adjustments and cropping for your photo, tap on the “Done” or “Save” button to apply the changes. Keep in mind that you can always revert back to the original version of your photo by tapping on the “Reset” or “Cancel” button, depending on your device and the Instagram version you are using.
After adjusting and cropping your photo (if desired), you are now ready to move on to the next step: adding a caption and hashtags to your Instagram post.
Step 9: Add a Caption and Hashtags
When it comes to adding a caption and hashtags to your Instagram post, this step is crucial for providing context, expressing your thoughts, and making your post discoverable to a wider audience.
Once you have finalized your edited and cropped photo, tap on the caption field located below the photo. This will open up the keyboard, allowing you to enter your caption.
When writing your caption, you have the freedom to be creative, informative, or personal, depending on the tone and purpose of your post. Your caption can include a description or story related to the photo, witty or inspirational quotes, or any other relevant details that you want to share with your followers.
Keep in mind that Instagram captions have a maximum character limit of 2,200 characters, but only the first few lines will appear in the initial preview. It’s important to make those first few lines engaging and attention-grabbing to encourage users to read more.
In addition to the caption, hashtags play a pivotal role in helping your post reach a wider audience. Hashtags are keywords or phrases preceded by the ‘#’ symbol that allow users to easily discover content related to specific topics.
When choosing hashtags, consider using a combination of broad and specific ones that are relevant to your photo and target audience. For example, if you’re posting a photo of a sunset, you might include hashtags like #sunset, #nature, and #photography as broad, general hashtags, as well as more specific ones like #sunsetlovers or #sunsetphotography.
You can include up to 30 hashtags in your Instagram caption, but it’s important to use them strategically. Aim for a mix of popular and niche hashtags to maximize your chances of reaching the right audience.
Besides adding hashtags within your caption, you can also consider adding them as a comment immediately after posting your photo. This keeps your caption visually clean while still allowing your post to be discovered through the hashtags.
Remember that your caption and hashtags should complement your photo and resonate with your audience. This is an opportunity to engage with your followers, spark conversations, and convey the message behind your photo.
Once you have crafted a captivating caption and added hashtags, you’re almost ready to share your Instagram post. But before that, keep reading to explore optional steps like tagging people and adding a location.
Step 10: Tag People (Optional)
Tagging people in your Instagram posts allows you to mention and give credit to individuals who are featured in your photo or who may be interested in the content you’re sharing. It’s a great way to connect with others and increase engagement on your post.
After adding a caption and hashtags to your post, you can proceed to tag people by tapping on the “Tag People” option. This is typically represented by an icon that resembles a person with a plus sign.
To tag someone in your photo, tap on the specific area of the photo where the person appears. Instagram will automatically detect the faces and suggest usernames of people you follow.
If the person you want to tag isn’t appearing in the suggestions, you can manually type their username in the search bar. Instagram will search for the user and allow you to select the correct account to tag.
When you tag someone in your post, the tagged person will receive a notification and the photo will appear on their profile under the “Photos of You” section. This makes it easier for others to discover your post and potentially follow you.
It’s important to be respectful when tagging people in your photos. Make sure you have their permission before tagging them and consider whether they would be comfortable being associated with your post.
Tagging others also allows you to foster a sense of community and connection on Instagram. By acknowledging and featuring others in your posts, you can build relationships, collaborate with other content creators, and engage with your followers in a more meaningful way.
Once you have tagged the relevant individuals in your photo, you can proceed to the final optional step: adding a location to your Instagram post.
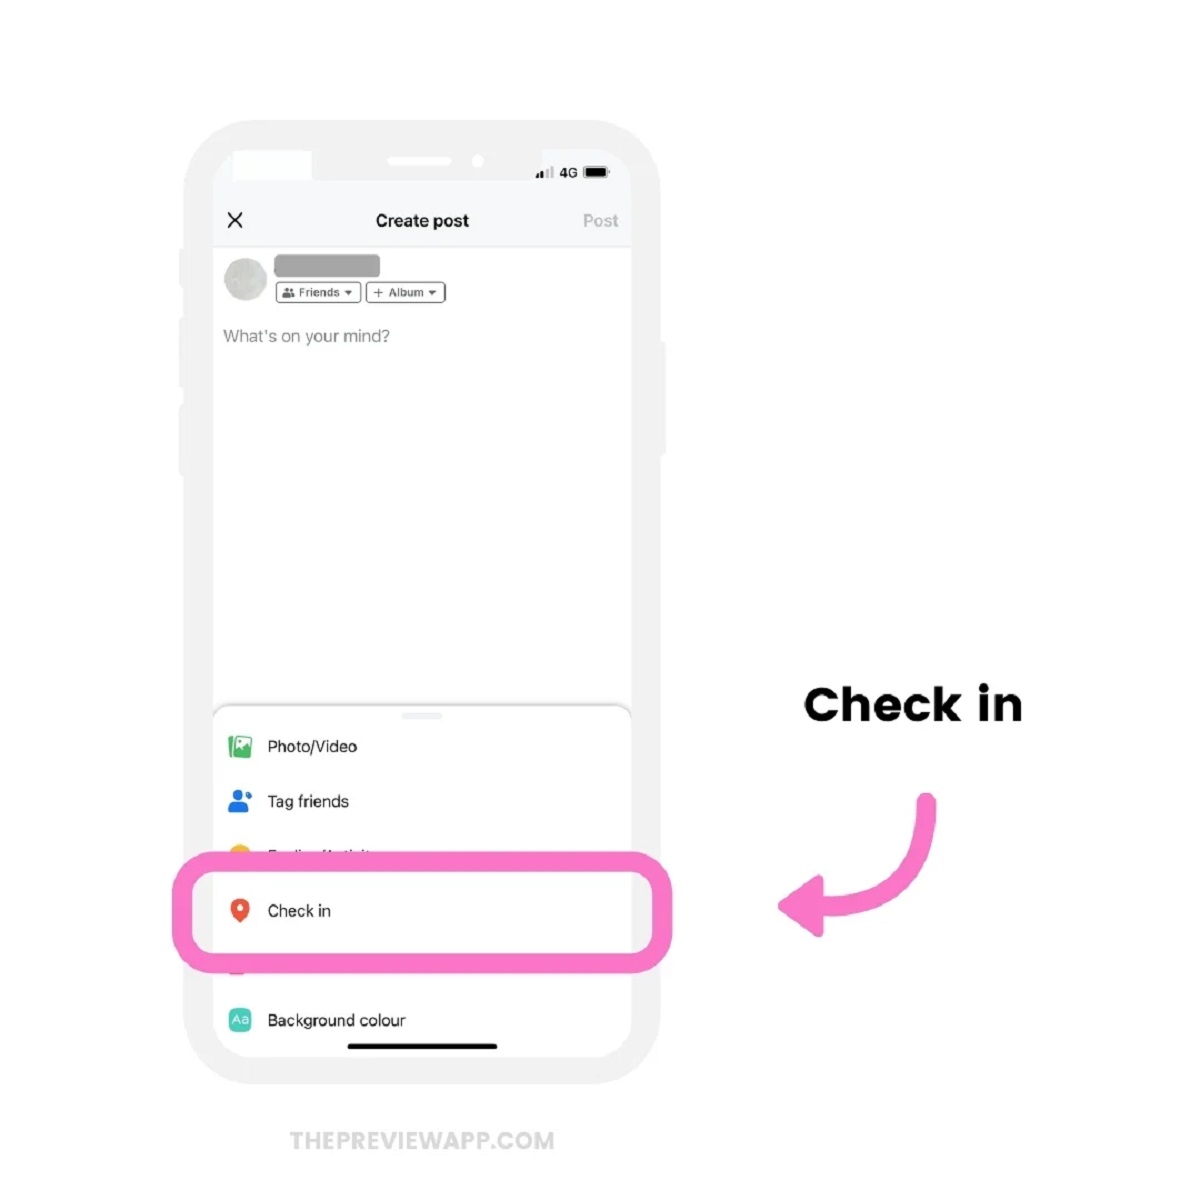
Step 11: Add Location (Optional)
Adding a location to your Instagram post allows you to provide additional context and make it easier for others to discover your content. By specifying the location where your photo was taken, you can connect with people who are interested in that particular place or who may be in the same location.
After tagging people (if desired) and before sharing your post, you can include a location by tapping on the “Add Location” option. This will open up a search bar where you can enter the name of the location.
Instagram will provide a list of suggested locations as you type, including places, landmarks, venues, cities, and more. Select the correct location from the list to attach it to your post.
Using a specific location can be especially beneficial if you’re promoting a local business, showcasing a travel destination, or simply sharing your favorite spots with your followers. It allows others who are interested in that location to discover your post through location-based searches or explore the content that has been shared from that place.
Adding a location can also help create a sense of authenticity and transparency, especially for travel influencers, photographers, or those looking to connect with others in specific areas.
However, it’s important to be mindful of privacy concerns when adding a location to your post. If you’re sharing a personal photo or a location you’d rather keep private, it’s best to omit the location tag.
Remember that adding a location is optional, and you have full control over whether to include it in your post or not. Consider the content of your photo and the purpose of your post before deciding whether to add a location or not.
Once you have decided whether or not to include a location, you’re ready for the final step: sharing your post with your followers on Instagram.
Step 12: Share Your Post
After following all the previous steps and making final adjustments to your Instagram post, it’s time to share it with your followers. Sharing your post allows your carefully curated photo, caption, hashtags, and any other added elements to be visible to your audience and potentially reach a wider audience through engagement and shares.
To share your post, look for the “Share” or “Post” button, typically represented by a paper plane icon. Tap on this button to finalize and publish your post on Instagram.
Once you tap on the share button, your post will be uploaded and become visible to your followers on their Instagram feeds. It may take a few seconds or minutes for your post to be fully uploaded, depending on your internet connection speed and the size of the photo you’re sharing.
While your post is being shared, you can add the finishing touches by sharing it to other connected social media accounts such as Facebook or Twitter. This can help extend your reach and connect with friends and followers on other platforms.
Once your post is live, it’s time to engage with your audience. Monitor the comments, respond to any questions or feedback, and interact with your followers. Engaging with your audience not only builds a connection but also improves your chances of reaching a wider audience through increased engagement and visibility.
Remember to maintain a consistent posting schedule and continue sharing captivating photos, interesting captions, and meaningful content to keep your followers interested and engaged.
Instagram is a dynamic platform, so don’t be afraid to experiment with different types of posts, hashtags, captions, and features to discover what works best for your audience. Learning and adapting to the preferences of your followers will help you grow your presence and make a lasting impact.
Congratulations! You have successfully completed all the steps to add photos to your Instagram posts. Now it’s time to continue sharing your creative, inspiring, and visually stunning content with your Instagram community.
Conclusion
Adding photos to your Instagram posts is a fundamental skill that allows you to share your life, creativity, and interests with your followers. Throughout this guide, we have covered the step-by-step process to help you navigate the world of Instagram posting. From opening the app and accessing the camera screen to selecting, editing, and sharing your photos, each step plays a crucial role in creating engaging and visually appealing content.
Remember, Instagram offers a range of tools and features to enhance your photos, such as filters, editing options, tagging people, adding locations, and including captivating captions and relevant hashtags. Utilizing these features allows you to not only express yourself but also increase the discoverability and engagement of your posts.
As you continue to explore Instagram and refine your posting skills, always keep your audience in mind. Understand what type of content resonates with them, what engages them, and what sparks their interest. By creating meaningful connections through thoughtful captions, relevant hashtags, and beautiful imagery, you can cultivate a loyal following and make a lasting impact.
So, unleash your creativity, experiment with different styles, and share your unique perspective with the world through your Instagram posts. Remember, the more you engage with your audience and stay consistent in your posting, the more likely you are to grow your presence and connect with like-minded individuals.
Now that you have a solid understanding of how to add photos to your Instagram posts, it’s time to put your skills into action. So grab your smartphone or tablet, open up Instagram, and start sharing your moments, stories, and inspirations with the world.