Why Use Instagram Locations
Instagram locations are an essential feature that can significantly boost your presence on the platform. By adding a location to your Instagram post, you allow users to easily discover your content and engage with it. Whether you’re a business, influencer, or regular user, utilizing Instagram locations can provide numerous benefits. Here are a few reasons why you should consider using Instagram locations:
1. Increased Discoverability
By attaching a location to your Instagram post, you increase its visibility to individuals who are browsing specific locations or searching for posts within a certain area. This allows you to reach a wider audience and increases the chances of your content being discovered by new users.
2. Connect with Local Audience
If you have a local business or are targeting a specific geographic area, using Instagram locations enables you to connect with individuals in that region. By tagging your posts with relevant locations, you can attract the attention of local users who may be interested in your products or services.
3. Build Trust and Authenticity
Using Instagram locations adds an extra layer of authenticity to your posts. When you specify a location, it provides users with a sense of transparency, as they can trust that you are indeed in that specific place. This is especially important for businesses and influencers who want to establish trust and credibility with their audience.
4. Increase Engagement
Posts with tagged locations tend to receive higher engagement compared to those without locations. Users are more likely to engage with content that is relevant to their interests or located in places they are familiar with. By utilizing Instagram locations, you can captivate the attention of users who are specifically interested in the area you are tagging.
5. Stand Out in Search Results
When users search for specific locations on Instagram, posts that have been tagged with that location will appear in the search results. By including relevant locations in your posts, you can increase your chances of being featured in these search results, further expanding your reach and visibility on the platform.
Incorporating Instagram locations into your posts is a simple yet effective way to enhance your presence on the platform, connect with a larger audience, and improve engagement. Whether you’re promoting a business, sharing travel experiences, or showcasing your creative work, taking advantage of this feature can greatly benefit your Instagram strategy.
How to Add a Location to your Instagram Post
Adding a location to your Instagram post is a straightforward process that can significantly enhance your content’s discoverability. By following these steps, you can easily tag a location and increase engagement with your posts:
1. Start Creating a New Post
Begin by opening the Instagram app and tapping on the “+” button at the bottom center of your screen. This will take you to the post creation screen.
2. Capture or Select a Photo or Video
Choose whether you want to take a photo or video in real-time using your device’s camera or select an existing photo or video from your gallery. Pick the content you want to share and proceed to the next step.
3. Add Filters and Edit Settings (Optional)
If desired, you can apply filters, adjust brightness, contrast, or crop your photo/video to your liking. Explore the various editing options available on Instagram to enhance the visual appeal of your post.
4. Tag a Location
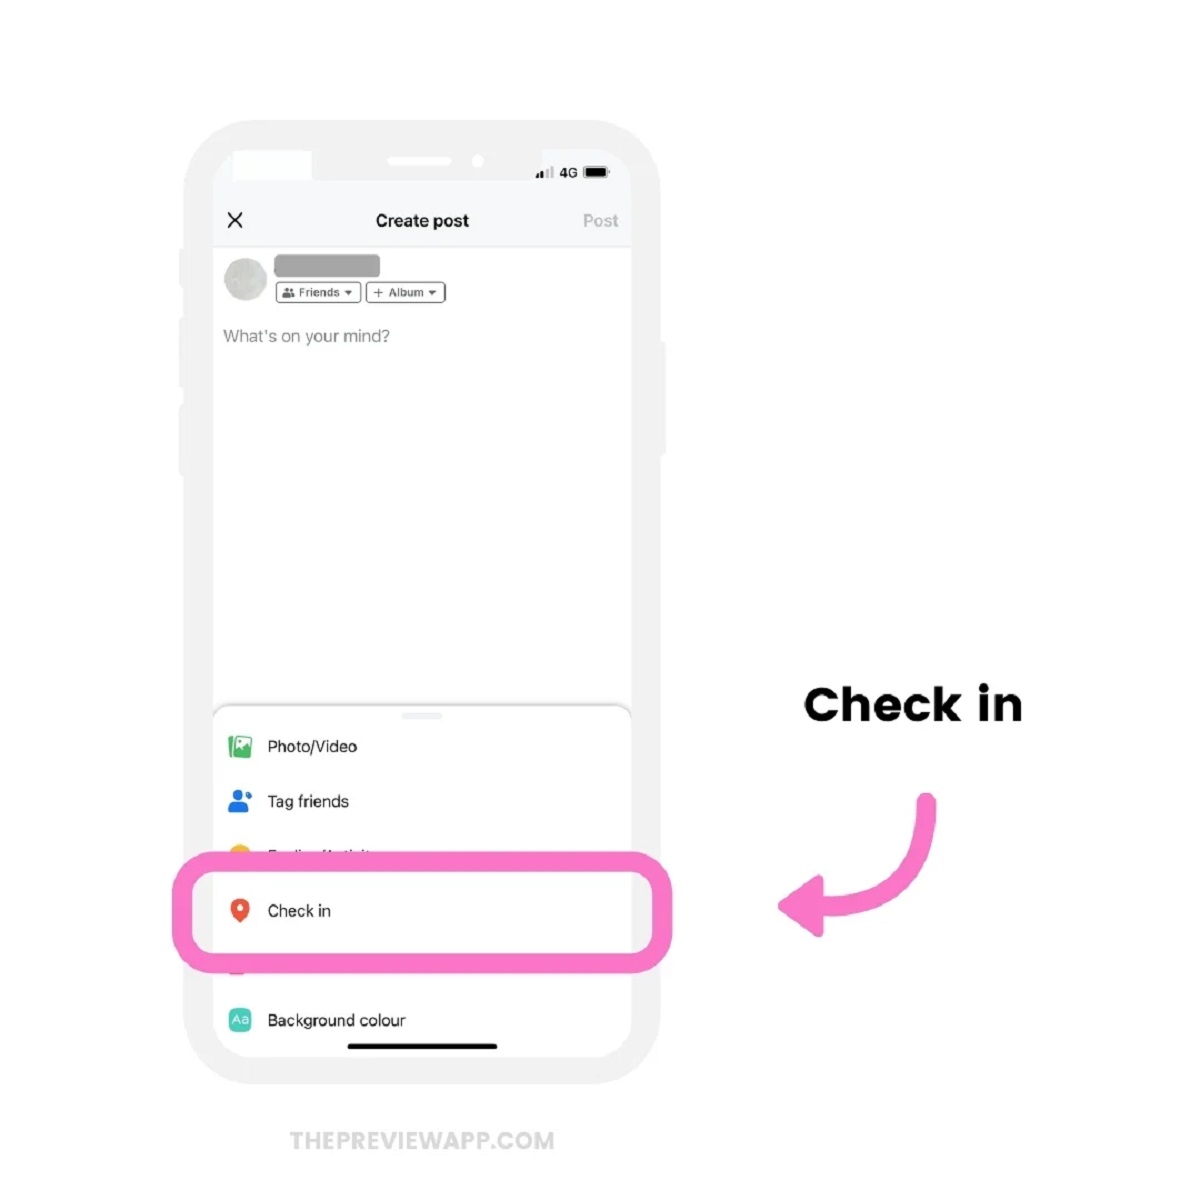
On the post creation screen, you will find an option to “Add Location.” Tap on it, and a search bar will appear. Here, you can enter the name of the location you want to tag.
5. Select the Correct Location
As you type in the name, Instagram will display a list of suggested locations. Choose the correct one that matches your intended location. It is important to tag the most accurate location to ensure your post reaches the right audience.
6. Review and Share
After selecting the location, take a moment to review your post and make any final adjustments. Add captions, hashtags, or tag other users as necessary. Once everything is ready, tap the “Share” button to publish your post.
That’s it! You have successfully added a location to your Instagram post. Now, users browsing that location or searching for posts within the area will be able to discover your content more easily.
Remember, you can also add a location to your Instagram Story by tapping on the sticker icon, selecting the location sticker, and following the same steps mentioned above.
By incorporating relevant locations into your Instagram posts, you can maximize your reach, connect with a local audience, and increase engagement with your content.
Adding a Location From the Explore Tab
The Explore tab on Instagram is a powerful tool that allows you to discover content from various locations around the world. Additionally, you can also add a location to your own Instagram post directly from the Explore tab. Here’s how:
1. Open the Explore Tab
To access the Explore tab, tap on the magnifying glass icon at the bottom of the Instagram app. This will open up a page with a collection of photos and videos from various users.
2. Search for the Desired Location
At the top of the Explore page, you will find a search bar. Enter the name of the location you want to tag in your post. As you type, Instagram will display a list of suggested locations.
3. Select the Location
From the list of suggested locations, find and select the correct one that matches your intended location. This will take you to the location’s Explore page.
4. Add the Location to Your Post
On the location’s Explore page, you will find a blue “Add Location” button at the top. Tap on it, and it will automatically take you to the post creation screen with the location tagged.
5. Create and Share Your Post
Proceed with creating your post by capturing or selecting a photo or video. Make any necessary edits, add captions or hashtags, and review everything. Once you’re satisfied, tap the “Share” button to publish your post.
By adding a location from the Explore tab, you can easily tag and share posts from specific locations that you discover while exploring the platform. This feature allows you to expand your reach and connect with users who are interested in the same location or exploring content from that area.
Remember, you can also explore individual posts from the location’s Explore page and interact with other users who have tagged that location. This can be a great way to engage with local communities and discover new content related to your interests.
Take advantage of the Explore tab to not only find inspiration but also to add relevant locations to your own Instagram posts, making them more discoverable and engaging for your audience.
Adding a Location From the Locations Tab
The Locations tab on Instagram is a dedicated feature that allows you to explore different locations and easily add them to your own posts. By utilizing this tab, you can tag specific locations on Instagram and increase the visibility of your content. Here’s how to add a location from the Locations tab:
1. Open the Locations Tab
To access the Locations tab, open the Instagram app and tap on the magnifying glass icon at the bottom of the screen. This will take you to the Explore page.
2. Tap on the Search Bar and Select ‘Places’
At the top of the Explore page, you will find a search bar. Tap on it and select the “Places” option. This will allow you to search for specific locations.
3. Search for the Desired Location
Type in the name of the location you want to tag in your Instagram post. As you type, Instagram will display a list of suggested locations related to your search.
4. Select the Correct Location
From the list of suggested locations, find and select the correct one that matches your intended location. This will take you to the location’s page.
5. Add the Location to Your Post
On the location’s page, you will find an option to “Add Location.” Tap on it, and it will automatically take you to the post creation screen with the location tagged.
6. Create and Share Your Post
Proceed with creating your post by capturing or selecting a photo or video. Edit your content, add captions or hashtags, and review everything to your satisfaction. Finally, tap the “Share” button to publish your post.
By adding a location from the Locations tab, you can easily tag specific places and increase the visibility of your Instagram posts. This feature allows you to connect with an audience that is interested in or searching for content related to that location.
Additionally, exploring the Locations tab can be a great way to discover new places, find inspiration, and connect with other users who have tagged the same location. You can engage with their content and build connections within local communities or locations that resonate with your interests.
Make the most out of the Locations tab on Instagram to enhance your content, expand your reach, and connect with like-minded individuals from different parts of the world.
Creating a New Location on Instagram
Instagram allows users to create new locations if the desired location is not already listed in their database. This feature comes in handy when you want to tag a specific place that is not available as a suggested location. Here’s how you can create a new location on Instagram:
1. Open the Post Creation Screen
Begin by opening the Instagram app and tapping on the “+” button at the bottom center of the screen. This will take you to the post creation screen.
2. Tap on ‘Add Location’
On the post creation screen, you will find an option to “Add Location.” Tap on it, and a search bar will appear.
3. Search for the Desired Location
In the search bar, enter the name of the location you want to create. If the location is not listed in the suggestions, proceed to the next step to create a new location.
4. Choose ‘Add [Location Name]’ at the Bottom of the Search Results
If the desired location does not appear in the search results, you will see an option that says “Add [Location Name]” at the bottom of the list. Tap on it to proceed.
5. Fill in the Location Details
Instagram will prompt you to enter specific details about the location to create it. Fill in the relevant information such as the location’s name, address, and any additional details that can help users identify the place accurately.
6. Create and Share Your Post
Once you have filled in the location details, tap on the “Create” or “Done” button. This will take you back to the post creation screen with the newly created location now available to select.
7. Tag the Created Location
With the newly created location available, select it from the list of suggested locations. It will now appear as the location tag on your post.
By creating a new location on Instagram, you can tag specific places that are not already listed in their database. This allows you to provide accurate information about the location and make it easier for others to discover your content related to that place.
Please note that not all users have the ability to create new locations, and Instagram may require verification or other criteria before approving the location creation request.
Utilize the option to create a new location when necessary and enhance the accuracy and relevance of your Instagram posts.
Adding a Custom Location to your Instagram Post
Instagram offers the flexibility to add custom locations to your posts, allowing you to tag unique places that are not listed in the standard location database. Whether it’s a private event, a hidden gem, or your own business, adding a custom location can help you provide specific context to your audience. Here’s how you can add a custom location to your Instagram post:
1. Start Creating a New Post
Begin by opening the Instagram app and tapping on the “+” button at the bottom center of the screen. This will take you to the post creation screen.
2. Capture or Select a Photo or Video
Choose whether you want to take a photo or video in real-time using your device’s camera, or select an existing photo or video from your gallery. Pick the content you want to share and proceed to the next step.
3. Add Filters and Edit Settings (Optional)
If desired, you can apply filters, adjust brightness, contrast, or crop your photo/video to your liking. Explore the various editing options available on Instagram to enhance the visual appeal of your post.
4. Add a Location
On the post creation screen, you will find an option to “Add Location.” Tap on it, and a search bar will appear.
5. Enter the Custom Location
In the search bar, type in the name of the custom location you want to tag. If it is not in the suggested list, proceed to the next step to create a custom location.
6. Create a Custom Location
If the desired custom location does not appear in the search results, Instagram allows you to create a custom location. Scroll down to the bottom of the search results and tap on “Add a Custom Location.”
7. Enter the Custom Location Details
Instagram will prompt you to enter specific details about the custom location, such as the name and address. Fill in the relevant information accurately.
8. Tag the Custom Location
Once you have entered the custom location details, tap on the “Create” or “Done” button. This will take you back to the post creation screen with the custom location now available to select.
9. Review and Share
After selecting the custom location, take a moment to review your post and make any final adjustments. Add captions, hashtags, or tag other users as necessary. Once everything is ready, tap the “Share” button to publish your post.
With the ability to add custom locations on Instagram, you can provide more specific context and information to your audience. It allows you to express your creativity, share exclusive locations, and promote your own businesses or events effectively.
Make use of this feature to enhance the relevance and uniqueness of your Instagram posts.
Utilizing Instagram Location Features for Businesses
Instagram offers powerful location features that businesses can leverage to increase their visibility, engage with their target audience, and drive more customers to their physical locations. By effectively utilizing these features, businesses can enhance their Instagram presence and attract potential customers. Here are some ways businesses can make the most of Instagram’s location features:
1. Tagging Your Business Location
When creating Instagram posts, businesses should be sure to tag their physical location. This allows users who are browsing or searching for that specific location to discover the business’s posts. By tagging the location, you make it easier for potential customers to find your business and engage with your content.
2. Sharing Behind-the-Scenes Content
Take advantage of the location features to share behind-the-scenes content of your business. This could include showcasing the staff, capturing the ambiance, or highlighting unique aspects of the location. By sharing authentic content related to your business’s location, you can create a connection with your audience and build trust.
3. Running Location-Based Promotions
Businesses can use Instagram’s location features to run promotions and special offers targeted to a specific geographic area. By tagging a location in a post about a limited-time offer or discount, you can attract customers who are in close proximity to your business. This can help drive foot traffic and increase sales.
4. Collaborating with Local Influencers
Instagram location features provide businesses with the opportunity to collaborate with local influencers. Find influencers who have a strong presence in your area and partner with them to create content highlighting your business. By leveraging their reach and influence, you can expand your brand’s visibility within the local community.
5. Engaging with User-Generated Content
Encourage your customers to tag your business location in their posts or use a specific location-based hashtag when sharing content related to your business. This allows you to discover and engage with user-generated content, which can help increase brand awareness and build a sense of community around your business.
6. Utilizing Instagram Stories Location Stickers
Instagram Stories location stickers are a great way to showcase your business’s location and engage with your audience. Use location stickers to create geotagged stories that users in that area can discover and view. This can help increase brand exposure and attract potential customers.
7. Monitoring Competitors in Your Area
Utilize Instagram’s location features to keep an eye on your competitors in the same area. By monitoring their location-tagged posts, you can gain valuable insights into their strategies, promotions, and engagement with the local audience. This information can help you refine your own marketing efforts and stay ahead in the competitive landscape.
Overall, businesses can effectively utilize Instagram’s location features to increase their visibility, engage with their target audience, and drive more foot traffic to their physical locations. By taking advantage of these features, businesses can enhance their Instagram presence, build a strong local community, and ultimately boost their bottom line.
Tips for Choosing the Right Location on Instagram
Choosing the right location on Instagram is essential to maximize the reach, engagement, and relevance of your posts. Here are some tips to help you select the perfect location for your Instagram content:
1. Be Specific and Relevant
When selecting a location, be as specific as possible. Avoid generic or broad locations that may not accurately represent the content of your post. Choose a location that is relevant to the content you are sharing to attract the right audience.
2. Consider the Target Audience
Think about your target audience and where they are located. If you are targeting a local or regional audience, select a location that will resonate with them. Understanding your target audience’s demographics and interests can help you choose the most appropriate location for your posts.
3. Utilize Popular and Trending Locations
Using popular and trending locations can help increase the visibility of your posts. Research popular landmarks, events, or destinations in your area and tag them in your posts. This can attract users who are searching or exploring posts related to those popular locations.
4. Highlight Unique Local Places
Consider highlighting unique local places or hidden gems in your area. This can help differentiate your content and attract users who are interested in discovering new and interesting locations. Showcasing lesser-known spots can make your posts stand out and generate engagement.
5. Incorporate Location-Specific Hashtags
Research and use location-specific hashtags in your posts. This can make your content more discoverable to users who follow or search for those hashtags. It helps your posts appear in the feed or explore section of users interested in that particular location.
6. Tailor Locations to Different Types of Content
Consider tailoring your locations based on the type of content you are posting. For example, if you are sharing food-related content, tag the restaurant or cafe where the dish was prepared. If you are showcasing a product, tag the store or location where it can be found. This adds credibility and relevancy to your posts.
7. Experiment with Location Tags
Don’t be afraid to experiment with different location tags to see which ones generate the most engagement and reach. Test various locations and monitor the response from your audience. This can help you refine your location strategy and focus on tags that resonate well with your target audience.
Choosing the right location on Instagram is crucial for reaching your desired audience, improving engagement, and increasing the visibility of your posts. By following these tips and considering the relevance and appeal of different locations, you can optimize your Instagram presence and connect with users who share similar interests or are located in specific areas.
Final Thoughts on Using Instagram Locations
Instagram locations play a significant role in enhancing the discoverability, engagement, and authenticity of your posts. By effectively utilizing location features, you can expand your reach, connect with a local audience, and make your content more relevant to users. Here are some final thoughts to consider when using Instagram locations:
1. Be Strategic and Purposeful
Don’t tag random or unrelated locations to your posts. Instead, be strategic and purposeful about the locations you choose. Consider your target audience, the content you are sharing, and the goals you want to achieve with your Instagram presence.
2. Localize your Approach
If your business or brand has a specific geographic focus, prioritize localizing your Instagram strategy. Tag relevant local locations to attract the attention of users in your area, driving foot traffic and building a strong customer base within your community.
3. Engage with the Community
Instagram locations provide an opportunity to engage with the community. Interact with users who tag the same location as you, collaborate with local influencers, and encourage user-generated content. This can foster a sense of community around your brand and build authentic connections.
4. Monitor and Analyze Performance
Regularly monitor and analyze the performance of your posts tagged with different locations. Pay attention to engagement metrics, reach, and audience insights. Use this data to optimize your location strategy and refine your content to better resonate with your audience.
5. Experiment and Adapt
Keep experimenting with different locations and approaches. Test the performance of various locations, hashtags, and content strategies to find what works best for your brand. Adapt your approach based on user feedback and evolving trends to stay relevant and maintain growth.
6. Stay Authentic and Transparent
Ensure that you are genuinely present at the locations you tag. Authenticity is crucial on Instagram, and users appreciate transparency. Build trust with your audience by accurately representing your location and providing genuine insights and experiences.
7. Be Mindful of Privacy Concerns
Respect privacy concerns and be mindful of tagging sensitive or private locations. Always prioritize the safety and privacy of yourself and others when using Instagram locations. If unsure, err on the side of caution and avoid tagging potentially sensitive places.
Incorporating Instagram locations into your posts can elevate your content and help you connect with a wider audience. By being strategic, engaging with the community, and analyzing performance, you can harness the power of location features to achieve your Instagram goals.
Remember, Instagram is continually evolving, and new features and updates may impact the way locations are used. Stay informed, adapt your strategies, and keep leveraging location features to optimize your Instagram presence.


